
Microscope and Sample Preparation
Inter-chapter 4
- Understand how to use the lab microscopes and cameras
- Learn how to prepare specimens for viewing under the microscopes
Resources
- Compound Scope Tutorial (video tutorial, linked on Canvas, and available in student folders in the lab)
- Stereomicroscope Tutorial (video tutorial, linked on Canvas, and available in student folders in the lab)
- How to use Preview (video tutorial, linked on Canvas, and available in student folders in the lab)
- Using Leica Software (video tutorial, linked on Canvas, and available in student folders in the lab)
Special Skills
- Using the lab microscopes (may have several types in your classroom)
- Preparing plant and animal sections (making wet-mount slides)
- Taking digital images with microscope cameras
Using Lab Microscopes
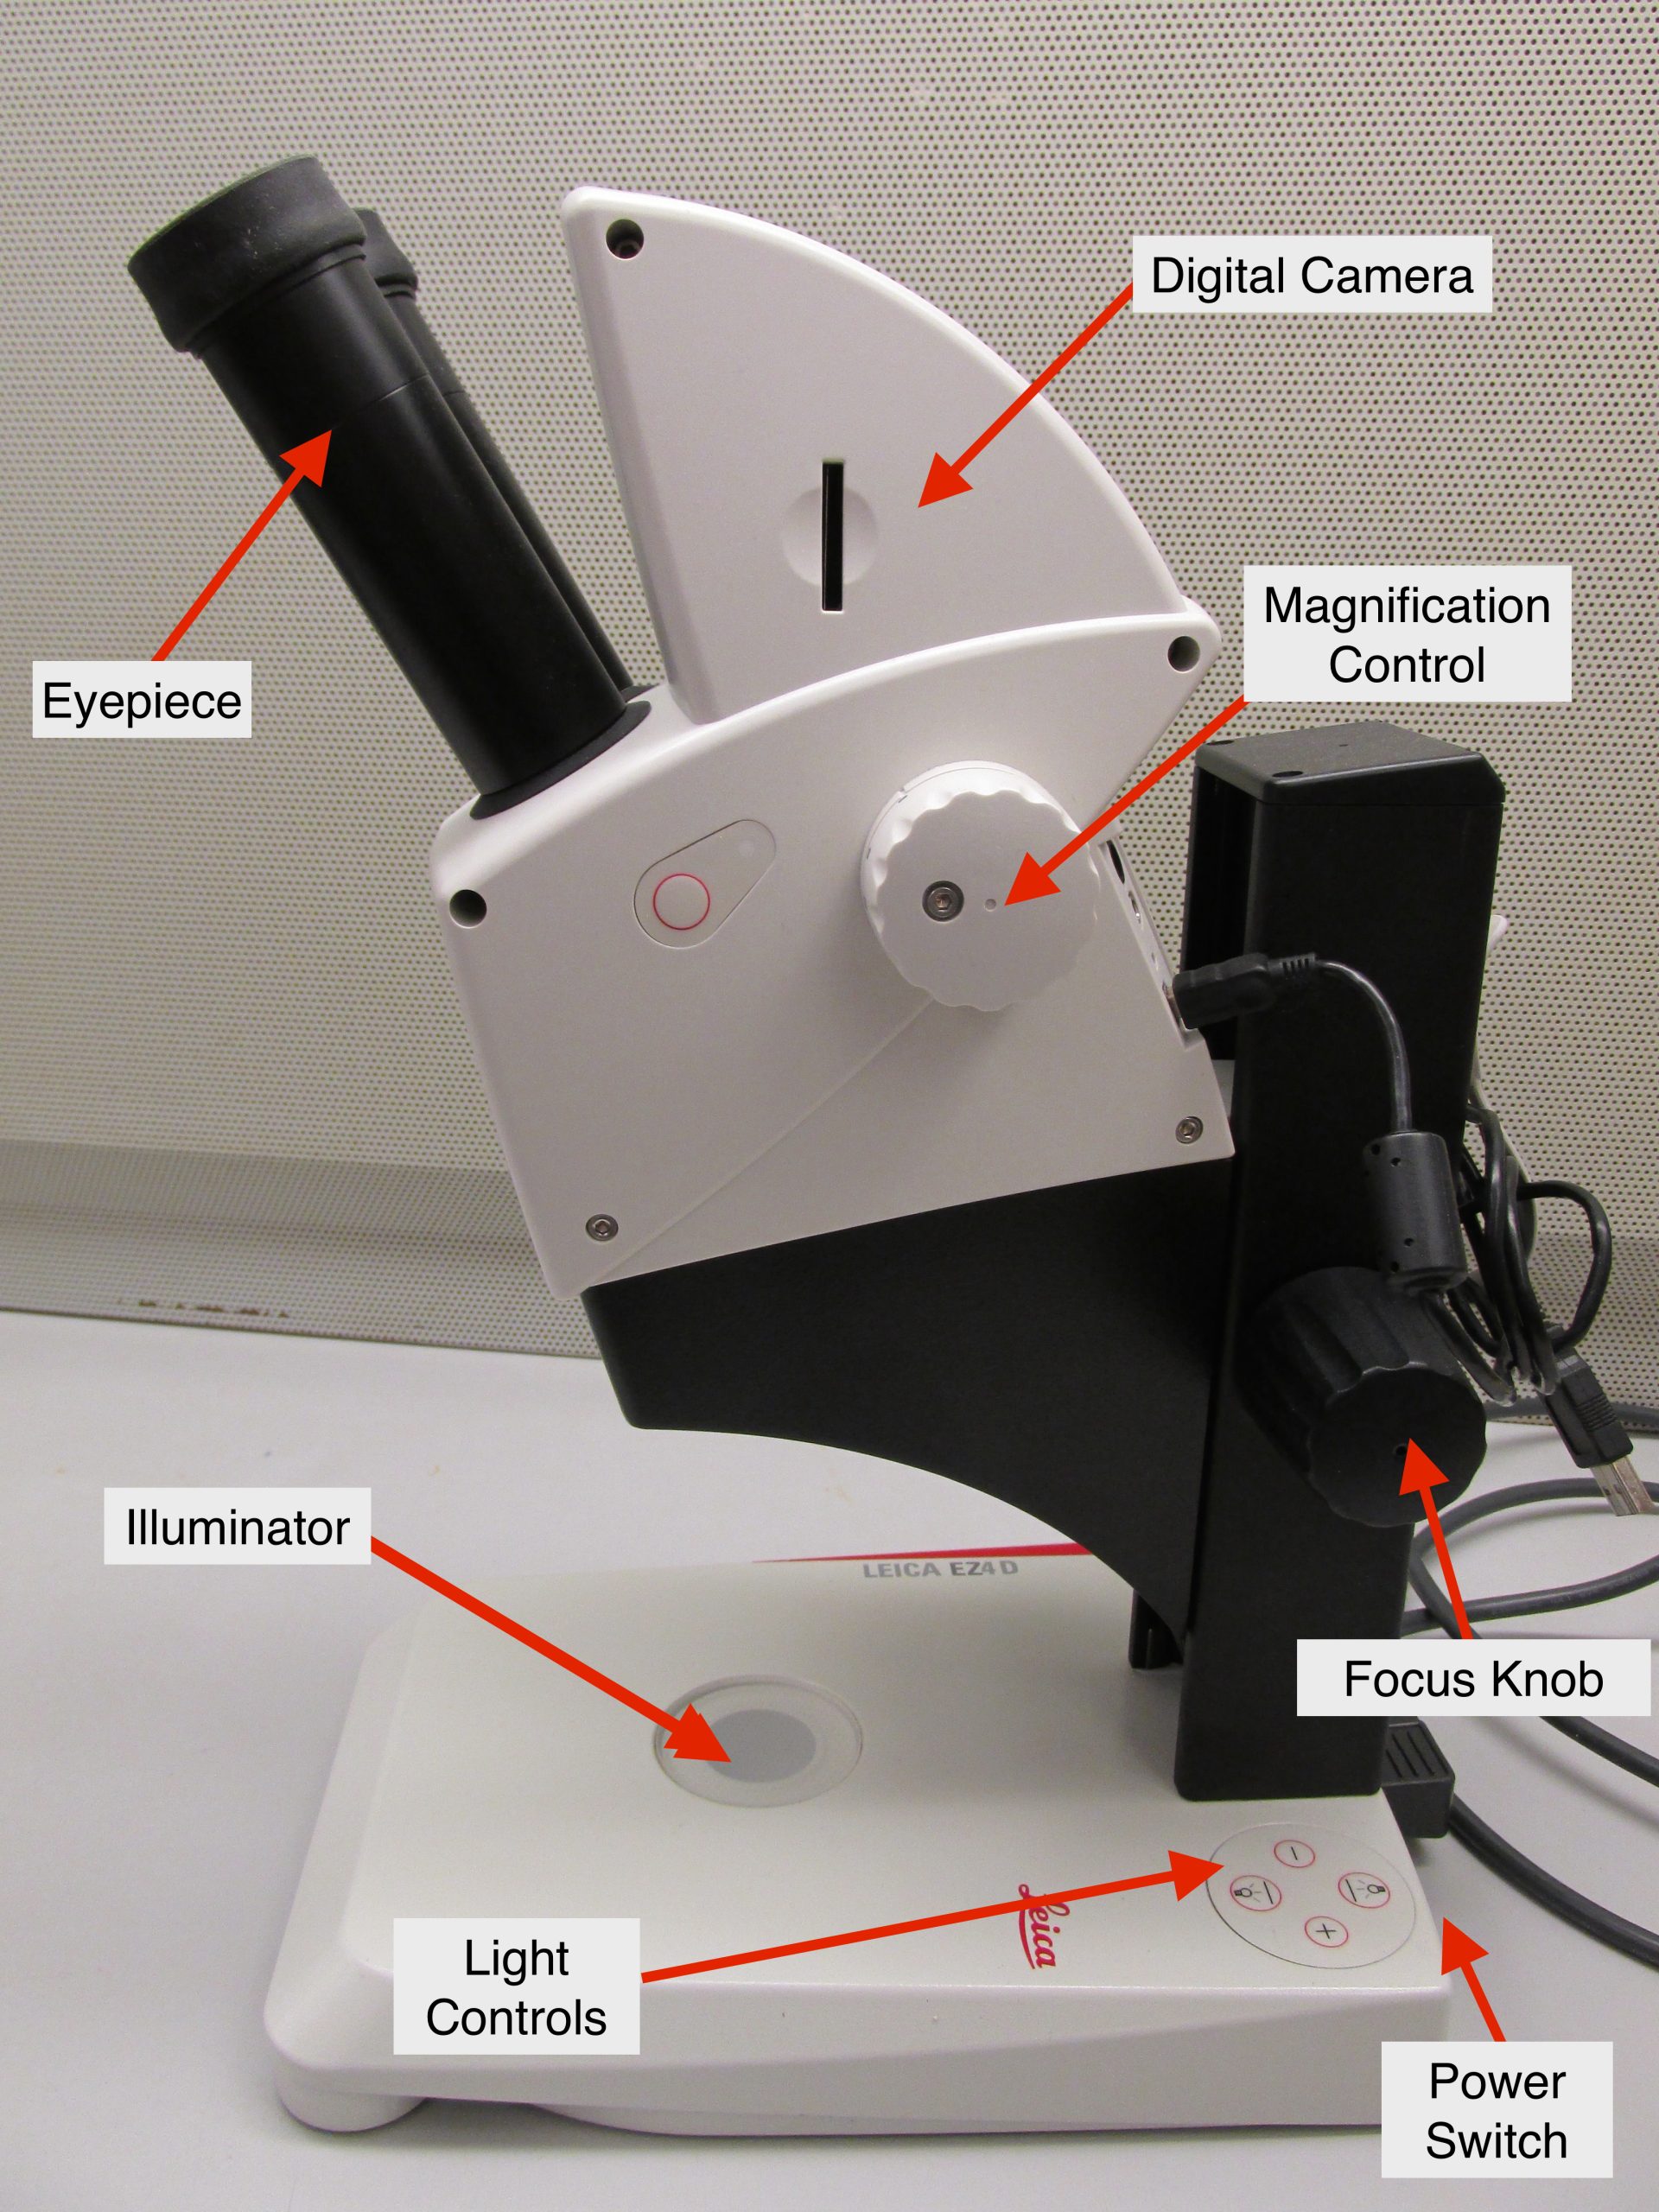
There are two types of microscopes available for use in the Biology 2120 Lab – the compound microscope and the stereomicroscope (dissecting microscope). Your classroom may have multiple brands or models of scopes, but all will fall into these two categories. For your convenience, there are stereomicroscopes and compound microscopes with digital cameras in each lab classroom, so you can take digital photos of the specimens you view in lab. There are a limited number of scopes with digital cameras in each room. Please be certain to share these scopes with your classmates so everyone has an opportunity to utilize the cameras.
The stereomicroscope (dissecting microscope) assists in your ability to look more carefully at lab specimens that do not require high power viewing (the stereomicroscope will allow you to zoom in to magnify a specimen 8–35×). Magnification of a microscope is the product of the power of the lens in the eyepiece and of the objective. If you want to look at the surface of a plant leaf or look carefully at a dragonfly’s wings, this microscope would adequately meet your needs. However, if you wanted to look at the cells inside the plant leaf or the cells that make up the hairs on the dragonfly’s wings, you will need a more powerful microscope. In those cases, you would need to prepare a microscope slide of the plant leaf or dragonfly wing and examine it using the more powerful compound microscope. In the case of the plant leaf, you would also need to section it to expose the cells on the interior of the leaf.
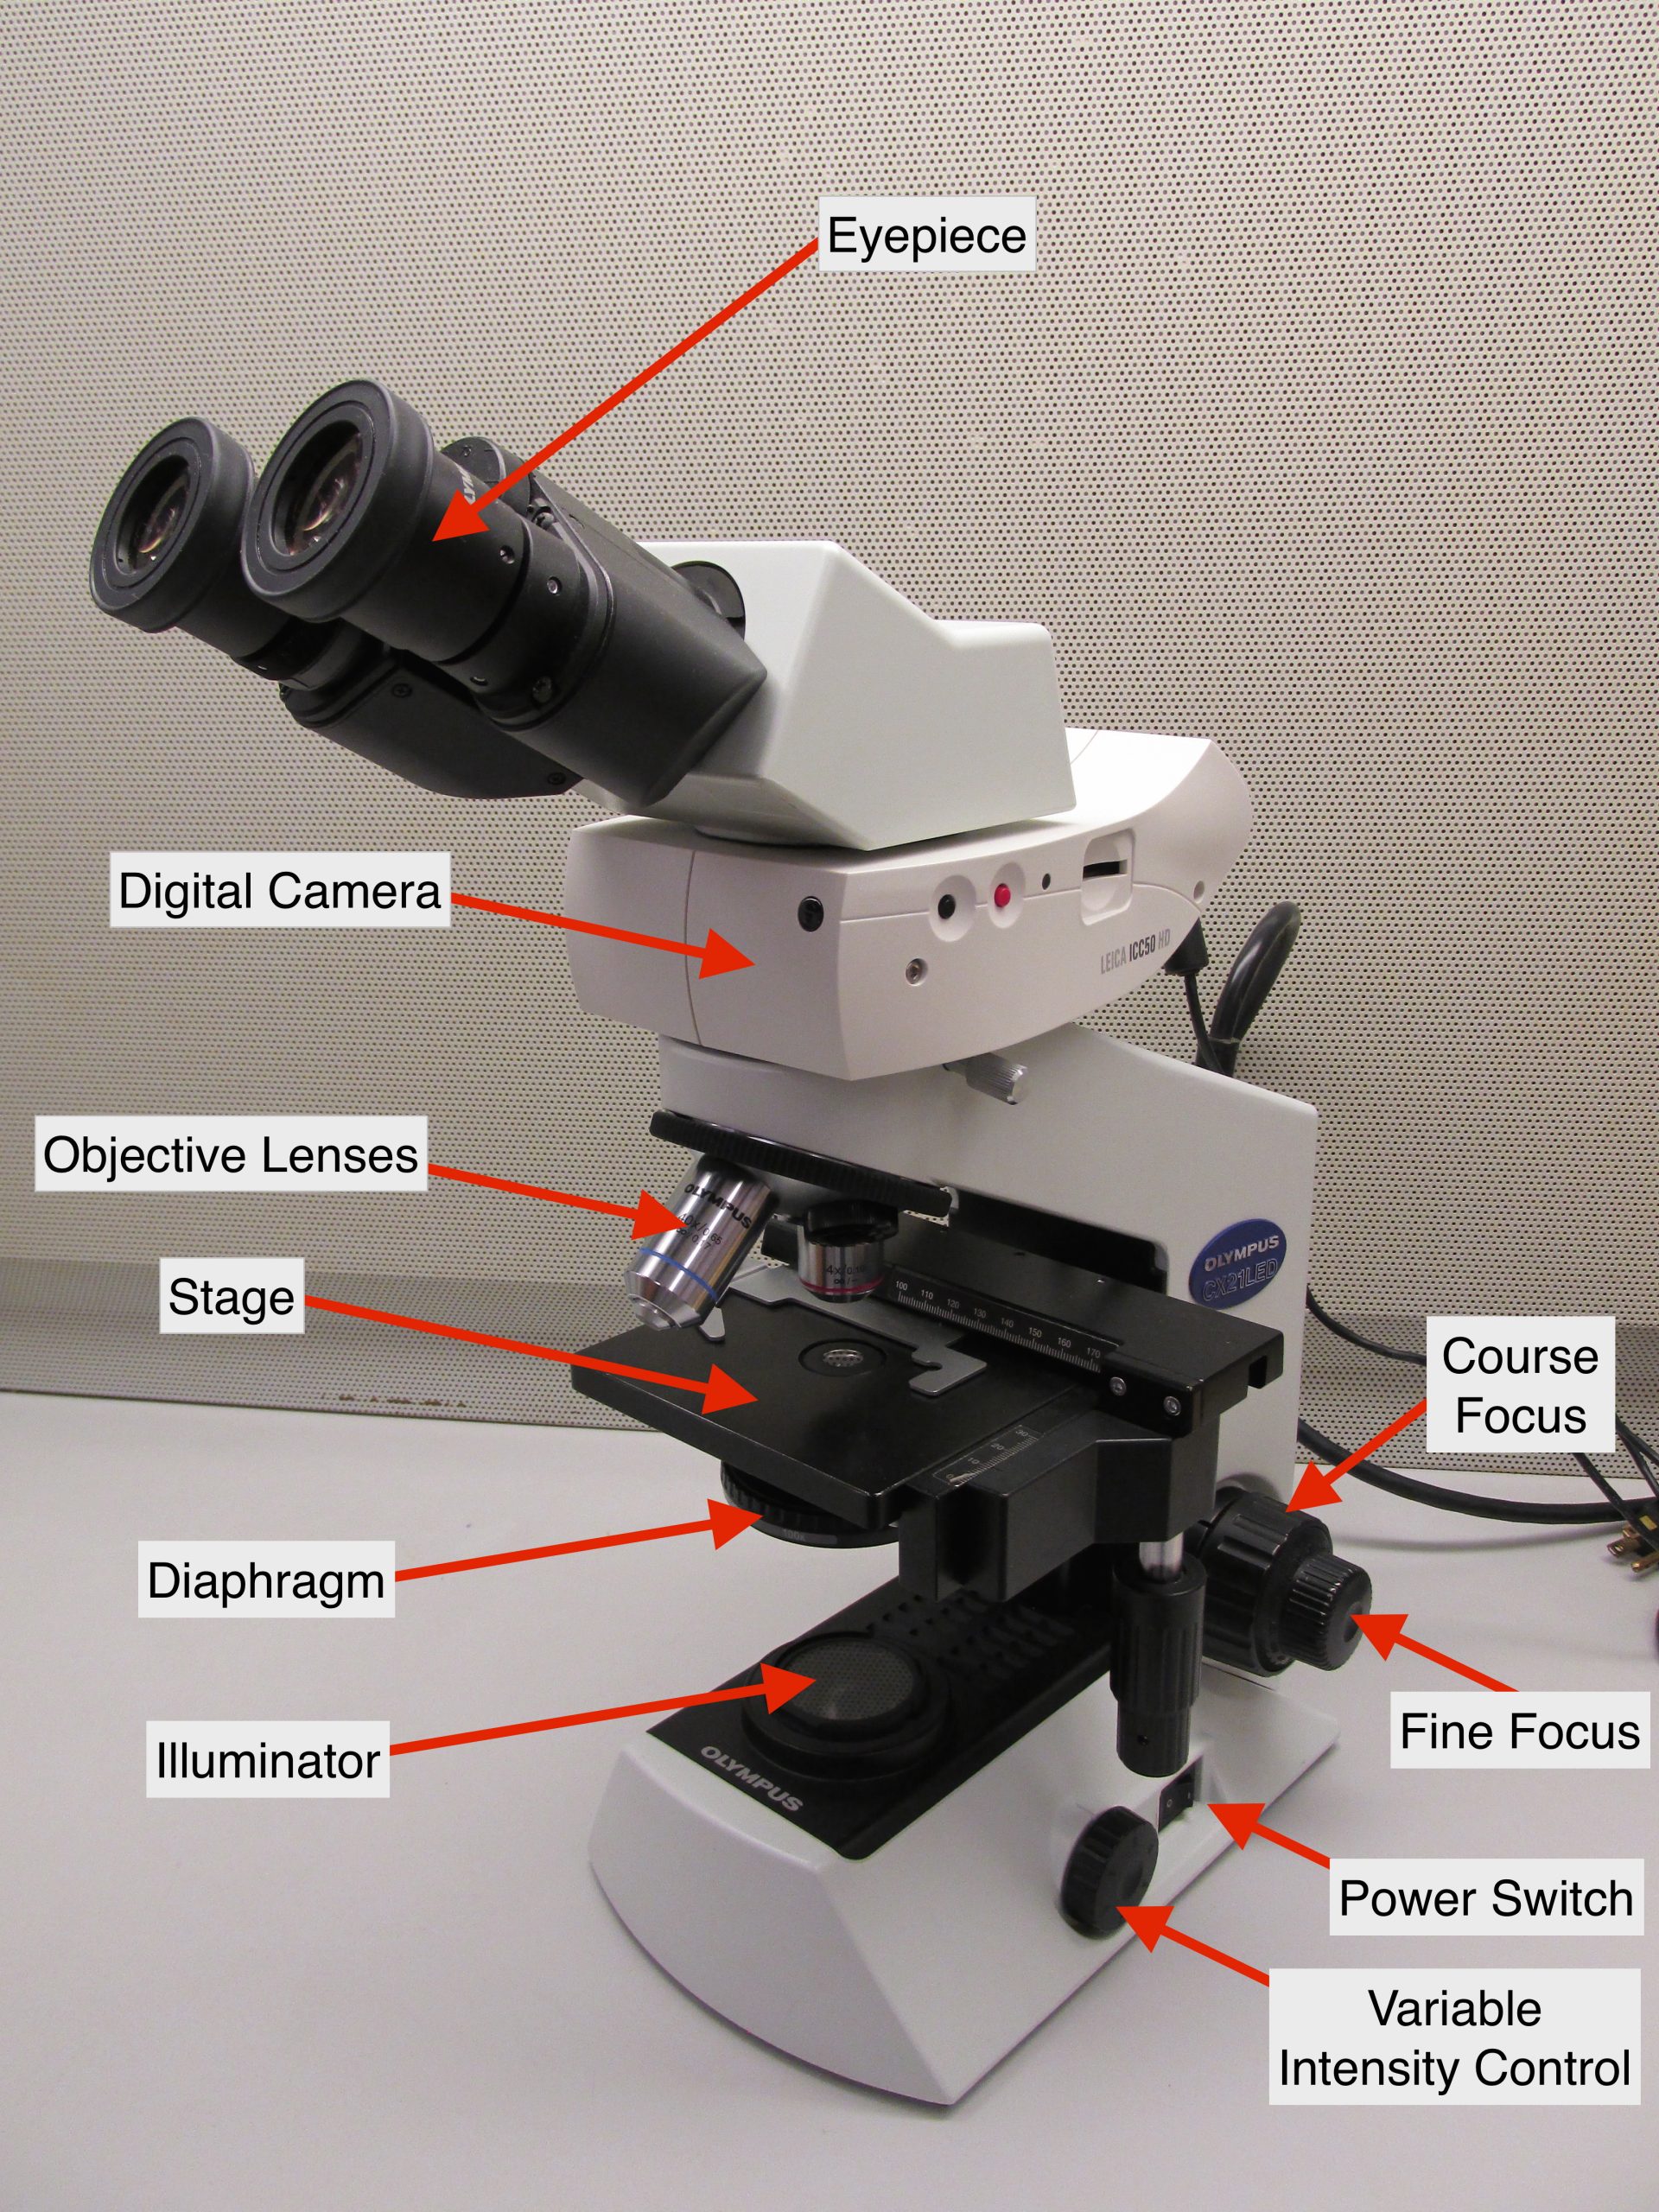
The compound microscope has 3 objectives that will allow you to magnify the specimen 4×, 10×, or 40× (a few of the compound scopes have a 4th objective that will allow you to magnify by 100×, if using oil immersion). None of the specimens you will view in lab require any magnification greater than 40× (the oil immersion lens will not be utilized in lab). The first week that you will be utilizing the microscopes will be the week in which you study plant cells and tissues (starting week 8). The majority of the specimens you will observe during that week’s lab will require you to use the compound microscope to view cell types inside plant structures.
The microscopes used in lab are valuable pieces of lab equipment. If you use them correctly and with care, they will be of tremendous help as you view specimens for the remainder of the semester. Your TA will spend a few minutes providing you with a brief lesson on how to use the microscopes. In addition, video tutorials describing how to use the lab microscopes can be found both on Canvas and on the laptop computers in lab. Before beginning your lab activities, make sure that you watch the video tutorials and spend some time familiarizing yourself with both types of microscopes. If you have questions, don’t hesitate to ask your TA.
Taking Digital Images with Microscope Cameras
Many of the microscopes in lab have a digital camera attached to them, allowing you to take digital images of the specimens you view in lab. This is a great way for you to create your own study guides. You can take digital images of any (or all) of the specimens you see in class. You should then use Cybox or email to save these images for future viewing at home.
You will be required to use the digital cameras periodically during lab for assignments. The assignments associated with the plant anatomy and physiology labs include taking and labeling digital images of various plant cells and tissues. Please watch the “Using Leica software” and “How to use Preview” video tutorials on the laptop computers in lab before taking your first photo. These video tutorials are also posted on Canvas so you can review them as often as needed.
You should note that all lab laptop computers have a program called “DeepFreeze” installed on them. This program deletes all student files and returns the computer to default settings each time the computer is restarted. You should be sure to save all your files carefully using Cybox or email in order to ensure that you will have them for later use. If you do not carefully save your files, they will be automatically deleted. This also means that you should be mindful of the power source for the lab laptops while they are in use. If the battery runs out on the computer during use, all student files will be lost.
Preparing Specimen Sections (Wet- Mount Slides)
Preparing your specimens for viewing under a microscope is an invaluable skill to learn during lab. To view the specimen properly, you will need to prepare it so you can find the cell or tissue types during your examination. If you do not prepare the specimen correctly, you may not be able to see the structures you are asked to view.
When making a slide of plant (or animal) material to look at under the microscope, it is important to make sure that you section, or slice, the specimen as thinly as possible. When you place the slide onto the microscope, light will pass through it from below, illuminating the specimen for viewing. If your section is too thick, the light will not be able to pass through the specimen and you will not be able to see the desired structures.
Be careful when you cut through specimens. We use very sharp razor blades in the preparation of wet mounts – please hold the specimens carefully and make sure that you do not cut yourself in the process of preparing them for viewing. Make sure you know the location of the first aid kit in your laboratory classroom, in the event that you need it.
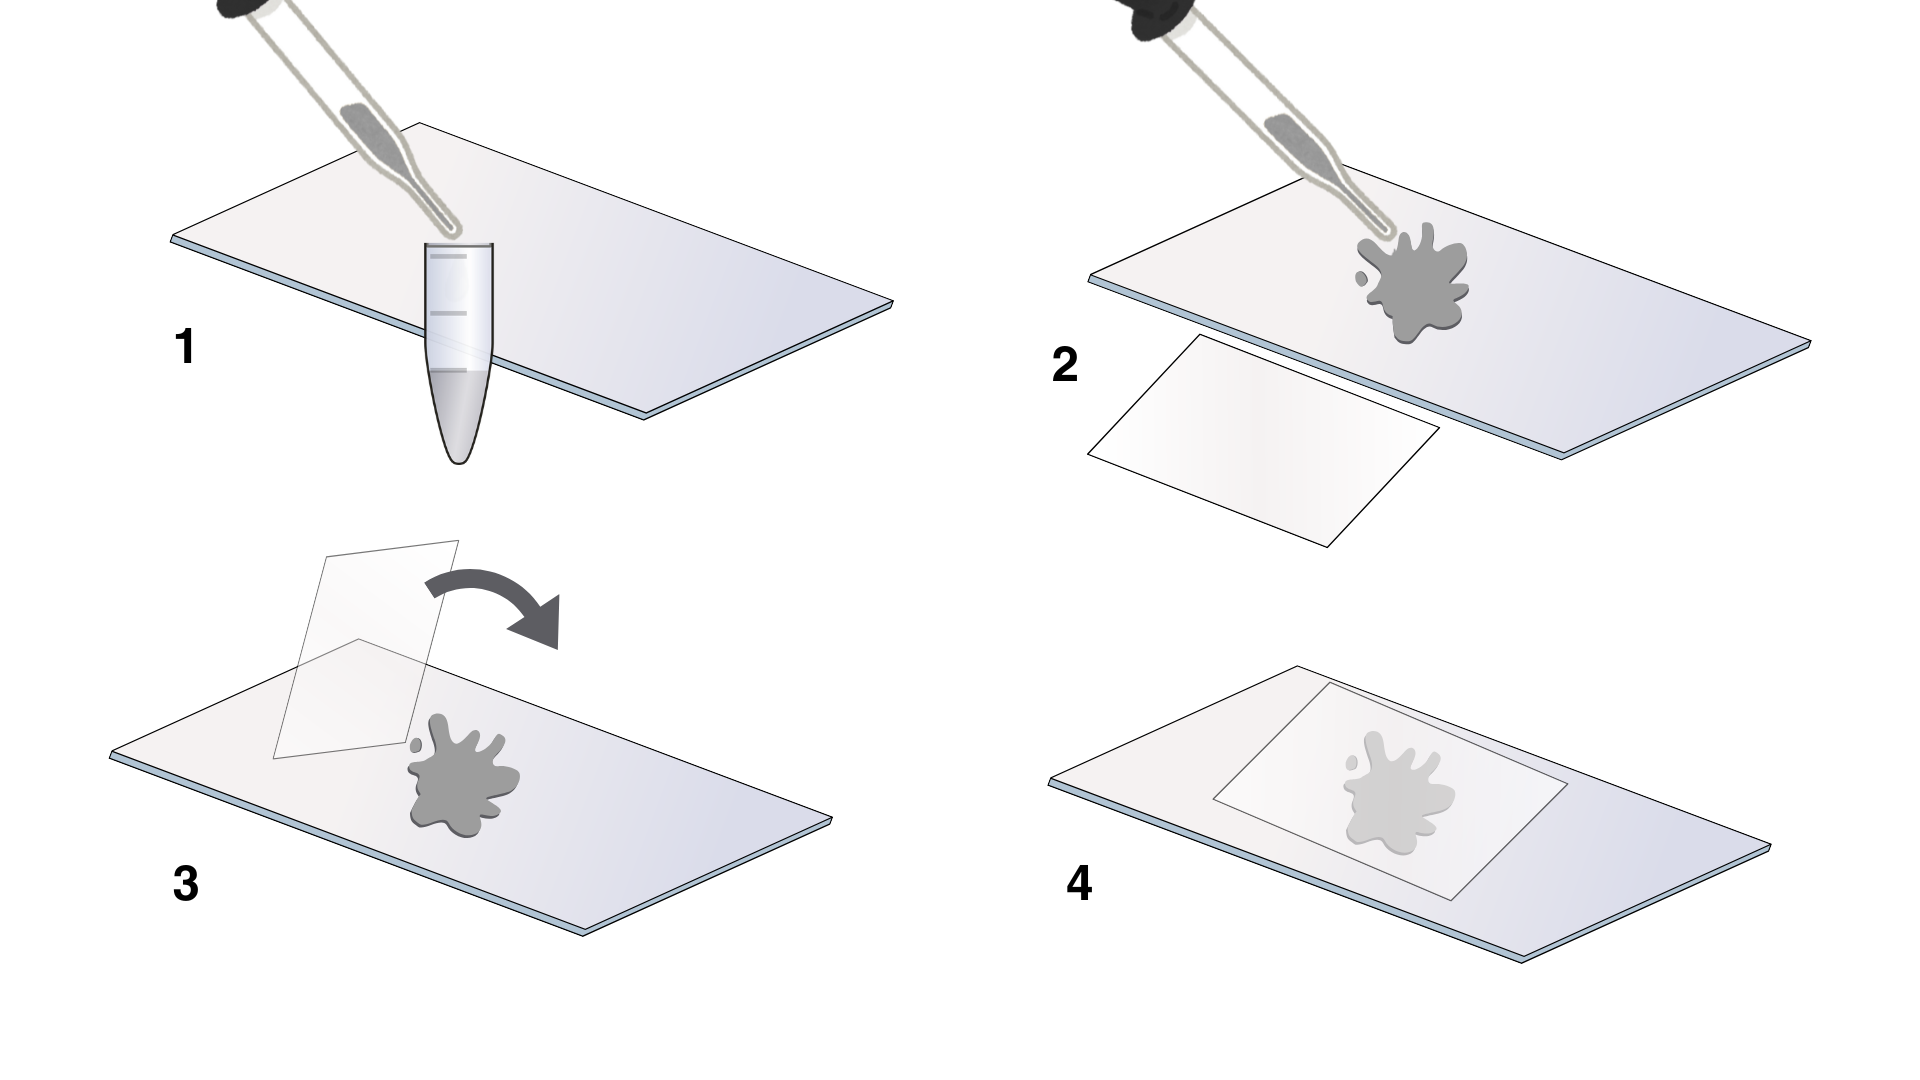
When you prepare slides for viewing under a microscope in lab, you will be suspending your sample (plant or animal) in a thin layer of water. This type of preparation is called a wet mount. The process for making a wet mount is demonstrated in Figure IC4.3 below.
You will need to know the difference between several types of slide preparations. If you are working with very small, very thin specimens you can create a “whole mount”. In this case, you will carefully place the entire specimen onto your microscope slide.
A “cross section” requires you to cut through a specimen at a right angle to the long axis in order to take your sample. A very thin section of the specimen will enable you to view the internal structures more clearly.
A “longitudinal section” of a specimen also requires you to cut a thin section of the specimen in order to see internal structures more clearly, but in this case, you cut through the specimen in a plane that is parallel to the long axis to take your sample.
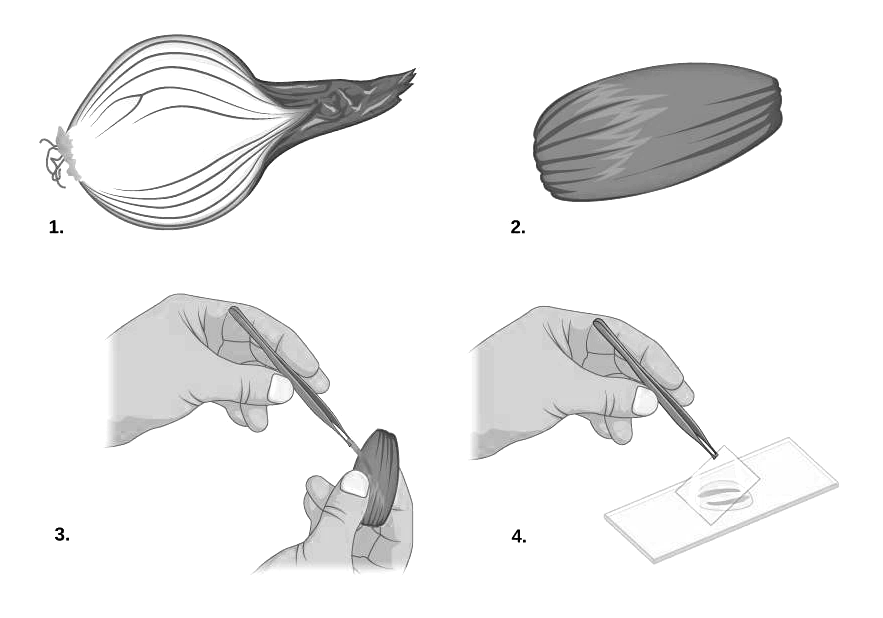
A tissue peel requires you to take a very thin sample from the outermost tissue of a plant specimen. In this case, you very carefully peel the outside layer of tissue off of the specimen to get a very thin (preferably one cell thick) sample, , as shown in Figure IC4.4. These preparations can also be called epidermal peels because they are often used to peel only the epidermal cells from a plant specimen. One of the specimens which will require this technique is the red onion. To complete the epidermal peel, you will need to carefully peel off only the red (or purple) epidermal layer of cells. When preparing an epidermal peel, you want to make sure that you have a drop of water on your microscope slide before you begin. The sample will be very fragile and has a tendency to roll or stick together if you do not immediately place it into water. Toothpicks are provided at each station in lab and can be of great assistance in rearranging and unrolling a specimen that was not initially lying flat against the glass slide.
Before you leave the microscope station, make sure that you do not leave any slides on the microscope, that the microscope stage and lens are clean, and the microscope is shut off when you are finished with it.
