
Part Three. Enscape
Chapter 22. Edit render outputs
Upon completing this session, students will be able to:
- (CO 1) Export enlarged jpg files (Original, ID) for print
- (CO 2) Create Executable file
- (CO 3) Create Render Panorama image
 Session Highlights
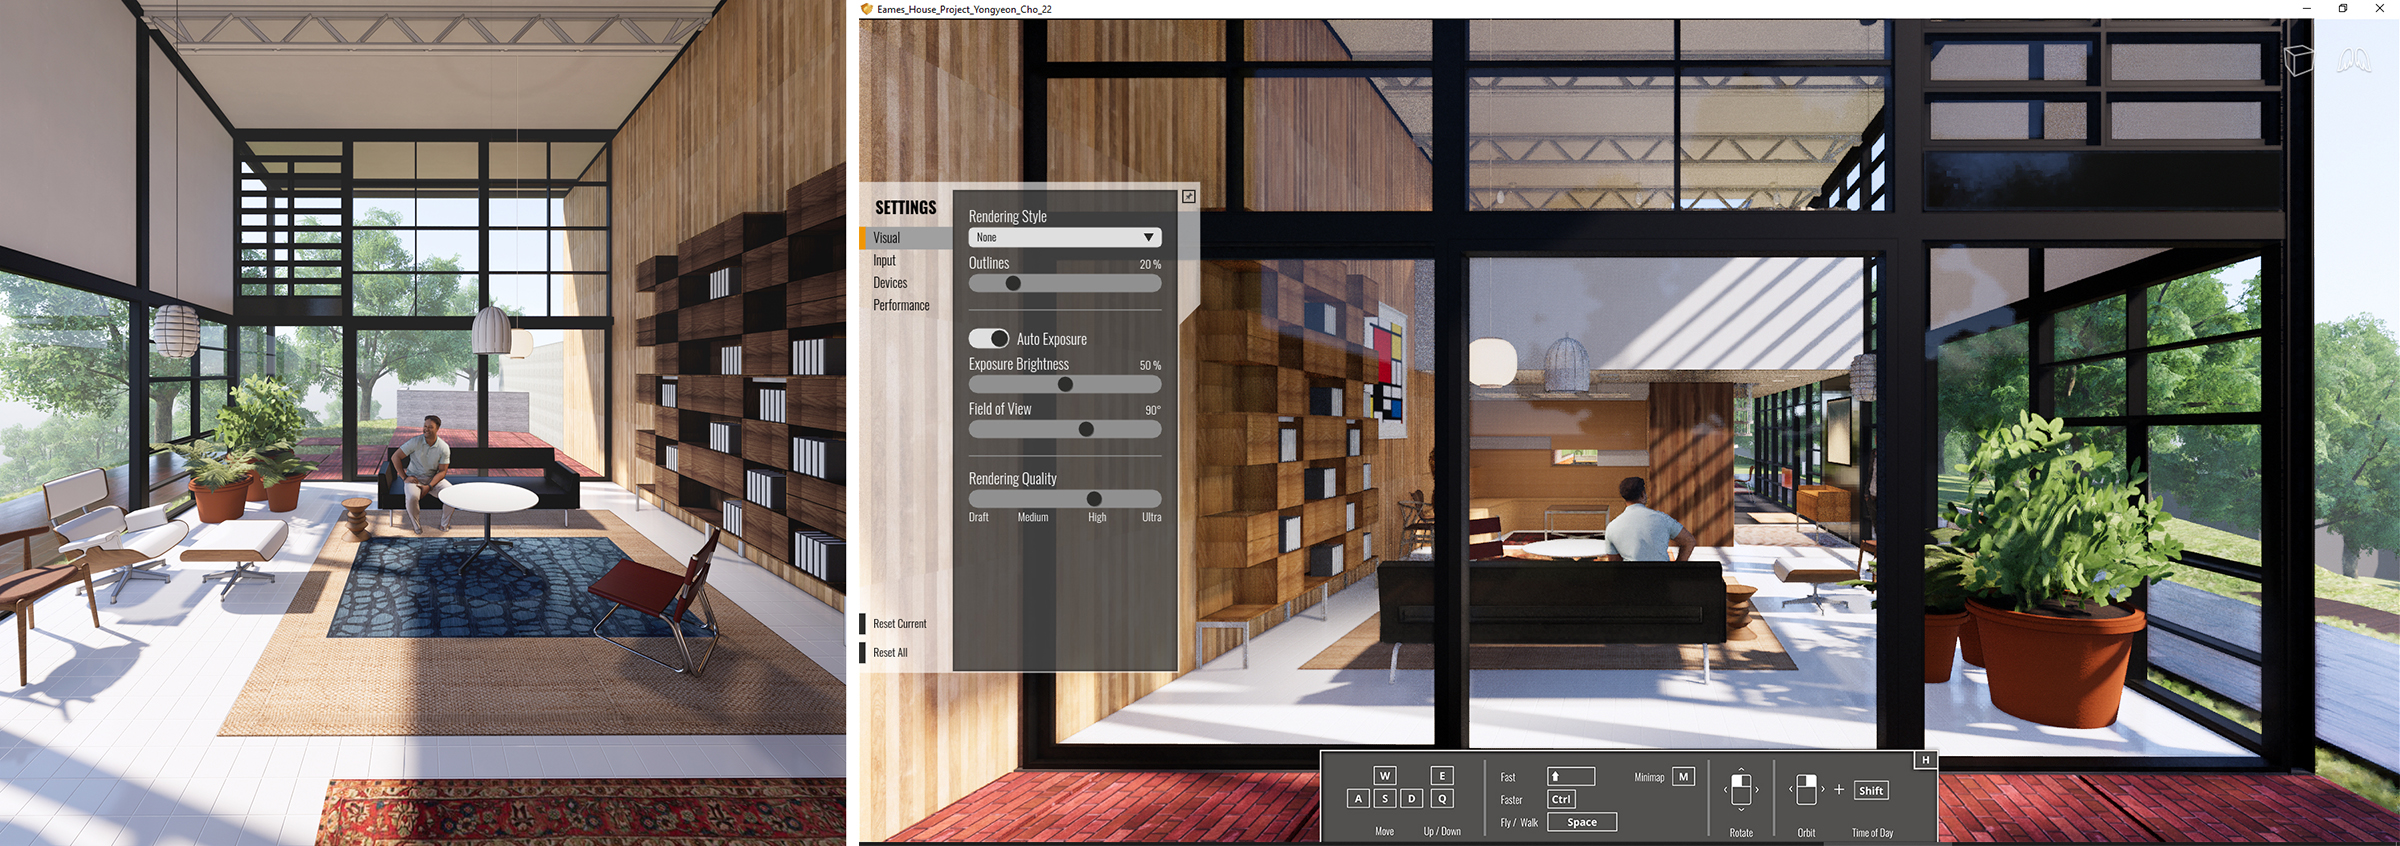
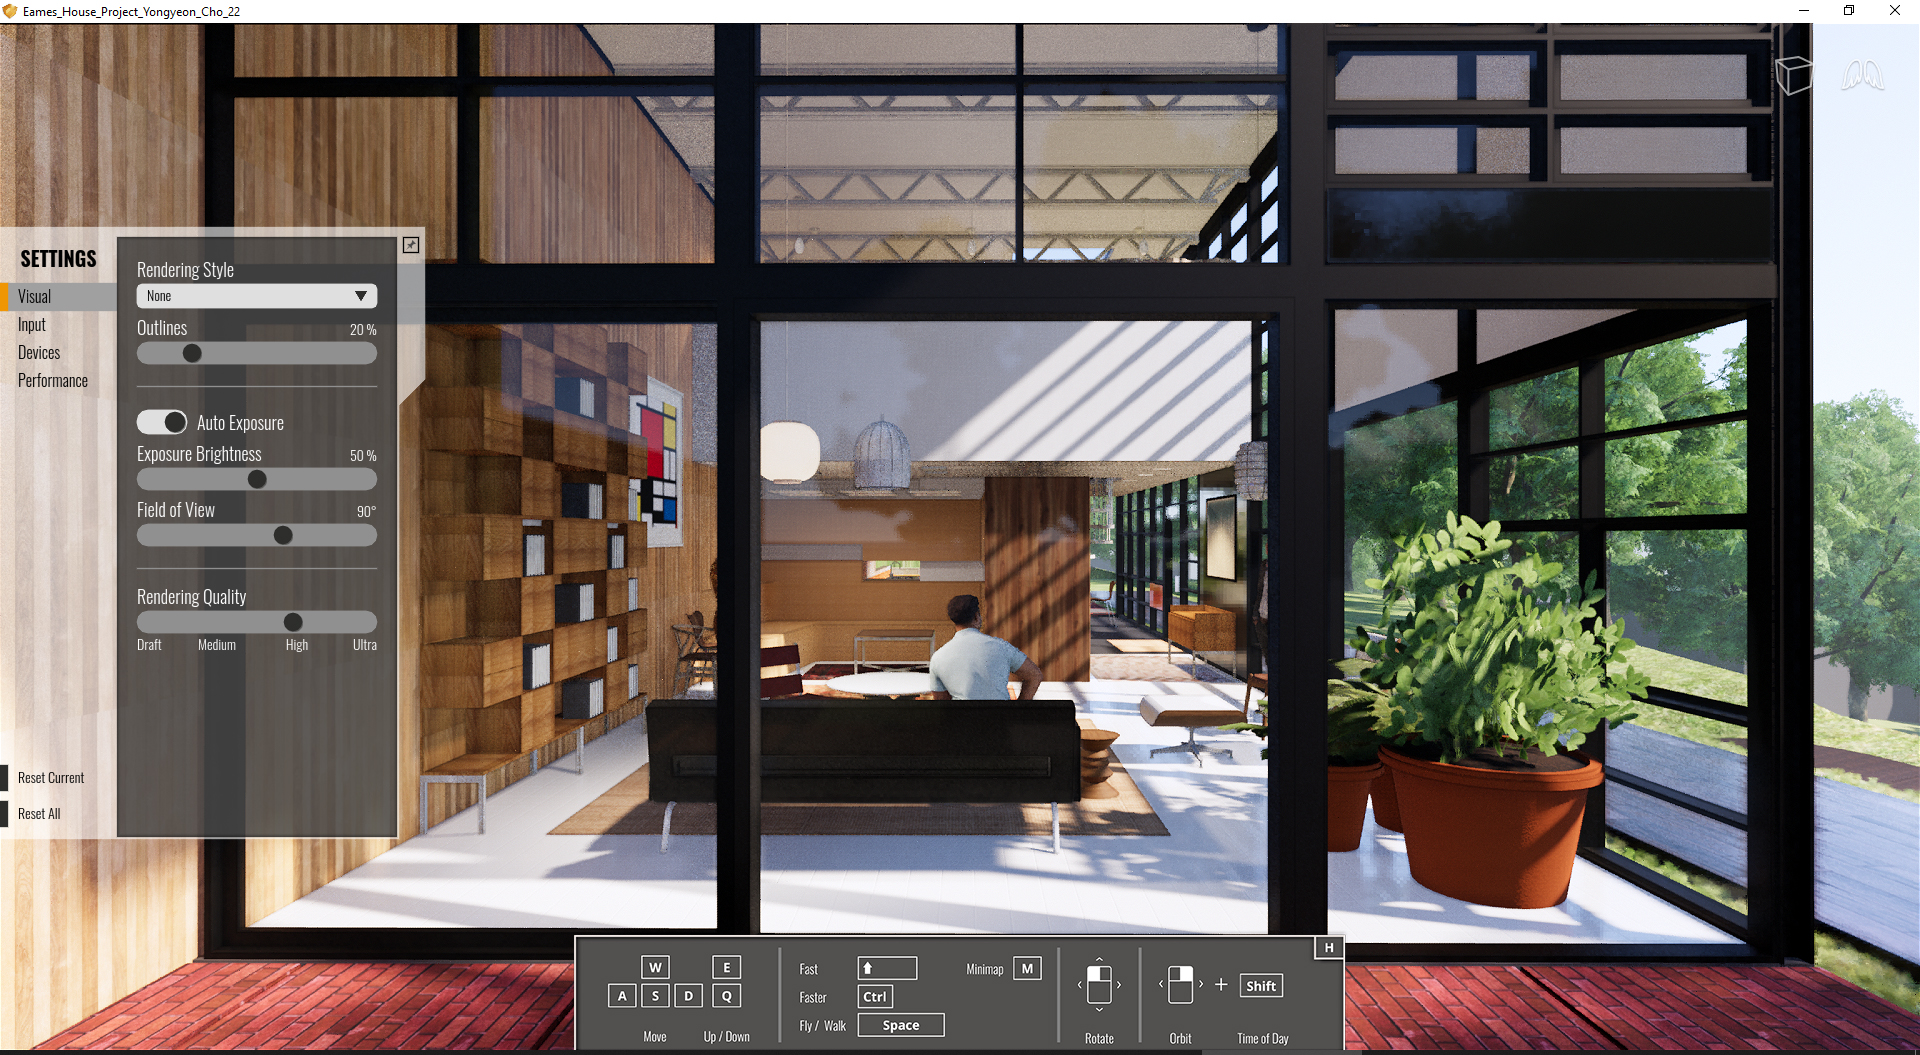
At the end of the session, students can create the graphics below.
 Lecture Contents
(CO 1) Export enlarged jpg files (Original, ID) for print
Refer to [lecture 14.1, CO 2], for the final render image process
If you need a special size of render image, change the resolution to Custom and change the values from Capture in Visual Settings
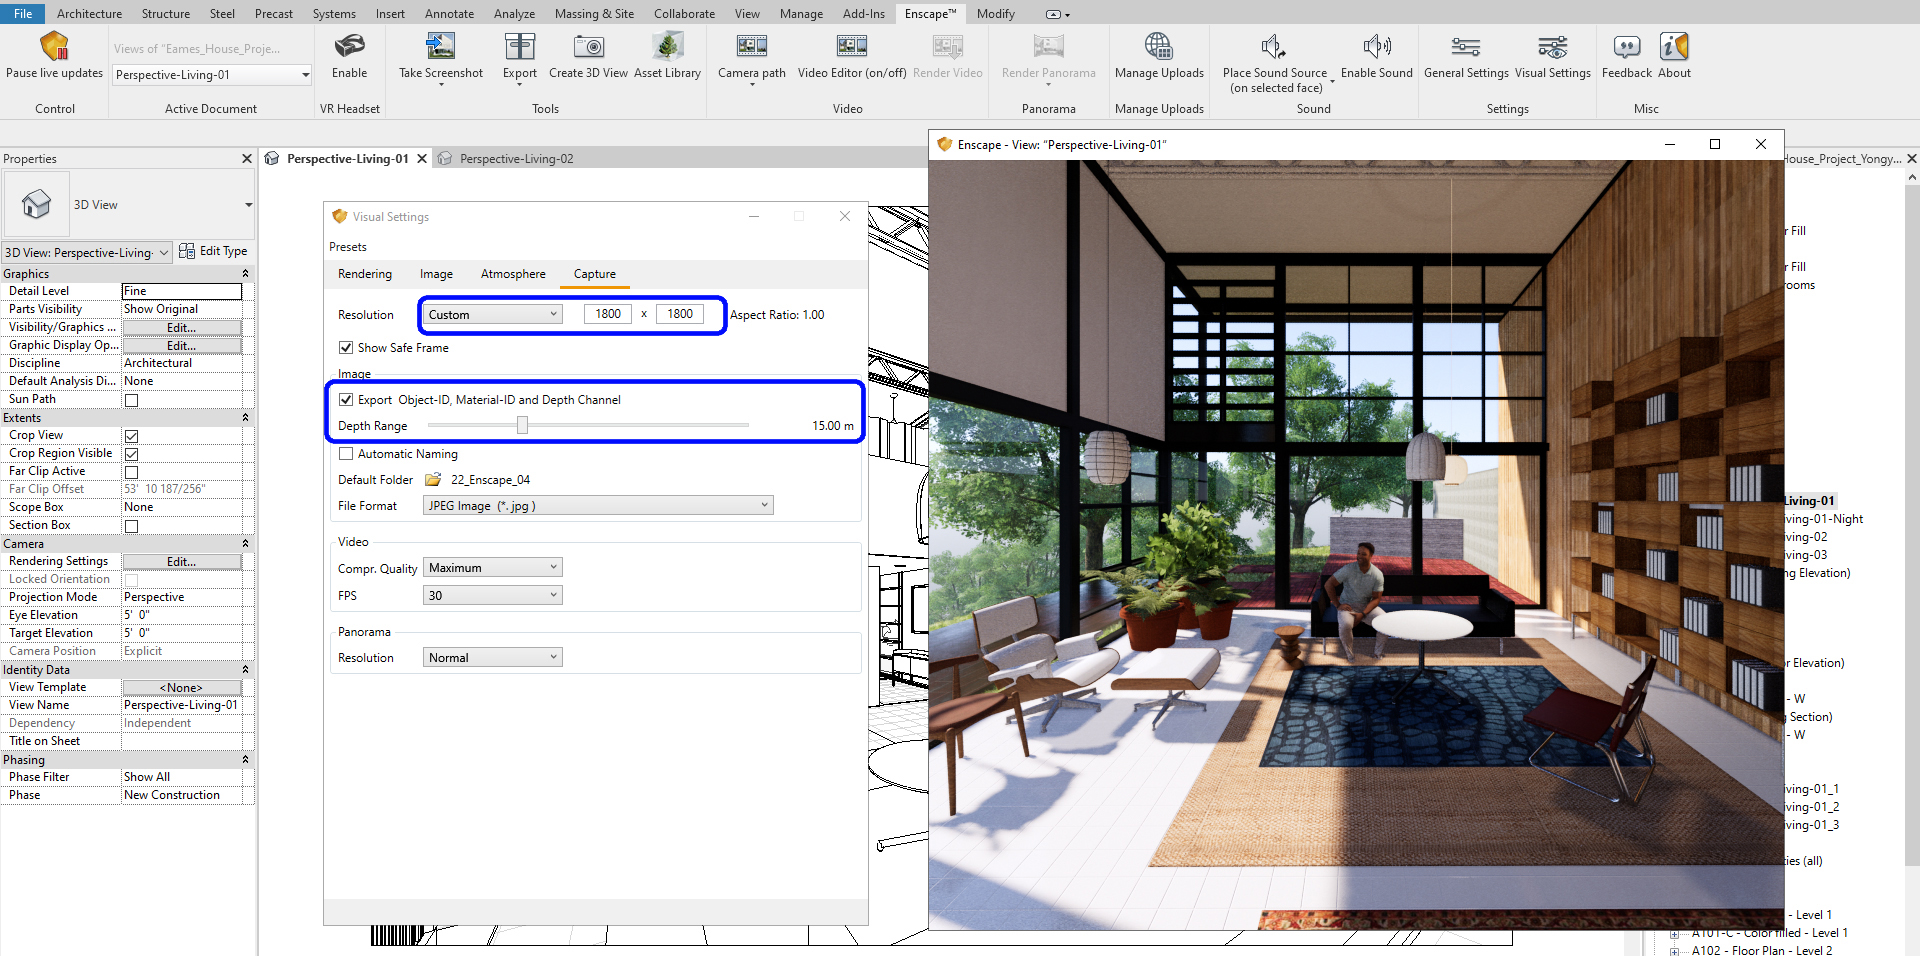
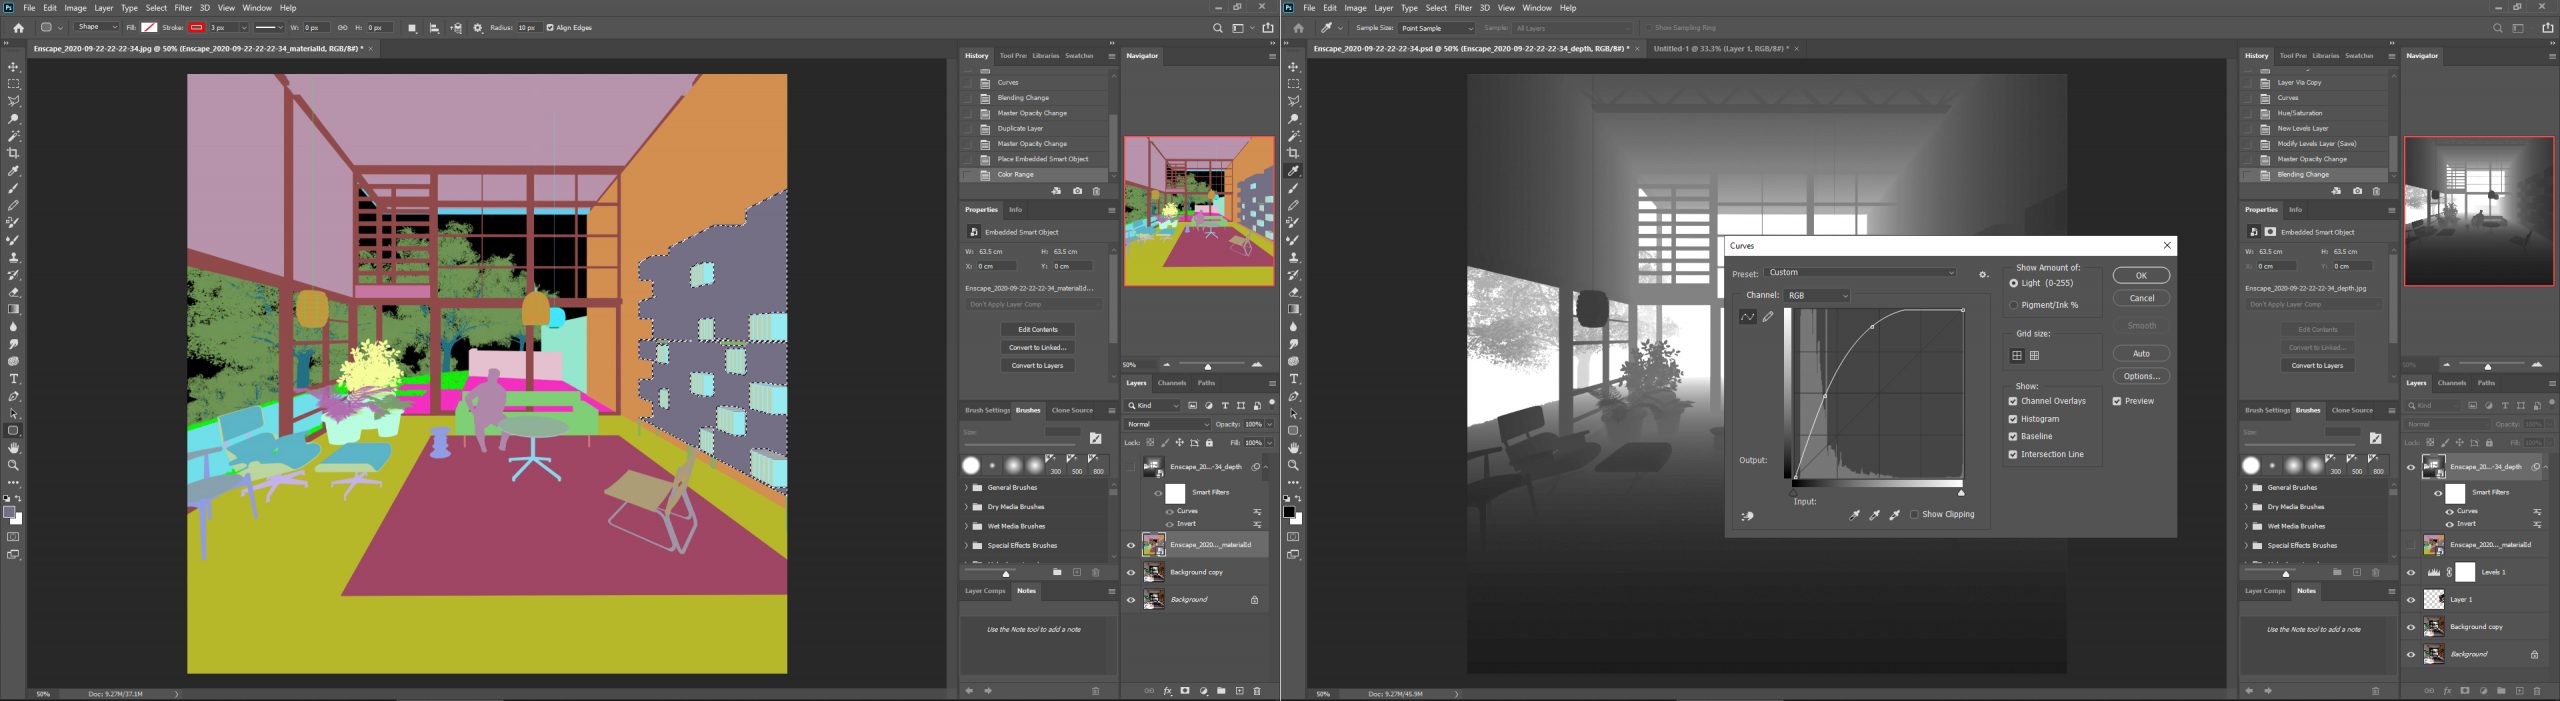
You can use the ID images and Depth map to adjust the rendering in photoshop.
(CO 2) Create Executable file
To export the EXE file
EXE file type is for a presentation, it does not require any programs like Revit, nor Enscape, material links, and lighting/render settings.
- [STEP 1] Click [Start] to launch Enscape and confirm your model is ready for export.
- [STEP 2] Select view to start
- [STEP 3] Add information (Icon, Title, Load first screen) from [Customization] on [General Settings]
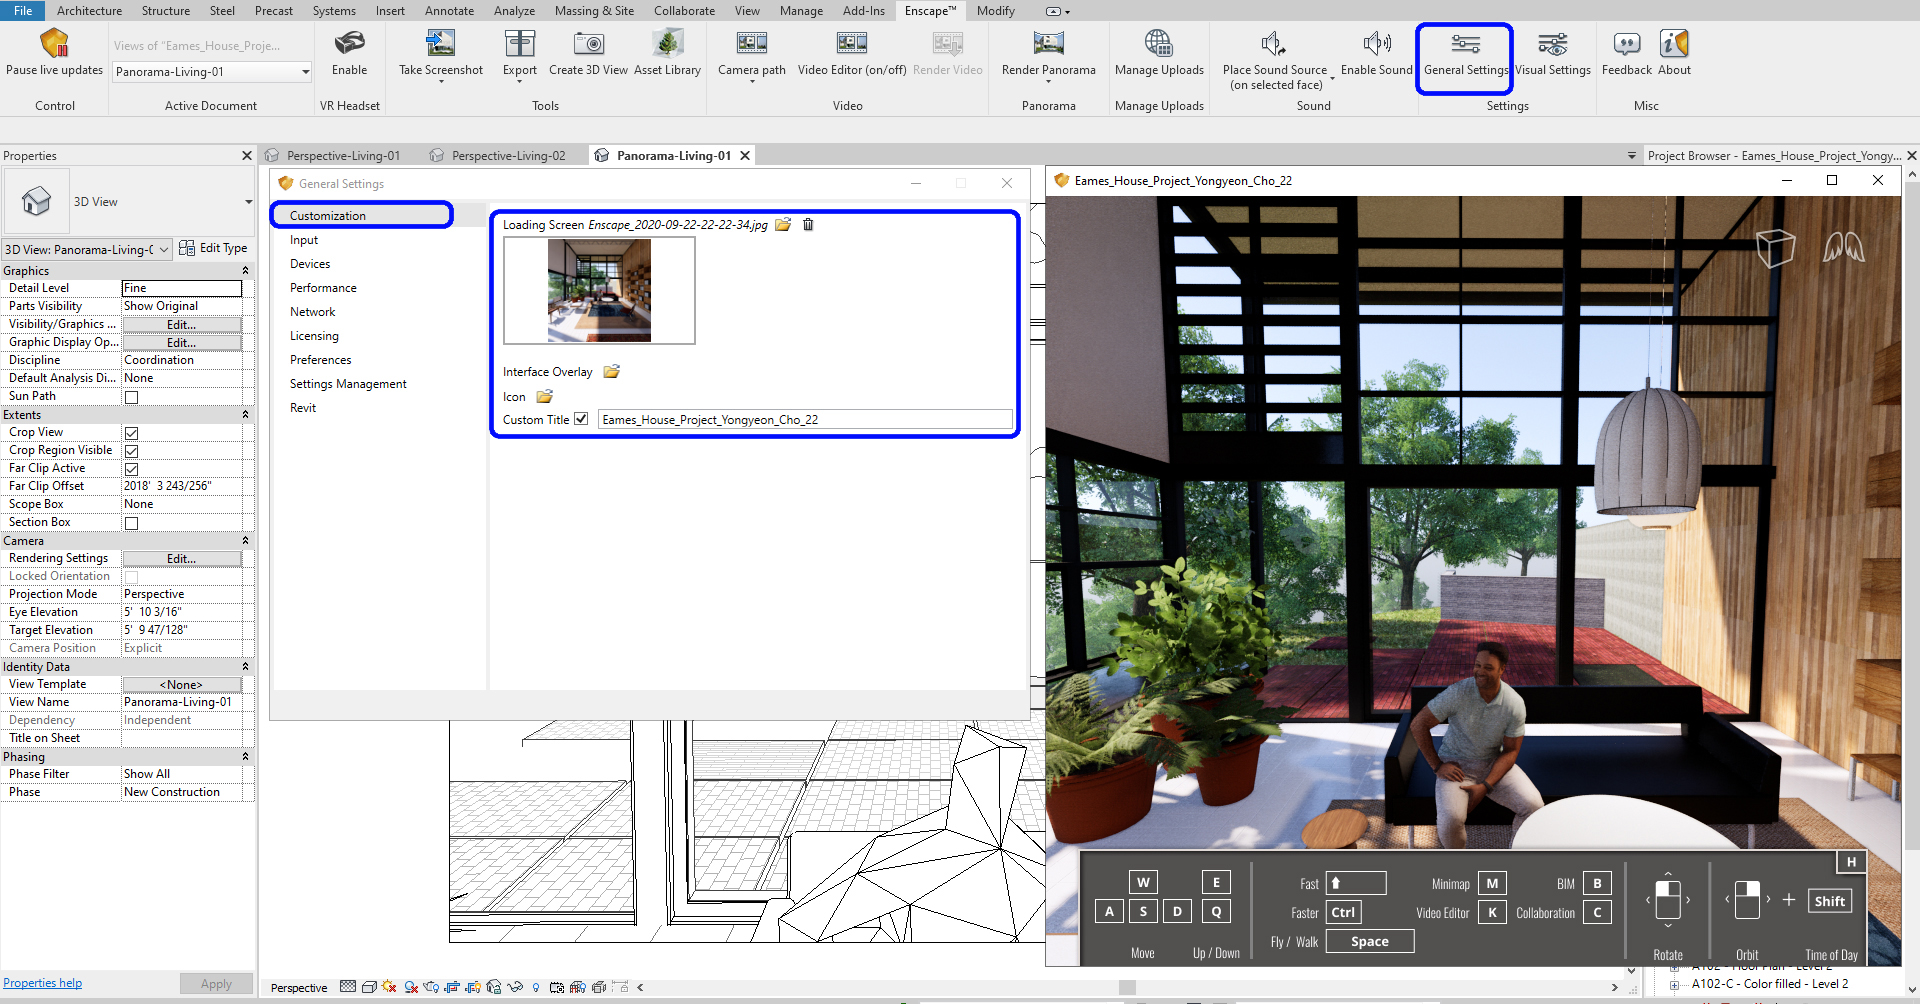
- [STEP 4] Click Export > Exe Standalone

- [STEP 5] Save > Name the file name and wait until the file is created
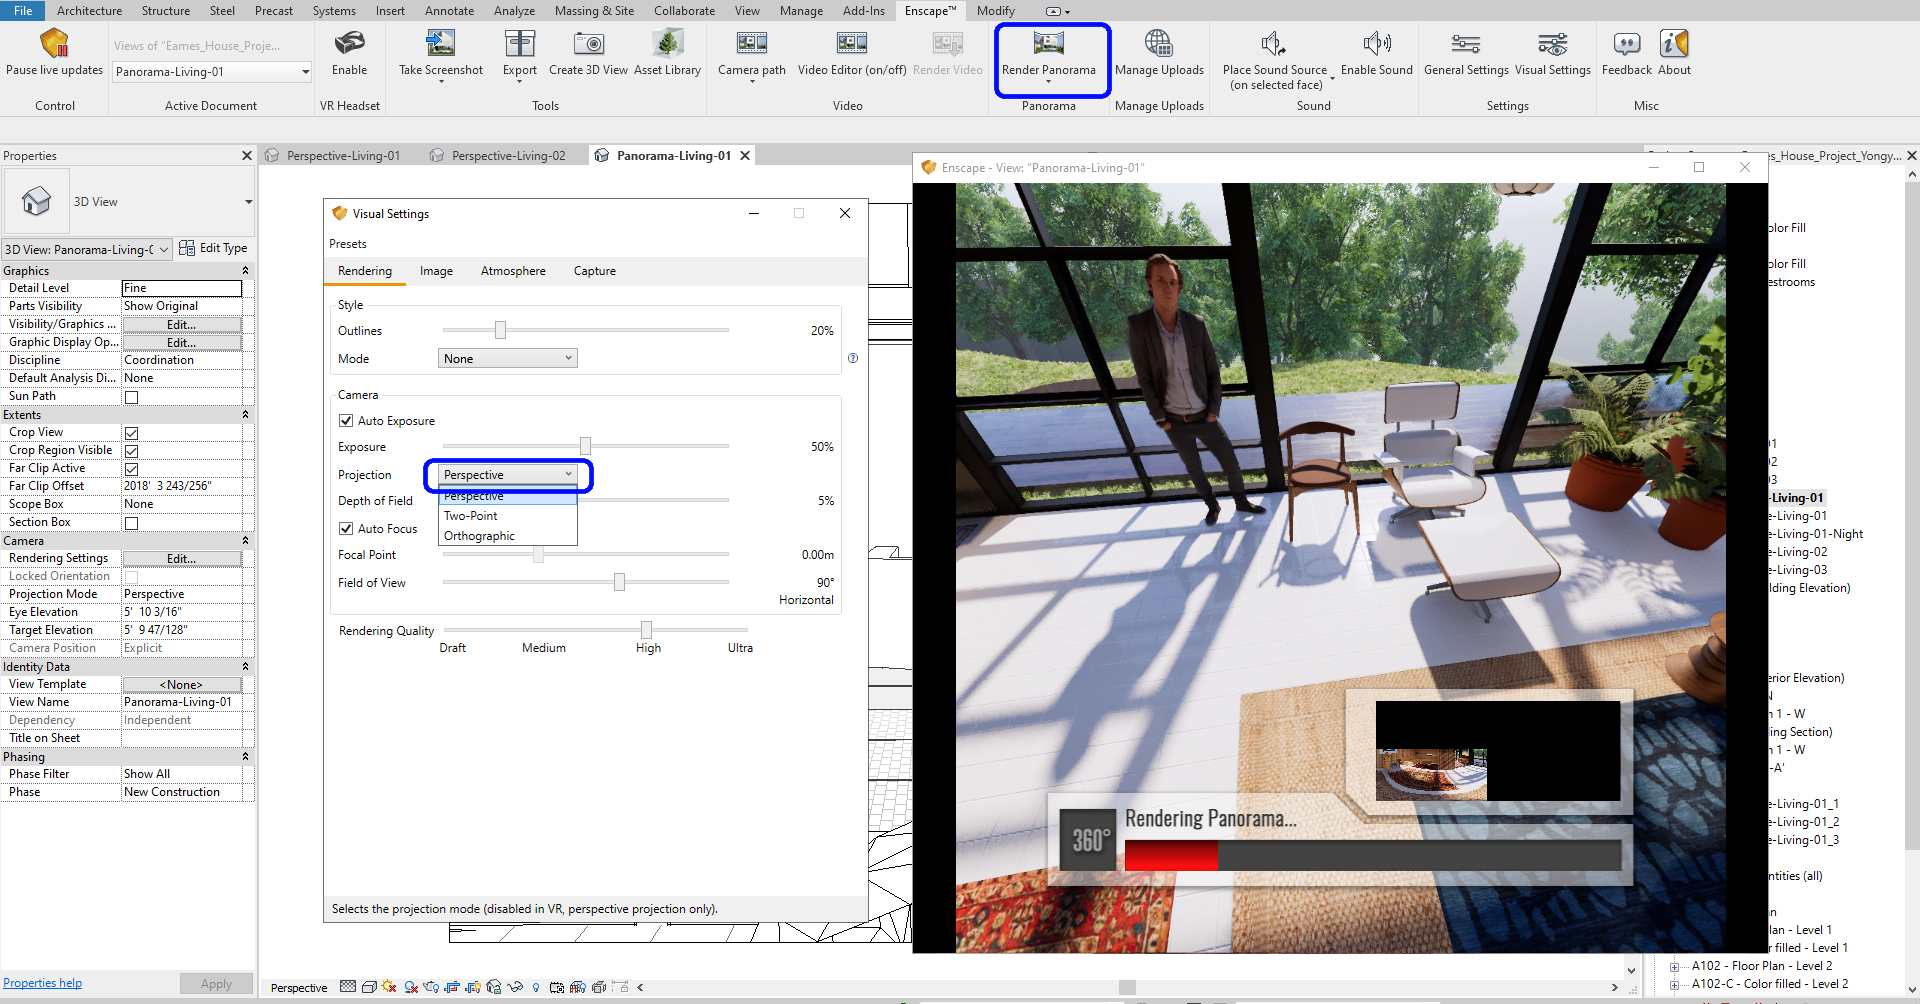
(CO 3) Create Render Panorama image
To create Render Panorama
(This option creates only one 360-degree rendering image with QR code at the same time)
- [STEP 1] Select a view to create a 360-degree rendering image (The center of a room/space)
- [STEP 2] Click Enscape Start. Confirm your Projection mode is [Perspective]
- [STEP 3] Click Render Panorama. The render takes time because this panorama needs to render 16 images (for the normal setting)
- [STEP 4] Automatically saved on [Manage Uploads], open [Manage Uploads]
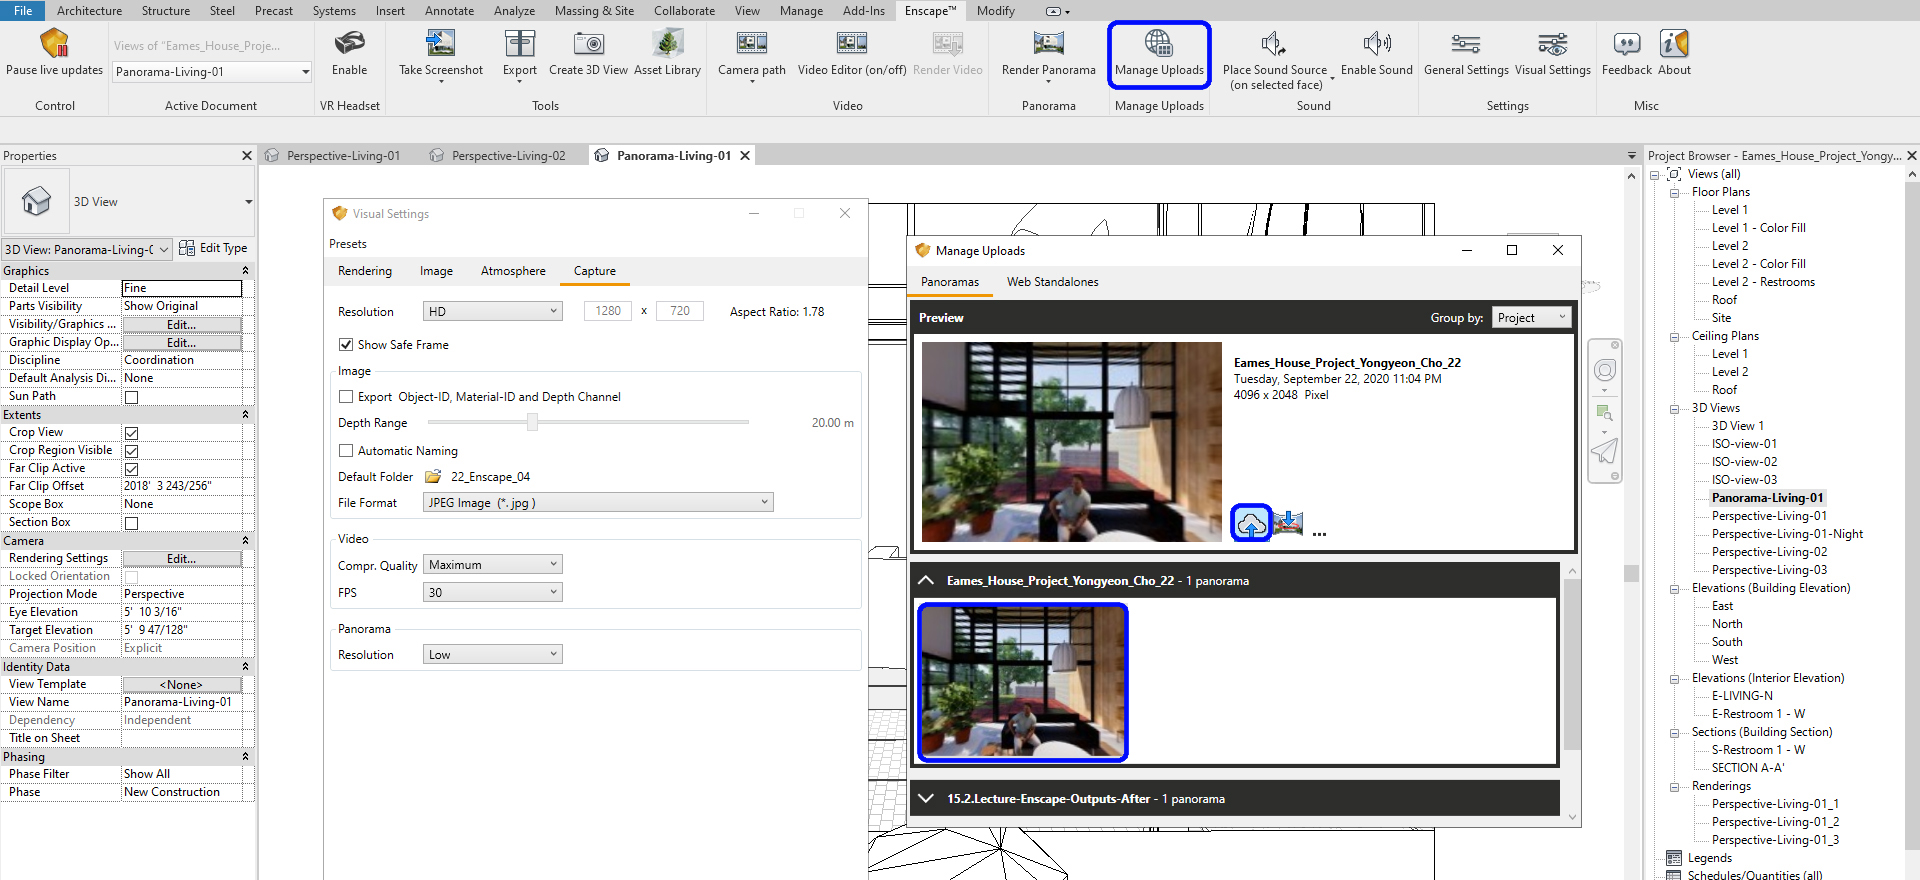 [STEP 5] Click the rendered image > Upload the rendered image in ENSCAPE CLOUD
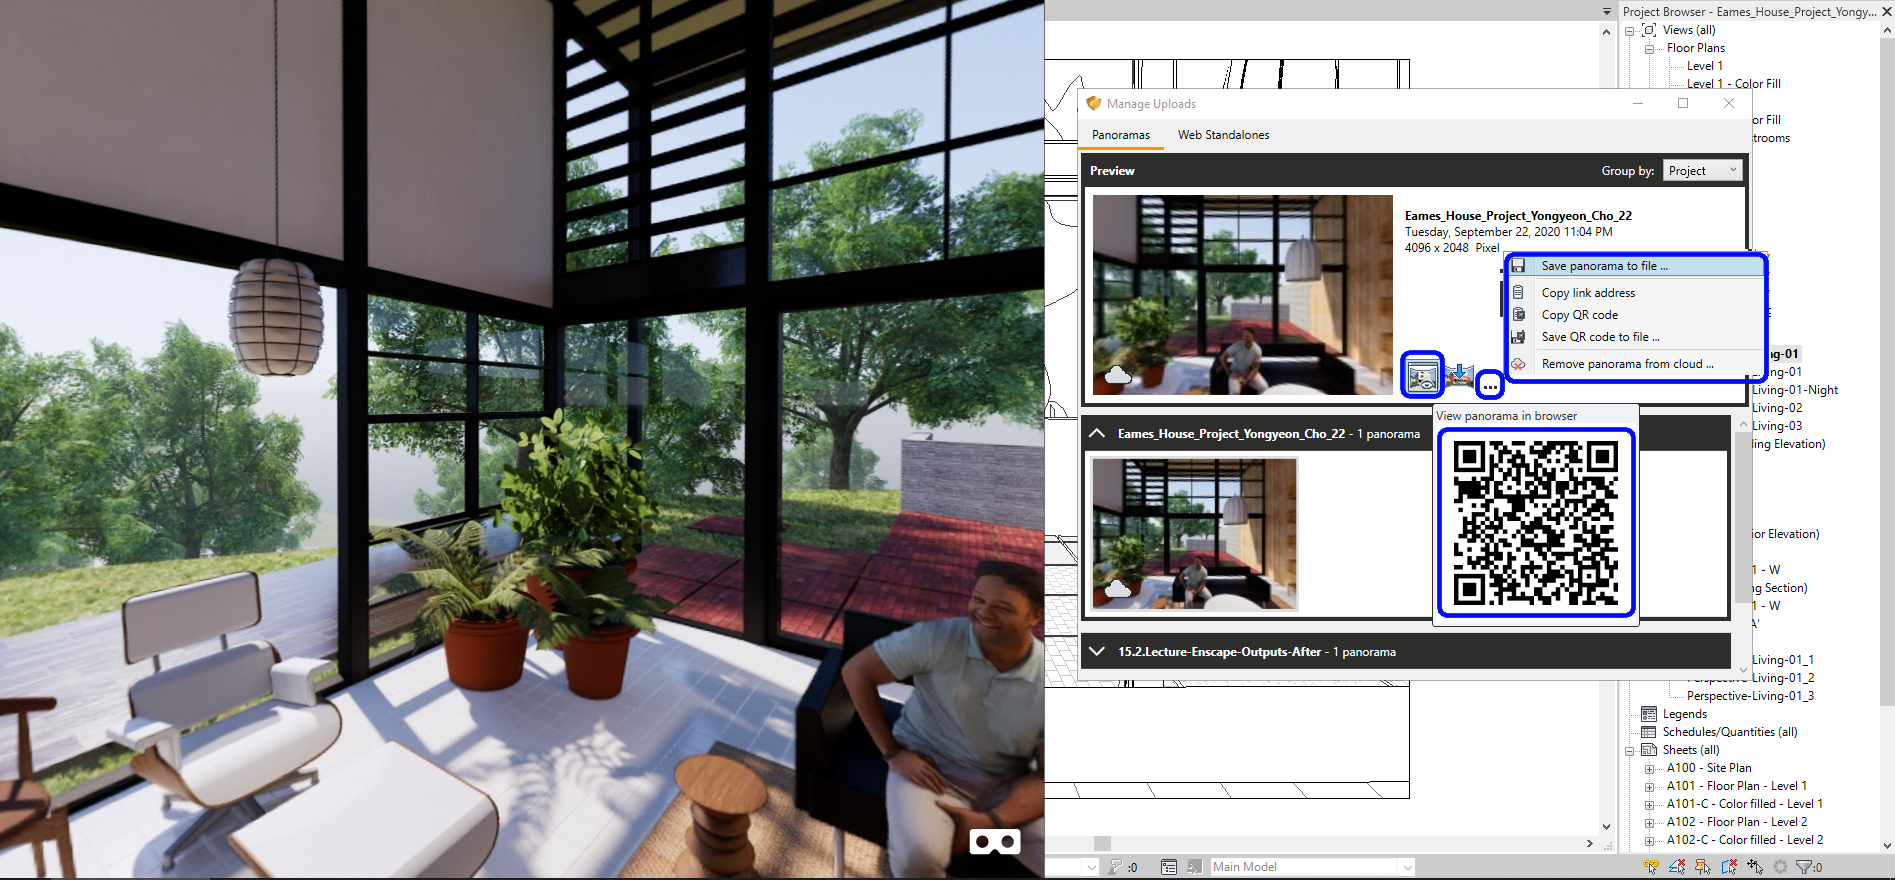
 - [STEP 6] Click the file to open the web browser or use a QR code
- [STEP 7] And the rendered image file and the QR code can be saved in JPG
Tips from Enscape using Panorama view
Please read this link for using the panorama view
Please read this link for an advanced level using panorama images
References
Panorama & Cardboard. (2020, July 20). Retrieved October 23, 2020, from https://enscape3d.com/community/blog/knowledgebase/panorama-cardboard/
