
Part Three. Enscape
Chapter 20. Edit model & materials
Upon completing this session, students will be able to:
- (CO 1) Understand workflow, name of the material
- (CO 2) Use 3D Grass, Water, Reflective, textures
- (CO 3) Change to Architecture Maquette (White model, Outline) & Light mode
- (CO 4) Create Orthometric views
 Session Highlights
At the end of the session, students can create the graphics below.

 Lecture Contents
(CO 1) Understand workflow, name of the material
To manage your file size for faster real-time rendering in Enscape, you would be better to reduce your file size
To apply a new material
- [STEP 1] Click [Material Browser] icon on [Material and Finish] category in the [Properties] palette
- [STEP 2] Click [Create New Material] on [Material Browser]
- [STEP 3] Rename the material that you created (Example. 001_XX_01_Description)
- [STEP 4] Check [Use Render Appearance] on [Graphic] tab
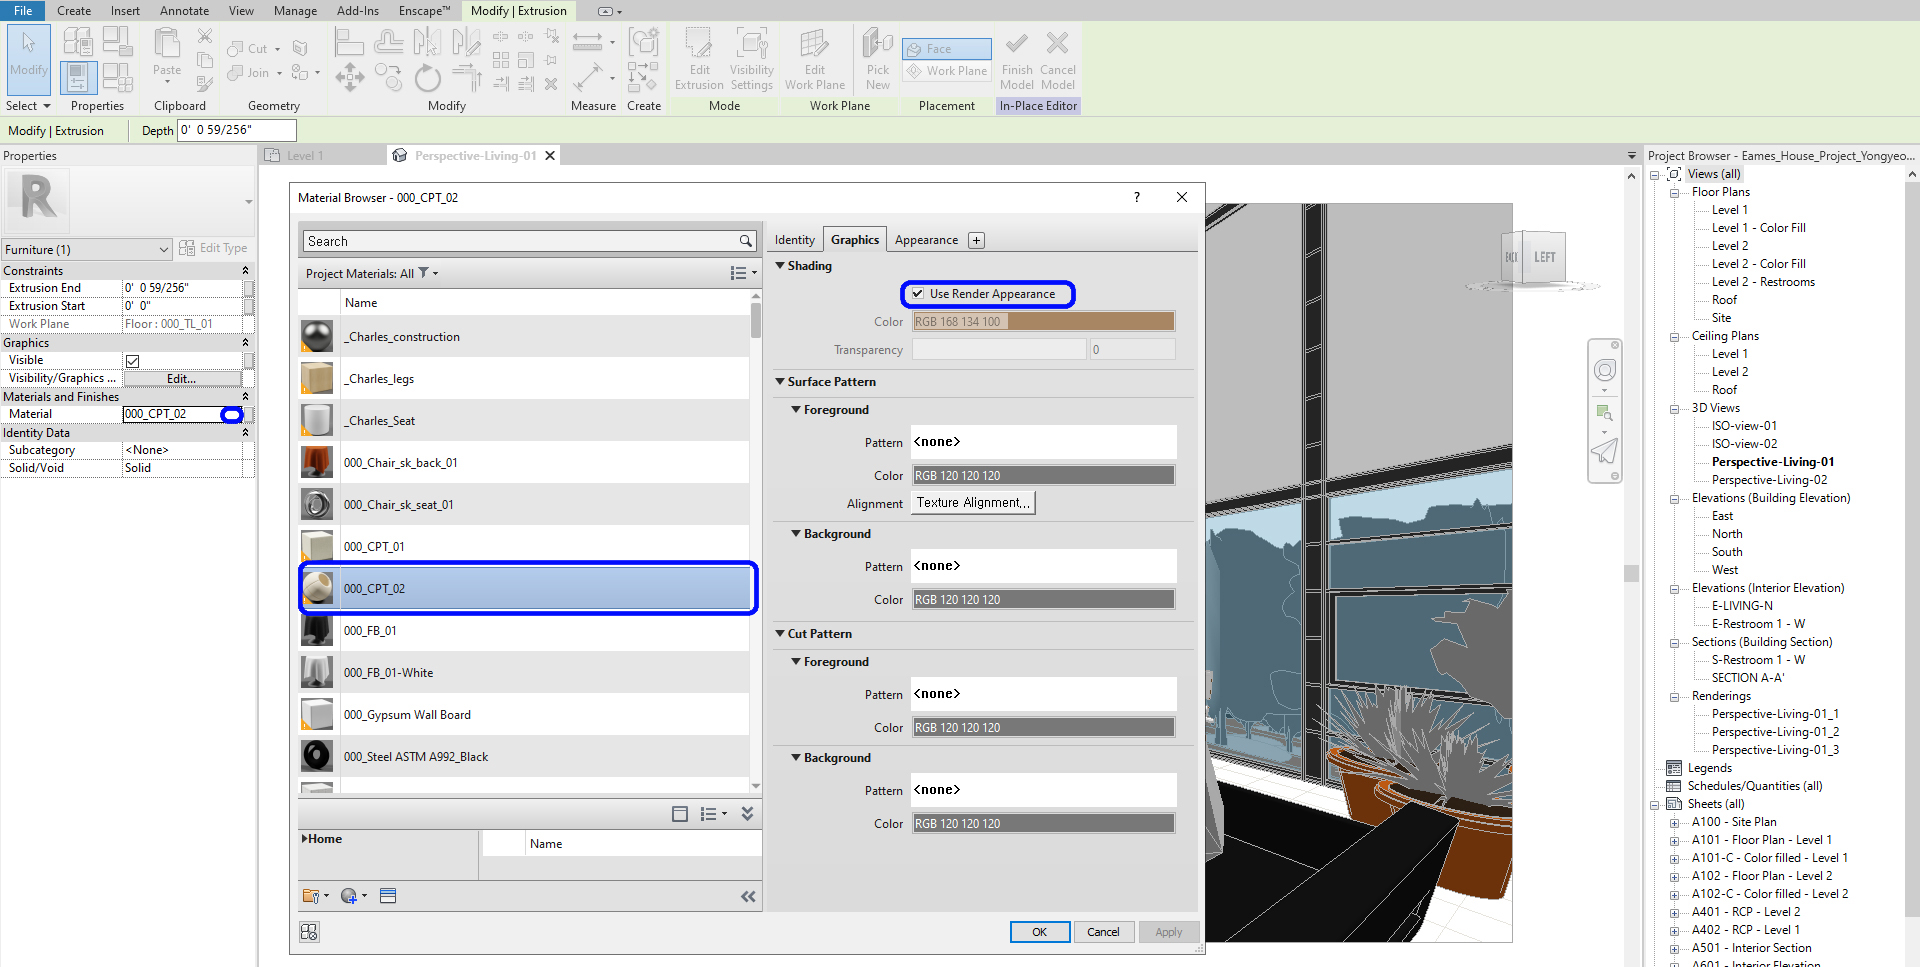
- [STEP 5] Click the [Appearance] tab on the [material browser]
- [STEP 6] Click [Replace] Icon
- [STEP 7] Click [ Appearance Library]
- [STEP 8] Select a category
- [STEP 9] Click a specific material that you would like to apply, or change > click the [replace] icon
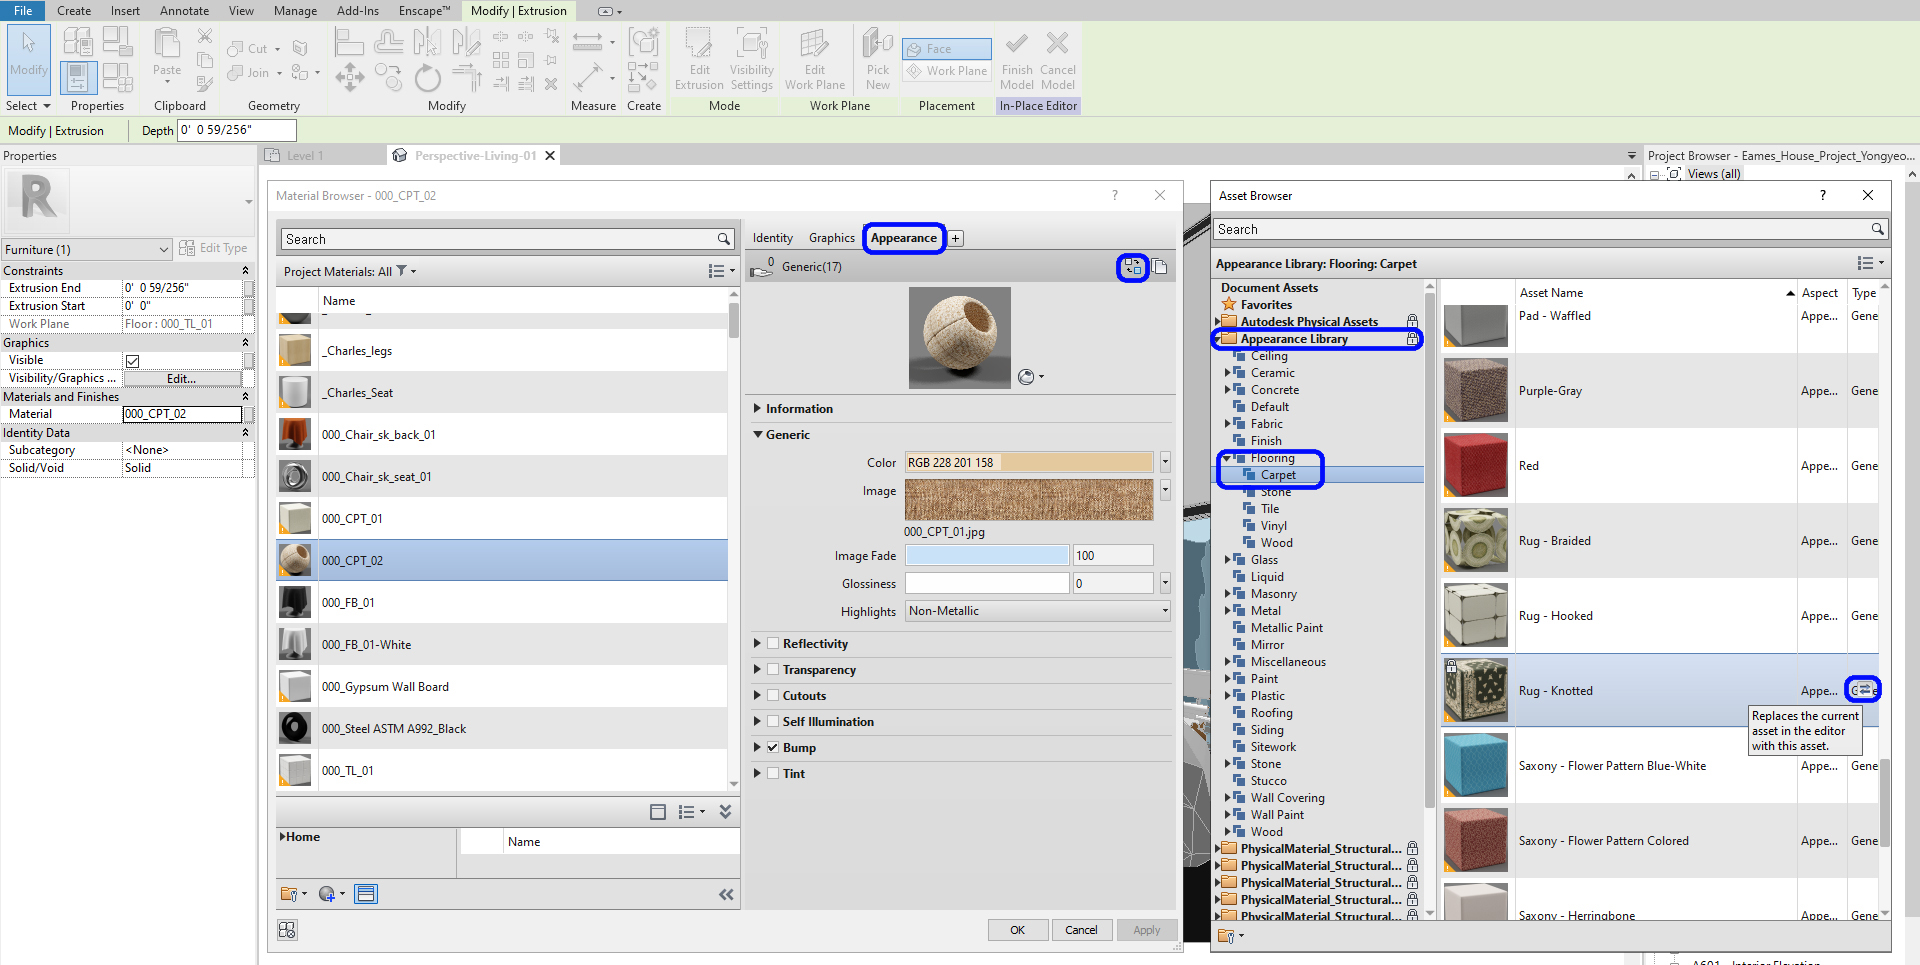
- [STEP 10] On the [Material Browser], click the Duplication icon. This process is recommended to make a unique material
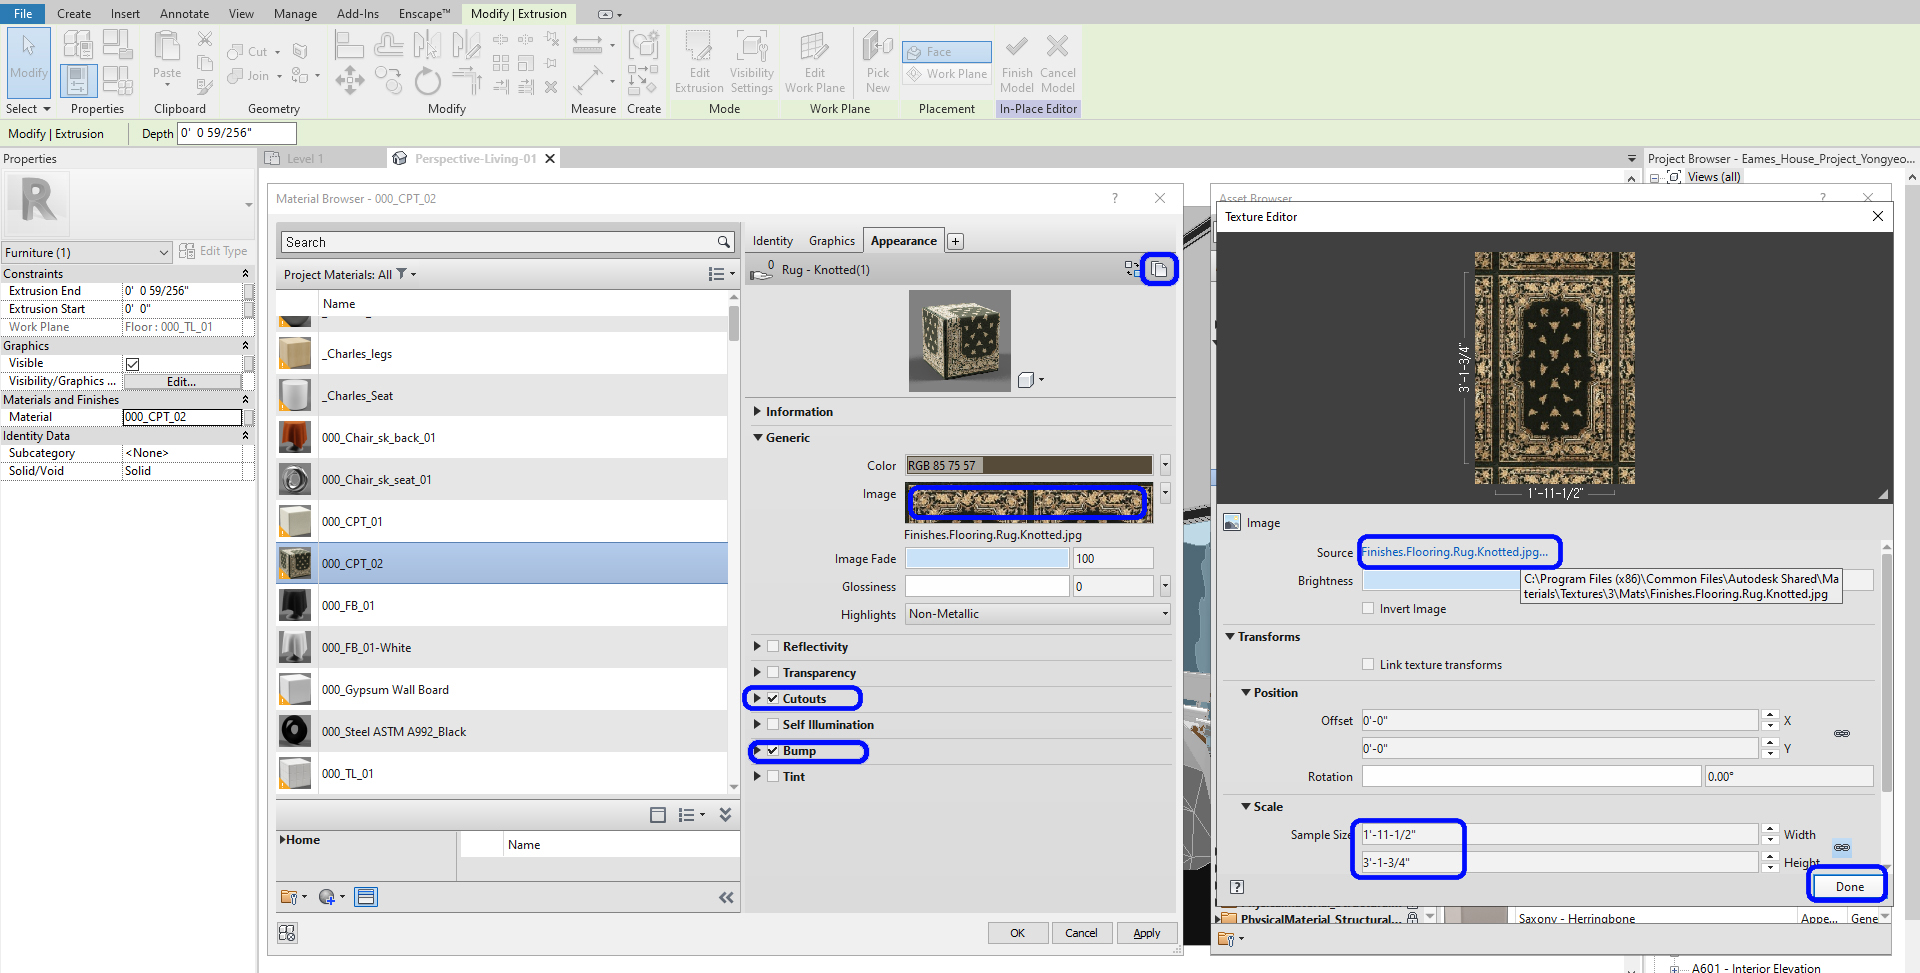
- [STEP 11] If the material image needs to be changed, click the image name. If the material size, location, or rotate, click image
- [STEP 12] Change the scale, offset, or rotate > Click done
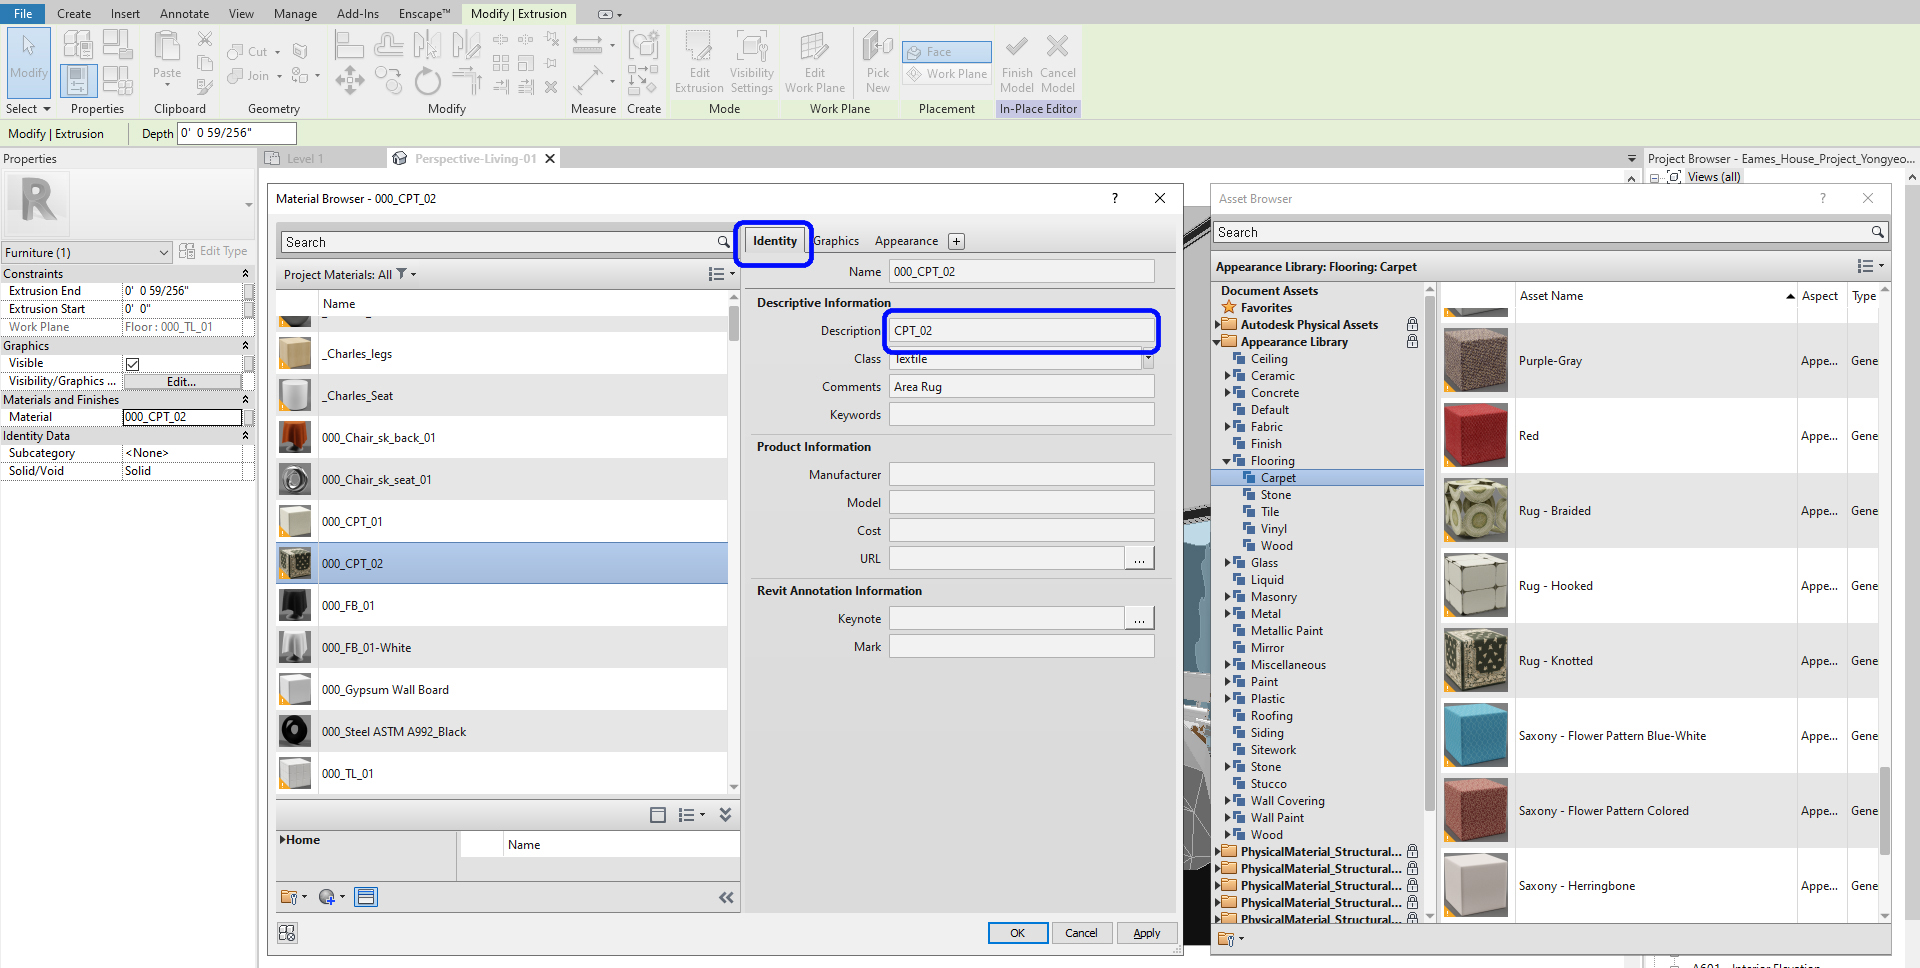
- [STEP 13] Update Information on the [Identity] tab
- Description = Material tag information
- Other information = Material schedule information
- [STEP 14] Update Information on the [Graphics] tab
- Shading, Check [Use Render Appearance]
- Update [Surface Pattern] if needed
- Update [Cut Pattern] if needed
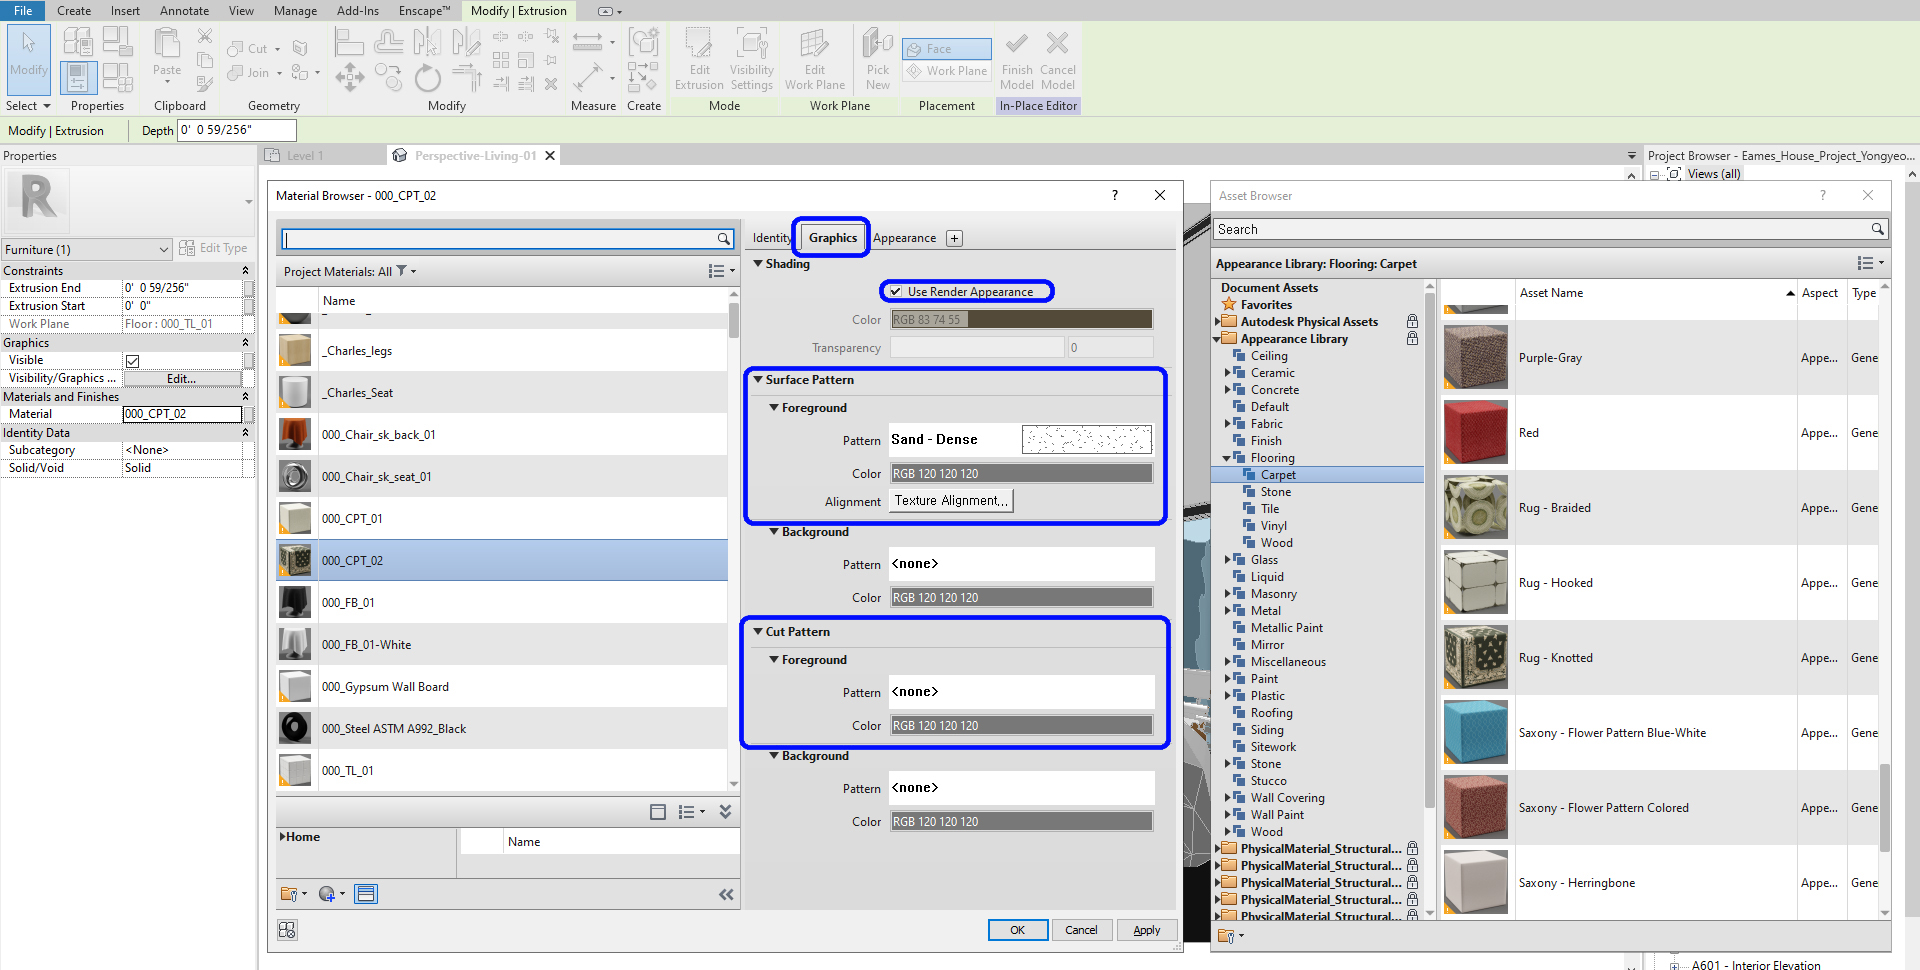
- [STEP 15] Update Information on the [Appearance] tab
- Information name = Should be unique
- Generic = Image or color
- Reflectivity
- Transparency
- Self-illumination – Create self-illuminated material like a light source
- Bump – Create a bumpy texture on a surface

- [STEP 16] Click [Apply] > click [ok]
For material, Enscape uses most of Revit material properties
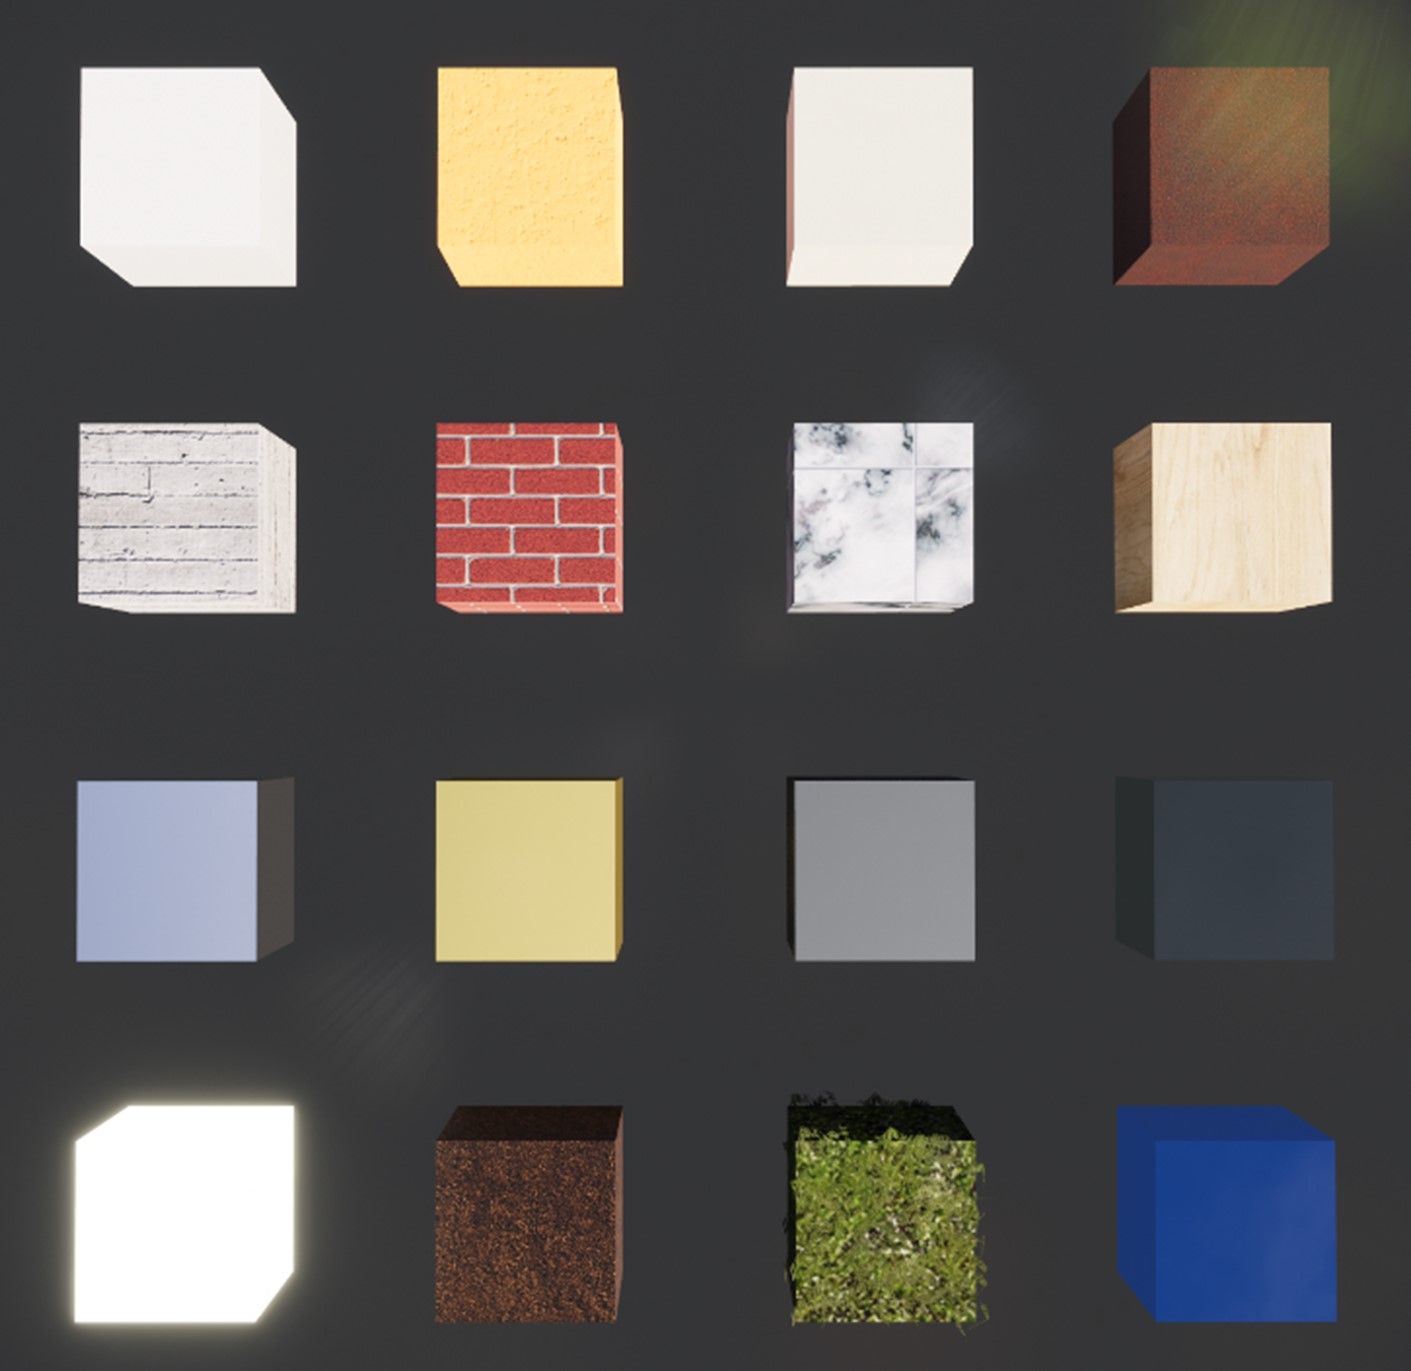
Materials in Revit can be found at this link
Use sample materials from this link
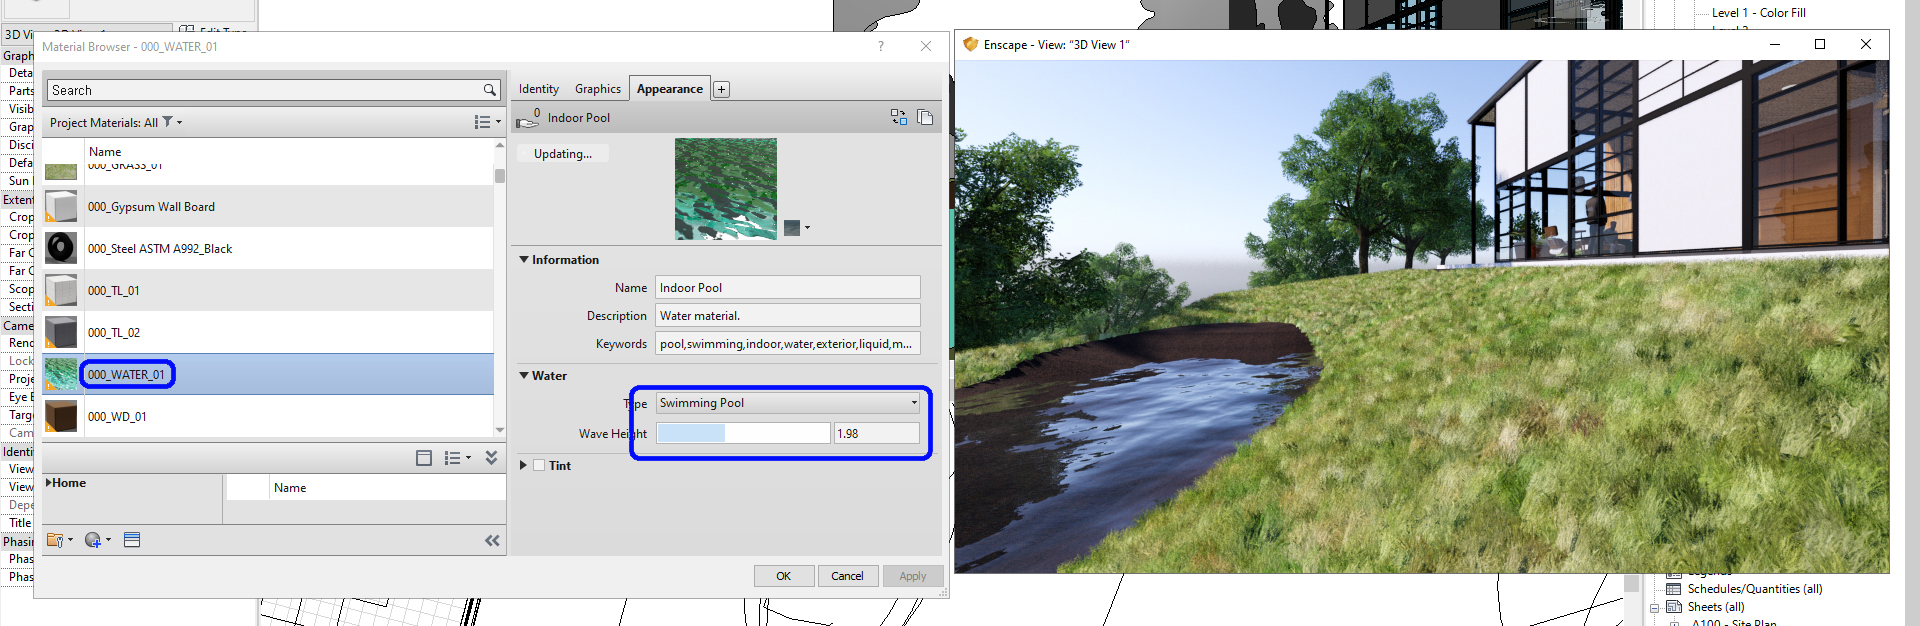
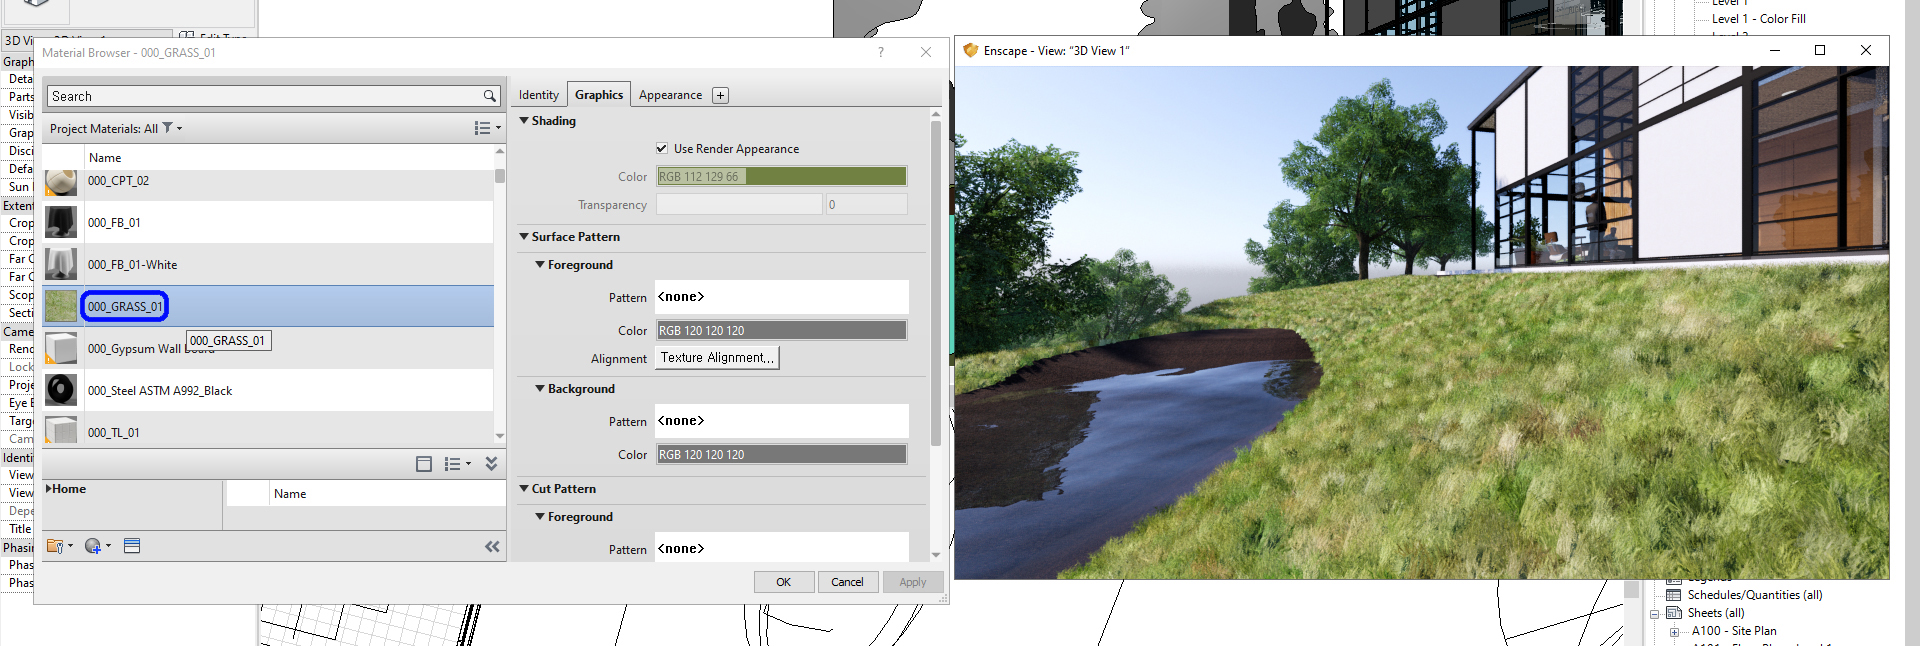
(CO 2) Use 3D Grass and Water
Enscape requires a special name for Water and Grass.
The material name must include [water] for water materials.
The material name must include [grass] for grass materials.
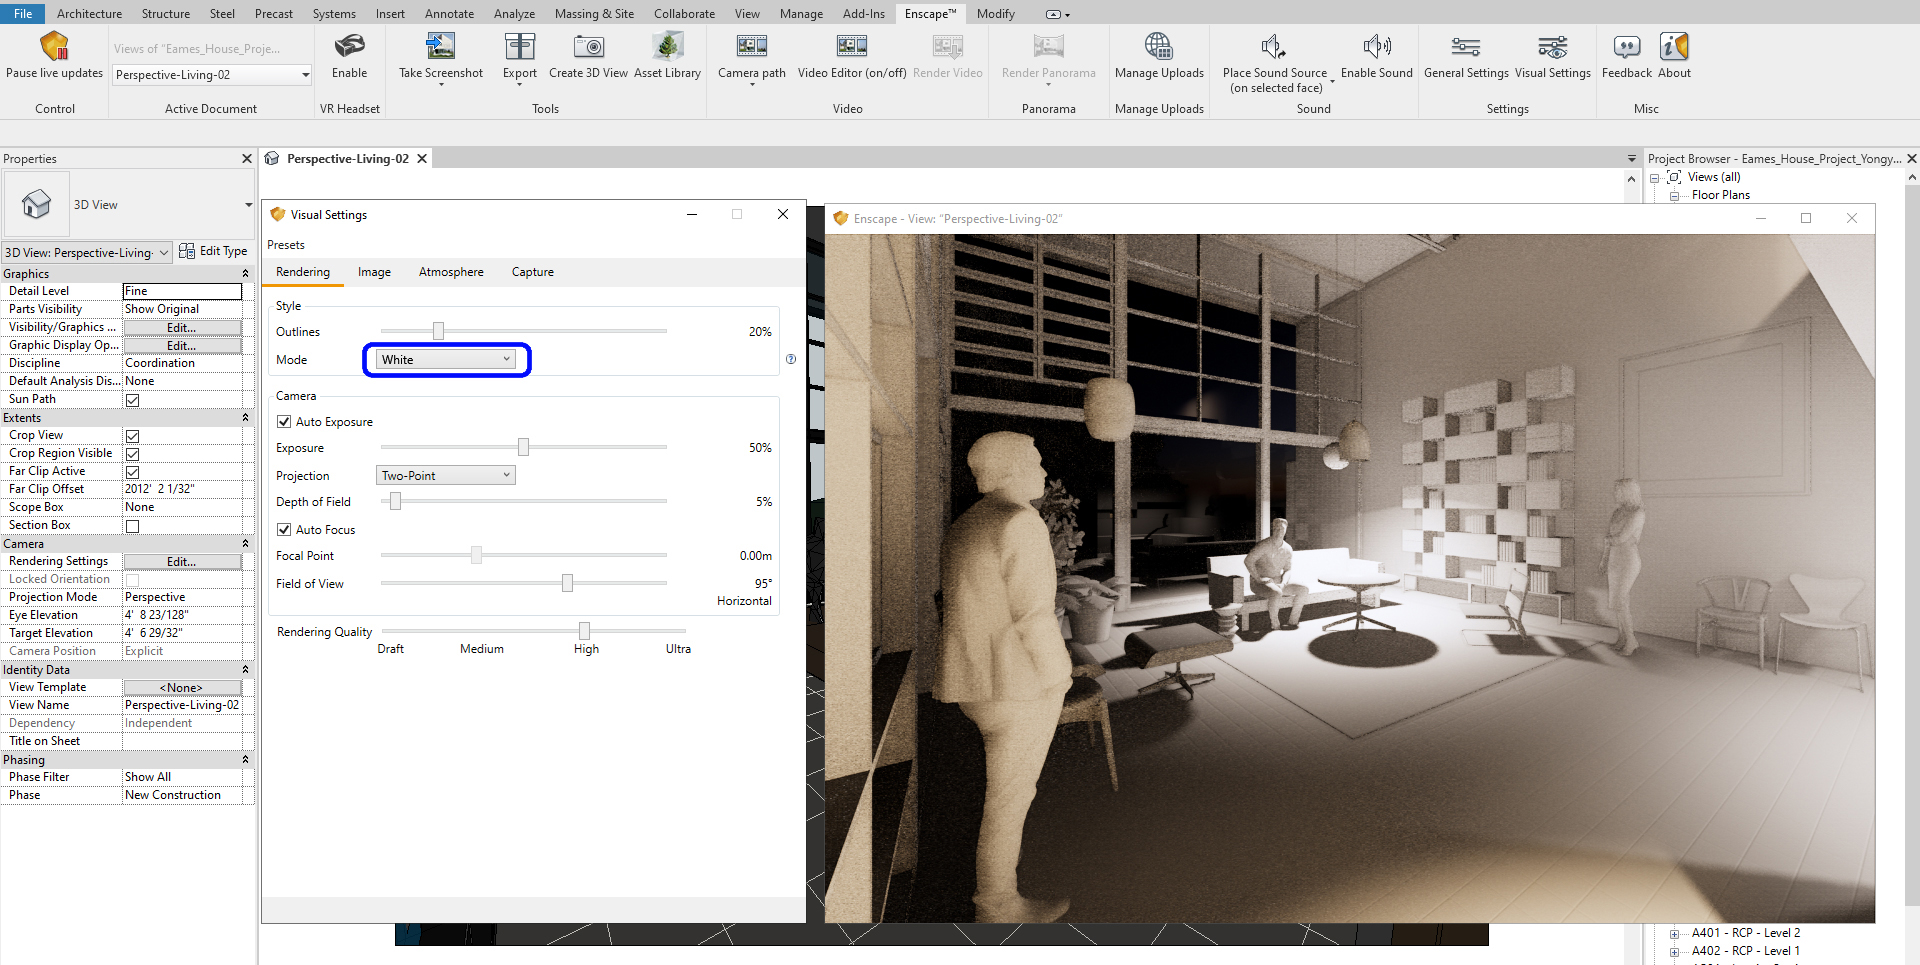
(CO 3) Change to Architecture Maquette (White model, Outline) & Light mode
Designers use white models to discuss the shape or form of space.
- [STEP 1] Open [visual settings]
- [STEP 2] Change mode to [White]
The designer also uses light mode to show lighting intensity. You can see where hot spots are and where the areas that need more lighting.
- [STEP 1] Open [visual settings.]
- [STEP 2] Change the mode to [Light view.]
- [STEP 3] You may uncheck [Automatic Scale] for manual

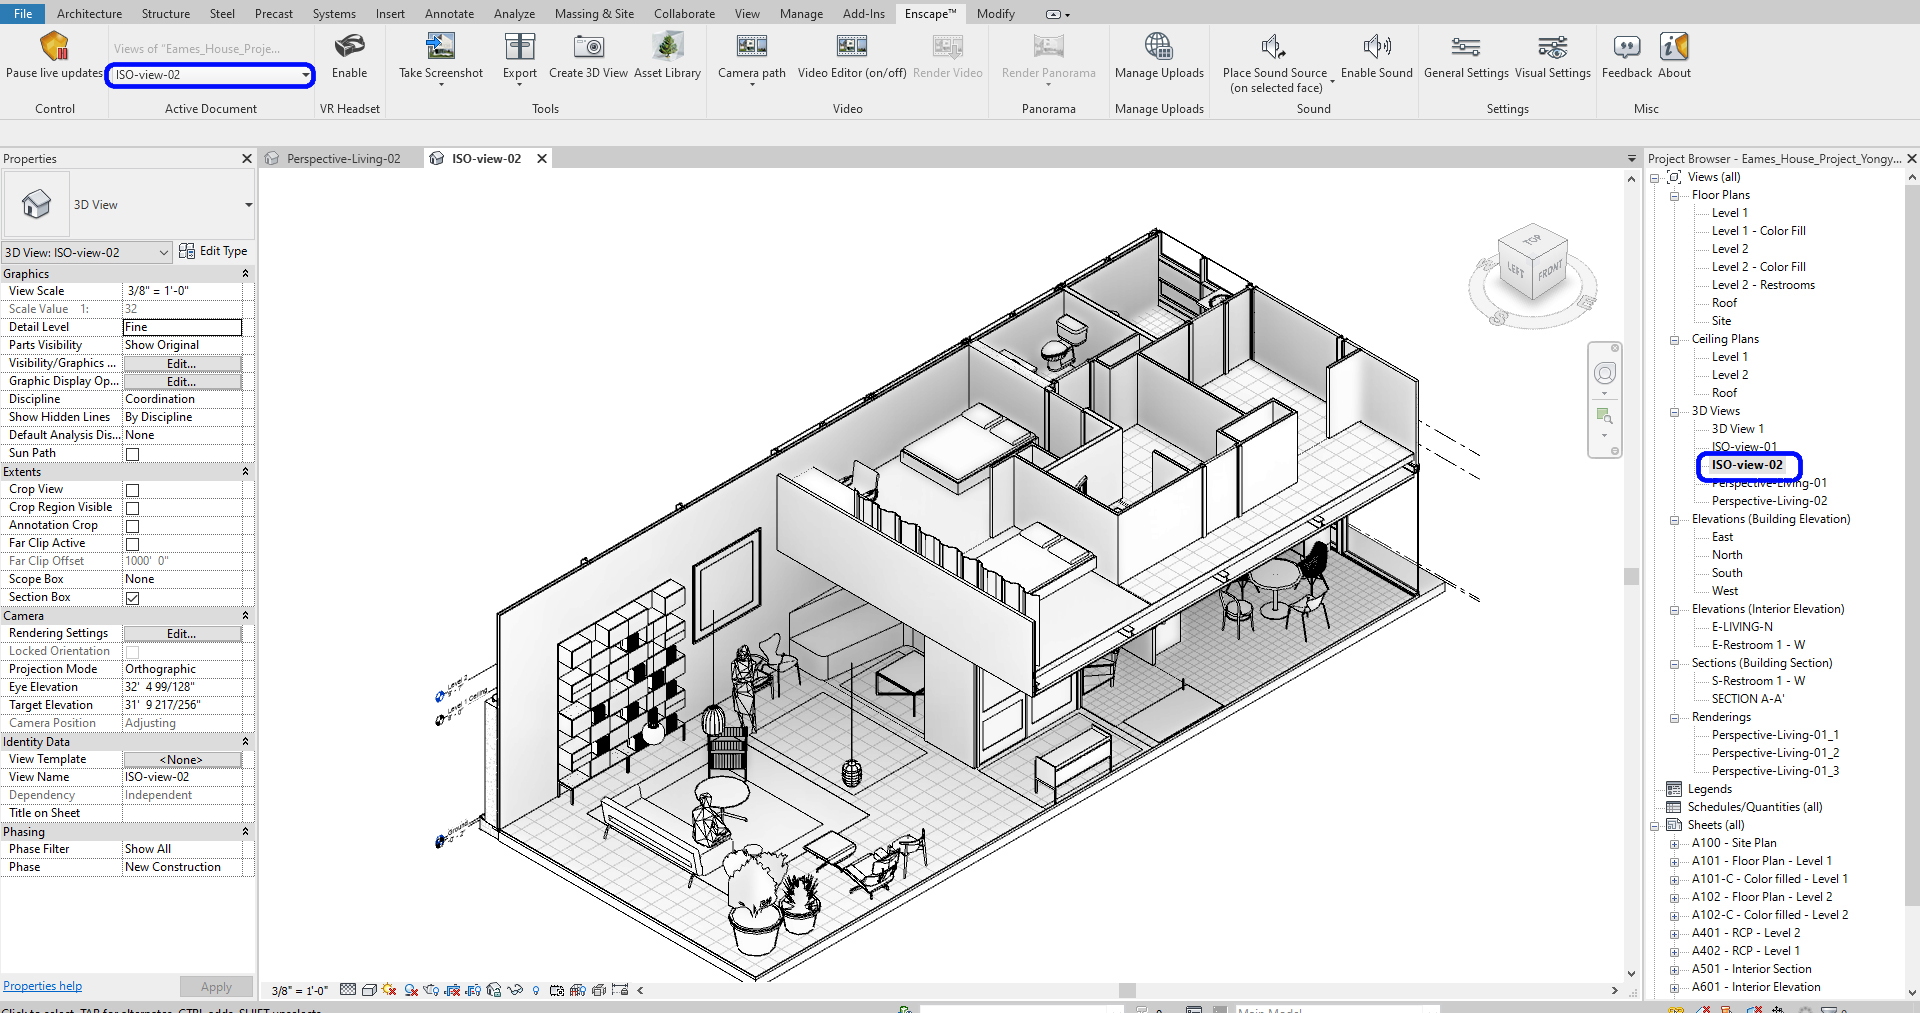
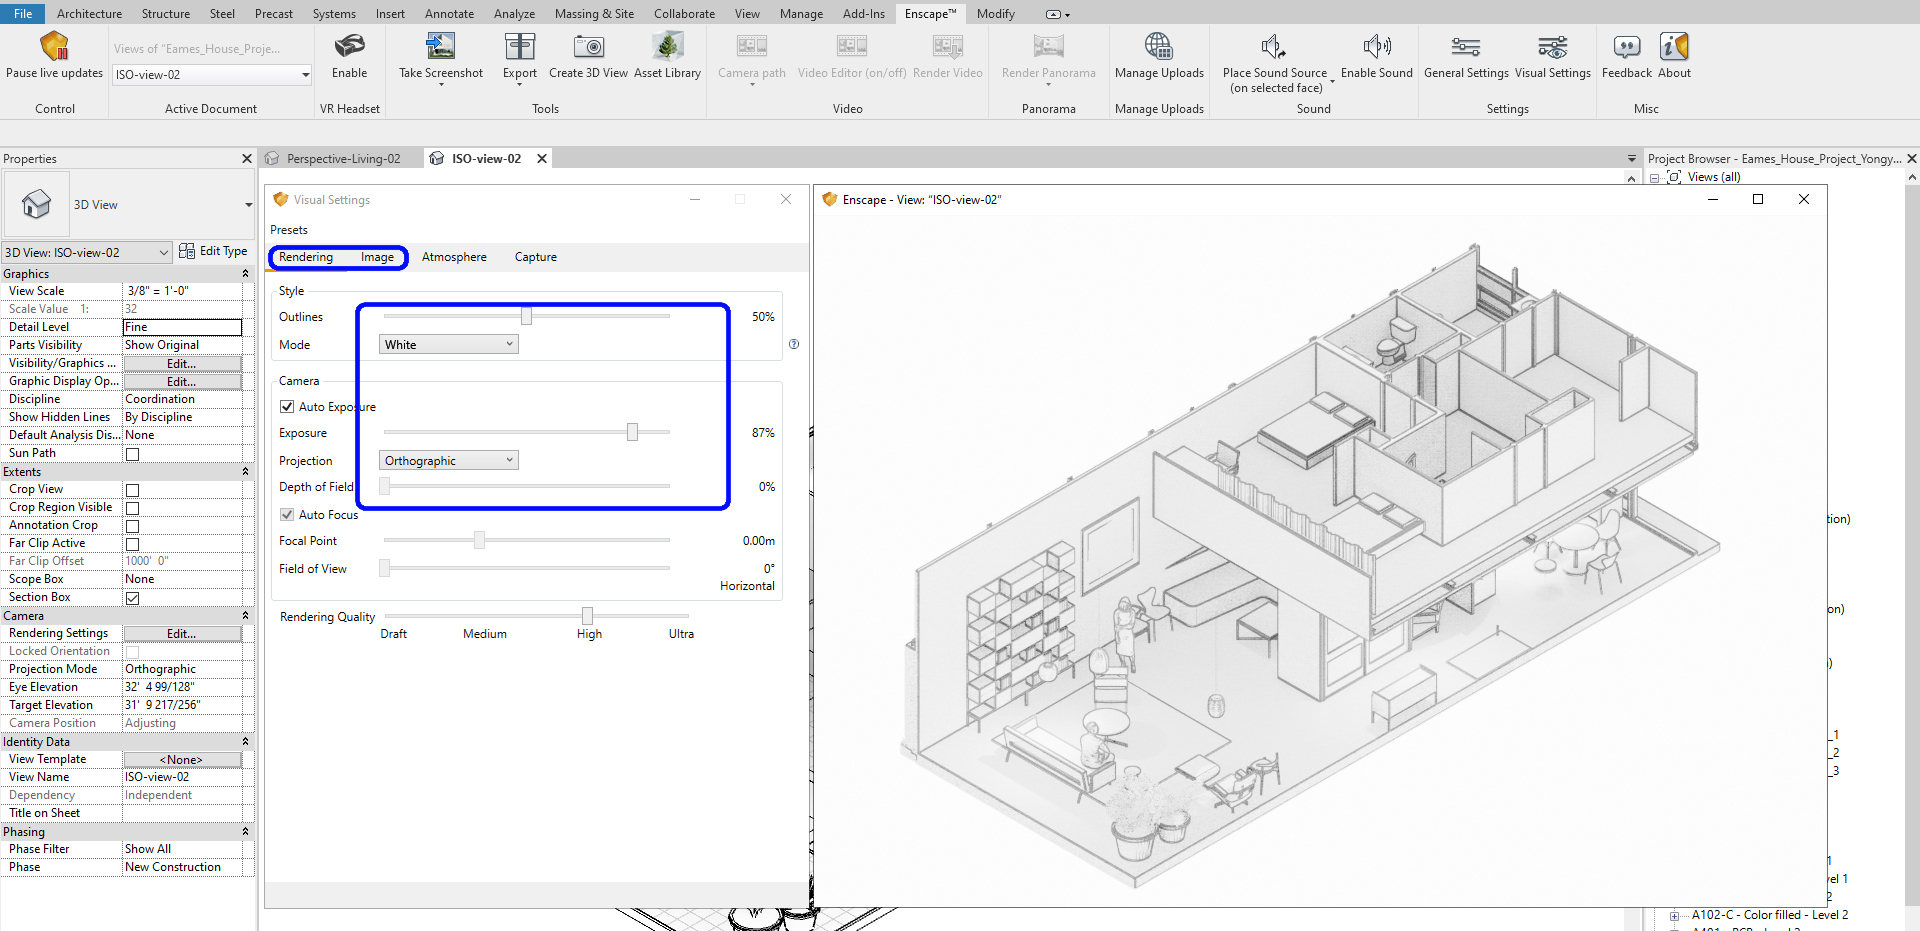
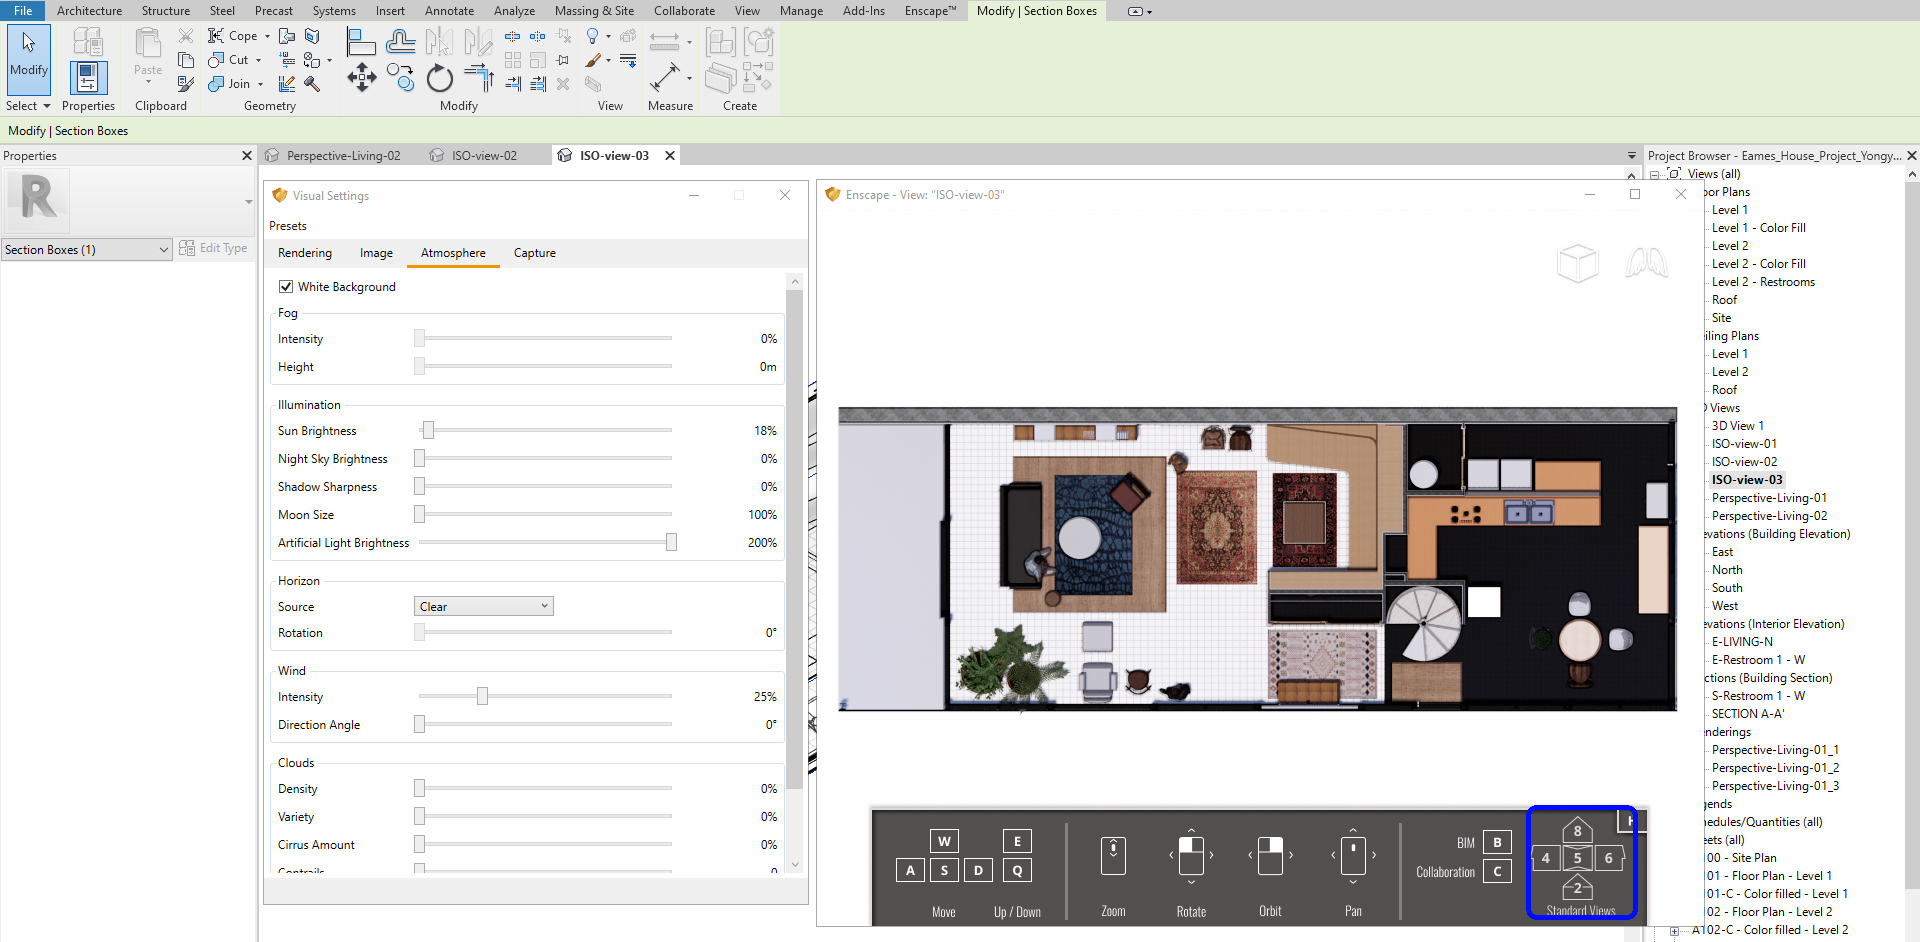
(CO 4) Create Orthometric views
To create an isometric view via Enscape, you need an isometric view on your Revit file.
- [STEP 1] Create a Default 3D view by clicking the [3D view] from the View] tab, under [Create] panel
- [STEP 2] Use [section box] and hide in view by element or category to hide unnecessary items
- [STEP 3] Synchronize the view by selecting [view name]
- [STEP 4] Change the Projection to [Orthographic] from [Visual Settings] under [Rendering]
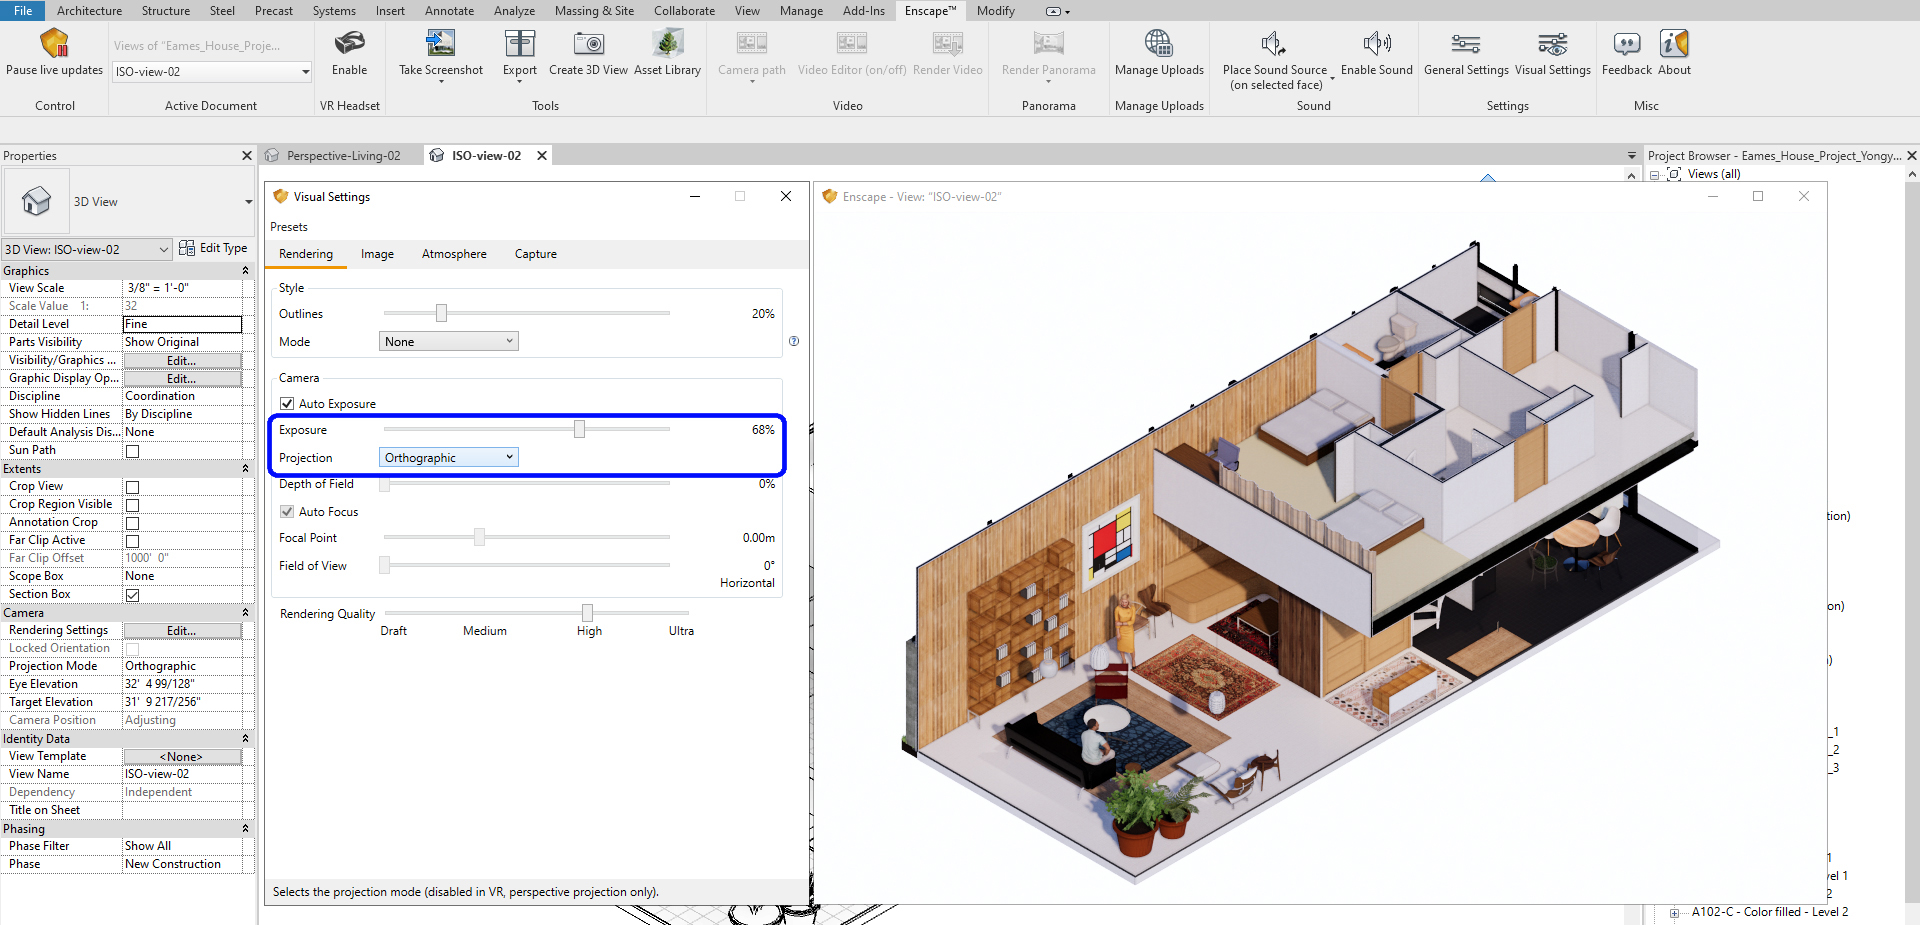
- [STEP 5] You may change the [render style mode] on your [visual settings]
- [STEP 6] You also may change views using numbers on the keyboard
For a floor plan, press [ 5 ]
References
Materials in Revit. (2020, July 16). Retrieved October 23, 2020, from https://enscape3d.com/community/blog/knowledgebase/revit-material-parameters/
Free Enscape Student & Educational Licenses – Enscape™. (2020, June 05). Retrieved October 23, 2020, from https://enscape3d.com/educational-license/
