
Part Two. Revit
Chapter 8. Introduction to Revit
Upon completing this session, students will be able to:
- (CO 1) Purpose of using Revit – How & Why Interior Design uses Revit
- (CO 2) Install Revit
- (CO 3) Understand Project Templates – Default and Own
- (CO 4) Save Revit file – Set the project folder and backup file
- (CO 5) Open an existing project file
- (CO 6) Keyboard shortcuts
- (CO 7) Understand the User Interface – Toolbar, Properties, Drawing area, Option bar, and Project Browser
 Session Highlights
At the end of the session, students can create the graphics below.
 Lecture Contents
(CO 1) Purpose of using Revit – How & Why Interior Design uses Revit
Introduction of Revit, a BIM (Building Information Model) software
- Charles River Software originally developed the software in 1997, renamed Revit Technology Corporation in 2000, and acquired by Autodesk in 2002.
- Autodesk Revit is BIM software for Architects, Interior Designer, Landscape Architects, Structural Engineers, MEP Engineers, Contractors, and more.
- Revit can be used as a very powerful collaboration tool among different disciplines in the Architecture, Engineering, and Construction (AEC) industry.
image credit: https://commons.wikimedia.org/wiki/File:Revit.jpg
- Revit has a huge library for modeling in the software itself and supports plug-ins, advanced data management systems, and energy modeling analysis.
- Revit modeling process is complicated and not easy for a first-time user.
- Software required better hardware, 40% more expensive than Autodesk CAD but higher productivity.
- For architects and interior designers, the software is being used to create construction documents.
- Most of the commercial interior design/architectural design firms use Revit.
- Not much of renderings features, but support Virtual Reality plugins.
- Collaborate with CAD drawing users.
(CO 2) Install Revit
Install Autodesk Revit
- [STEP 1] Go to https://www.autodesk.com/education/free-software/revit on your window side in a web browser.
- [STEP 2] Click [CREATE ACCOUNT] if you do not have one. If you have the account, please sign in.
- [STEP 3] Click [Get product] under Revit.
- [STEP 4] Select, windows, 2021, and English. Click [INSTALL].
- [STEP 5] Accept the license and services agreement.
- [STEP 6] You will get an email from Autodesk for the license information (Product key and Serial Number). It may need the information for the activation process.
- [STEP 7] Click Install.
- [STEP 8] Click downloaded installation file to install.
- [STEP 9] Setup Initialization will download actual software to install it will take time.
- [STEP 10] While you are installing Select the “Architecture” discipline in the drop-down menu.
- [STEP 11] After installation, the license information required to activate Revit.
(CO 3) Understand Project Templates – Default and Own
Open Revit by double-clicking the Revit Icon.
Once the application opens you can see the HOME page. From the home page, you can open recent project files and recent family files. Also, you can create a new project file or a new family file.
Create a new project file with Architecture Template.
- [STEP 1] Click [NEW] under Models on the left side of the Home page
- [STEP 2] Click [Imperial-Construction Template] and select [Imperial-Architectural Template]
- [STEP 3] Click [OK] to create a new project file.
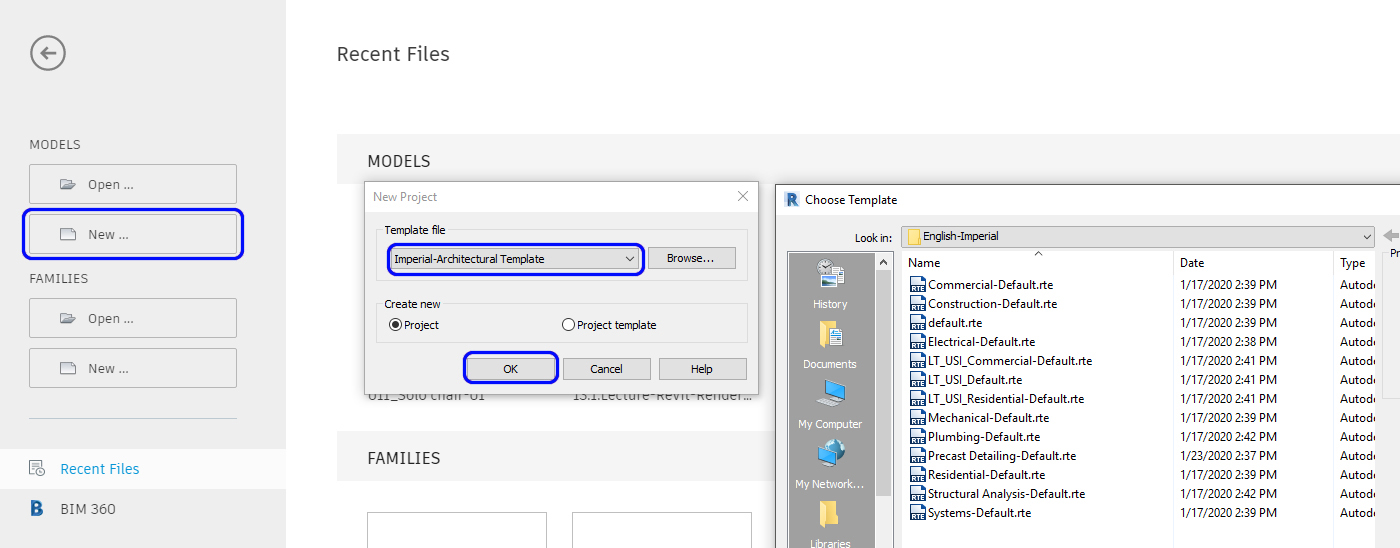
If you are working on a specific project like a residential building or a commercial project, there are more templates that Autodesk supports. To open the template, you can click [BROWSE]. And see what template is appropriate for your project.
Additionally, you can also create a project template for your firm. Many firms already created/use their own template (called a seed file) to save time and resources to develop their construction documents.
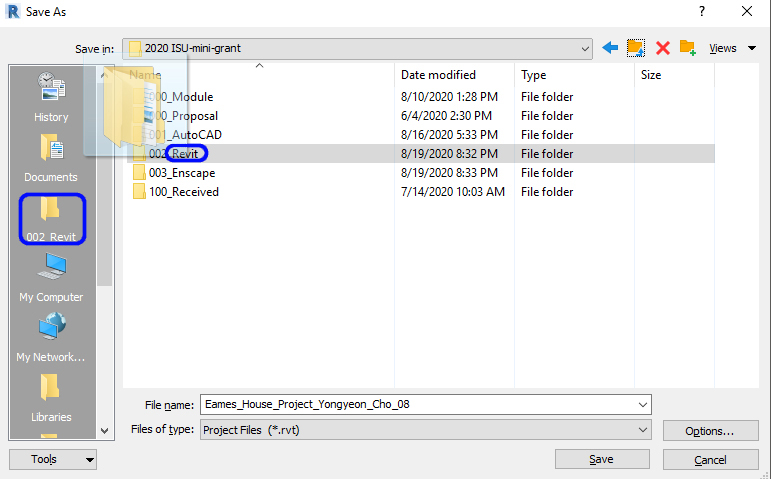
(CO 4) Save Revit file – Set the project folder and backup file
Saving a file must be a friend of yours. Once you create a new file you must save the Revit file first and work on it later.
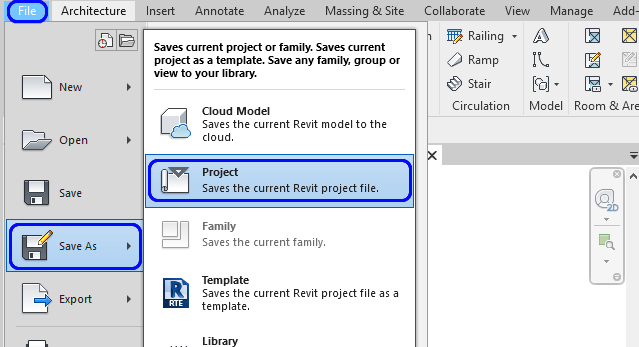
Save a file for the first time
- [STEP 1] Click [FILE] tab
- [STEP 2] Select [SAVE AS] from the file menu
- [STEP 3] Select [Project] under the menu
- [STEP 4] Find a folder location to save. If you do not have a folder, you can create a folder by pressing [ALT+5]. it is recommended to have a project folder to save the project Revit file. You also save other family files (e.g. Furniture, lighting family that you downloaded) and material images that you found under the project folder. You may draw and drop the folder to the left side of the browser for future use.
Tip, I strongly recommend having an external hard drive to save files. If your laptop hard disk is full, your hardware performance will be drastically reduced. To prevent this, your working file should be saved in an external hard disk. For extra safety, it is recommended to use Cloud file storage to save files.
- [STEP 5] Open a folder to save and make a unique name for the project.
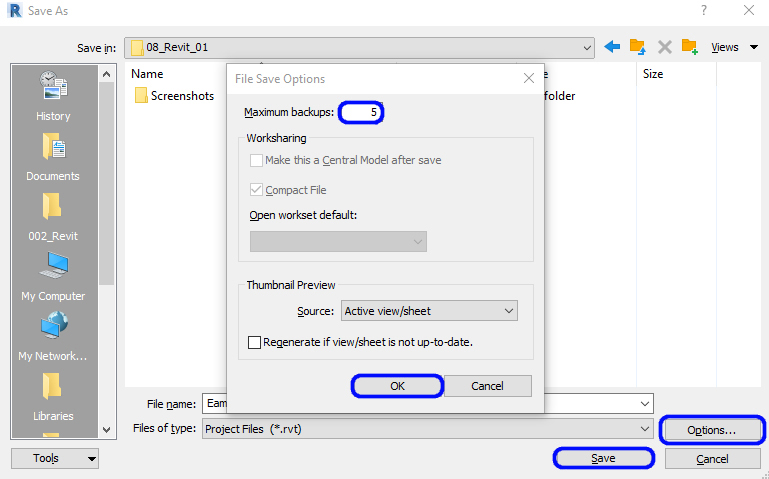
- [STEP 6] Before you click [SAVE], you may consider saving a backup file by clicking [OPTIONS]. Revit will automatically make backup project files. It is safe to have the backup files, but it will take time for the automatic backup file while you work on it. You may set the number of backup files (default is 20) by open [Option] in the save as browser. 5 backup files might be enough.
Save a file while working or end of the work
- [STEP 1] Click [FILE] tab
- [STEP 2] Select [SAVE] or simply press [CTRL + S]
(CO 5) Open an existing project file
Revit has 2 ways to open your project file.
The first method is just double-clicking your Revit project file.
The second method is opening a file in the application. I recommend this second option due to reducing errors that you might have, especially, while you are sharing a file with your co-workers.
- [STEP 1] Open the Revit software
- [STEP 2] Click [File] on the tab
- [STEP 3] Click [Open] on the file tab
- [STEP 4] Select the file that you want to open under the folder
- [STEP 5] Click [Open] to open the file
(CO 6) Keyboard shortcuts
To increase productivity, I recommend you become familiar with the following keyboard shortcuts.
- MV Move
- TL Thin Line
- VV Visibility
- ZE Zoom All to fit
- WT Tile Views
- TW Tab Views
- DI Aligned Dimension
- DL Detail Line
- CO Copy
- RO Rotate
- MA Match type properties
- AL Align
- PT Paint
For more information regarding shortcuts
https://www.autodesk.com/shortcuts/revit
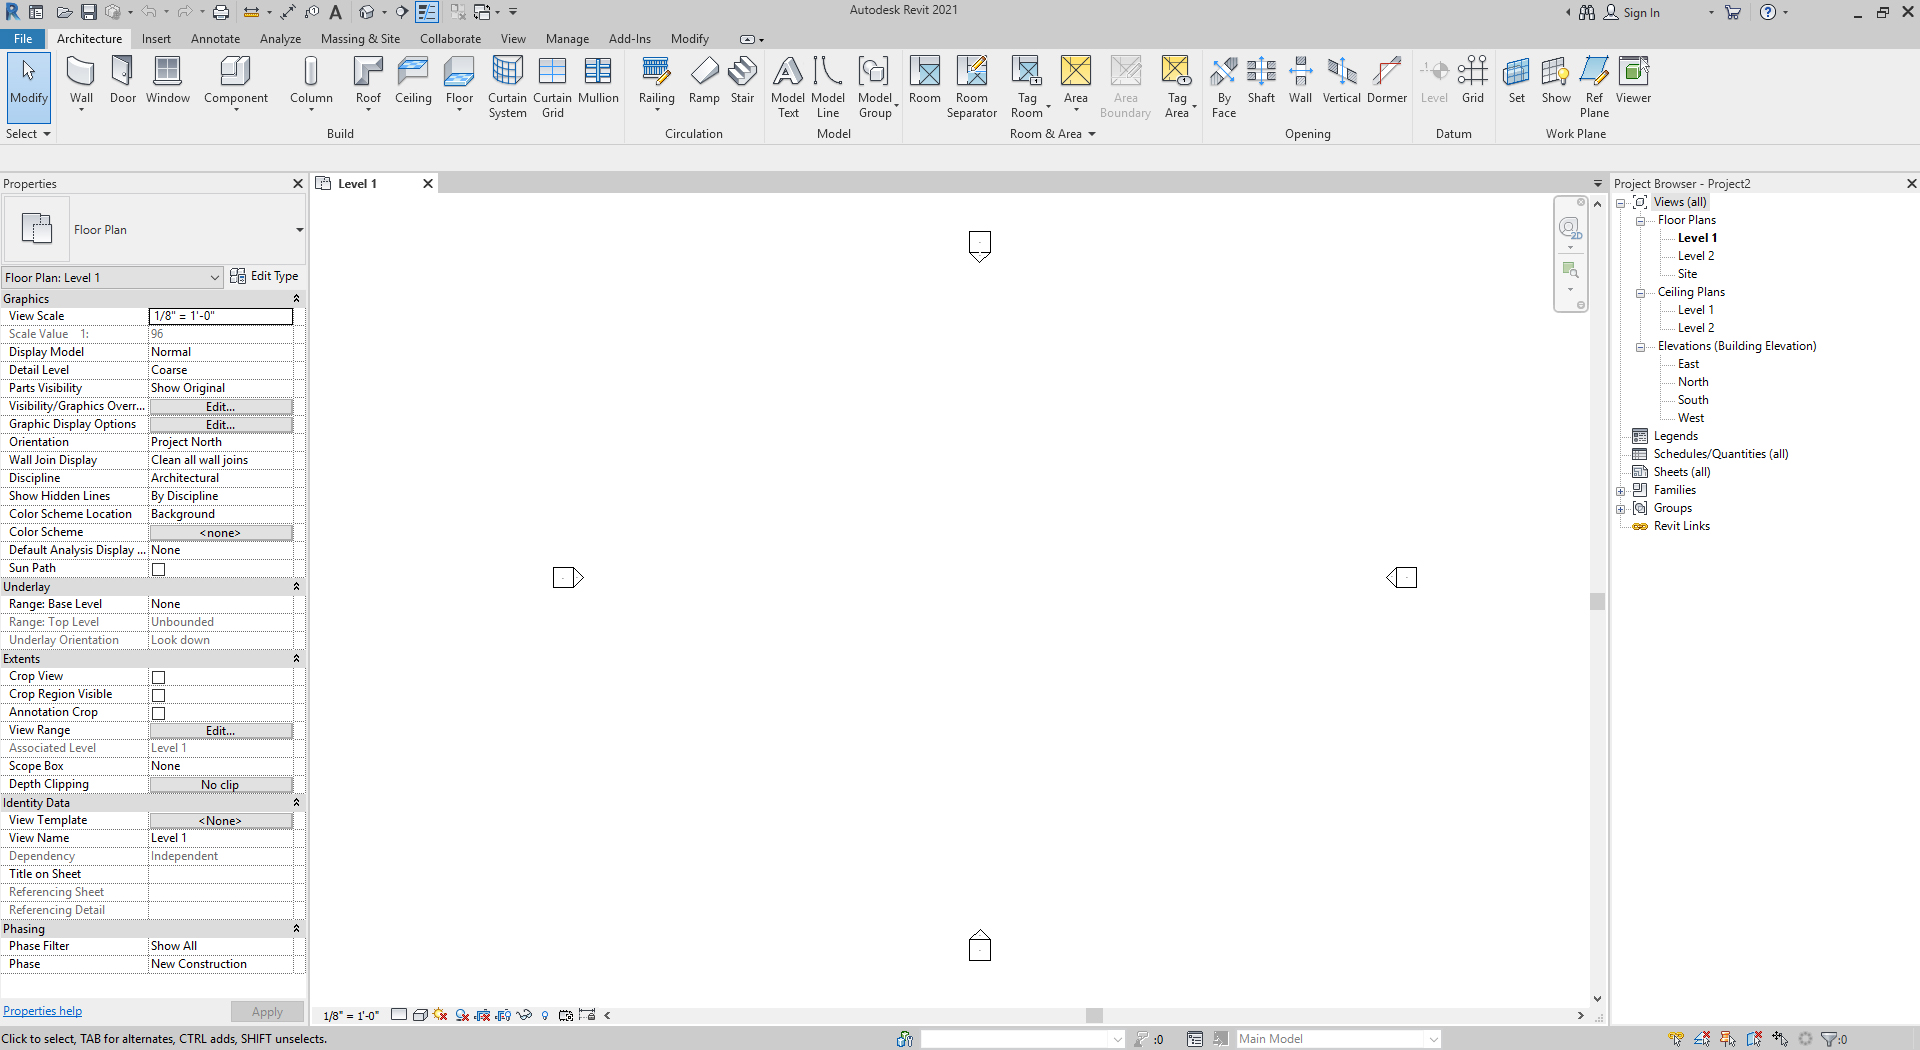
(CO 7) Understand the User Interface – Toolbar, Properties, Drawing area, Option bar, and Project Browser
Revit’s user interface is similar to AutoCAD’s one including an icon with text, and wording.
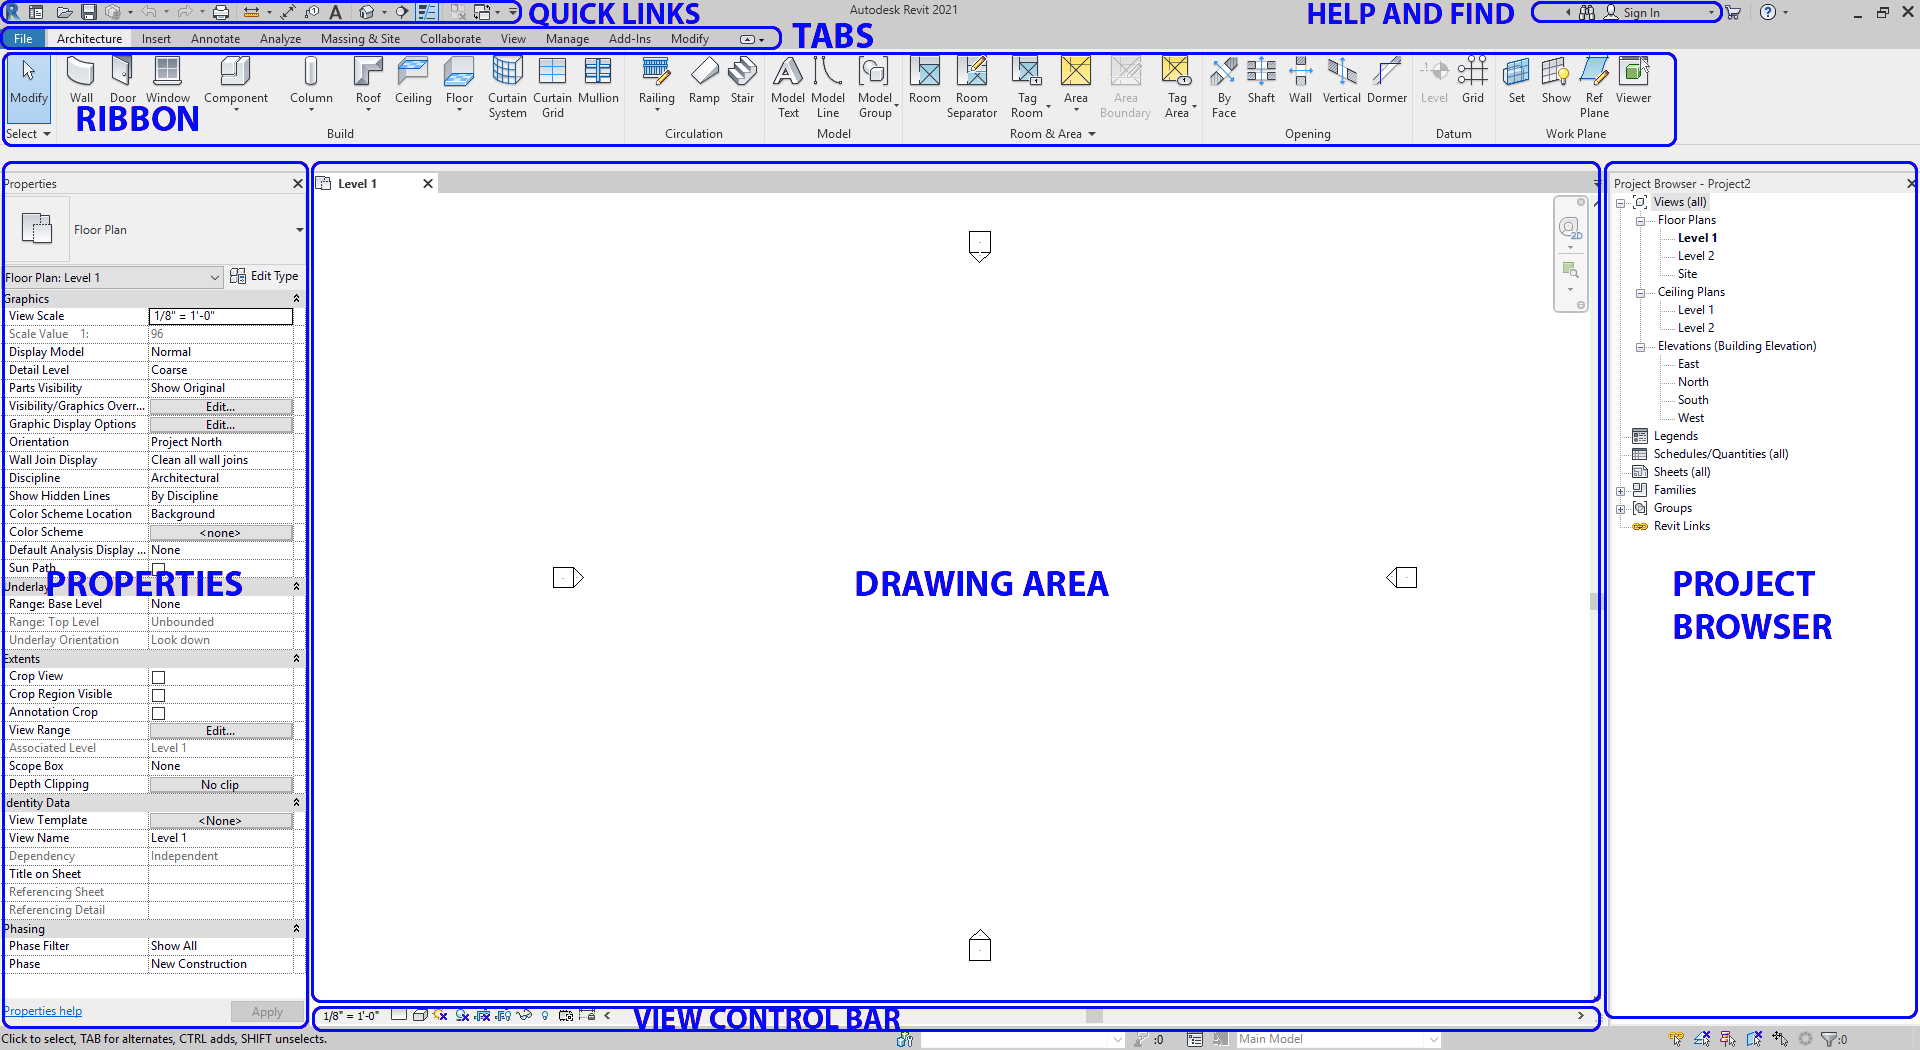
You may change the location of Properties and Project Browser to expand more drawing area.
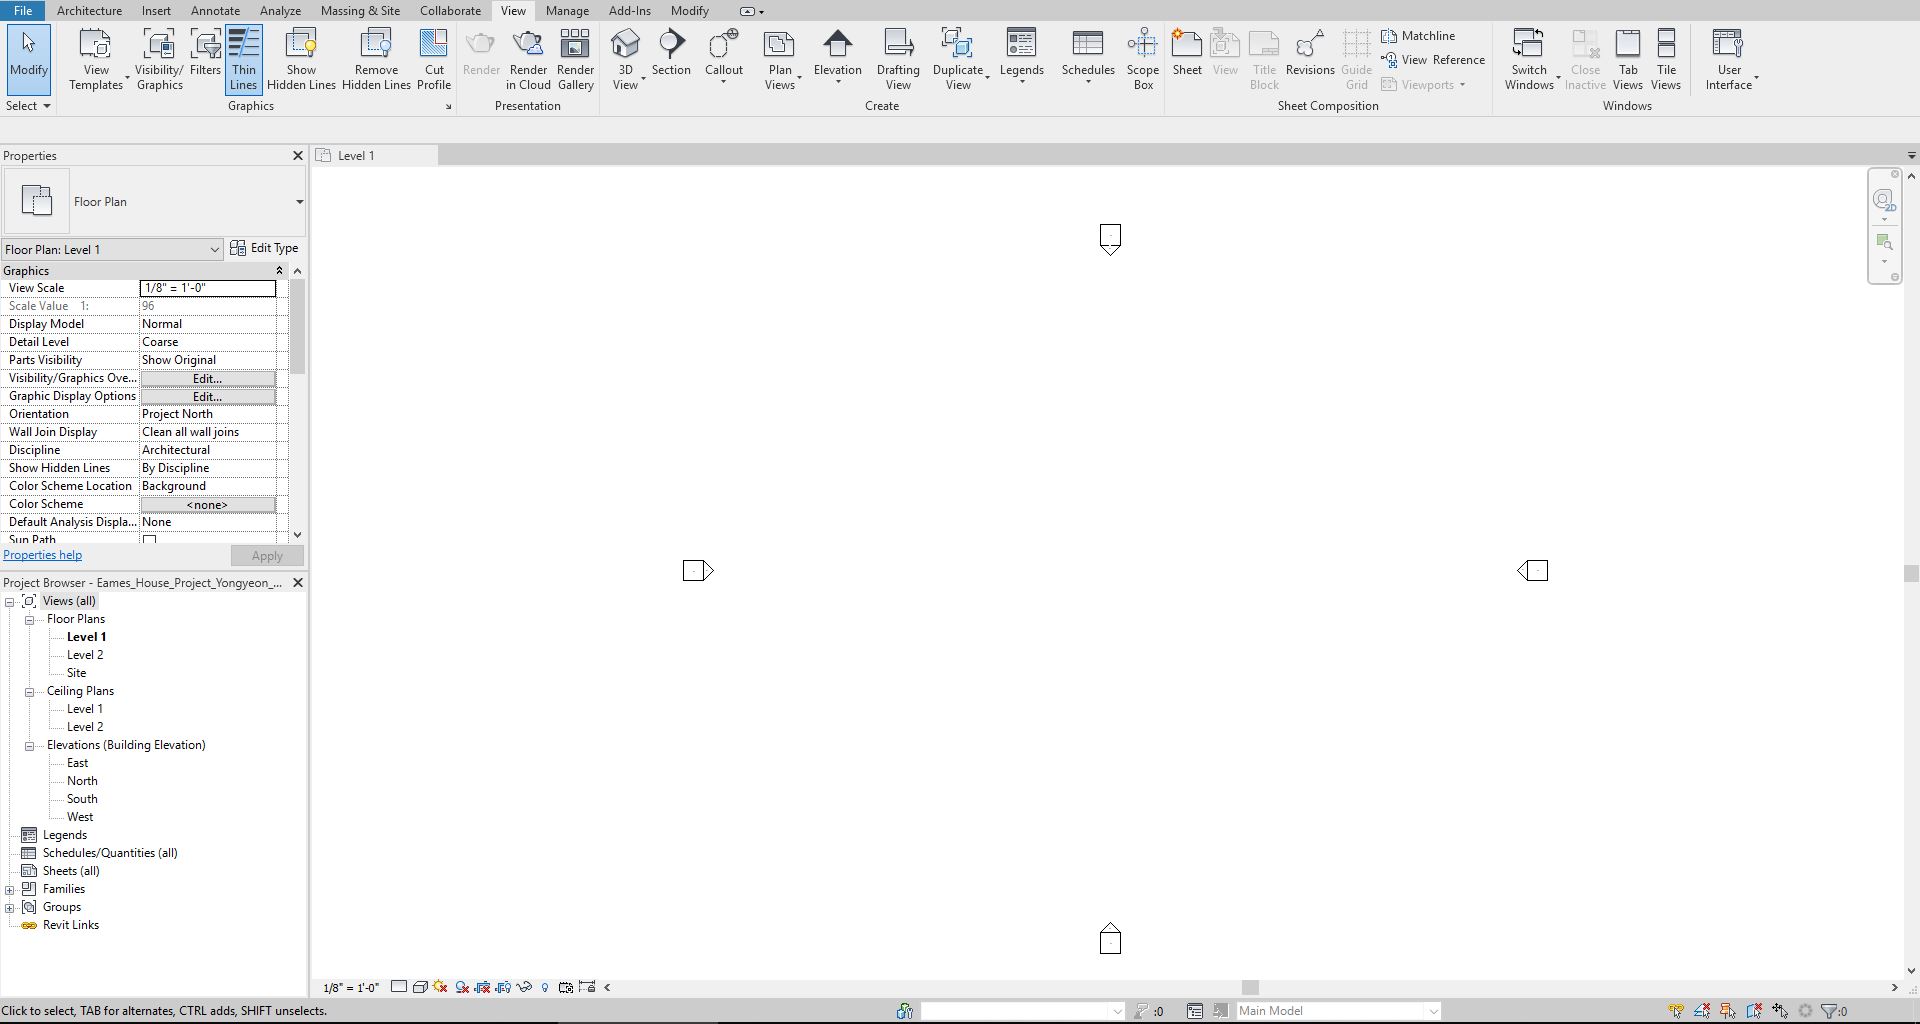
You also can change the Ribbon panel size by clicking the minimize panel button.

If you accidentally close Properties or Project Browser, you can open with [User Interface]
Select [VIEW] tab > Click [USER INTERFACE] > Check the box to open.
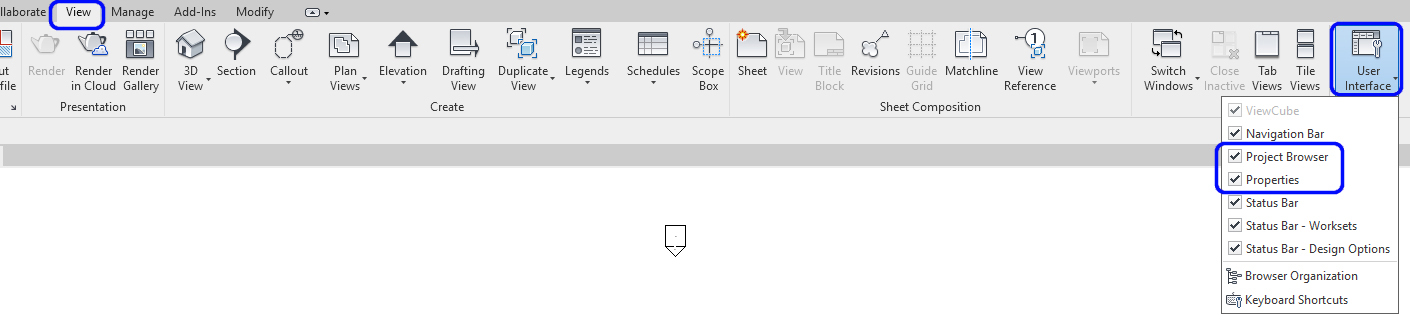
image credit: Screen captured and modified by the Author from the application
In the ribbon, you will find many tools for your work.
- Architecture

- Insert

- Annotate

- Analyze

- Massing & site

- Collaborate

- View

- Manage

- Add-Ins

- Modify

For more information regarding the user interface, please read this page
SAVE the file before closing the application.
Save in a different location for the backup (e.g., a cloud folder)
 References
Aynazinsaat. (2016). Azərbaycanca: Revit Architecture. Retrieved October 20, 2020, from https://commons.wikimedia.org/wiki/File:Revit.jpg
Revit Keyboard Shortcuts, Hotkeys & Commands Guide. (n.d.). Retrieved October 21, 2020, from https://www.autodesk.com/shortcuts/revit
Autodesk.Help. (2020, April 14). Parts of the User Interface. Retrieved October 20, 2020, from https://knowledge.autodesk.com/support/revit-products/getting-started/caas/CloudHelp/cloudhelp/2019/ENU/Revit-GetStarted/files/GUID-7793667D-5657-4382-9BEC-F7CB6AC8F53E-htm.html
