
Part Three. Enscape
Chapter 19. Introduction to Enscape
Upon completing this session, students will be able to:
- (CO 1) Understand what is Enscape
- (CO 2) Control/navigate Enscape
- (CO 3) Create views
- (CO 4) Add model backgrounds
- (CO 5) Add Entourages
- (CO 6) Render images
 Session Highlights
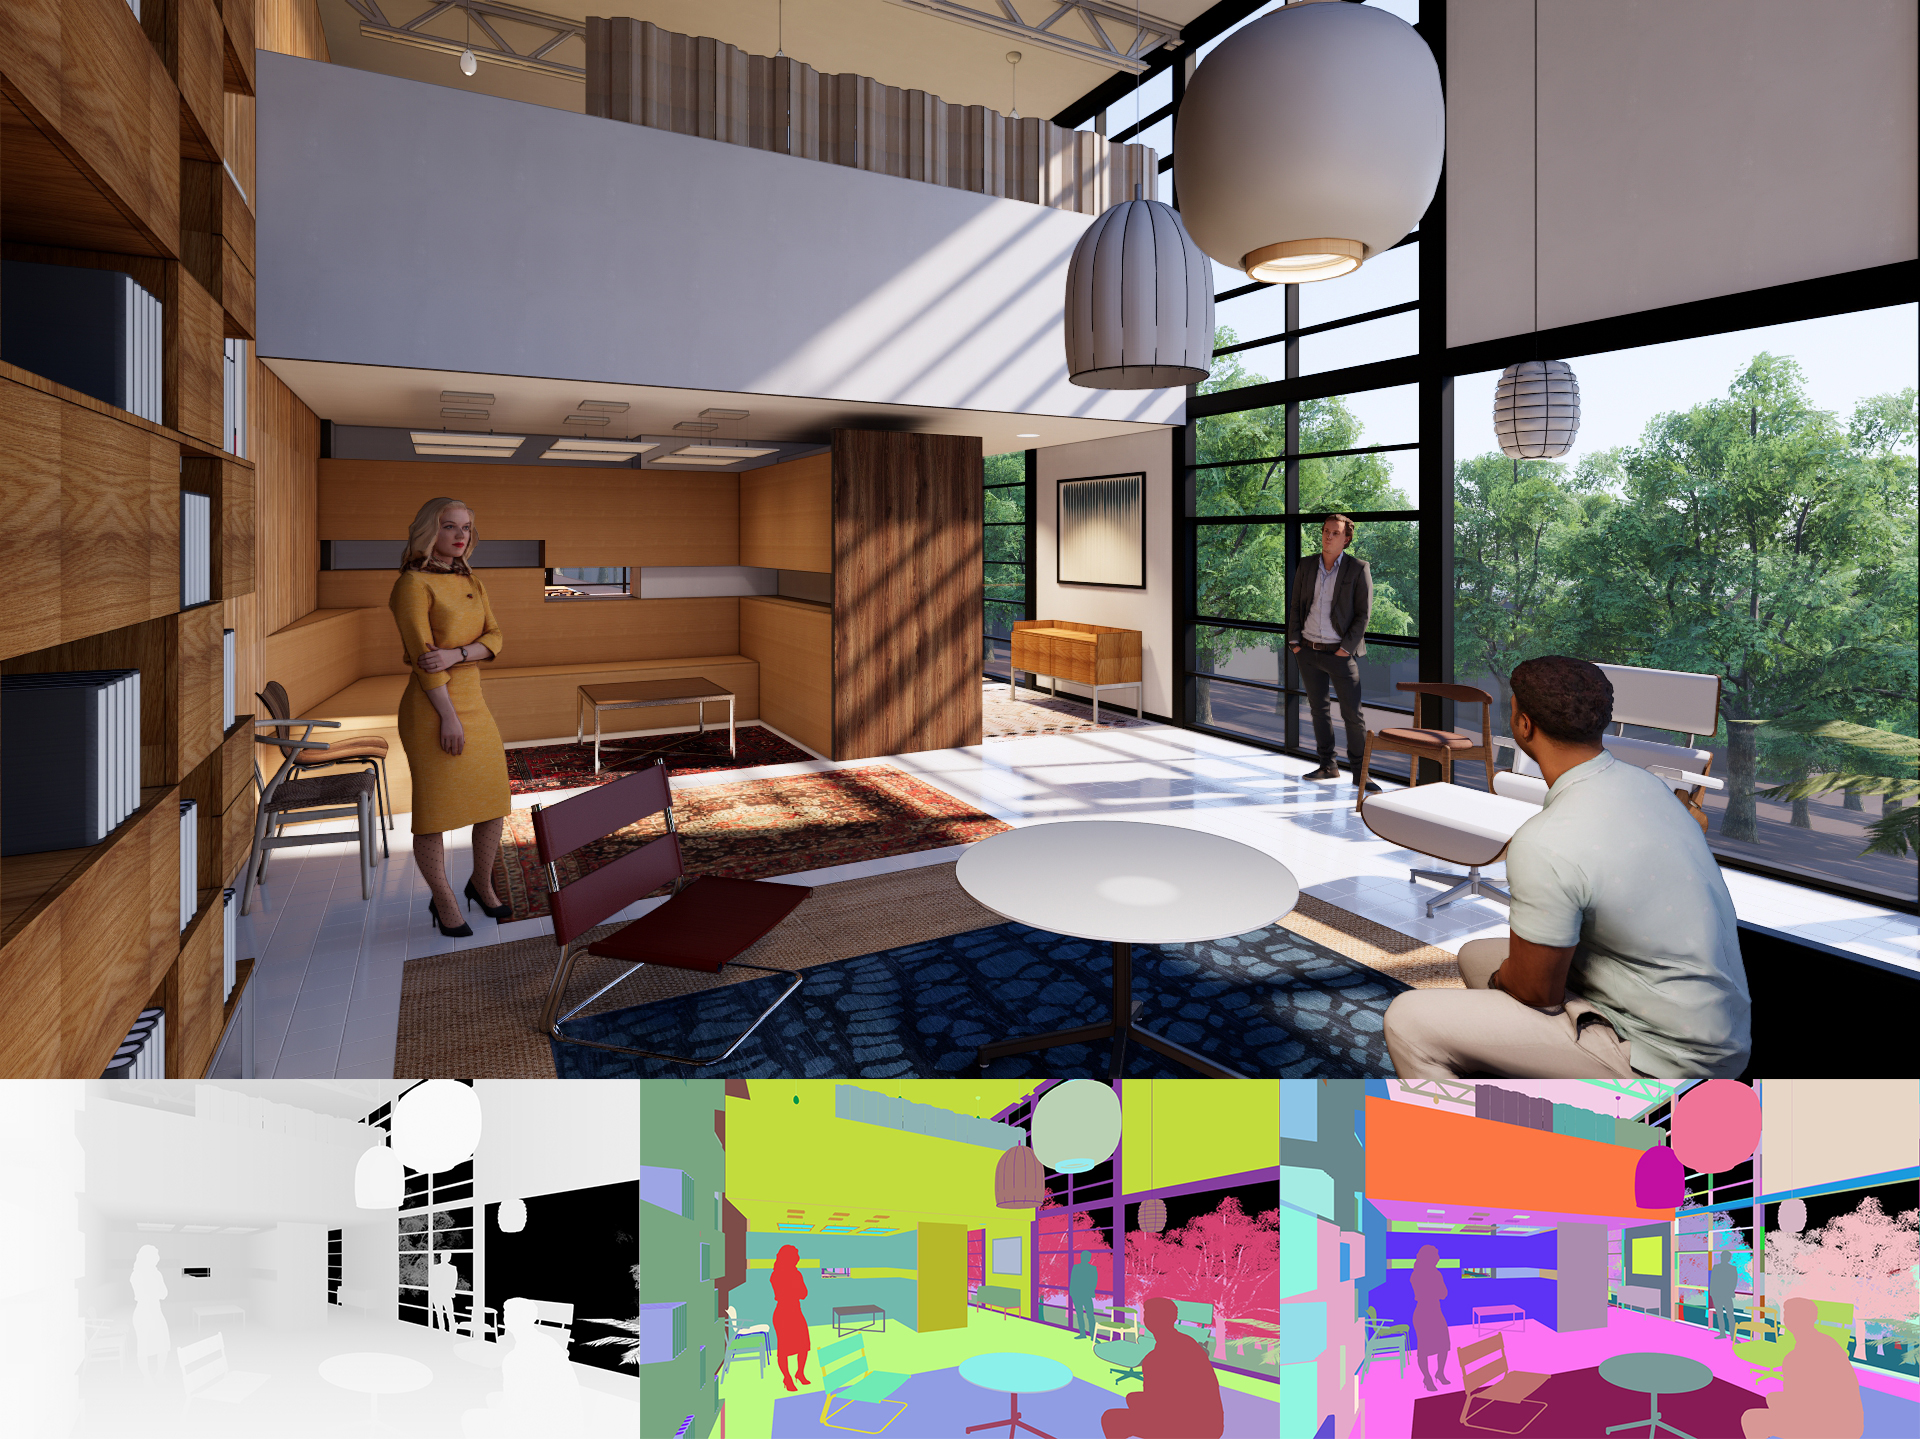
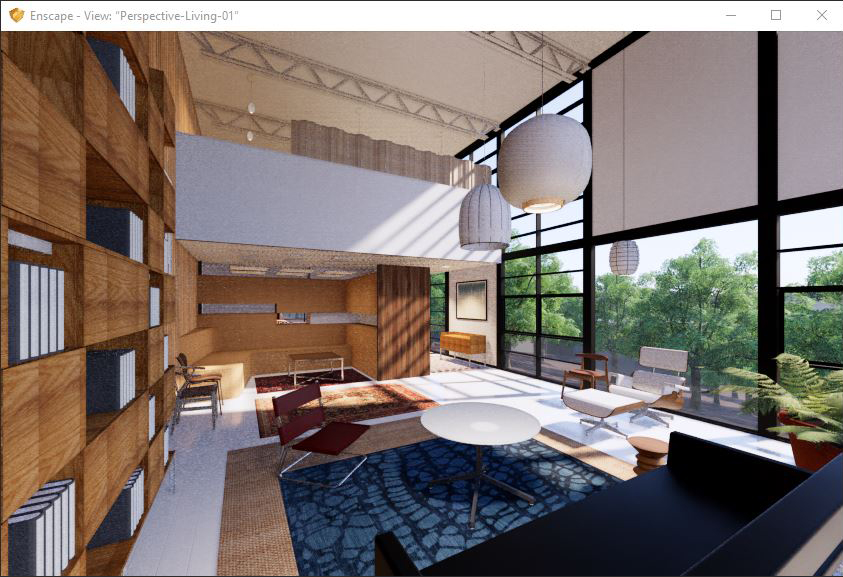
At the end of the session, students can create the graphics below.
 Lecture Contents
(CO 1) Understand what Enscape is
Enscape is a commercial real-time rendering and virtual reality “plug-in” for Revit, Sketchup, Rhino, ArchiCAD, & Vectorworks.
It is mainly used in the AEC industry and is developed and maintained by Enscape GmbH, founded in 2013 and based in Karlsruhe, Germany.
Enscape features. Information from: Enscape website
- [FEATURE 1] Real-time walk-through
CAYAS Architects was able to save 75% of their time to produce 3D visualizations by using Enscape - [FEATURE 2] Virtual Reality
“A key add-in for Revit and Rhino workflow through to VR.” Forster+Partners
“Now, with Enscape, our clients are amazed with what we show them. They are able to actually experience their project before it is even built. Enscape helps us to do a better job.” HMFH Architects - [FEATURE 3] Export functions
“Design is always an iterative process, but Enscape has made it a dynamic one” Turner Fleischer- Batch export
- 360-degree panorama
- Video exports
- Standalones – an EXE file
- [FEATURE 4] Various visual settings
- Clouds and backgrounds
- Time of day change
- White model mode
- Light analysis mode
- Volume fog effects
- Depth of Field option
- Ortho views
- BIM information
- [FEATURE 5] Asset library – more than 1000 options
Other architectural rendering applications
- Vray
- Lumion 3D
- Twinmotion
- Corona
Read this article to learn more about other rendering applications in this link.
Download and install Enscape
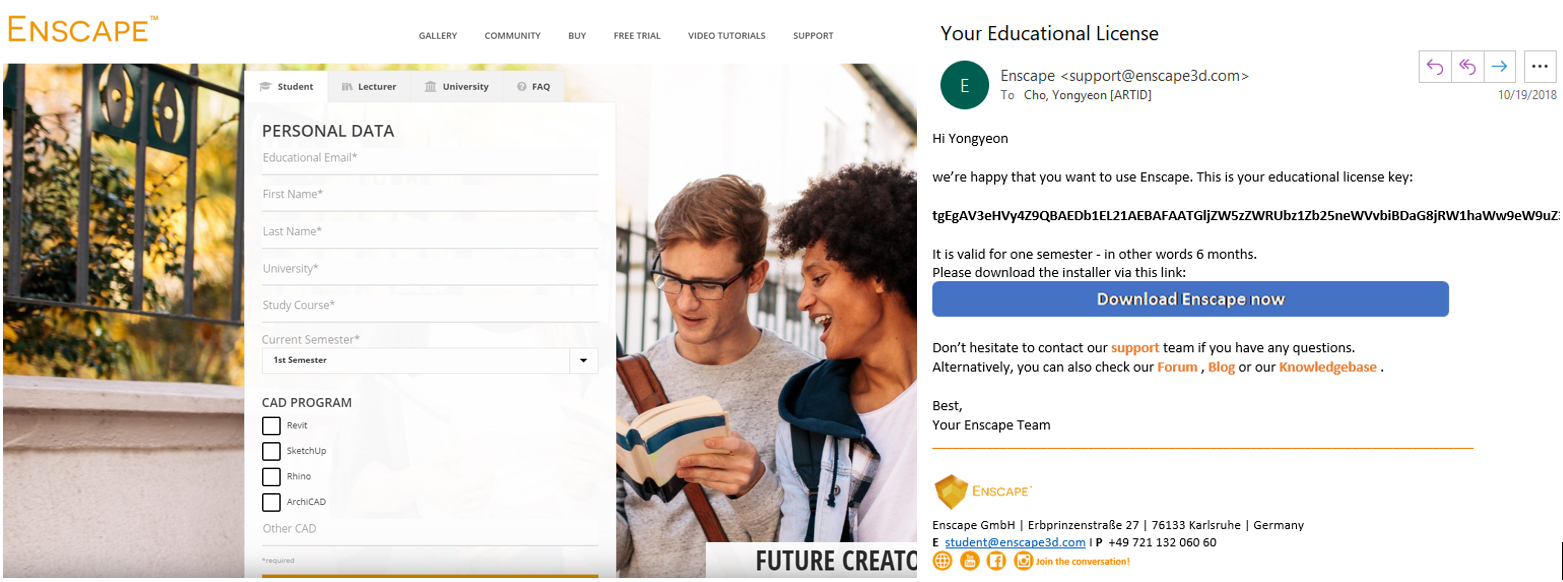
- [STEP 1] Request Enscape educational license form the link
- [STEP 2] Double click the downloaded Setup file.
- [STEP 3] Enscape requires four pre-installed programs, and you must install the necessary application (all free) to run Enscape.
- [STEP 4] In an advanced setup, you can install Enscape only for Revit.
If you would like to use Enscape Sketchup and Revit, you can select all (Default setting). - [STEP 5] Once the installation process is completed, open Revit. Note. Enscape is not stand-alone software. Enscape is a plug-in application in Revit, Sketchup, and Rhino. Therefore, you must have your application open in order to use Enscape.
- [STEP 6] Once you click Enscape Start, Enscape will ask for the license code to activate.
Please copy and paste the codes from your email and activate it.
Required Software information can be found in this link.
System requirements information can be found in this link
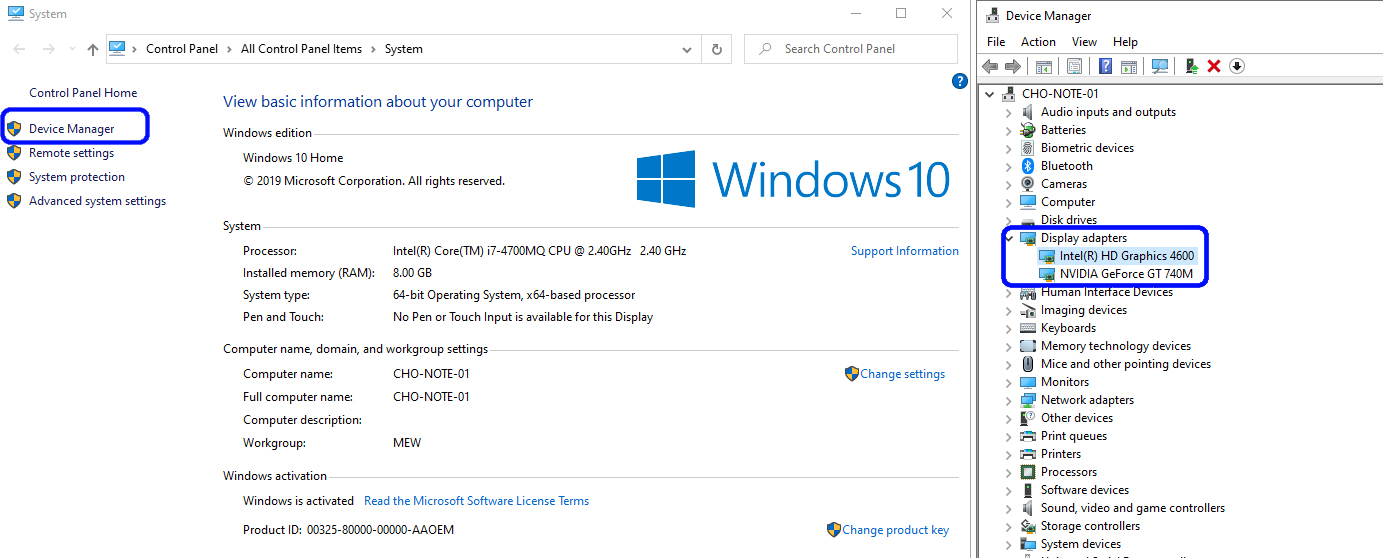
- To check your graphic drivers (Windows)
- Open your “This PC” on your Desktop
- Mouse “right-click” > Click “Properties” > Click “Device Manager” on the left side of the panel > Find “Display adapters” and see the graphic drivers
(CO 2) Control/navigate Enscape
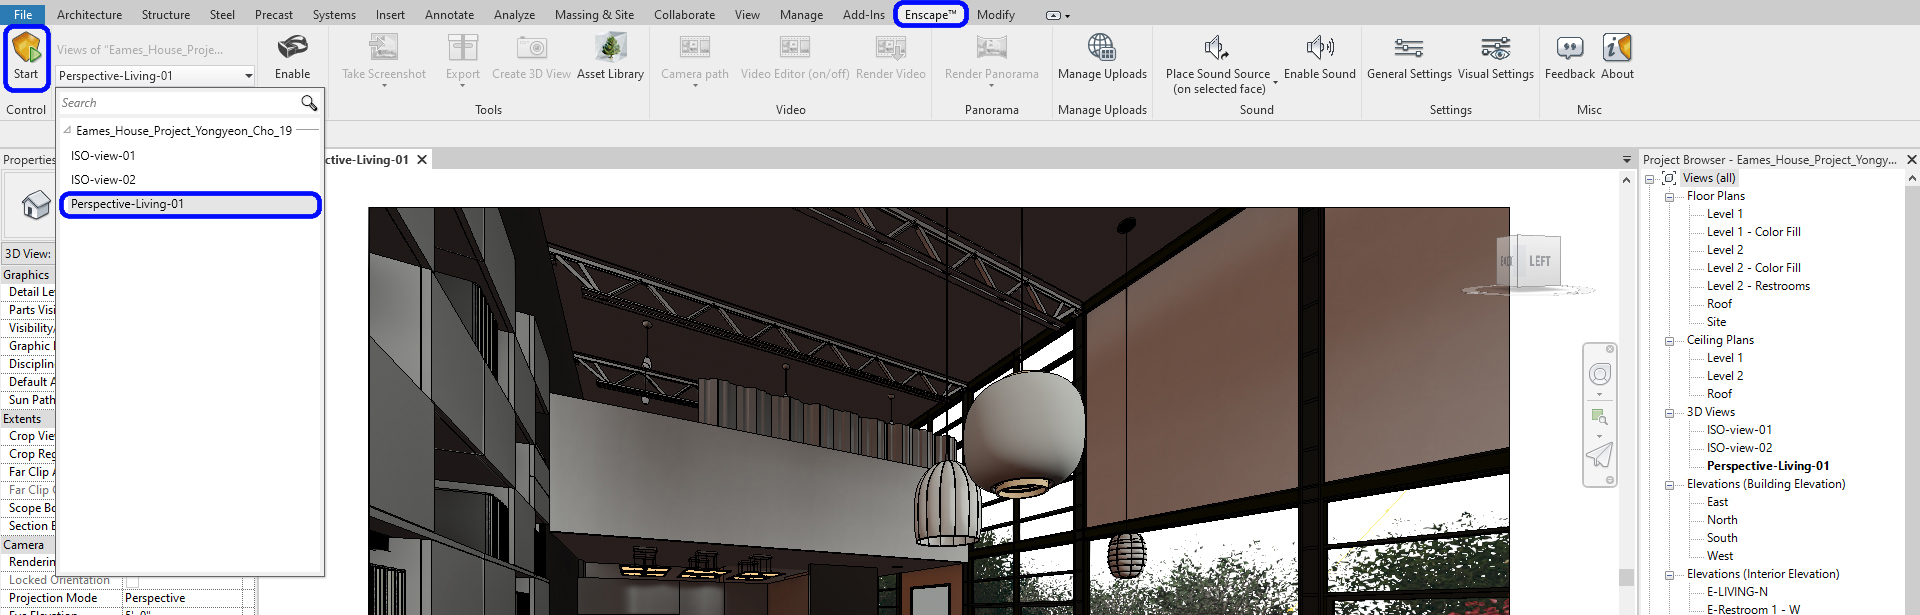
Open your project file and open a perspective that you want to make a rendered image in Enscape. Start Enscape
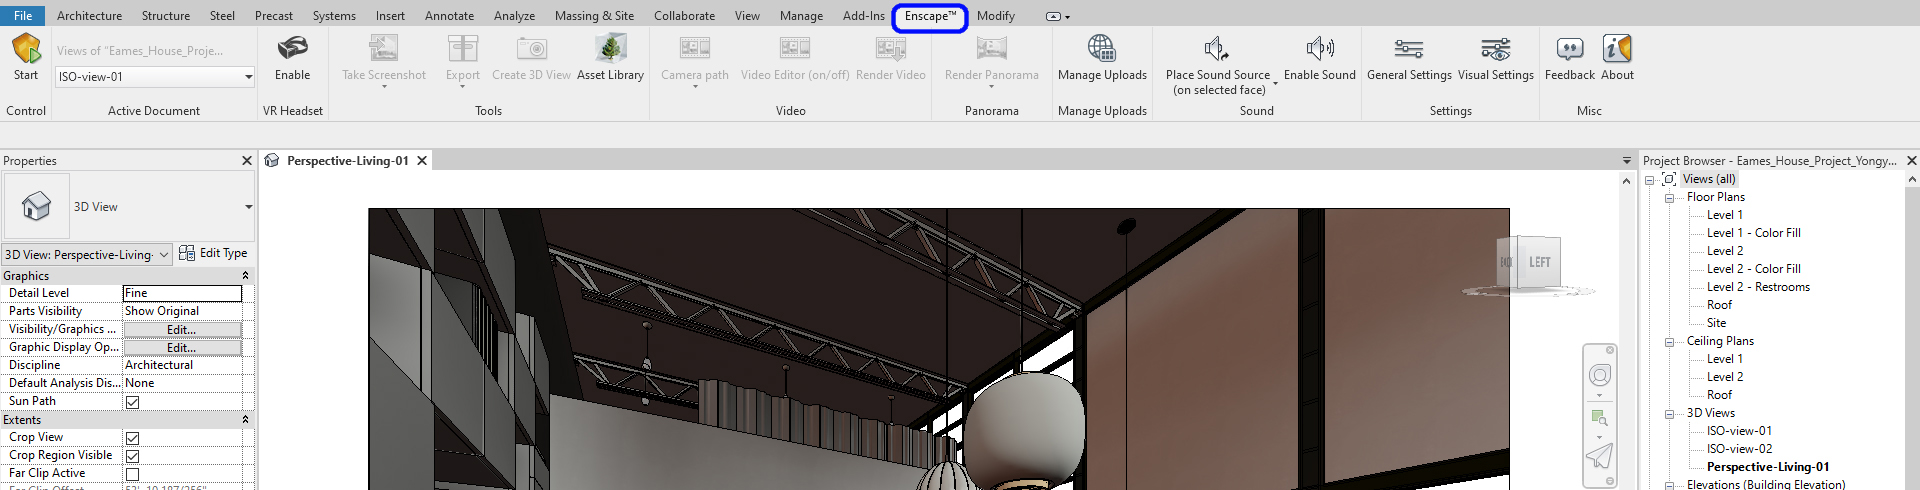
- [STEP 1] Click [Enscape] tab
- [STEP 2] Select the view that you would like to start on [Active Document] panel
- [STEP 3] Click [Start] on [Control] panel. Then it would be best if you waited a few seconds or minutes to launch the plug-in
Once Enscape is open, familiarize yourself with the navigation control
- [OPT 1] For the best practice, use dual monitors to see the Enscape real-time render on one monitor, your Revit project on the other monitor.
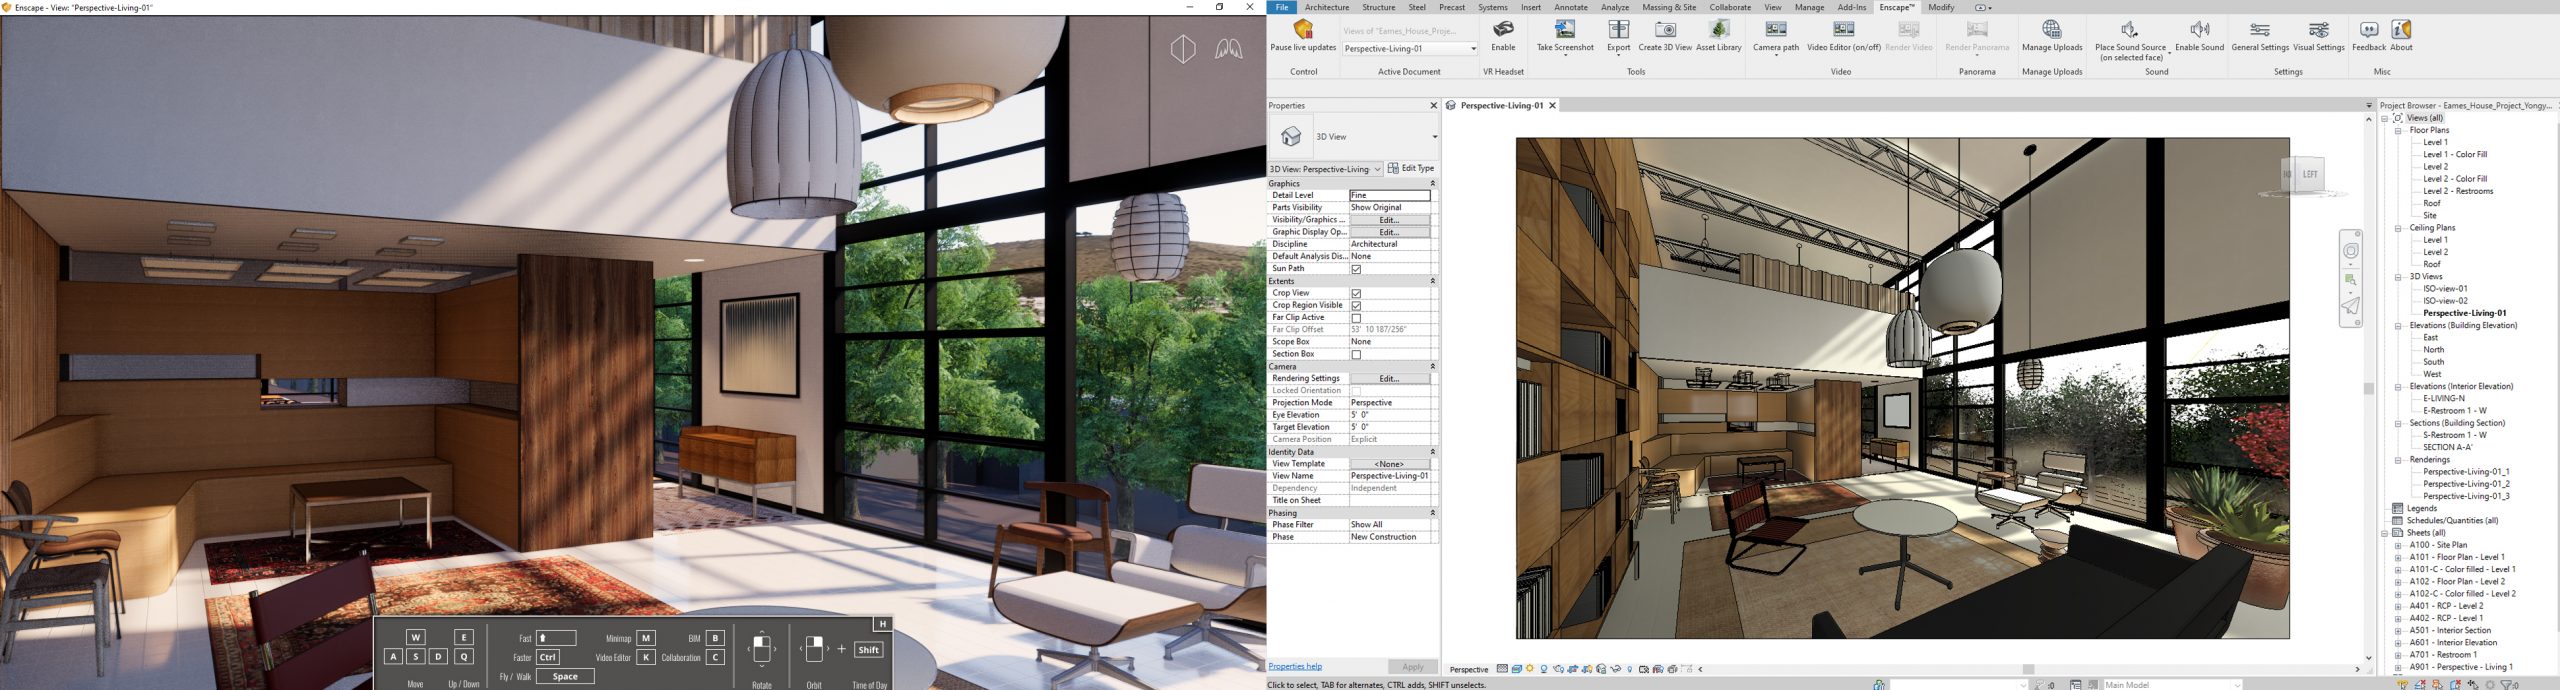
- [OPT 2] If you do not have two monitors, you can split your screen with two windows
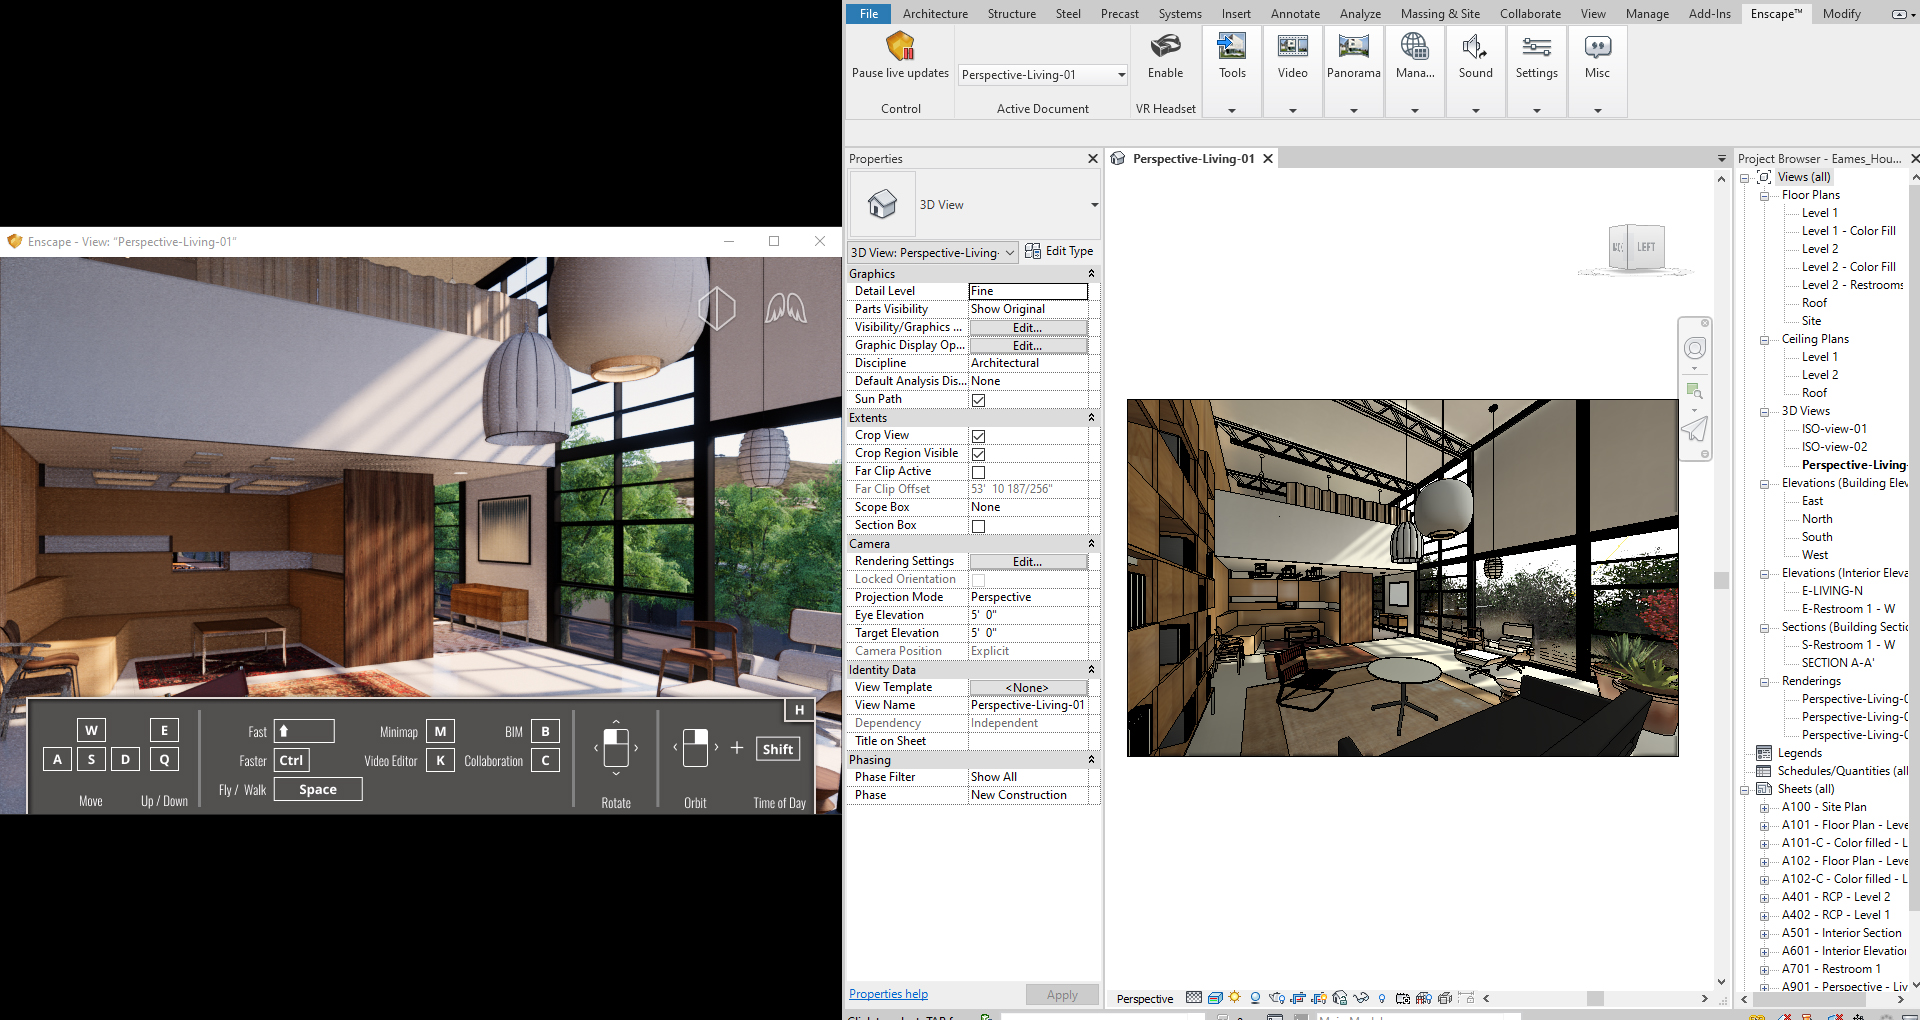
- Use both keyboard and mouse to navigate Enscape

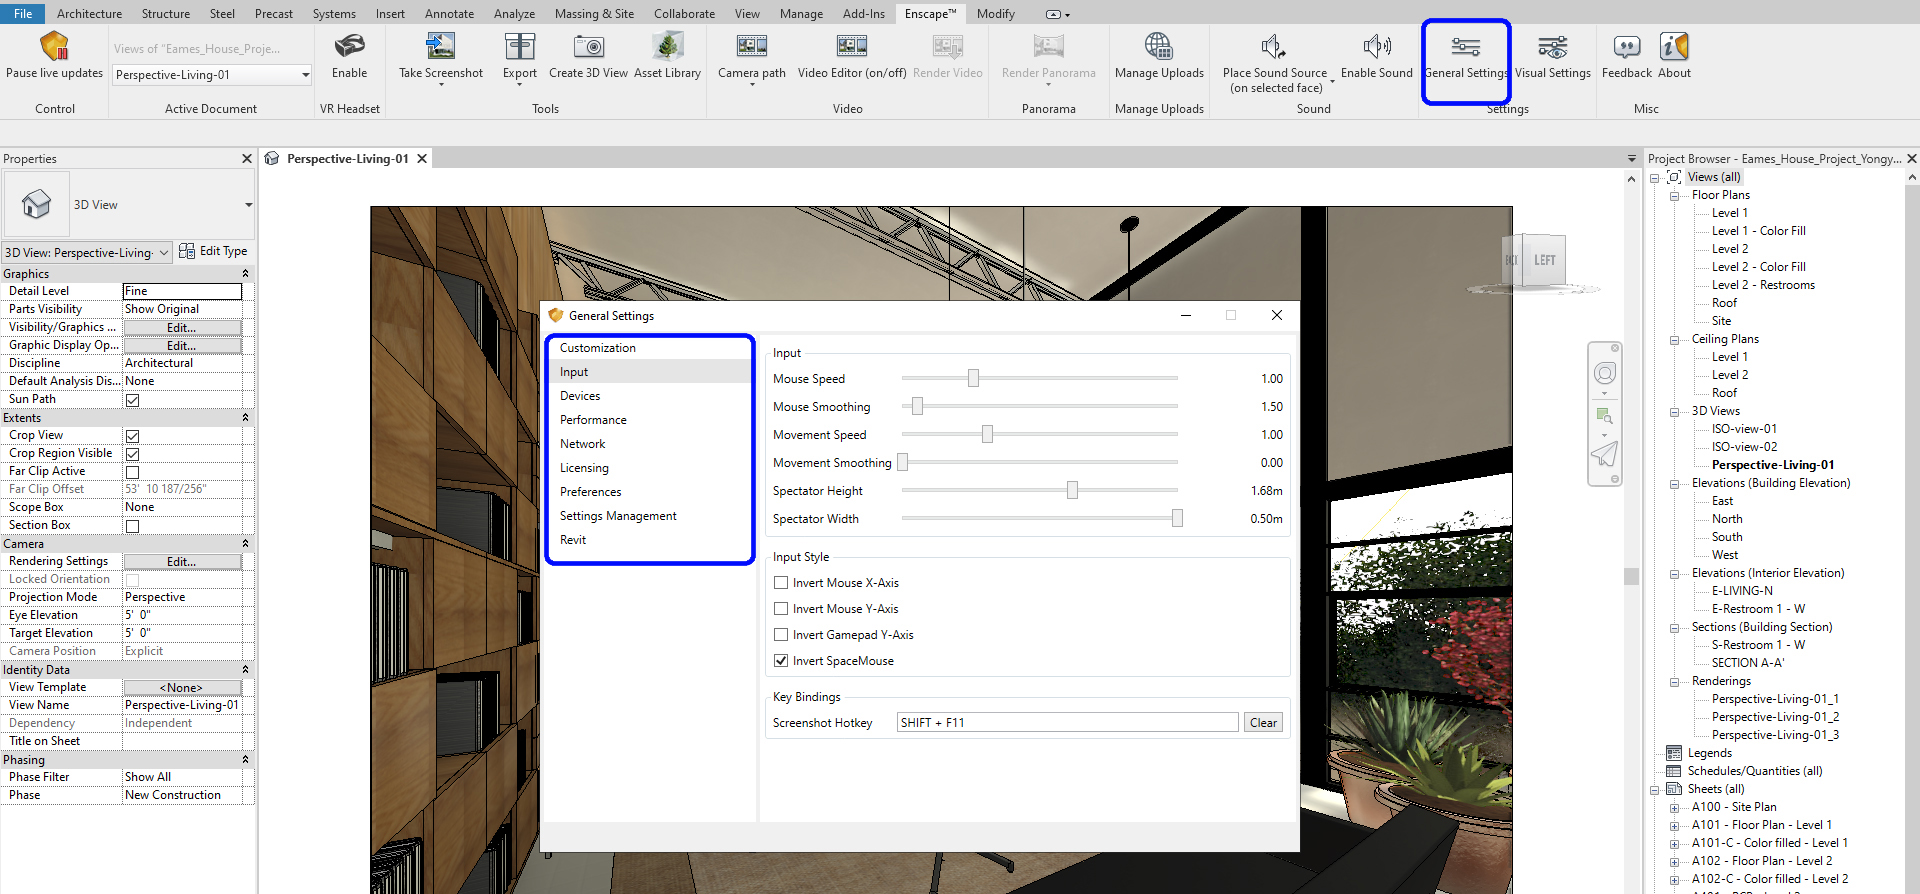
Adjust settings There are two types of settings.
- [OPT 1] General Settings
This setting is for the file and saves locations, mouse and keyboard control, licensing, etc.
- [OPT 2] Visual Settings
This setting is to render styles, image quality, camera settings, atmosphere, background, render settings, etc. - Below are the settings that I used in the rendering below

- the rendering preview
(CO 3) Create views
If you find a view while you navigate the real-time view from Enscape, you can create/ save a view
- [STEP 1] Once you find the view, stop to navigate
- [STEP 2] Click “Create 3D view” from the tools panel
- [STEP 3] Name the view
- [STEP 4] You can find the view that you just created on the Revit Project browser
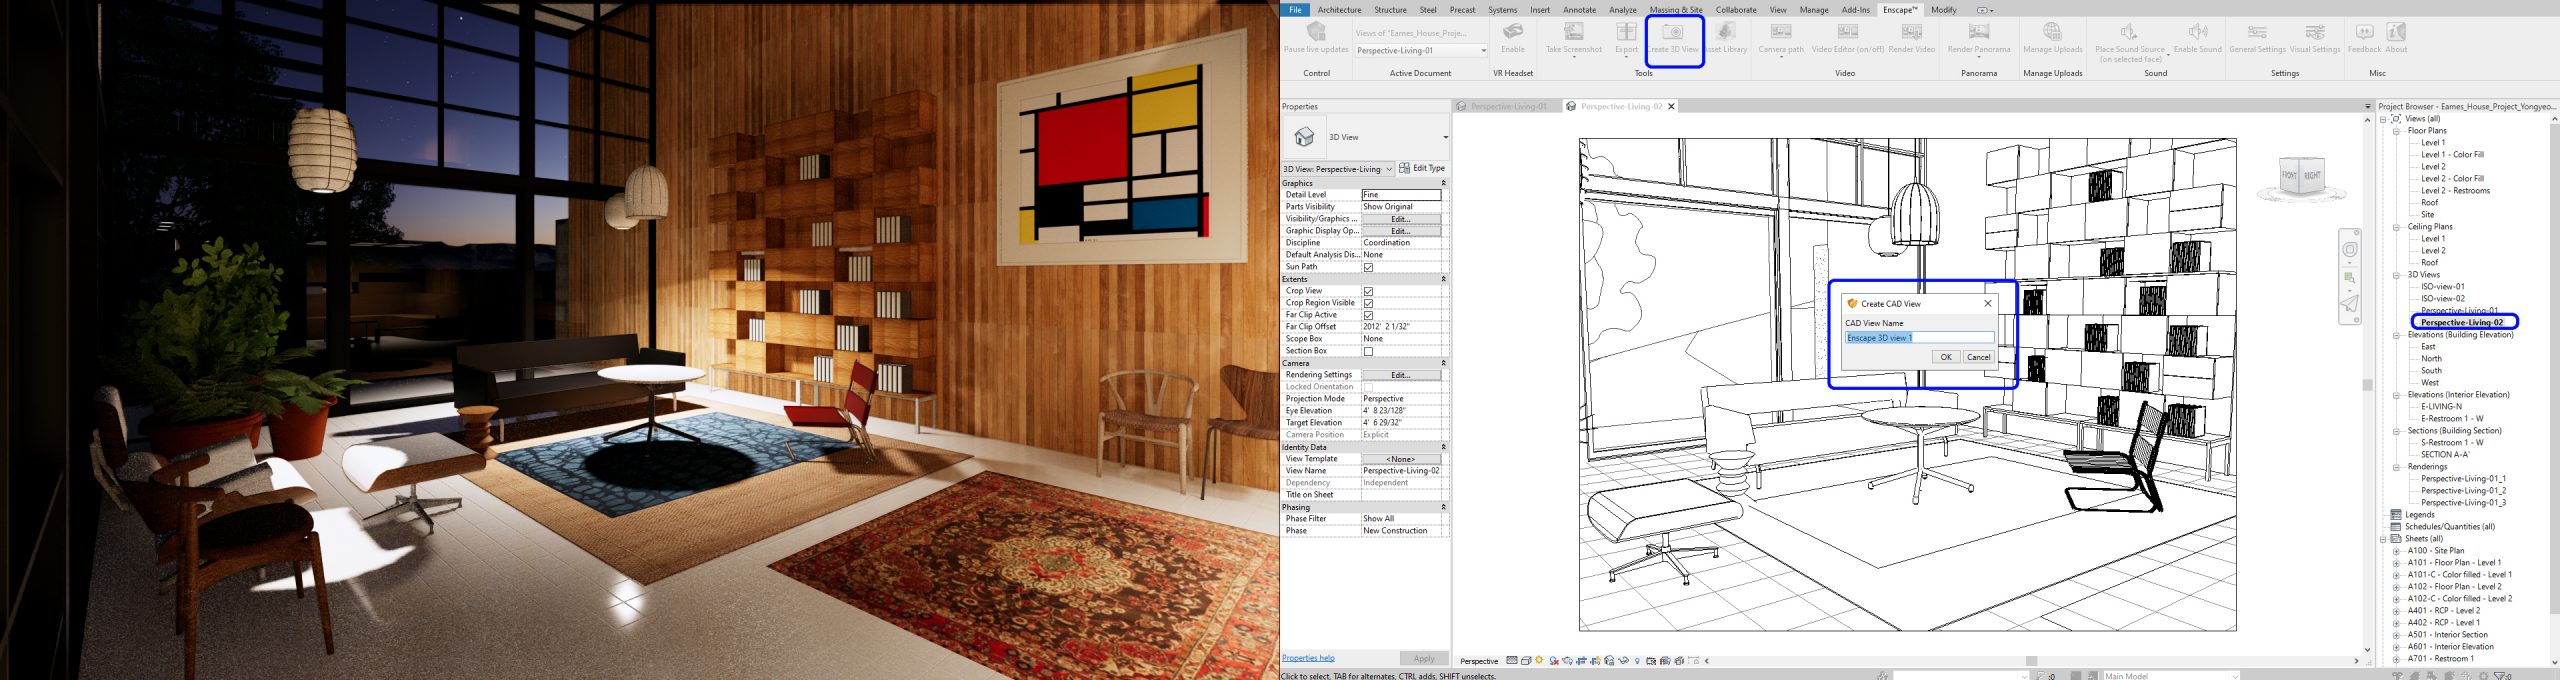
- [STEP 5] To go back your views that you created, click the view name on the [Active Document] panel
(CO 4) Add model backgrounds
There are two options to change the model background
- [OPT 1] Change your Atmosphere on the visual settings to change the model backgrounds
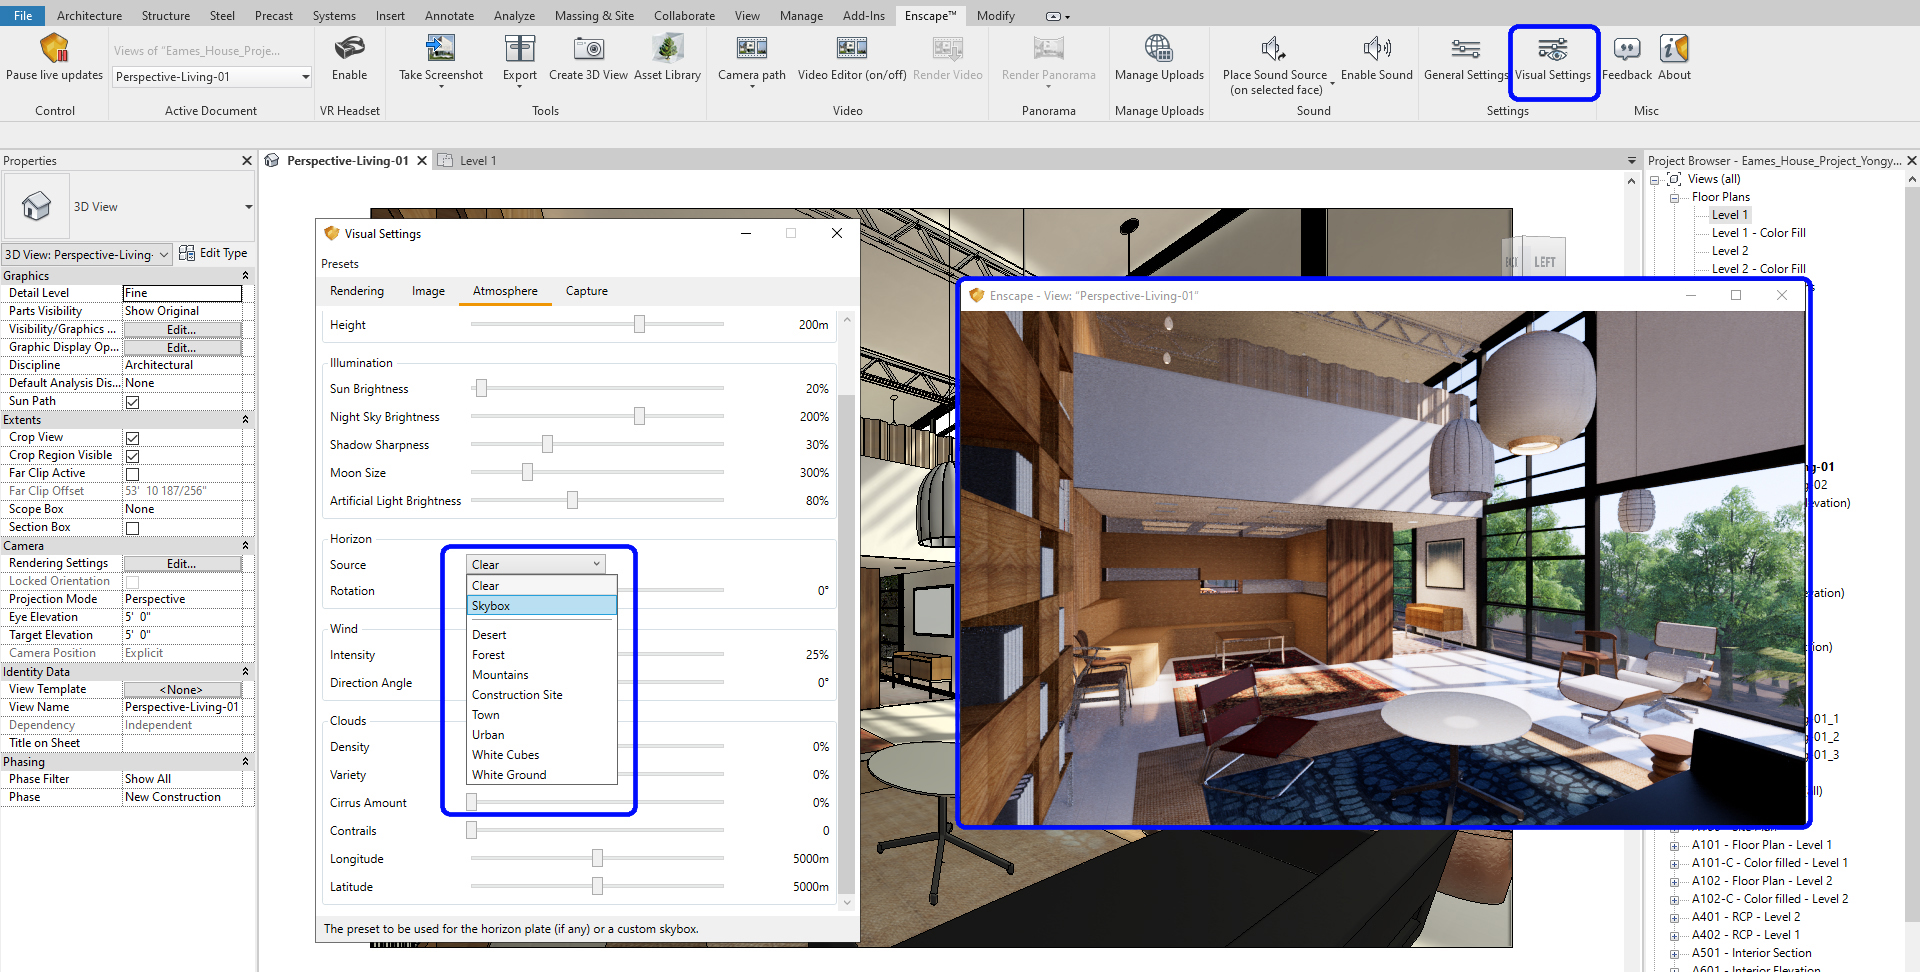
- [OPT 2] Try to use Skybox. Find free skyboxes from this link
(CO 5) Add Entourages
Add Enscape models from Asset Library
- [STEP 1] Click Asset Library from the Tools panel
- [STEP 2] Search items by category or tags
- [STEP 3] Open a floor plan that you want to add the selected Enscape model to the Revit model
- [STEP 4] Select the model and place it on your floor plan. Use Move, Rotate commands to place the Enscape model. Also, confirm the positions on your perspective view.
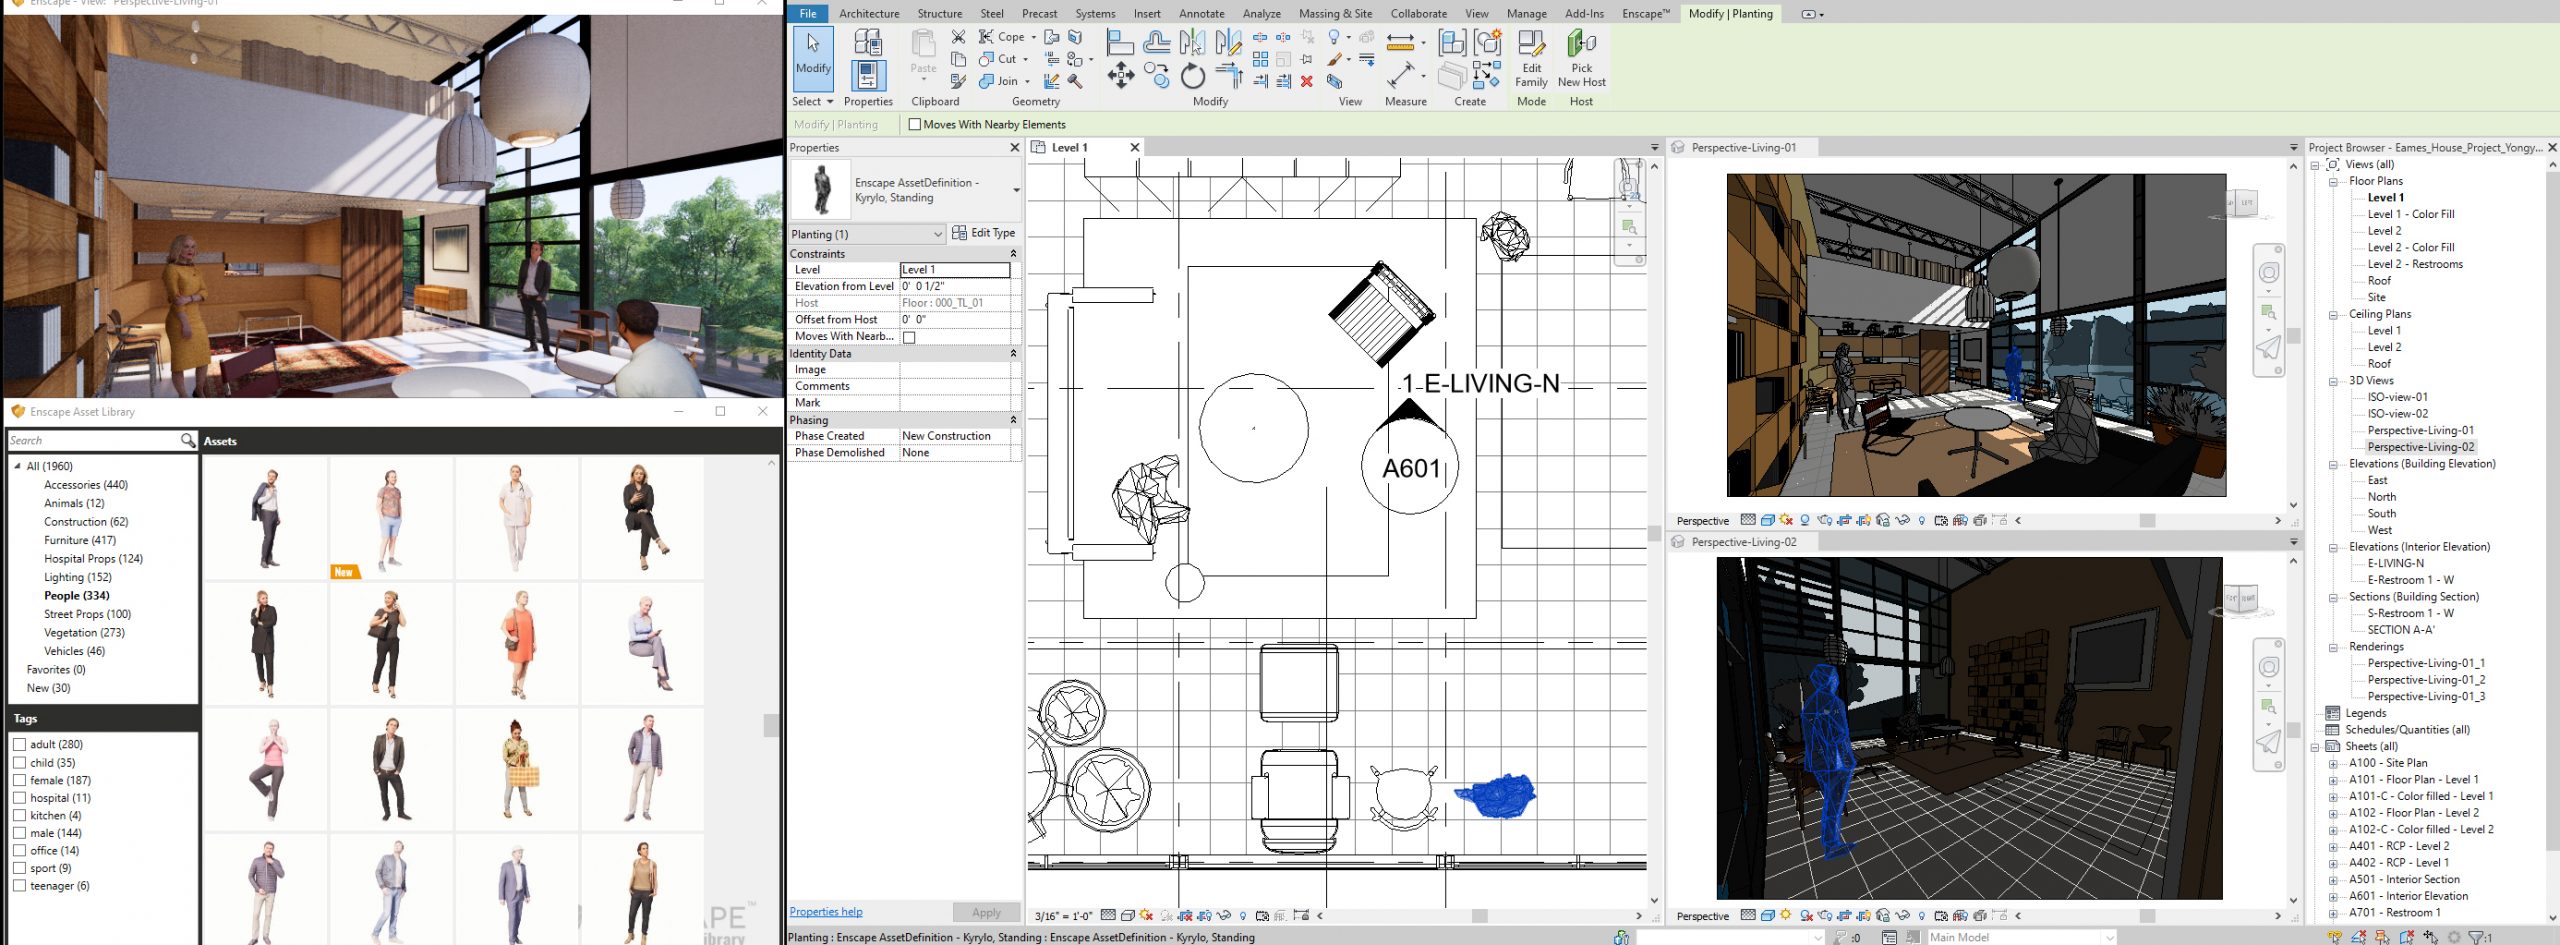
- [STEP 5] Once the placement is done, press [ESC] to go back to the library
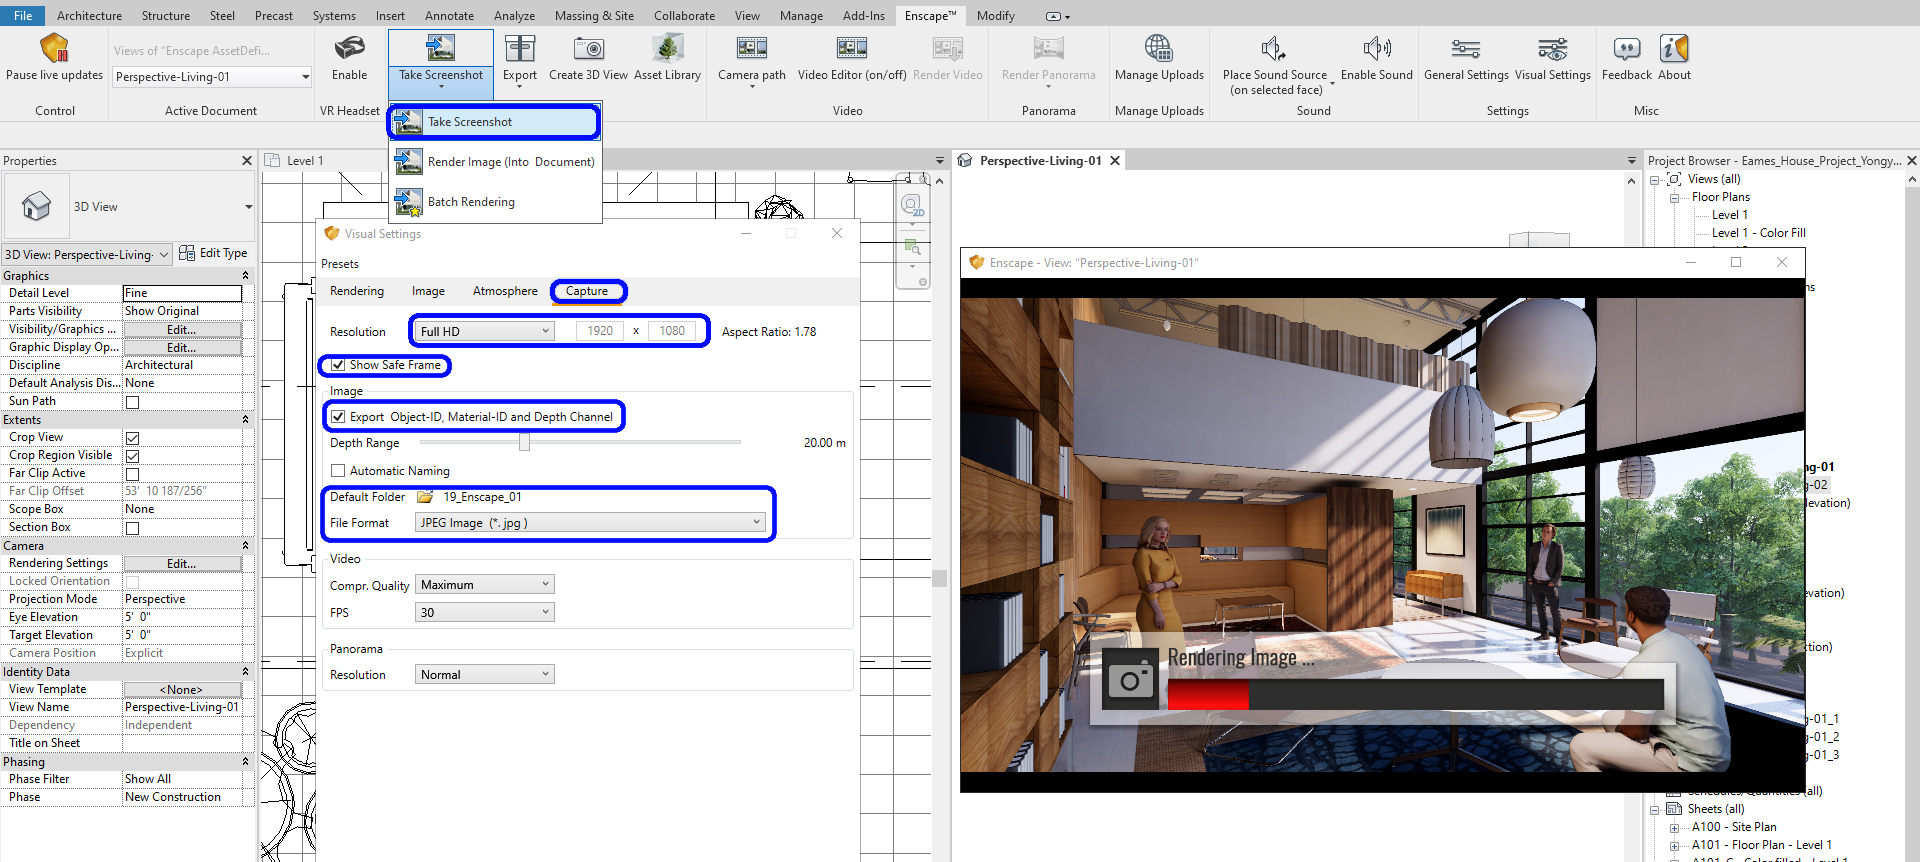
(CO 6) Render images
To make the final render
- [STEP 1] Click [Visual Settings] to set render size, file location, and file type.
- [STEP 2] Click [Capture] in your visual settings
- [STEP 3] Select the [Resolution] of the final rendering – Typically Full HD for PPT presentation, Ultra HD for Print version presentation. If your render size is unique, please select Custom and set the pixel size.
- [STEP 4] Check [Show Safe Frame] to see the preview on your real-time view
- [STEP 5] Check [Export Object-ID, Material-ID, and Depth Chanel], Adjust the depth for the Depth Chanel
- [STEP 6] Set a render location to save your final render image file by clicking the Folder
- [STEP 7] Select a file format, typically [JPG]
- [STEP 8] Select the view name that you want to generate a final render
- [STEP 9] Click [Render image] from [Enscape] tab, under [Tools] panel, to get the final render image outside of the file. You may click “Render image (into the document)” to use the rendered image on your Revit document. This way, you can add your final render image to your sheet
Free resources
References
Garubba, K., & Garubba, S. (n.d.). Enscape Features. Retrieved October 22, 2020, from https://enscape3d.com/features/
Kar, S. (2018, May 14). Top 9 Best Rendering Software for Architects This Year. Retrieved October 23, 2020, from https://www.architecturelab.net/best-rendering-software-for-architects/
Free Enscape Student & Educational Licenses – Enscape™. (2020, June 05). Retrieved October 23, 2020, from https://enscape3d.com/educational-license/
System Requirements. (2020, September 14). Retrieved October 23, 2020, from https://enscape3d.com/community/blog/knowledgebase/system-requirements/
Free Sample Projects. (n.d.). Retrieved October 22, 2020, from https://enscape3d.com/free-sample-projects/
Reinold, H. (n.d.). Free Resources for Architectural Projects. Retrieved October 23, 2020, from https://blog.enscape3d.com/free-resources-for-architectural-projects
