
Part Three. Advanced Modeling
Chapter 11. Revit – Organic shaped walls
Upon completing this session, students will be able to:
- (CO 1) Create a slanted wall without Massing tools
- (CO 2) Understand various 3D models using Massing
- (CO 3) Create an organic shape wall
- (CO 4) Create an organic shape curtainwall
 Session Highlights
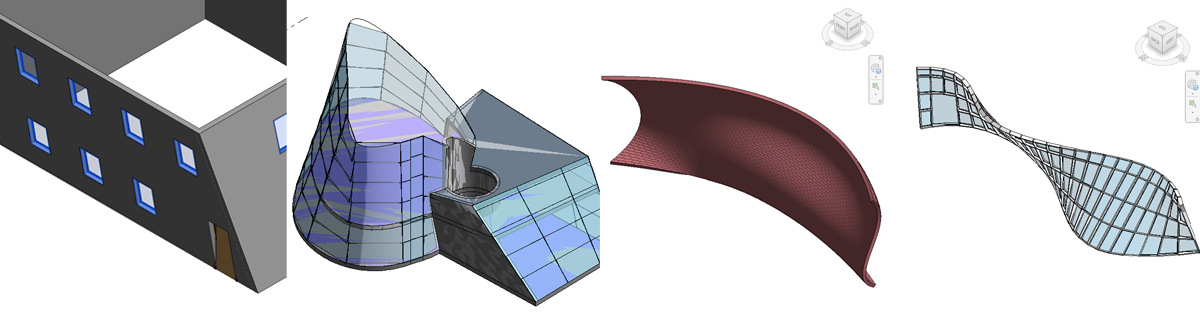
At the end of the session, students will be able to create the graphics below.
 Lecture Contents
(CO1) Create a slanted wall without Massing tools
A slanted wall is a new feature of Revit 2021.
Once you create a wall using [wall] from the [Architecture] tab, under the [Build] panel, you have an option to make the wall a slanted wall.
- [STEP 1] Select a wall(s) that you want to make a slanted wall(s) on a floor plan or a 3D view.
- [STEP 2] Update the setting [Cross Section] for the wall from [Properties] palette to [Slanted].
- [STEP 3] Update [Angle From Vertical] to the desired degree.
- [STEP 4] If you have dimensions or reference planes, you will receive an error message. Click [Remove reference] or/and [Delete Dimensions].
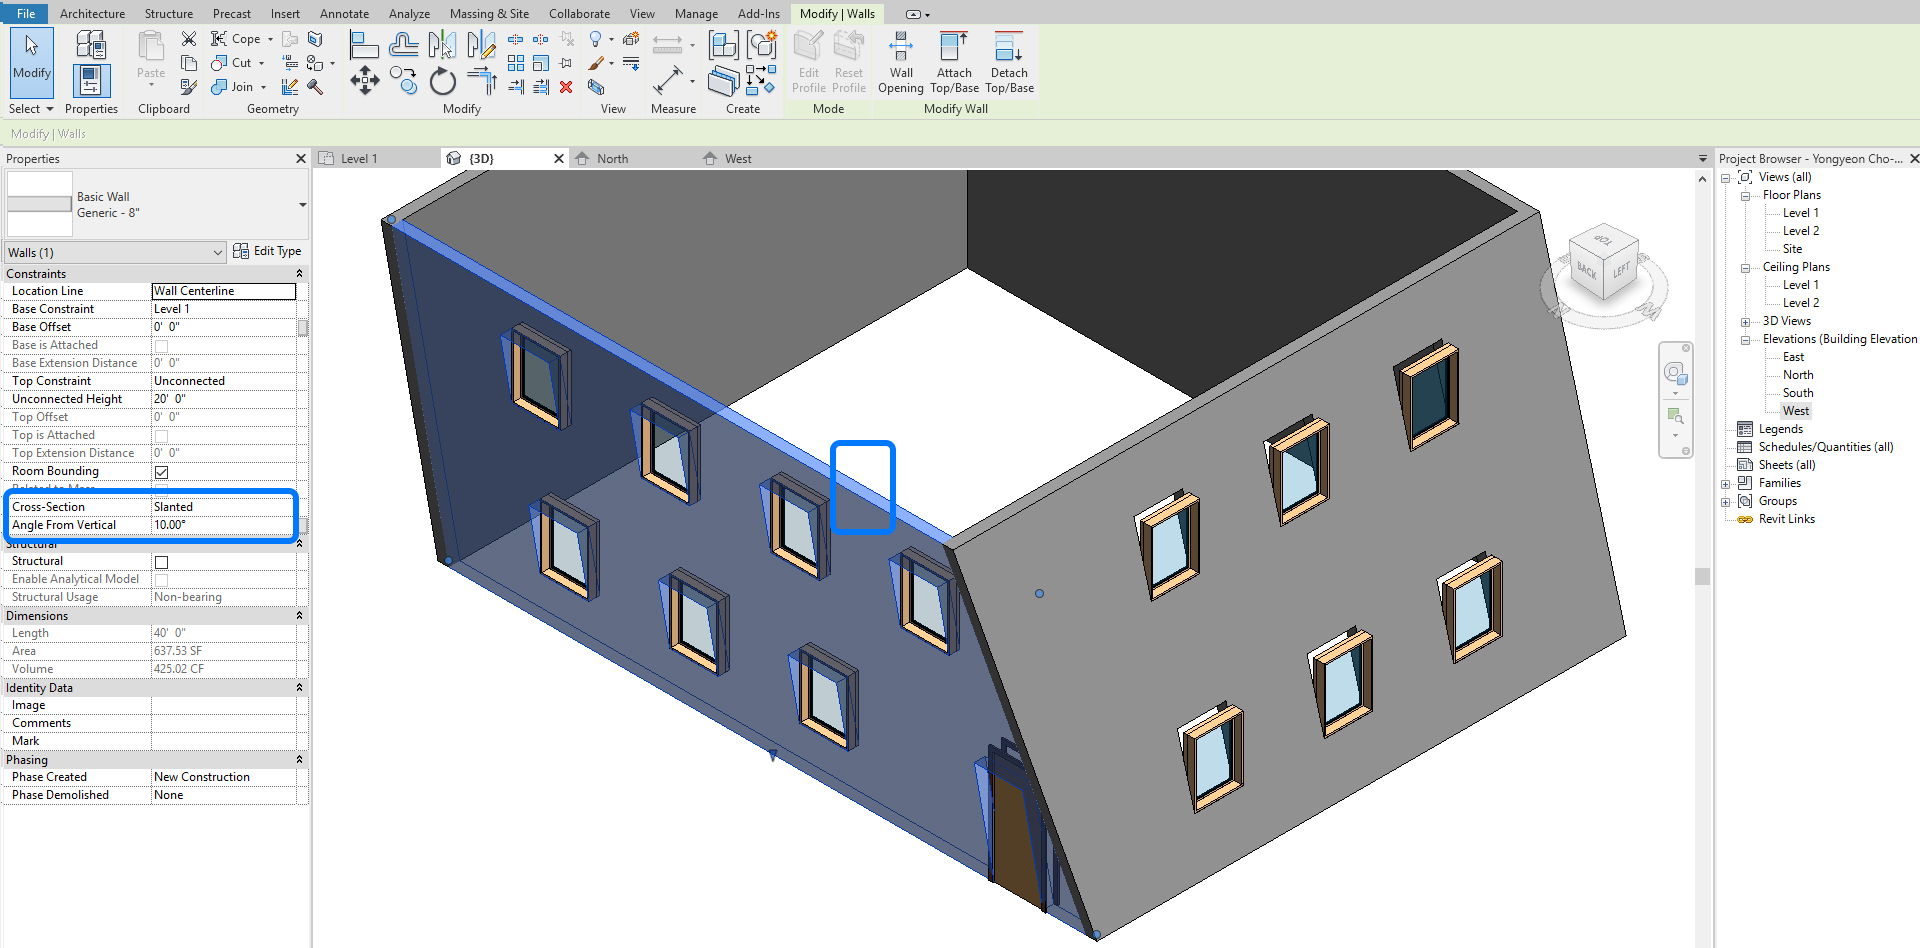
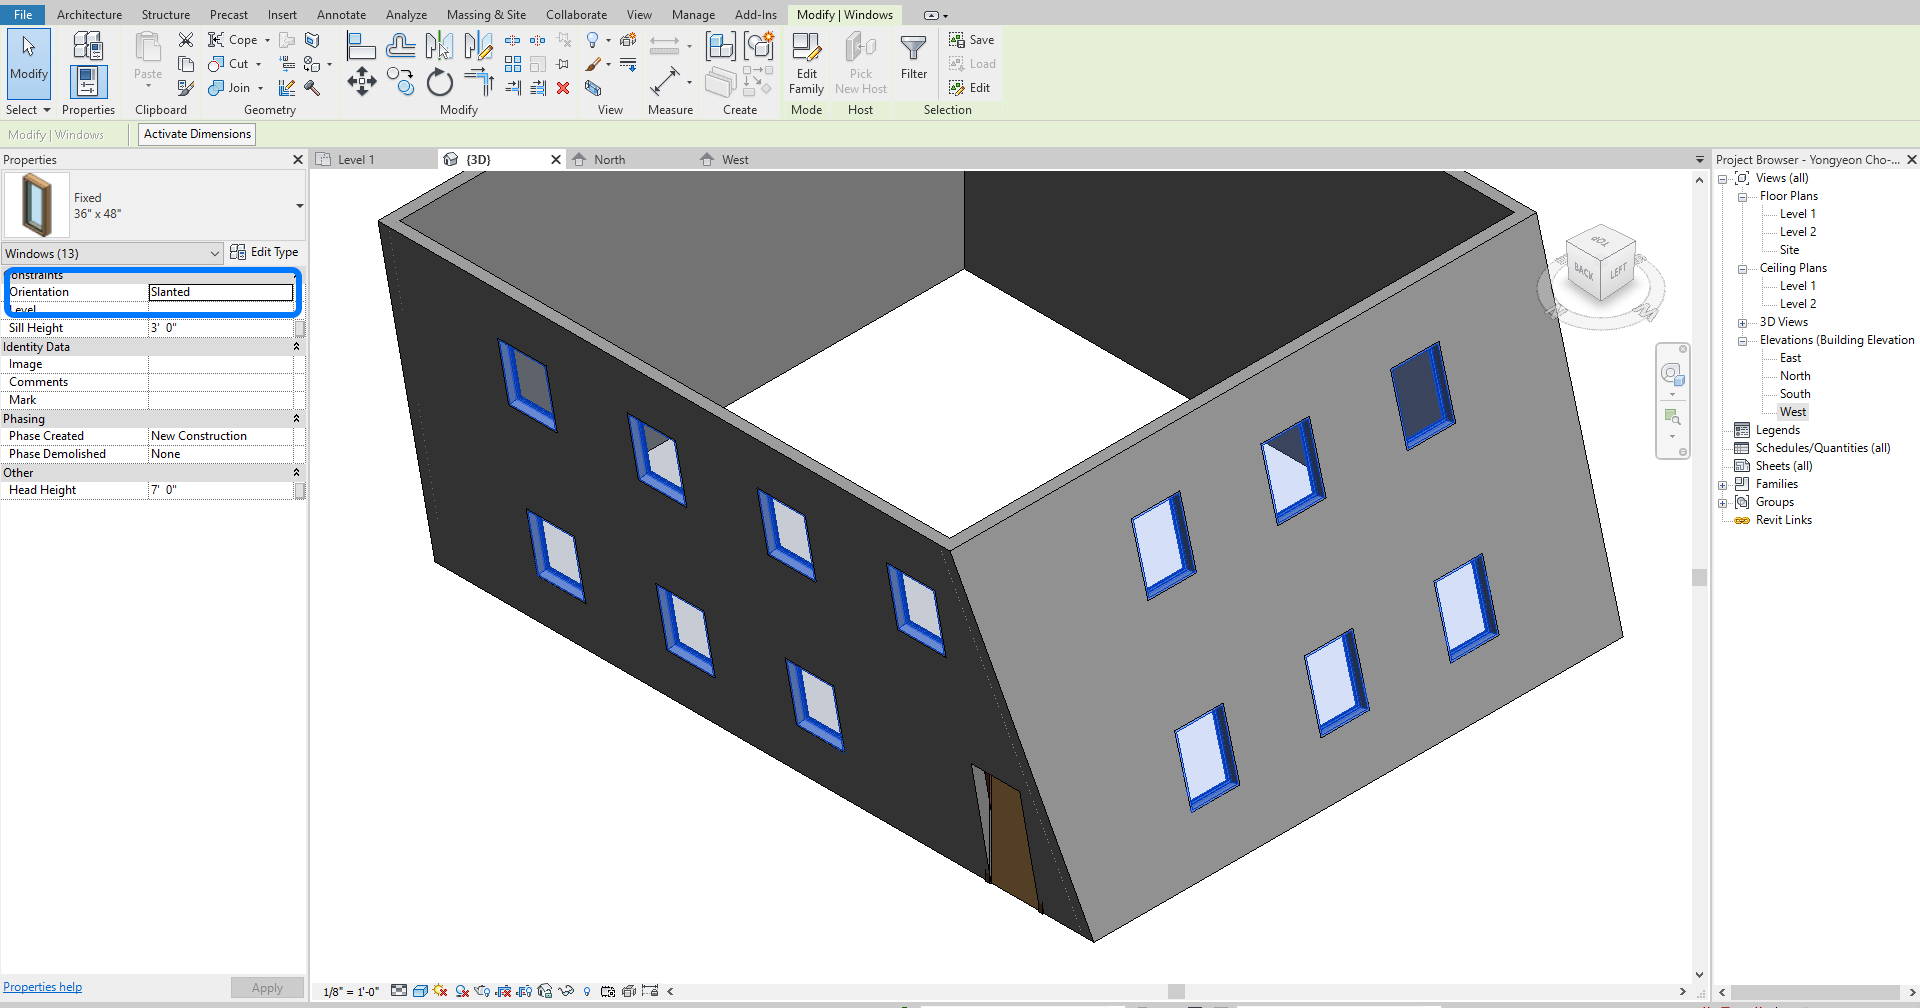
- [STEP 5] To make all windows aligned with the slanted wall, select all window instances. Update the setting [Orientation] for the windows from [Properties] palette to [Slanted].
(CO2) Understand various 3D models using Massing
Massing/ Massing studies is a useful tool to explore design ideas by shapes to conceptualize a building model. When the conceptual design is complete, you can add building elements directly to the shapes.
Create in-place or family-based mass instances that are specific to individual design options.
Generate floors, roofs, curtain systems, and walls from mass instances with control over element category, type, and parameter values. Fully control the regeneration of these elements when the mass changes.
For more information regarding massing in Revit, please refer to this Massing Studies tutorial.
To create a simple mass with other masses
- [STEP 1] Open a new project or use the existing Revit project.
- [STEP 2] Click [Show Mass by View Setting] from [Massing & Site] tab, under [Conceptual Mass] panel, this command is to see mass. If you want to hide mass, click again [Show Mass Form and Floors].
- [STEP 3] Click [In-Place Mass] from [Massing & Site], under [Conceptual Mass] panel > Name the mass.
- [STEP 4] Click [Set] from the [Create] tab, under the [Work Plane] panel to set a work plane, in this case, select [Level 1].
- [STEP 5] Click [Model] from [Create] tab, under [Draw] panel > Draw [Rectangle].
- [STEP 6] Select the rectangle > Click [Create Form] > Click [Solid Form].
- [STEP 7] Now you can control the mass by the face, edge, and point.
- [STEP 8] If needed, you and add mass with [Join] tool, subtract mass with [cut] or void form.
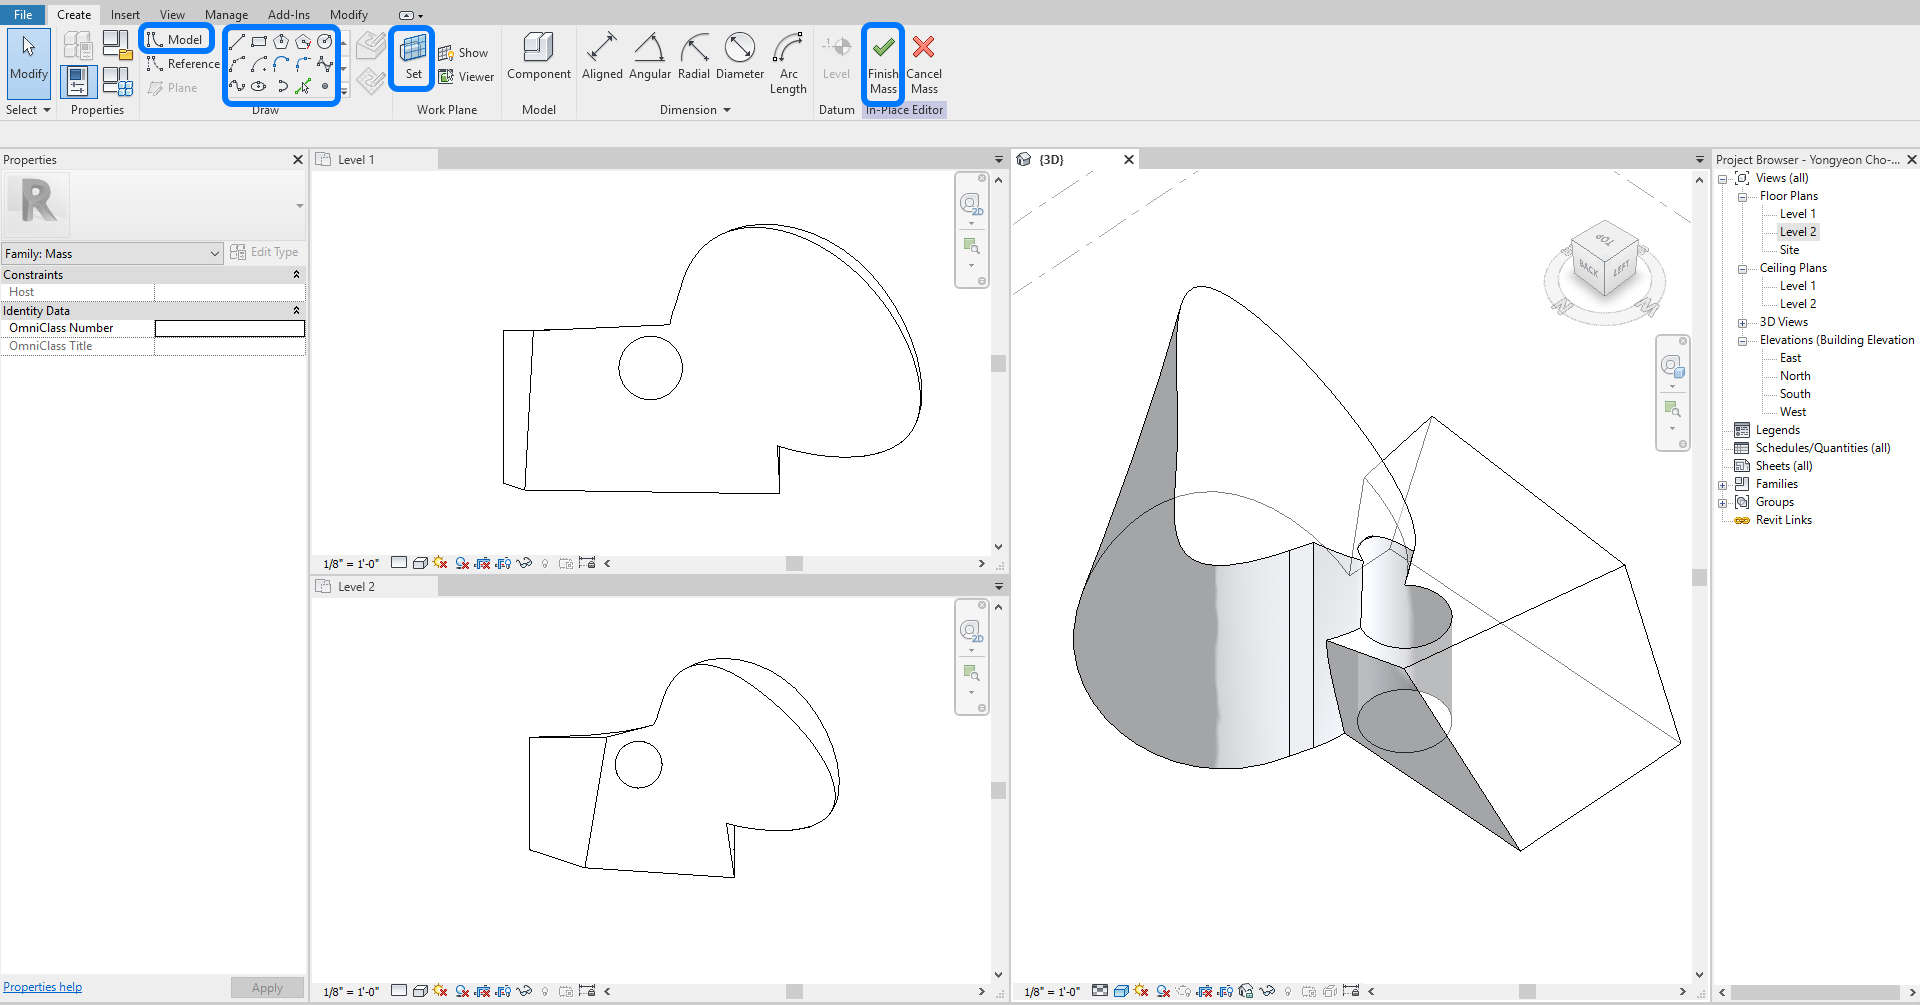
- [STEP 9] Once the mass seems in the right form, click [Finish Mass].
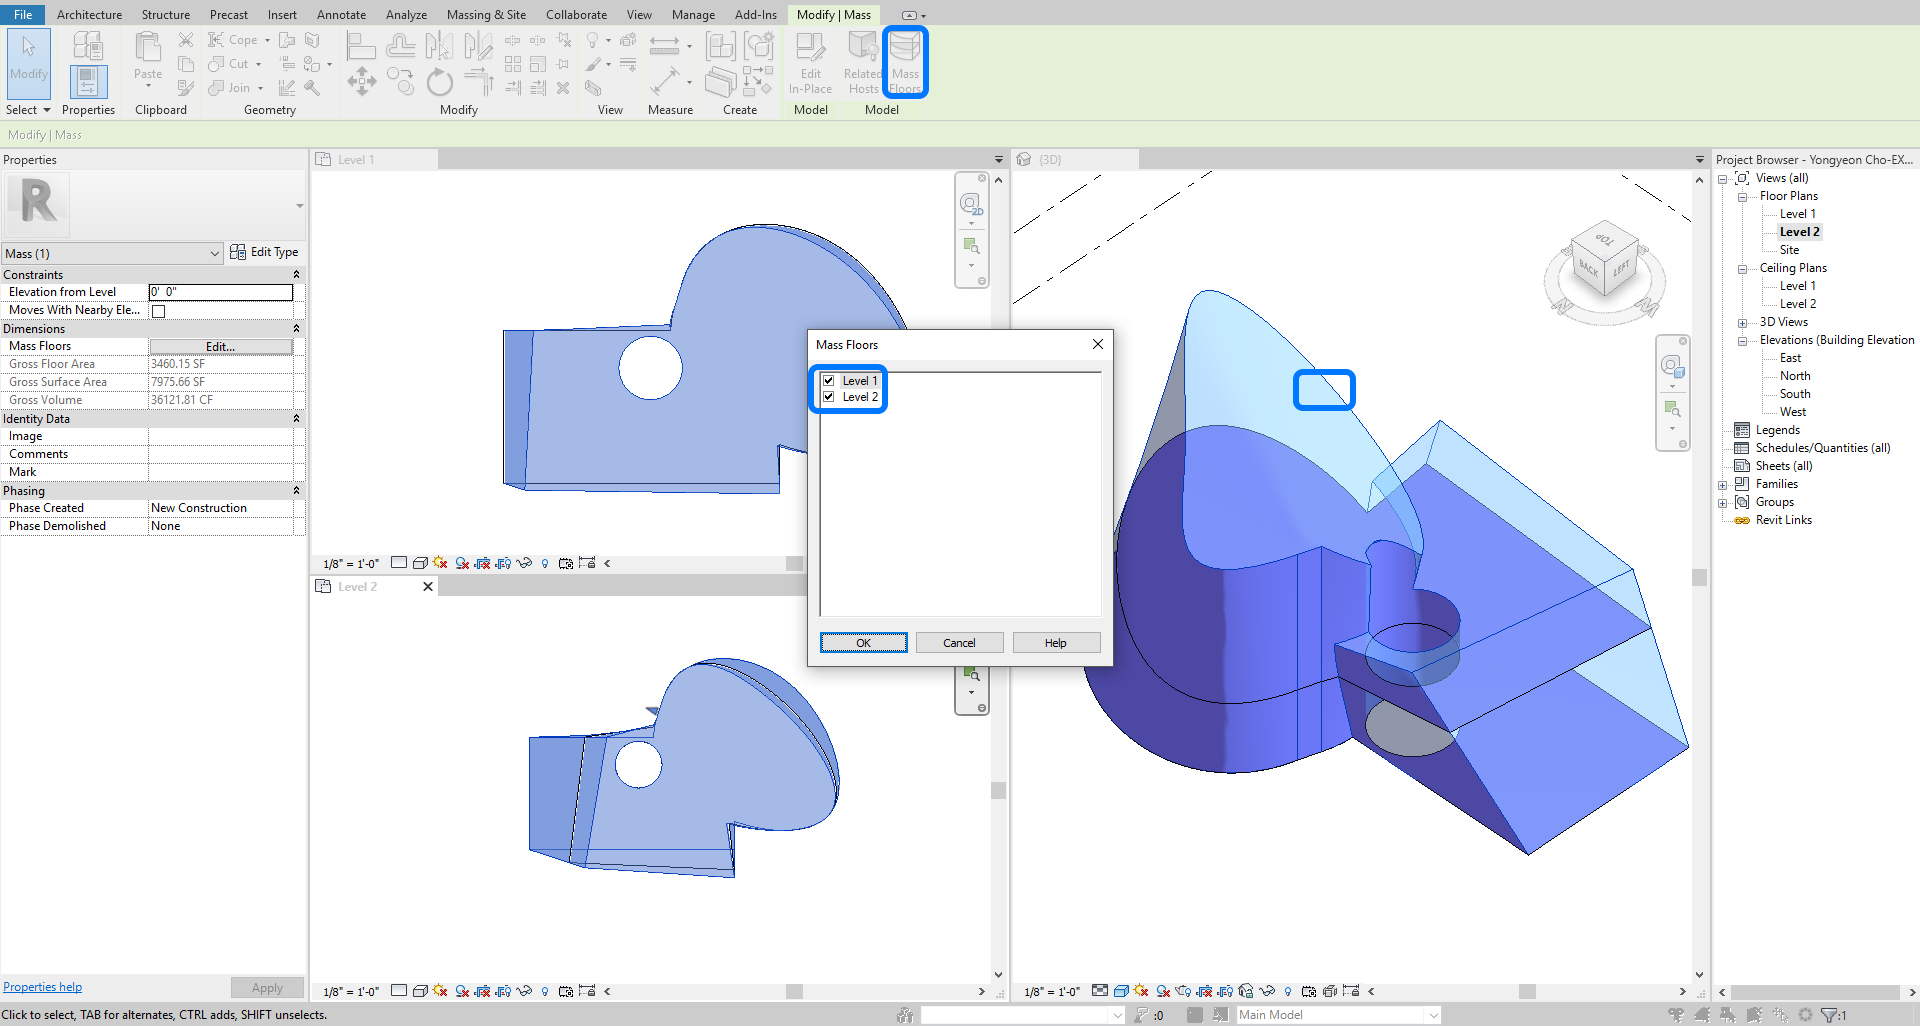
To create mass Floors
- [STEP 1] Select the mass you want to make floors.
- [STEP 2] Click [Mass Floors] from [Modify/Mass] tab, under [Model] panel.
- [STEP 3] Check levels for the floors.
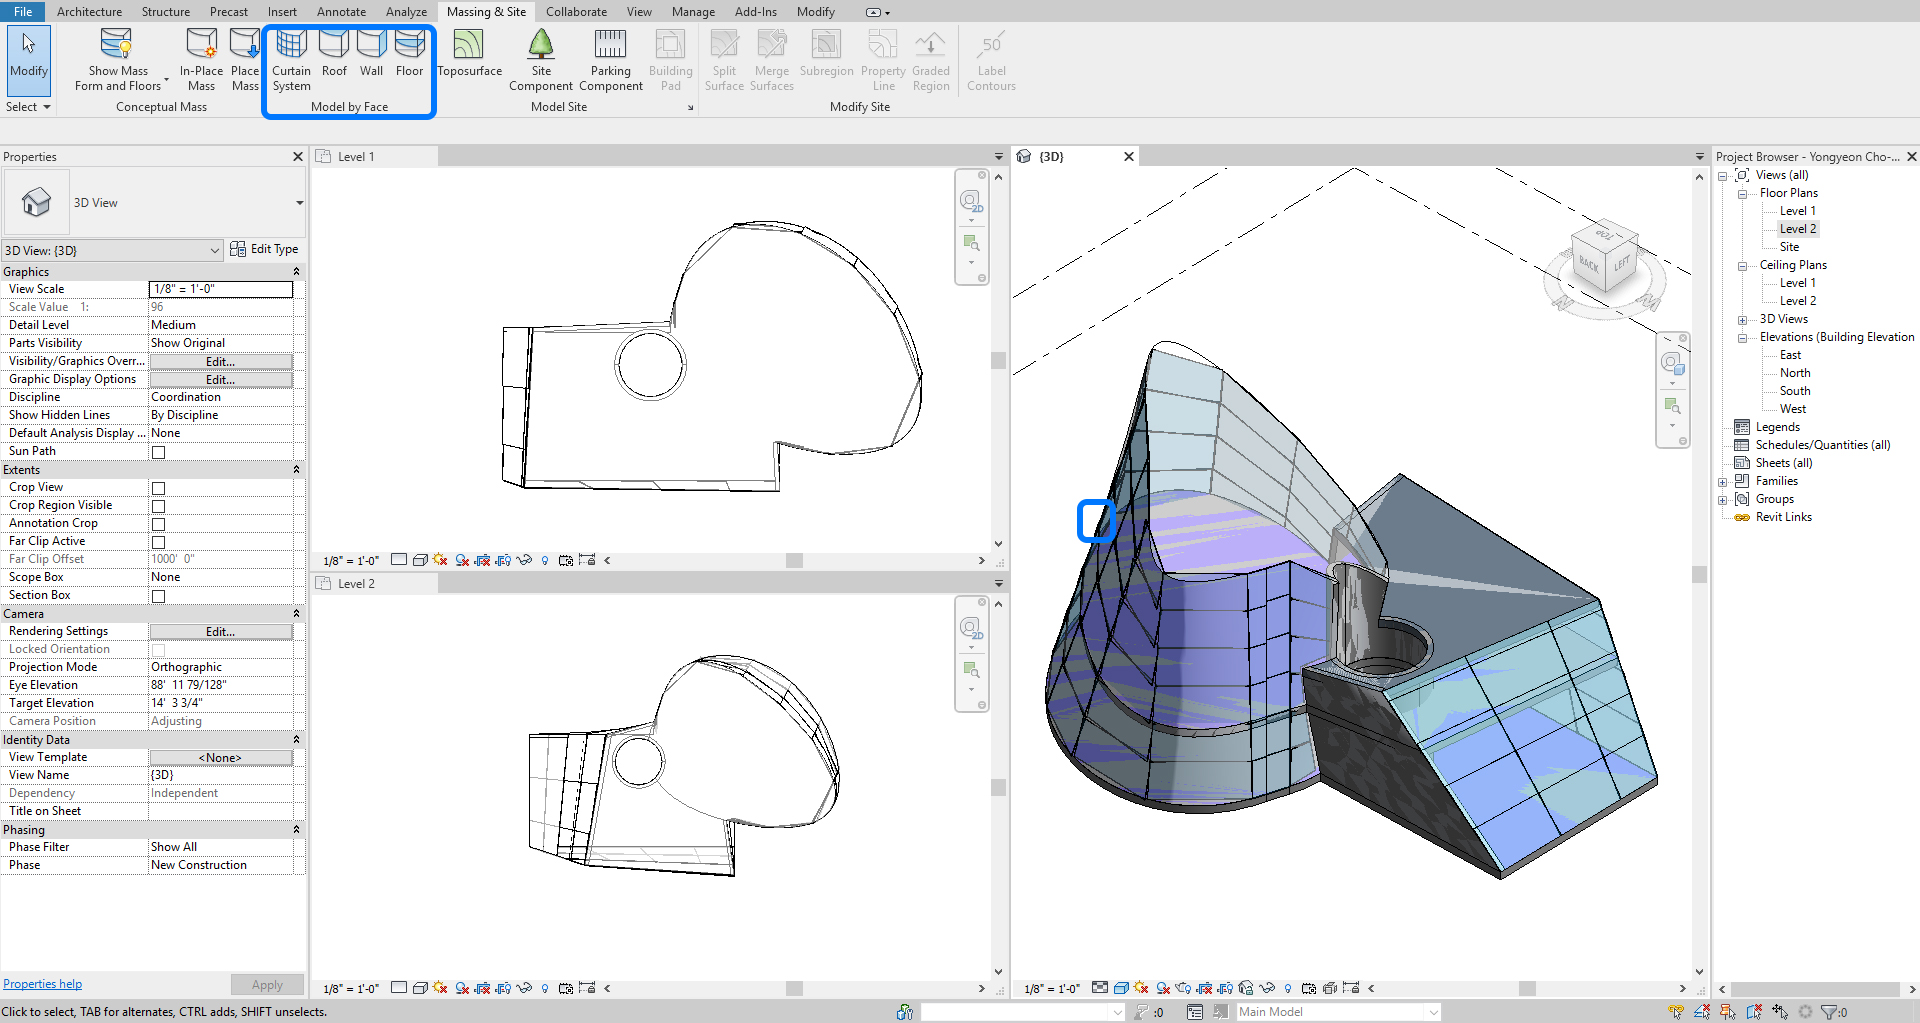
To create an architectural model (Curtain Wall, Wall, Floor, and Roof) by face
- [STEP 1] Use [Curtain System, Roof, Wall, Floor] from [Massing & Site] tab, under [Model by Face] panel.
- [STEP 2] Click a face to create architectural models.
- [STEP 3] Click [Create system, Create floor, Create roof] from [Modify/Place] under, [Multiple Selection] panel.
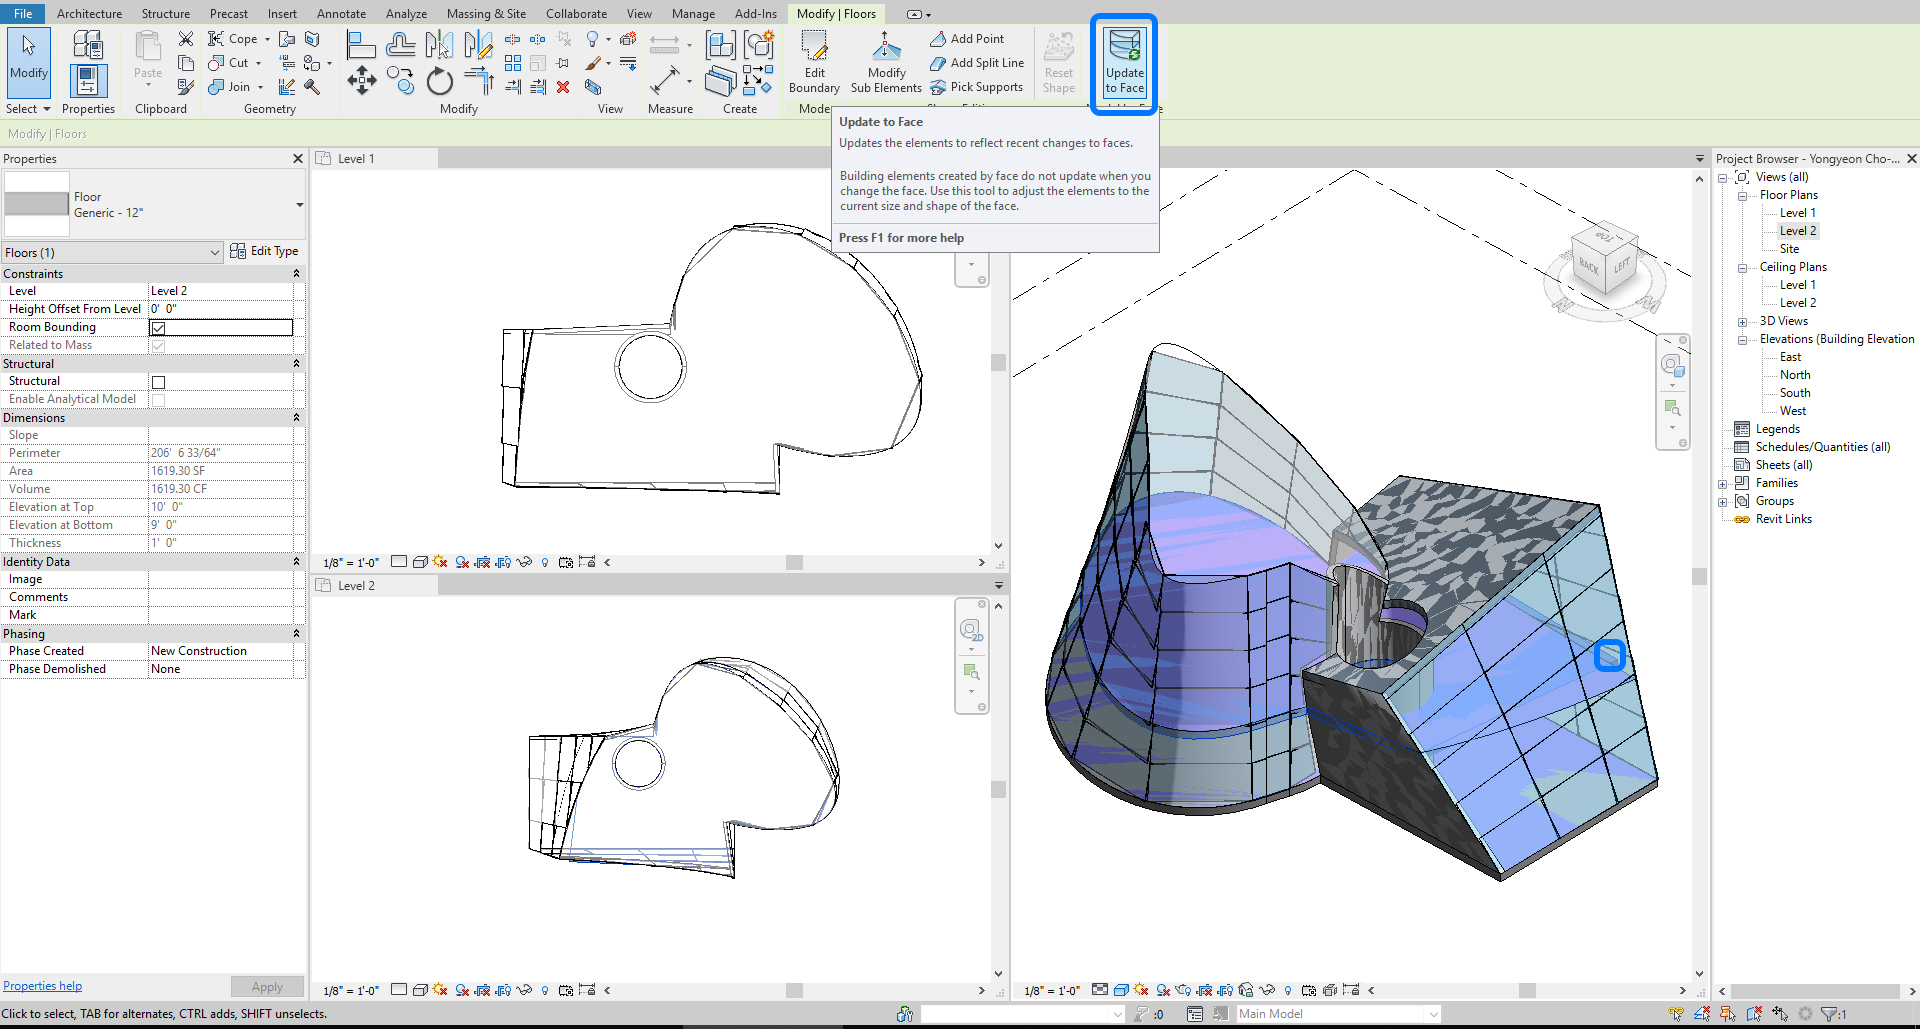
To modify the mass and update architectural models
- [STEP 1] Click the mass > Click [Edit In-Place].
- [STEP 2] Modify the mass by controlling the point, edge, and face > Click [Finish Mass].
- [STEP 3] Click model(s) > Click [Update to Face] from [Modify] tab, under [Model by Face].
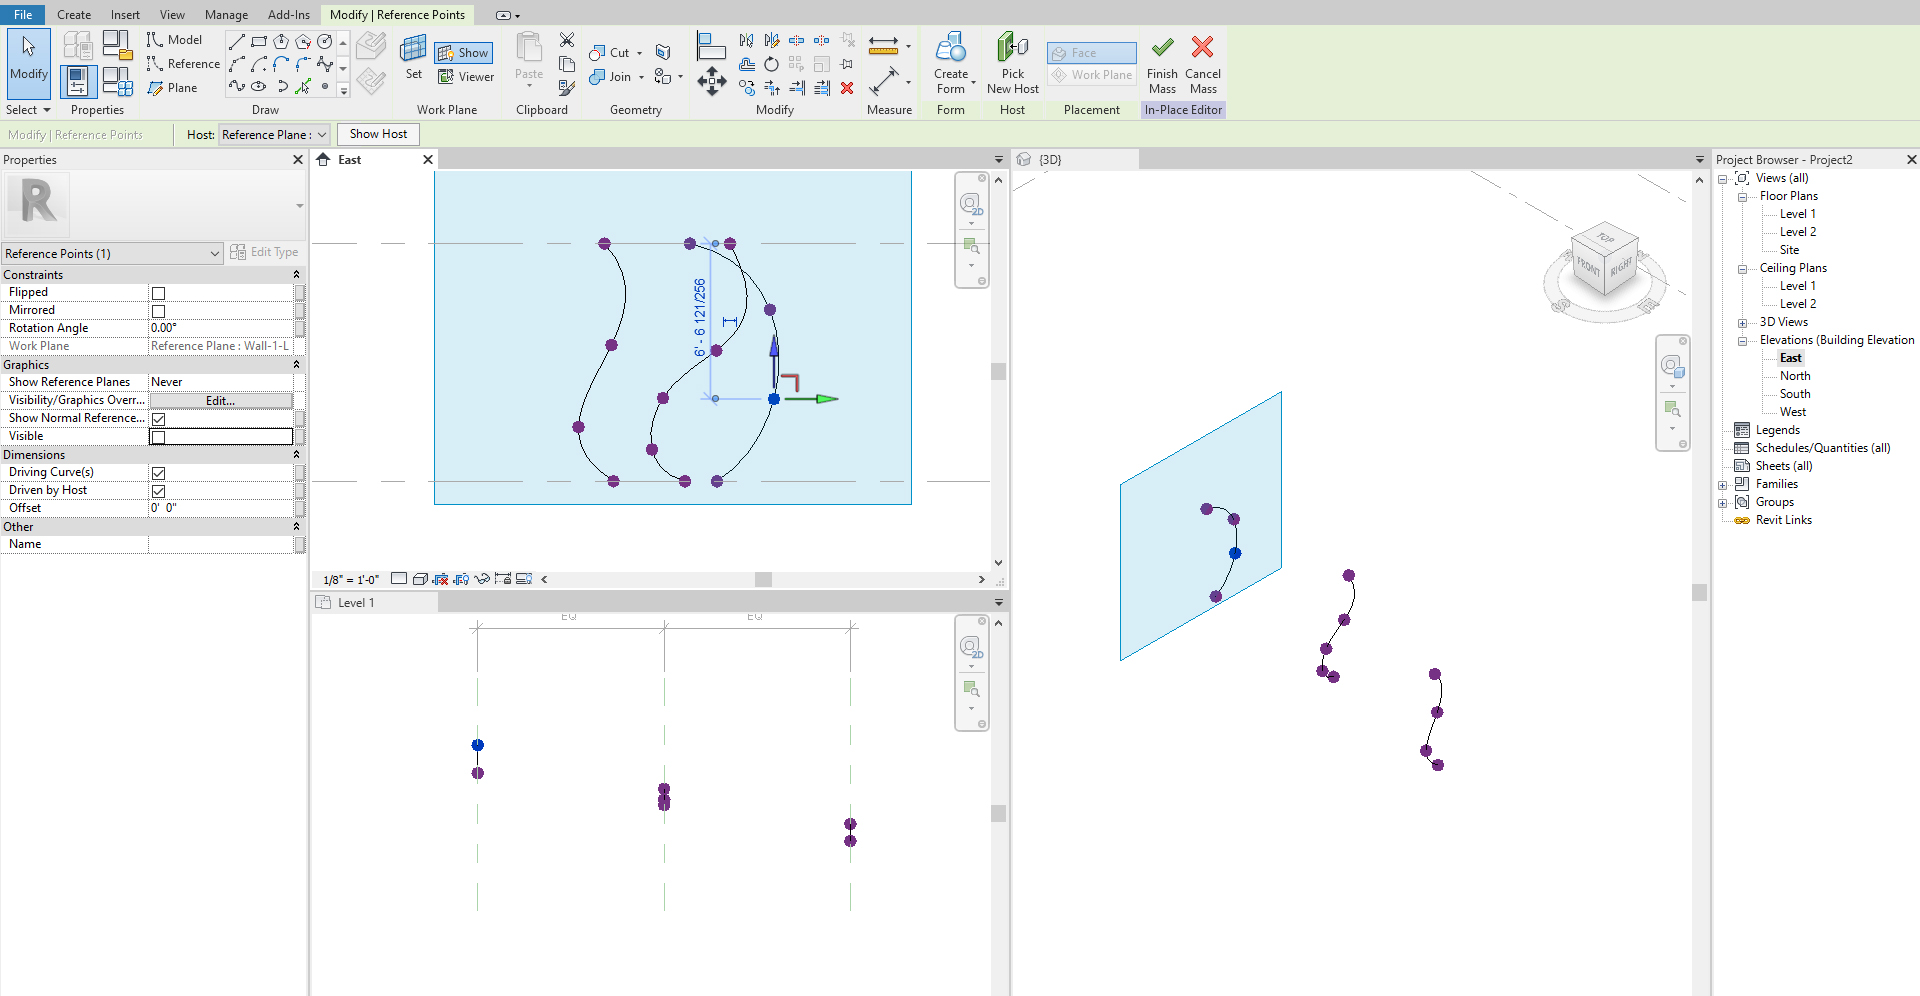
(CO3) Create an organic shape wall
In this tutorial, you will create an organic shape of the wall using Massing in Revit. To create an organic-shaped wall, you will need profiles (lines) on reference planes. By connecting the profiles, an organic-shaped wall will be created.
- [STEP 1] Draw more than two reference planes on a floor plan [Level 1]. I will create three reference planes. Click [Ref Plane] from [Architecture] tab, under [Work Plane] > Add dimensions if needed > Define names for the reference planes (Wall-1-L, Wall-1-C, Wall-1-R).

- [STEP 2] Click [Show Mass by View Setting] from [Massing & Site] tab, under [Conceptual Mass] panel, this command is to see mass, if you want to hide mass, click again [Show Mass Form and Floors].
- [STEP 3] Click [In-Place Mass] from [Massing & Site], under [Conceptual Mass] panel > Name the mass [Organic Wall-1].
- [STEP 4] Open [East] view and [3D] view, and make a tile view [WT].
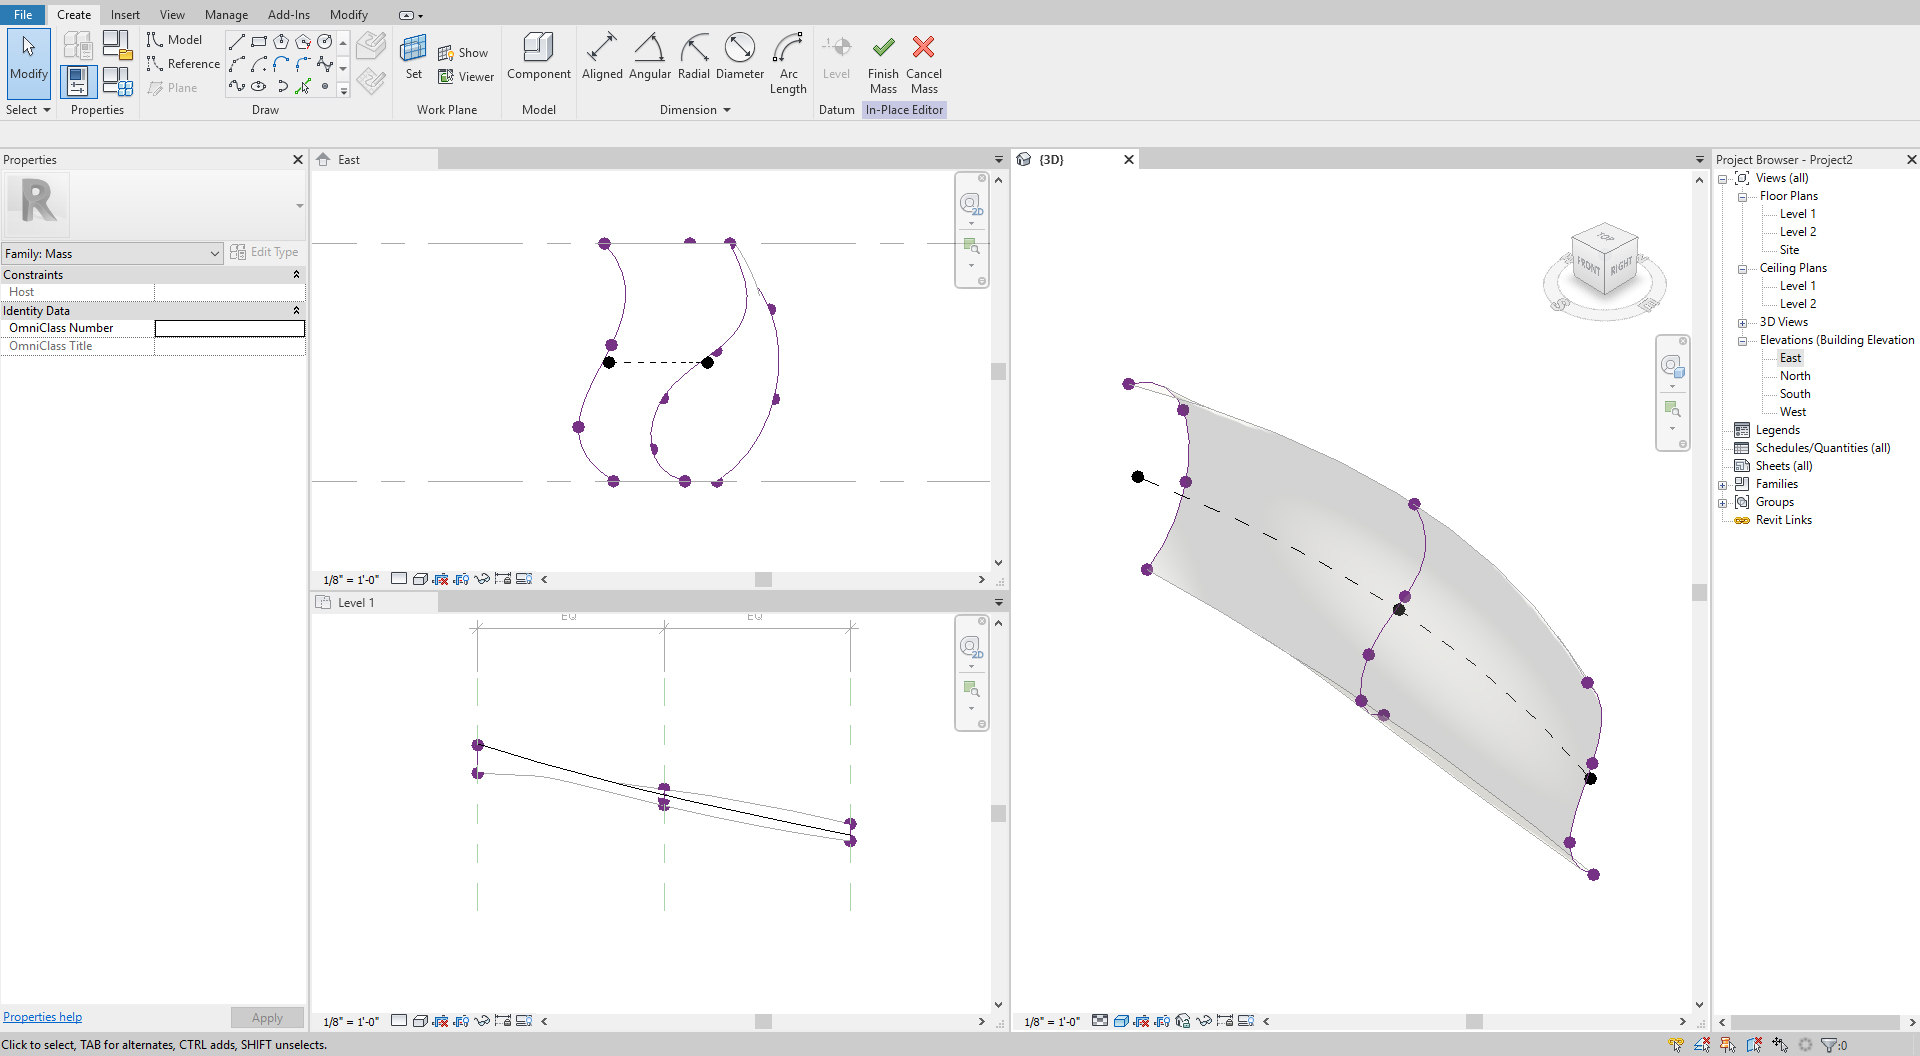
- [STEP 5] Click [Set] and click [Show] from [Create] tab, under [Work Plane] panel, Select [Reference Plane: Wall-1-R] from the option bar.
- [STEP 6] Click [Model] from [Create] tab, under [Draw] panel > Draw a line with [Spline through point] > Draw a line on the 3D and modify the line on the East view.
Repeat this step for the three reference planes.
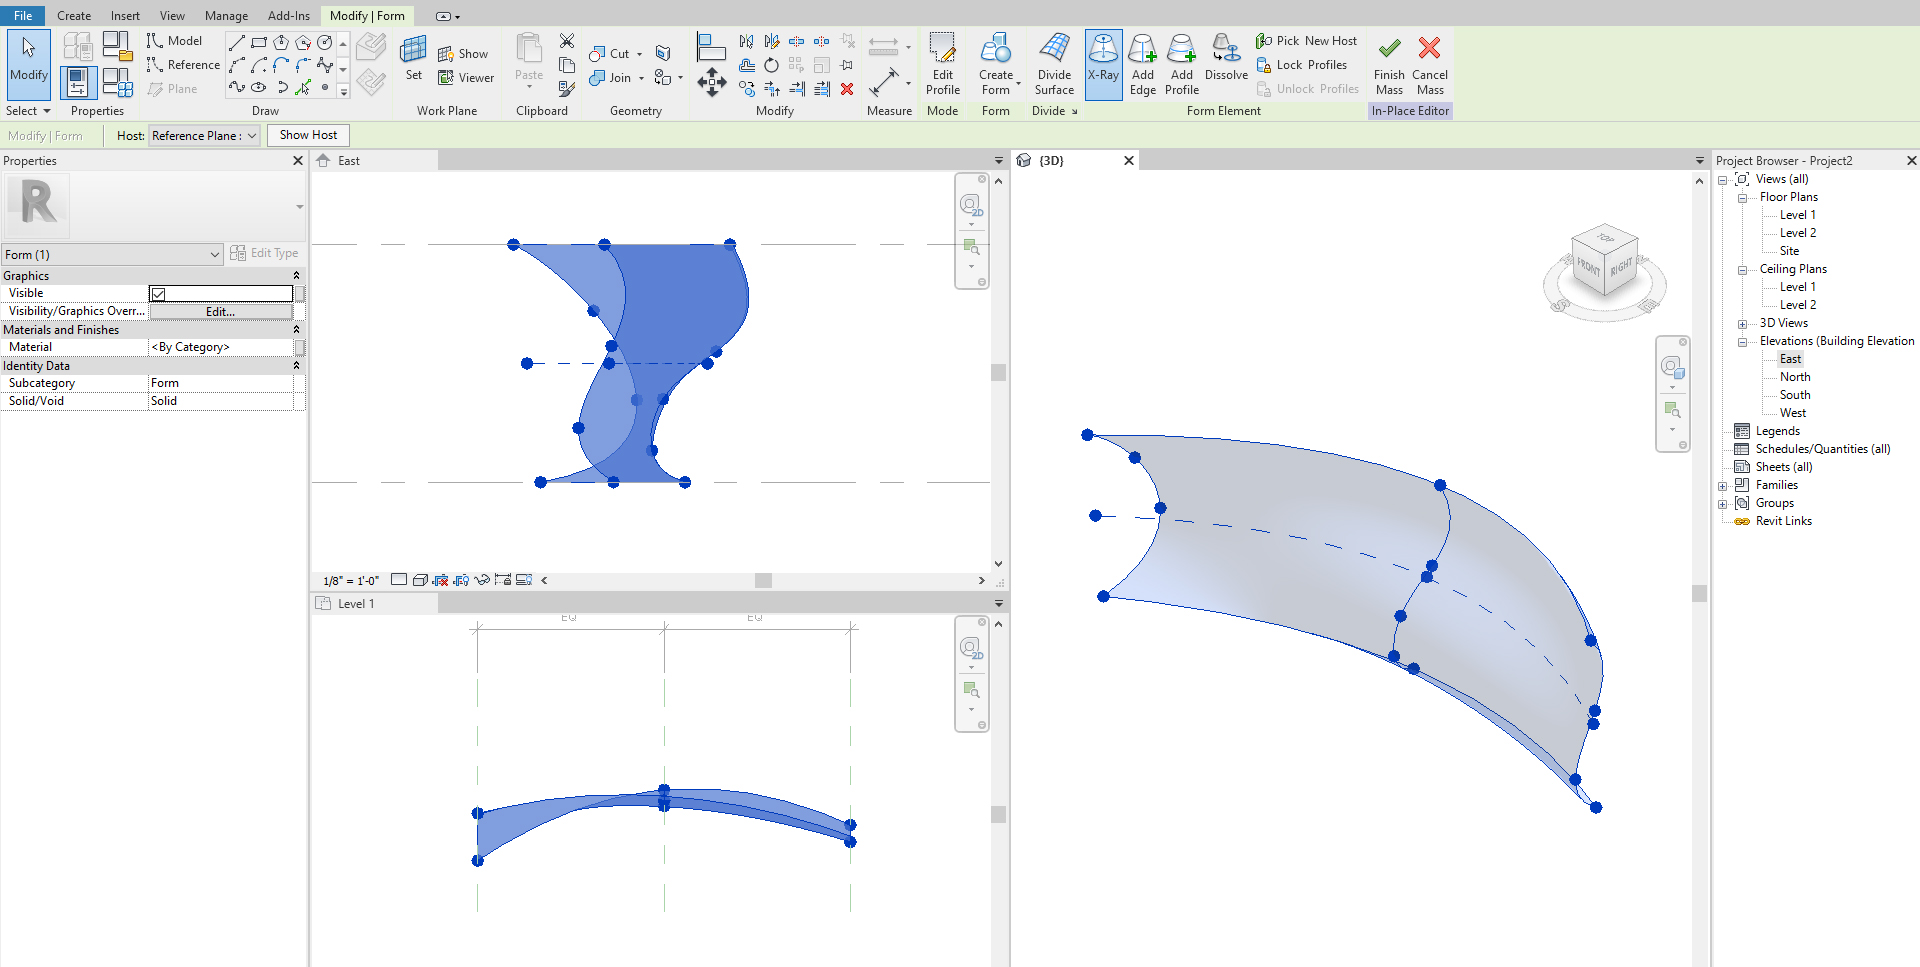
- [STEP 7] Select all profiles on [3D view] > Click [Create Form > Solid Form] from [Modify] tab, under [Form] panel. Change display mode to shaded on 3D view.
- [STEP 8] To modify the shape of the wall, click the wall > Click [X-Ray] > you can edit the point, edge, and face.
- [STEP 9] To change the profiles, click [Edit Profile] > edit profile > Click [Green checkmark] to complete this command.
- [STEP 10] To complete the mass, click [Finish Mass].
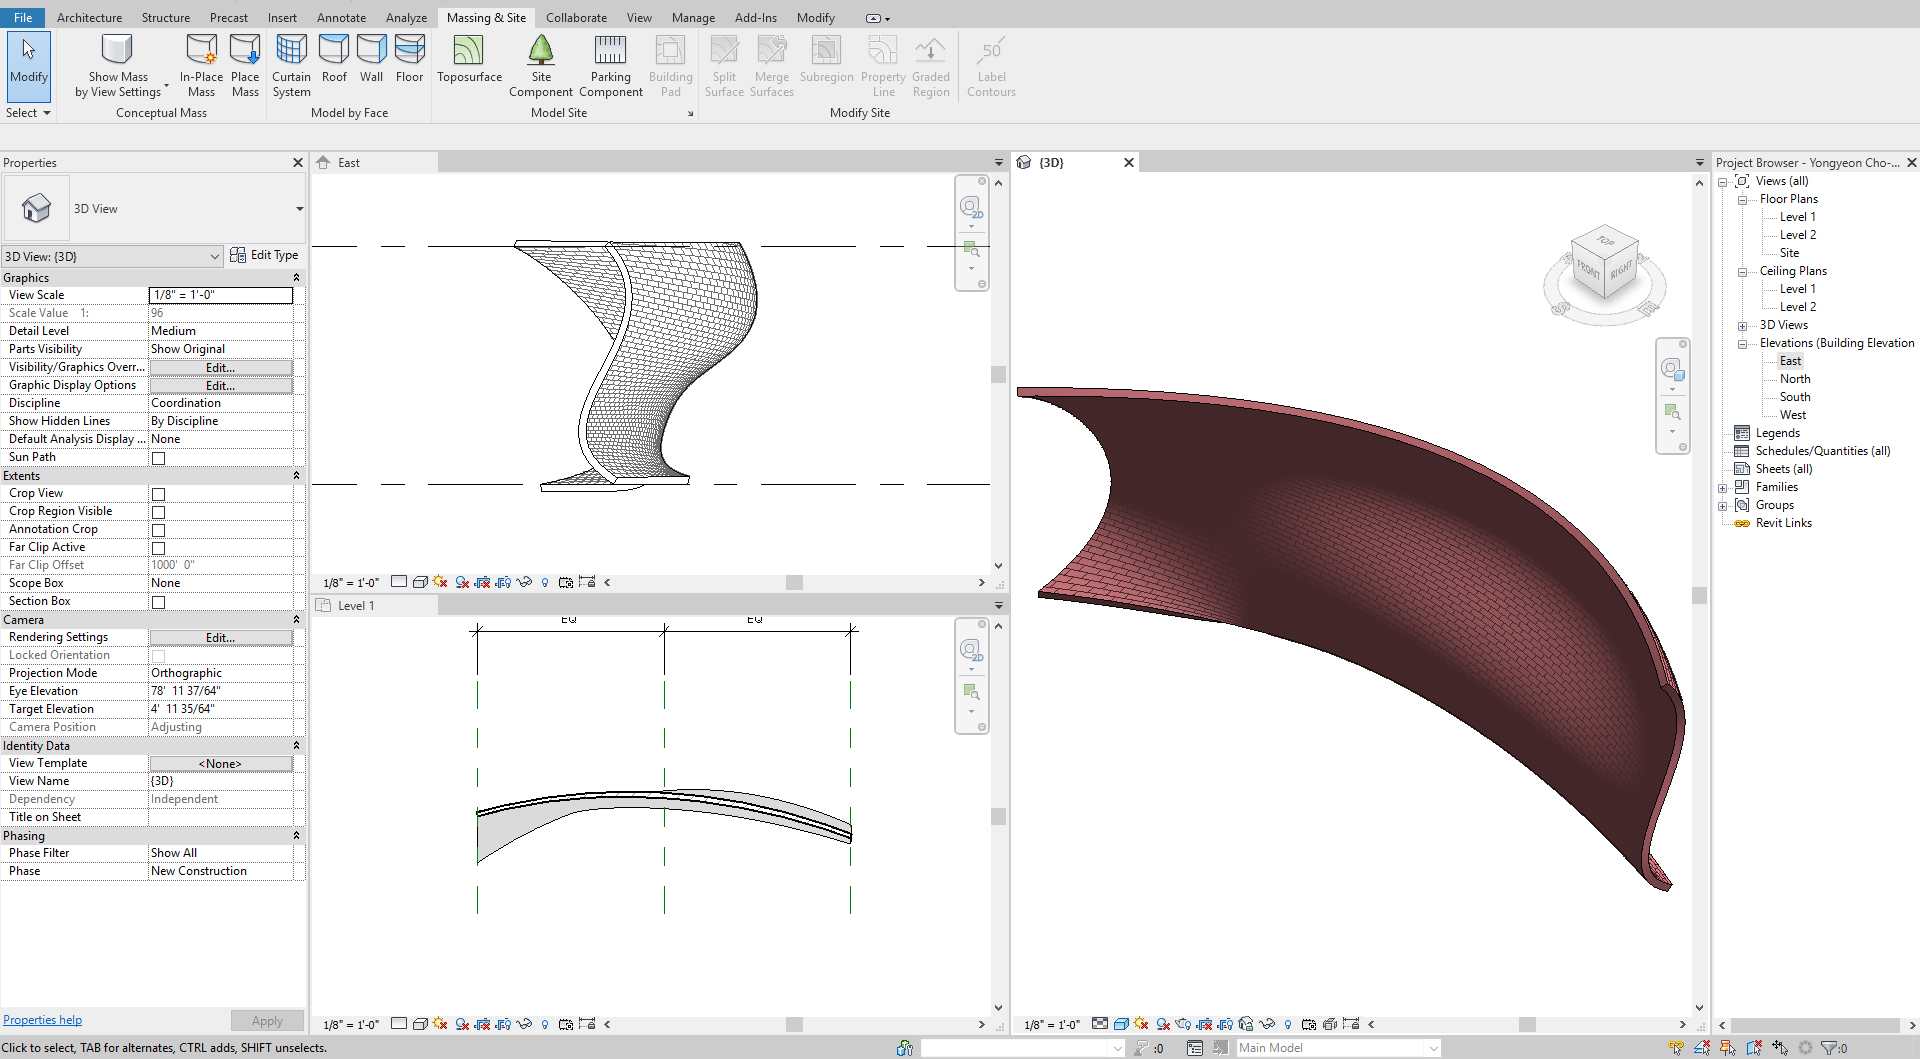
- [STEP 11] To add a wall, click [wall] from [Massing & Site], under [Model by Face] panel > Select a wall type > click the face of the mass to create a wall.
Note. If your wall is too thick or the mass is too wavy, you will get an error message.
(CO4) Create an organic shape curtainwall
In this tutorial, you will practice an organic-shaped curtain wall.
- [STEP 1] Click [Component] > click [Model-in-place] > Select [Mass] from [Family Category and Parameters] > click [OK] > Define name [Organic curtainwall-1].
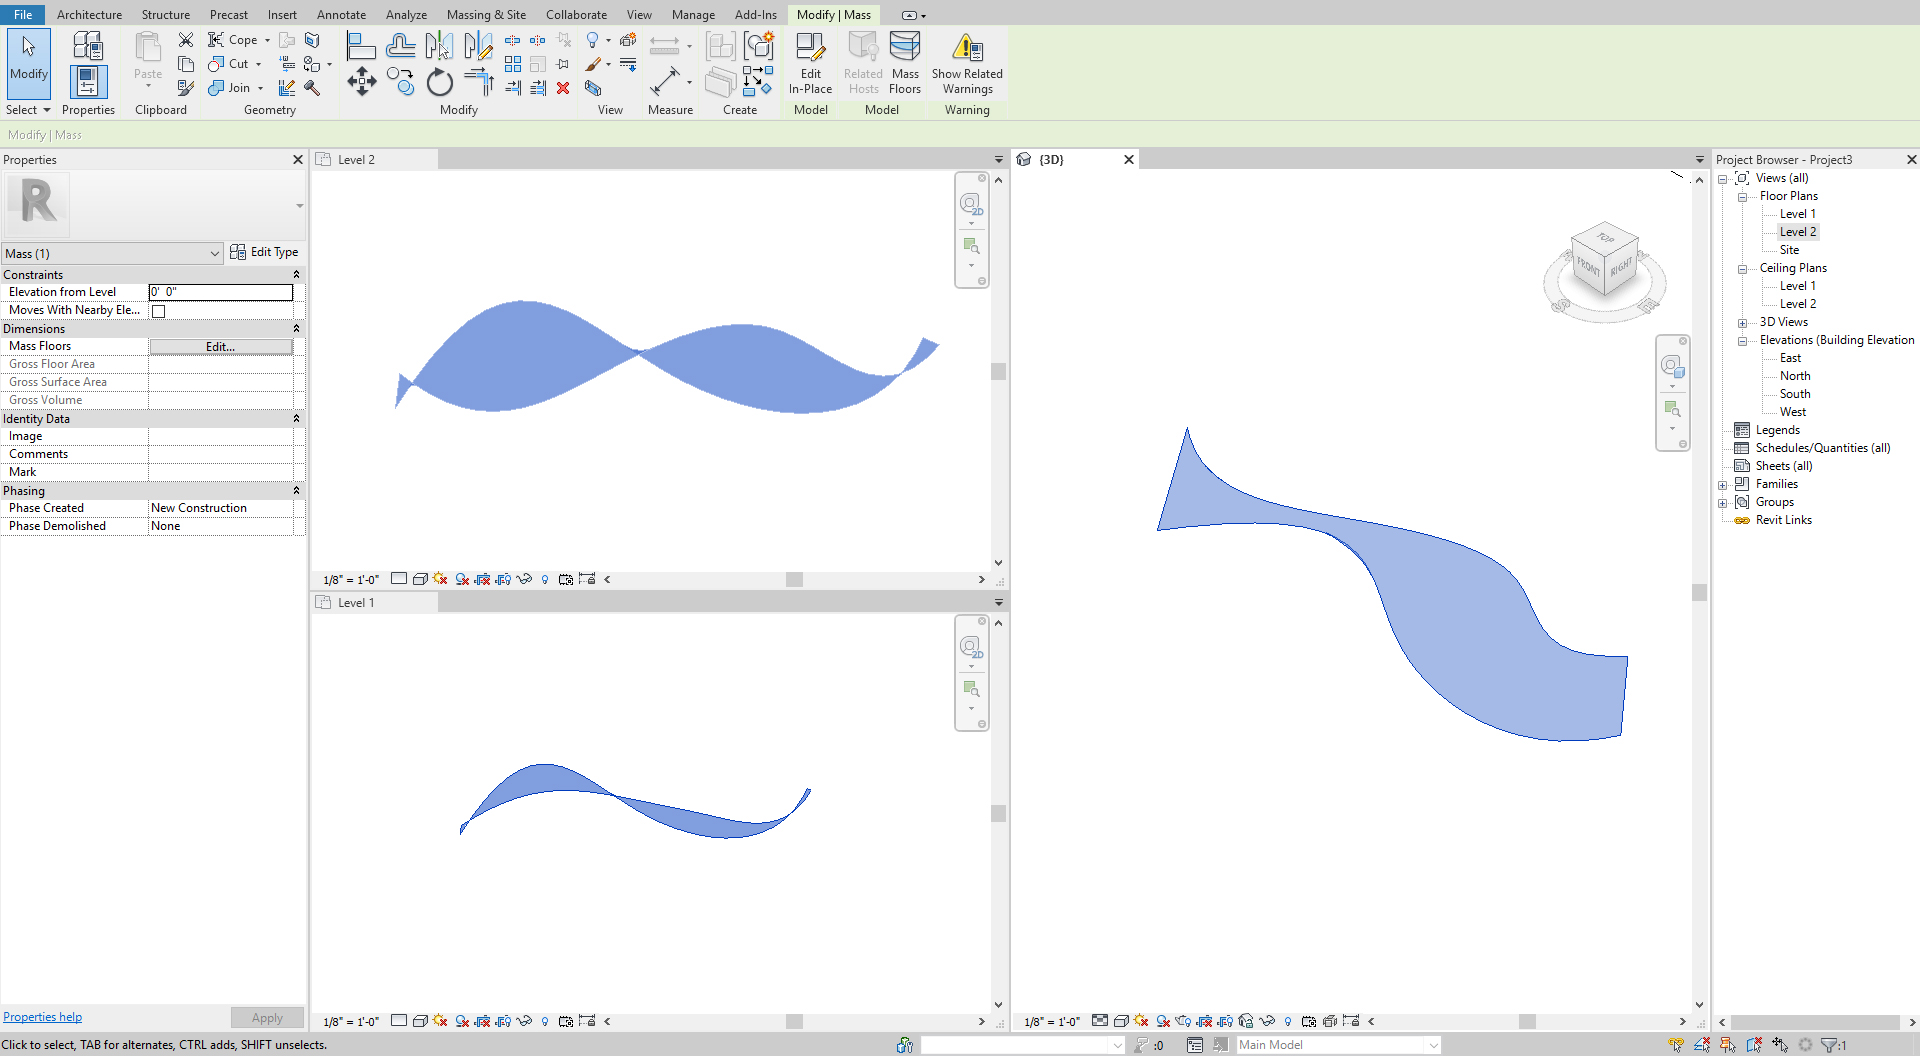
Note. This method is the same as just creating a mass from [Massing & Site]. - [STEP 2] Click [Model] and draw a curve line with [Spline Through Point] on Level 1. Make sure [Placement Plane] is [Level: Level 1].
- [STEP 3] Open Level 2 floor plan > Click [Model] and draw a curve line with [Spline Through Point] on Level 2. Make sure [Placement Plane] is [Level: Level 1].
- [STEP 4] Select all profiles on [3D view] > Click [Create Form > Solid Form] from [Modify] tab, under [Form] panel. Change display mode to shaded on 3D view.
- [STEP 5] Click [Finish Mass] to finish the model.
- [STEP 6] Click [Curtain System] from [Massing & Site] tab, under [Model by Face] panel > Click the mass you created > Click [Create System] from [Modify] tab, under [Multiple Selection].
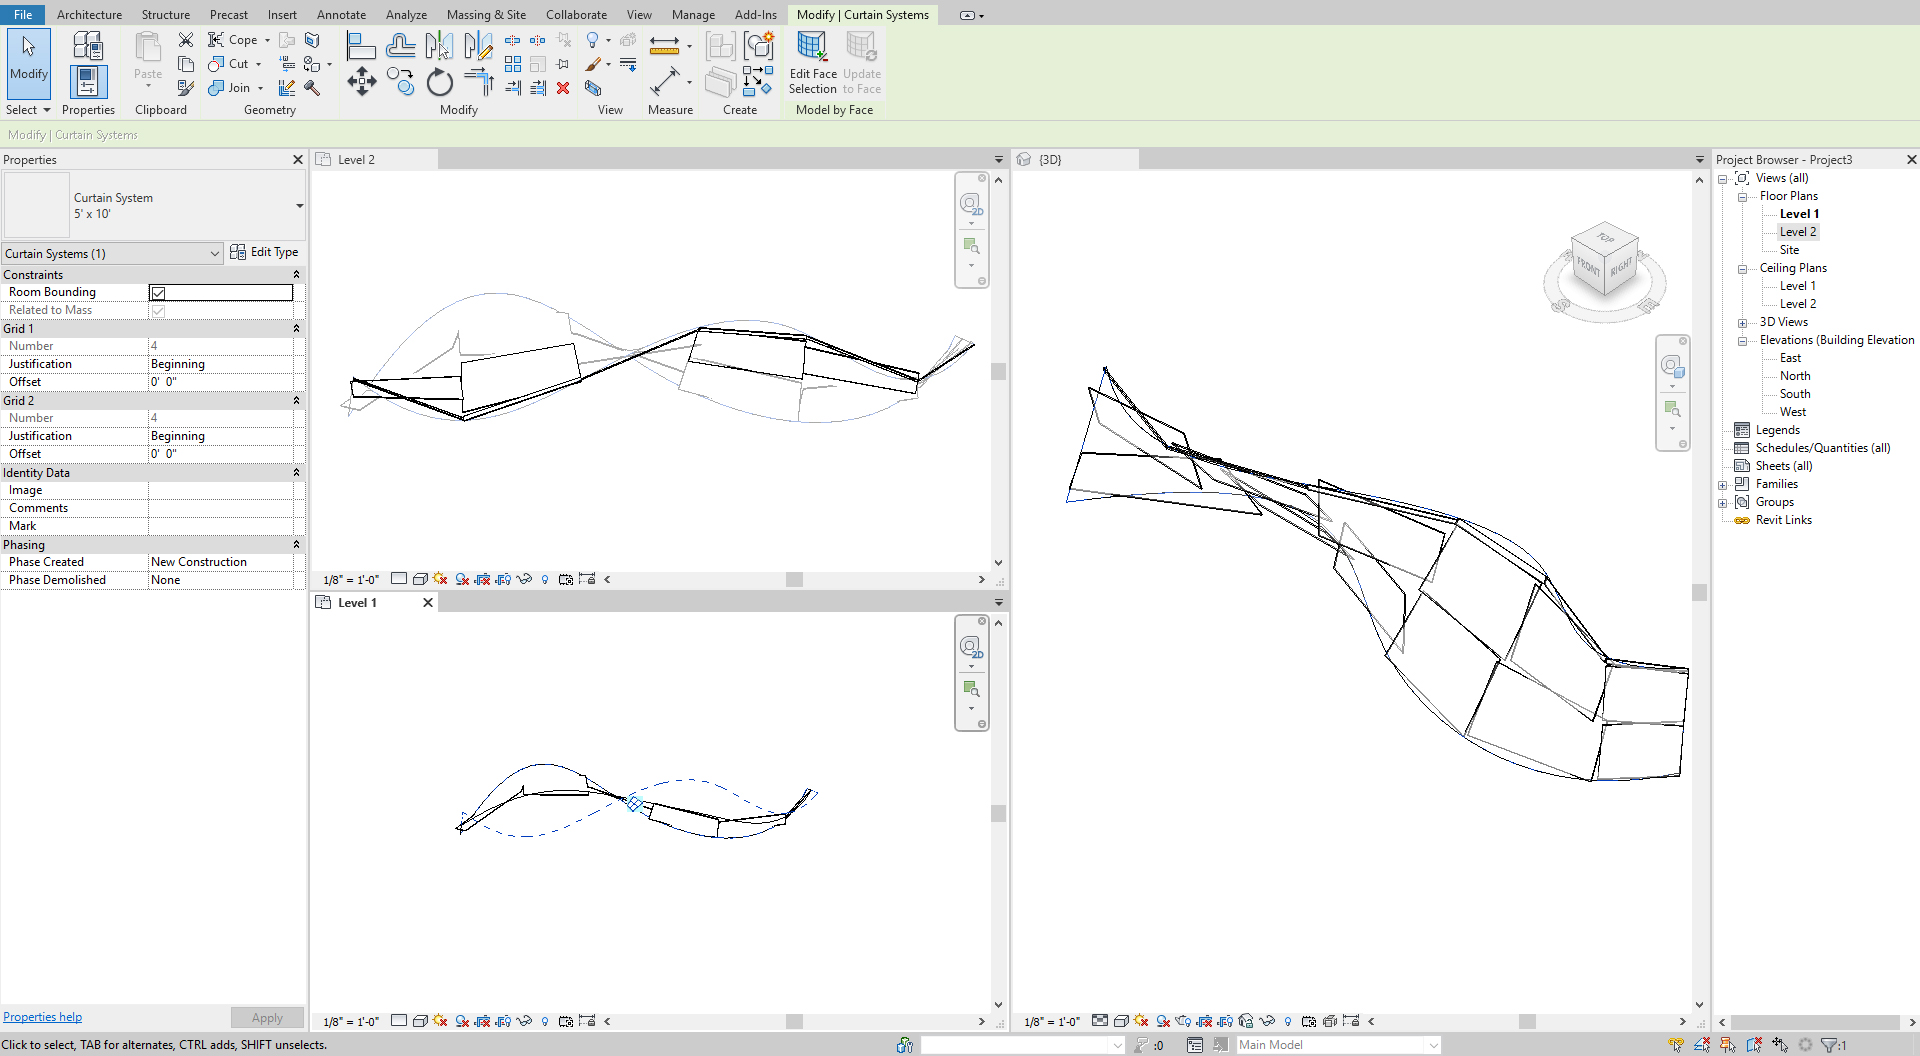
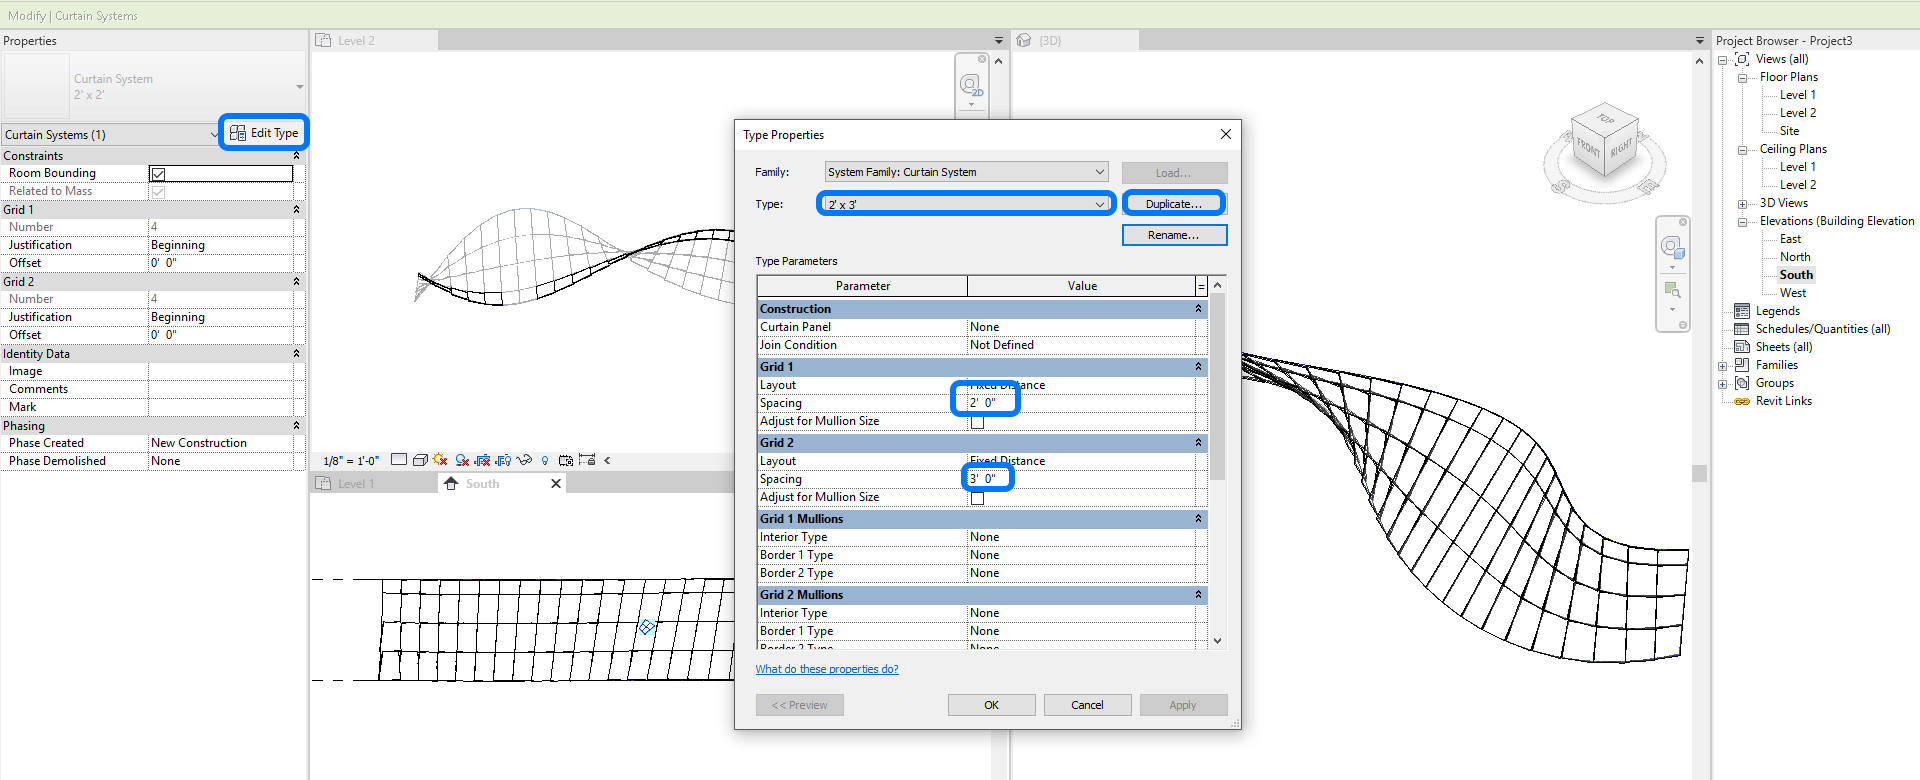
- [STEP 7] Click the curtain system > change the size of the panels by adding a new type [2’x 2′].
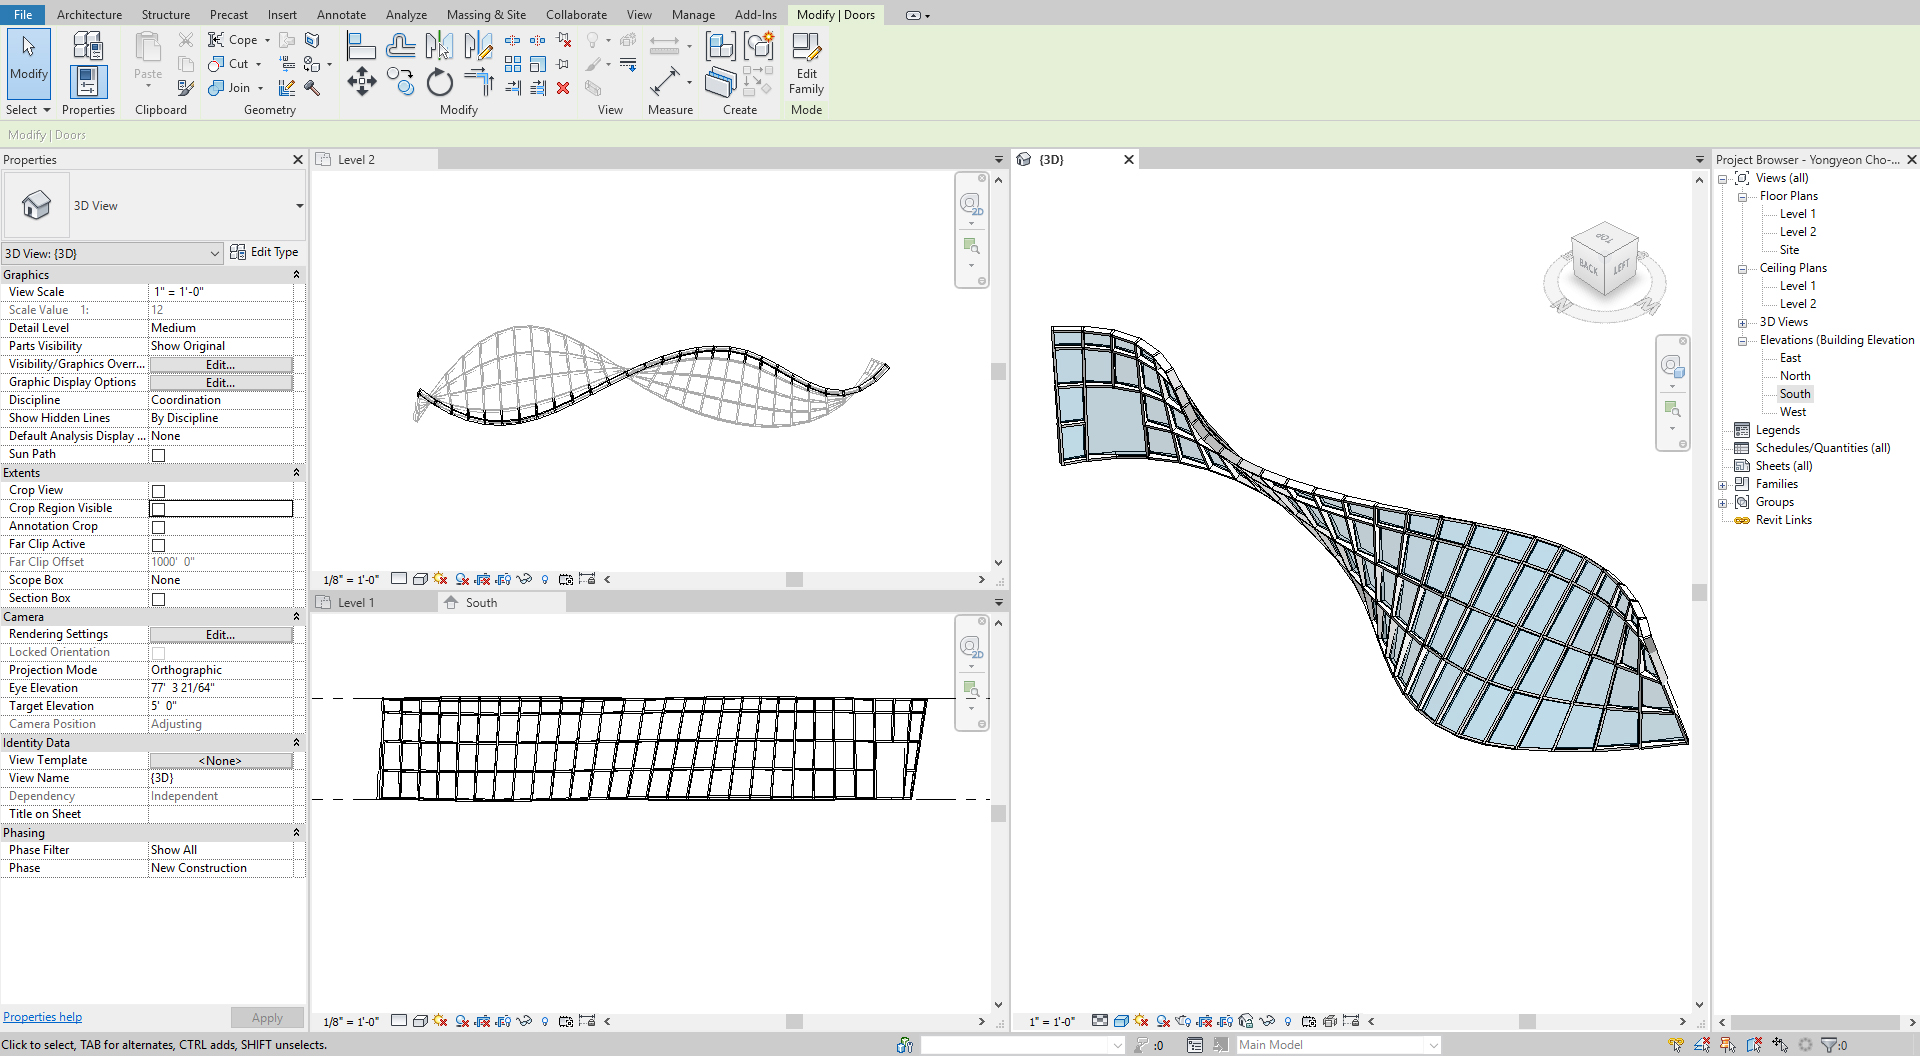
- [STEP 8] You can add and remove the grids by clicking.
- [STEP 9] Add Mullion by clicking [Mullion] from [Architecture] tab, under [Modify] panel. You also may add a mullion type to fit the size of the panels.
 References
Autodesk Help. (May 16, 2018). Massing Studies. Retrieved December 23, 2021, from https://knowledge.autodesk.com/support/revit/learn-explore/caas/CloudHelp/cloudhelp/2016/ENU/Revit-Model/files/GUID-B8858693-F46D-4211-8CCC-B5E88681C466-htm.html
