
Part Two. Hybrid Digital Drawing
Chapter 8. iPad & Procreate
Upon completing this session, students will be able to:
- (CO 1) Be introduced a drawing app – Procreate
- (CO 2) Understand the basic interface and gestures of “Procreate”
- (CO 3) Understand various Brushes and color
- (CO 4) Understand various tools in the app
- (CO 5) Be introduced various working processes for a perspective view
 Lecture Contents
(CO1) Be introduced a drawing app – Procreate
Procreate – App
“Procreate is a raster graphics editor app for digital painting developed and published by Savage Interactive for iOS and iPadOS. Designed in response to the artistic possibilities of the iPad, it was launched on the App Store (iOS) in 2011.
The aim of Procreate is to recreate the natural feel of physical drawing while utilizing the practical advantages of a digital platform. It offers over 130 customizable brush presets, multiple layers, blend modes, masks, 4K resolution export of process videos, autosave, and many other digital art tools. In addition to raster graphics, this software has limited abilities to edit and render text and vector graphics. Procreate is designed for multi-touch and the Apple Pencil. It also supports a number of third-party styluses, and import/export to Adobe Photoshop. PSD format.
Procreate does not require in-app purchases or any form of subscription (Wikipedia, 2021).
Procreate for architects
10 Immediate Reasons for Architects & Designers to Use Procreate (James Akers, 2020).
- Your iPad is your sketchbook for the digital age
- Layers act like tracing paper
- The select and move tool
- Quick lines and quick shapes
- Perspective and 2-D grid drawing assist
- Coloring with the select and fill method
- Artistic brushes
- Hue, Saturation, and Brightness
- Blending Modes
- How Procreate pulls everything together in one place
(CO2) Understand the basic interface and gestures of “Procreate”
User Interface
There are two types of interface in Procreate. One is a gallery, the other is a project.
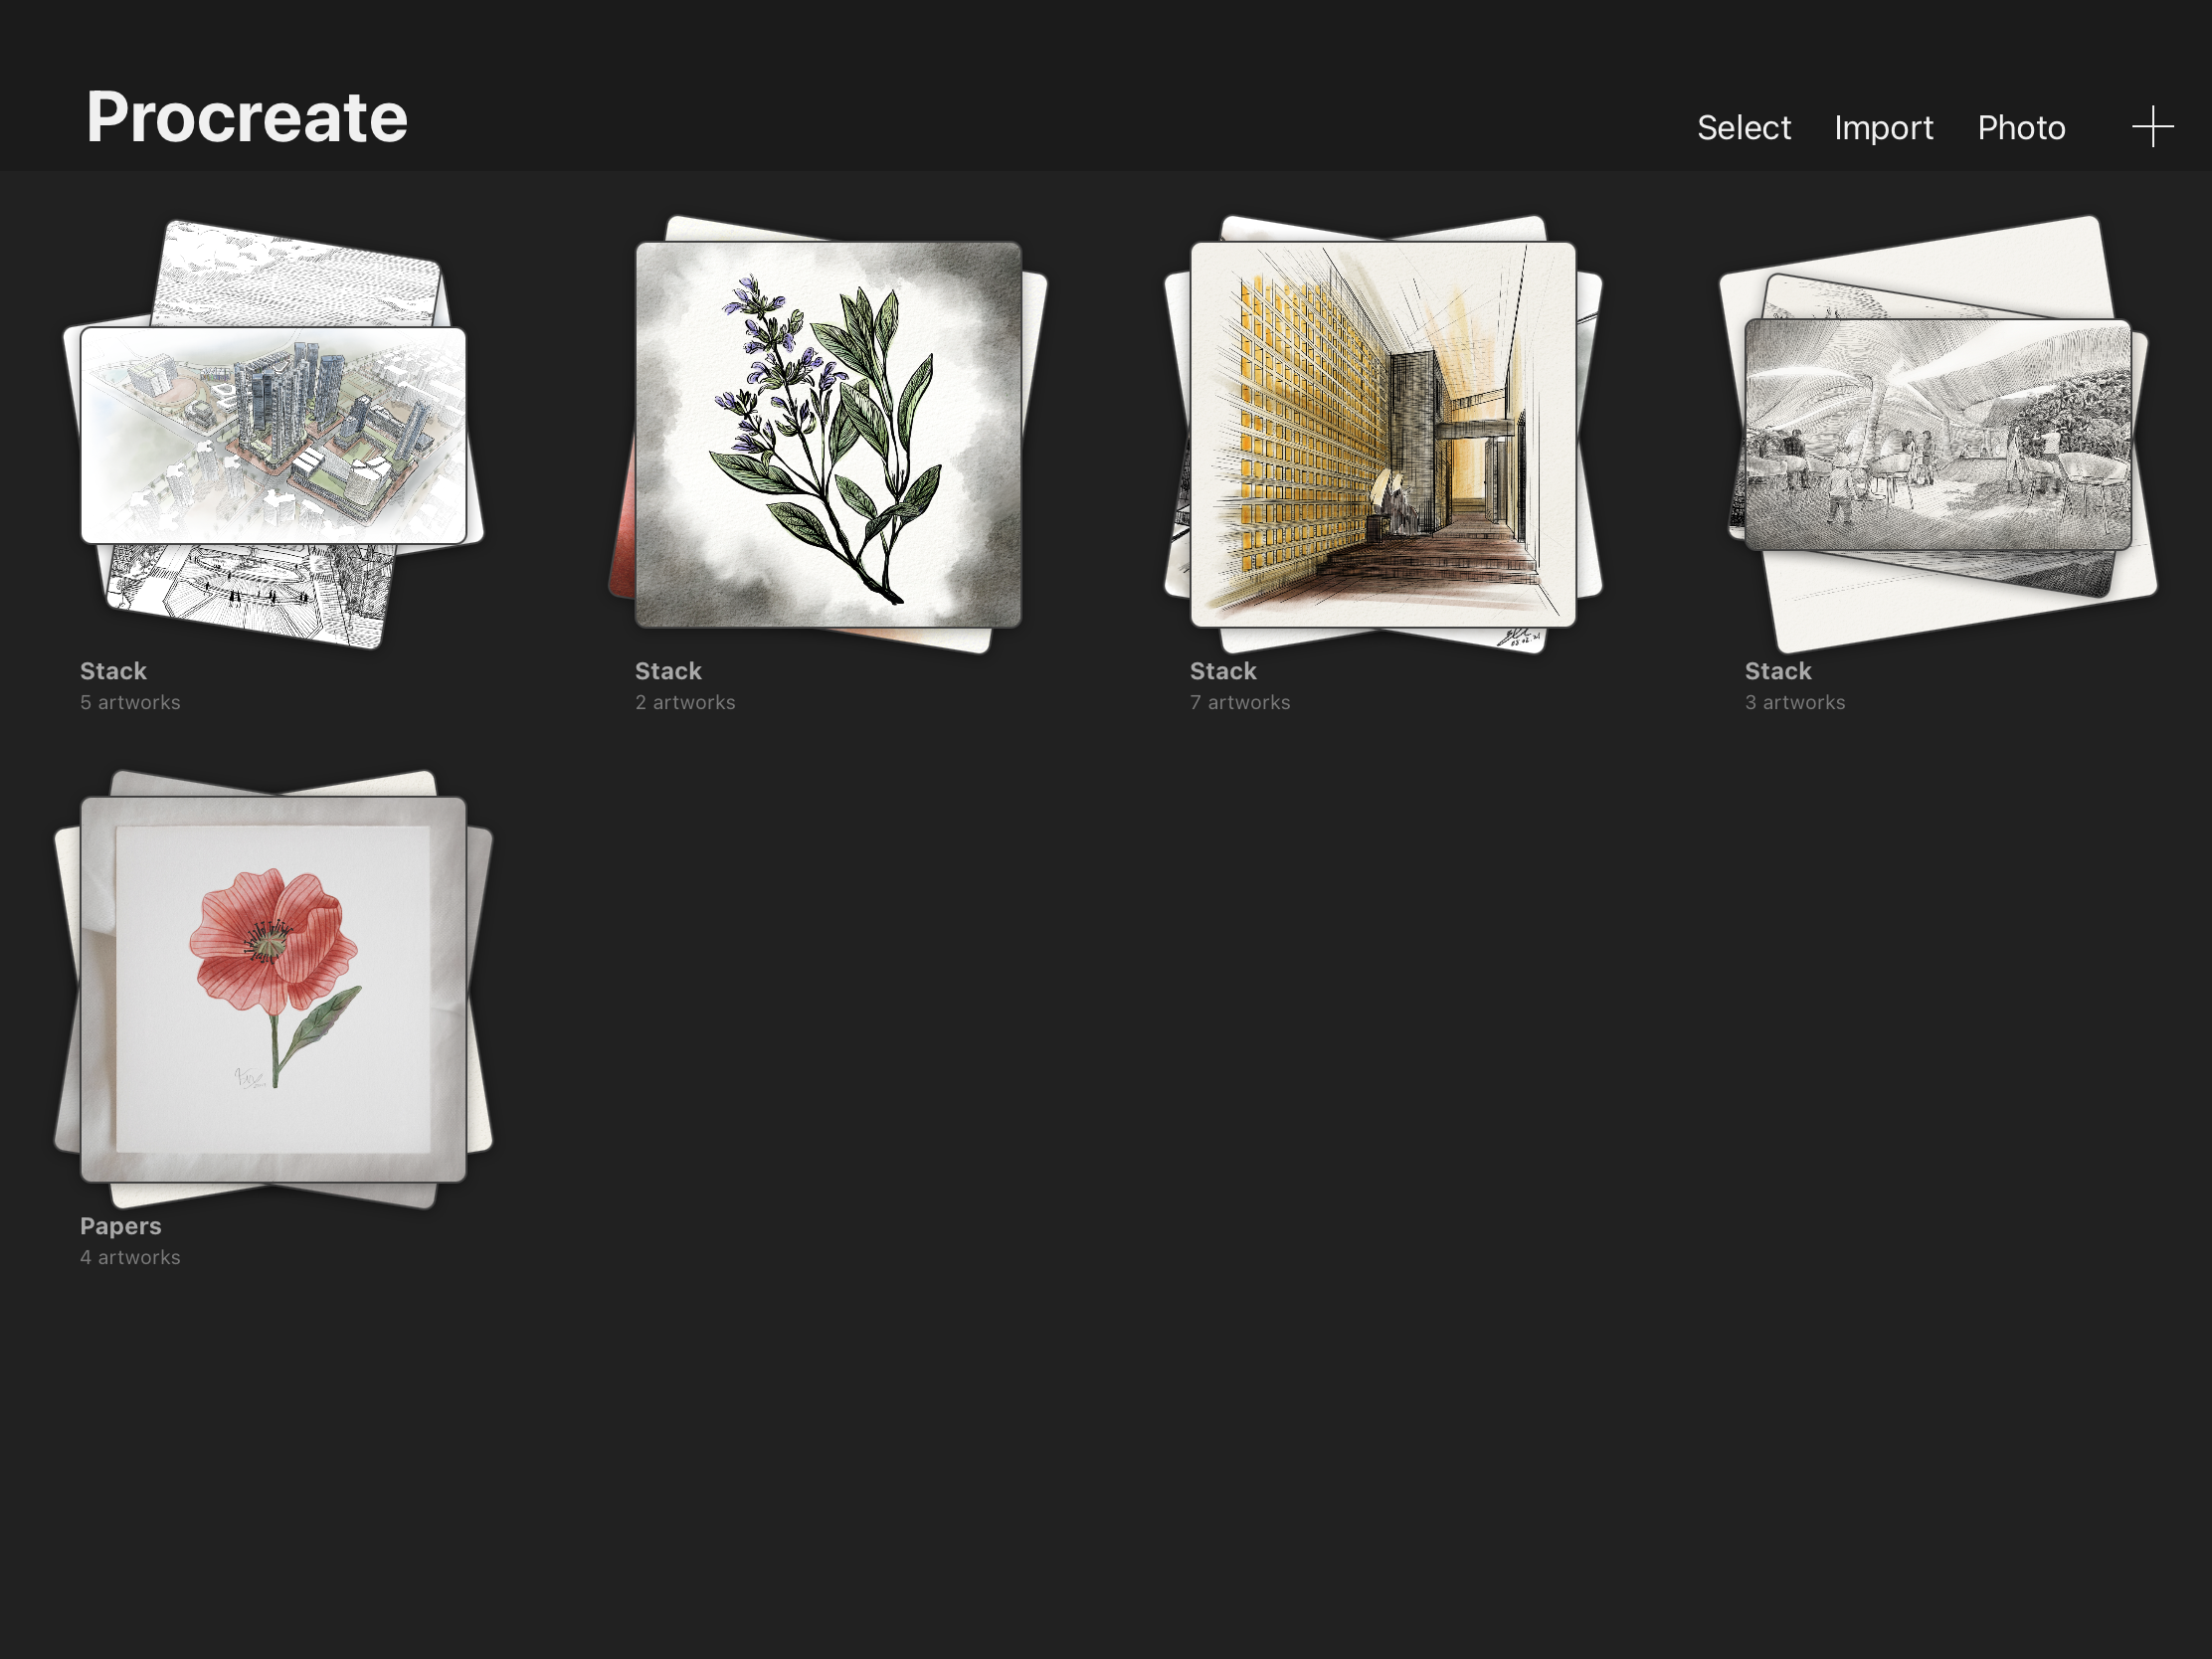
Gallery
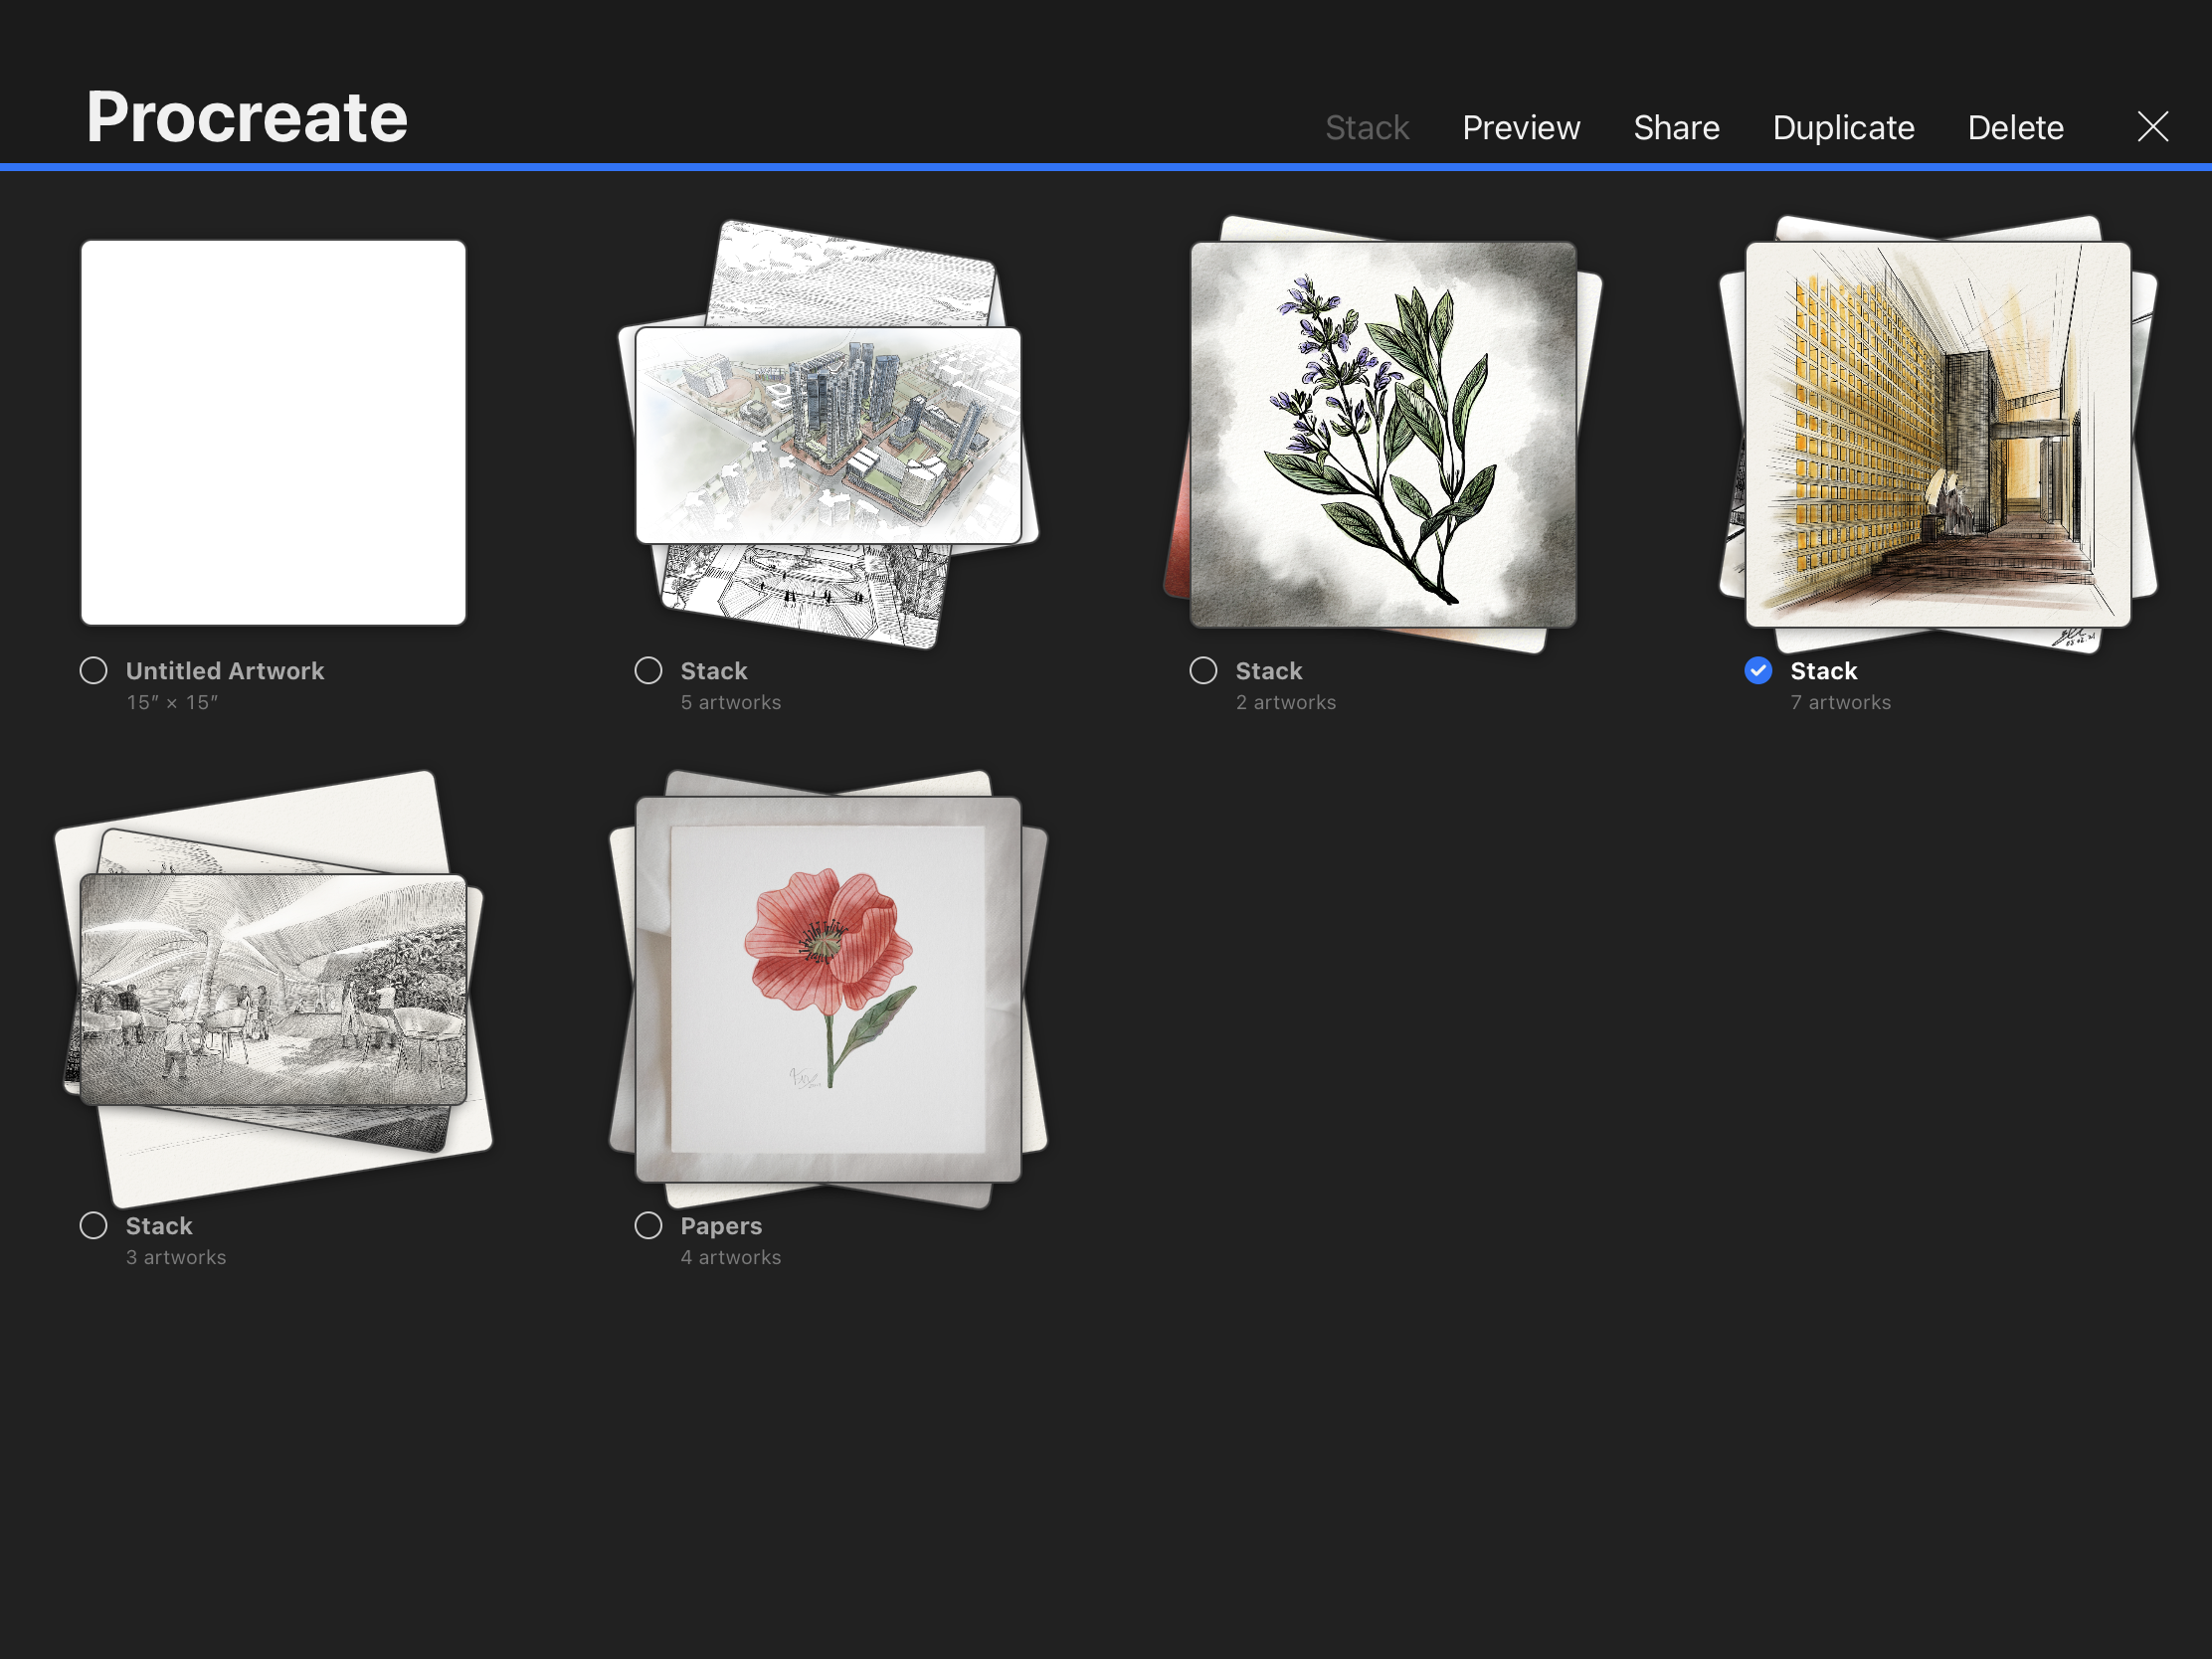
In the gallery, you can create a new project, organize your projects, share the projects in different formats, and import photos from iCloud and your photo to start your project.
Organize your projects – Select, delete, duplicate, rename, and stack.
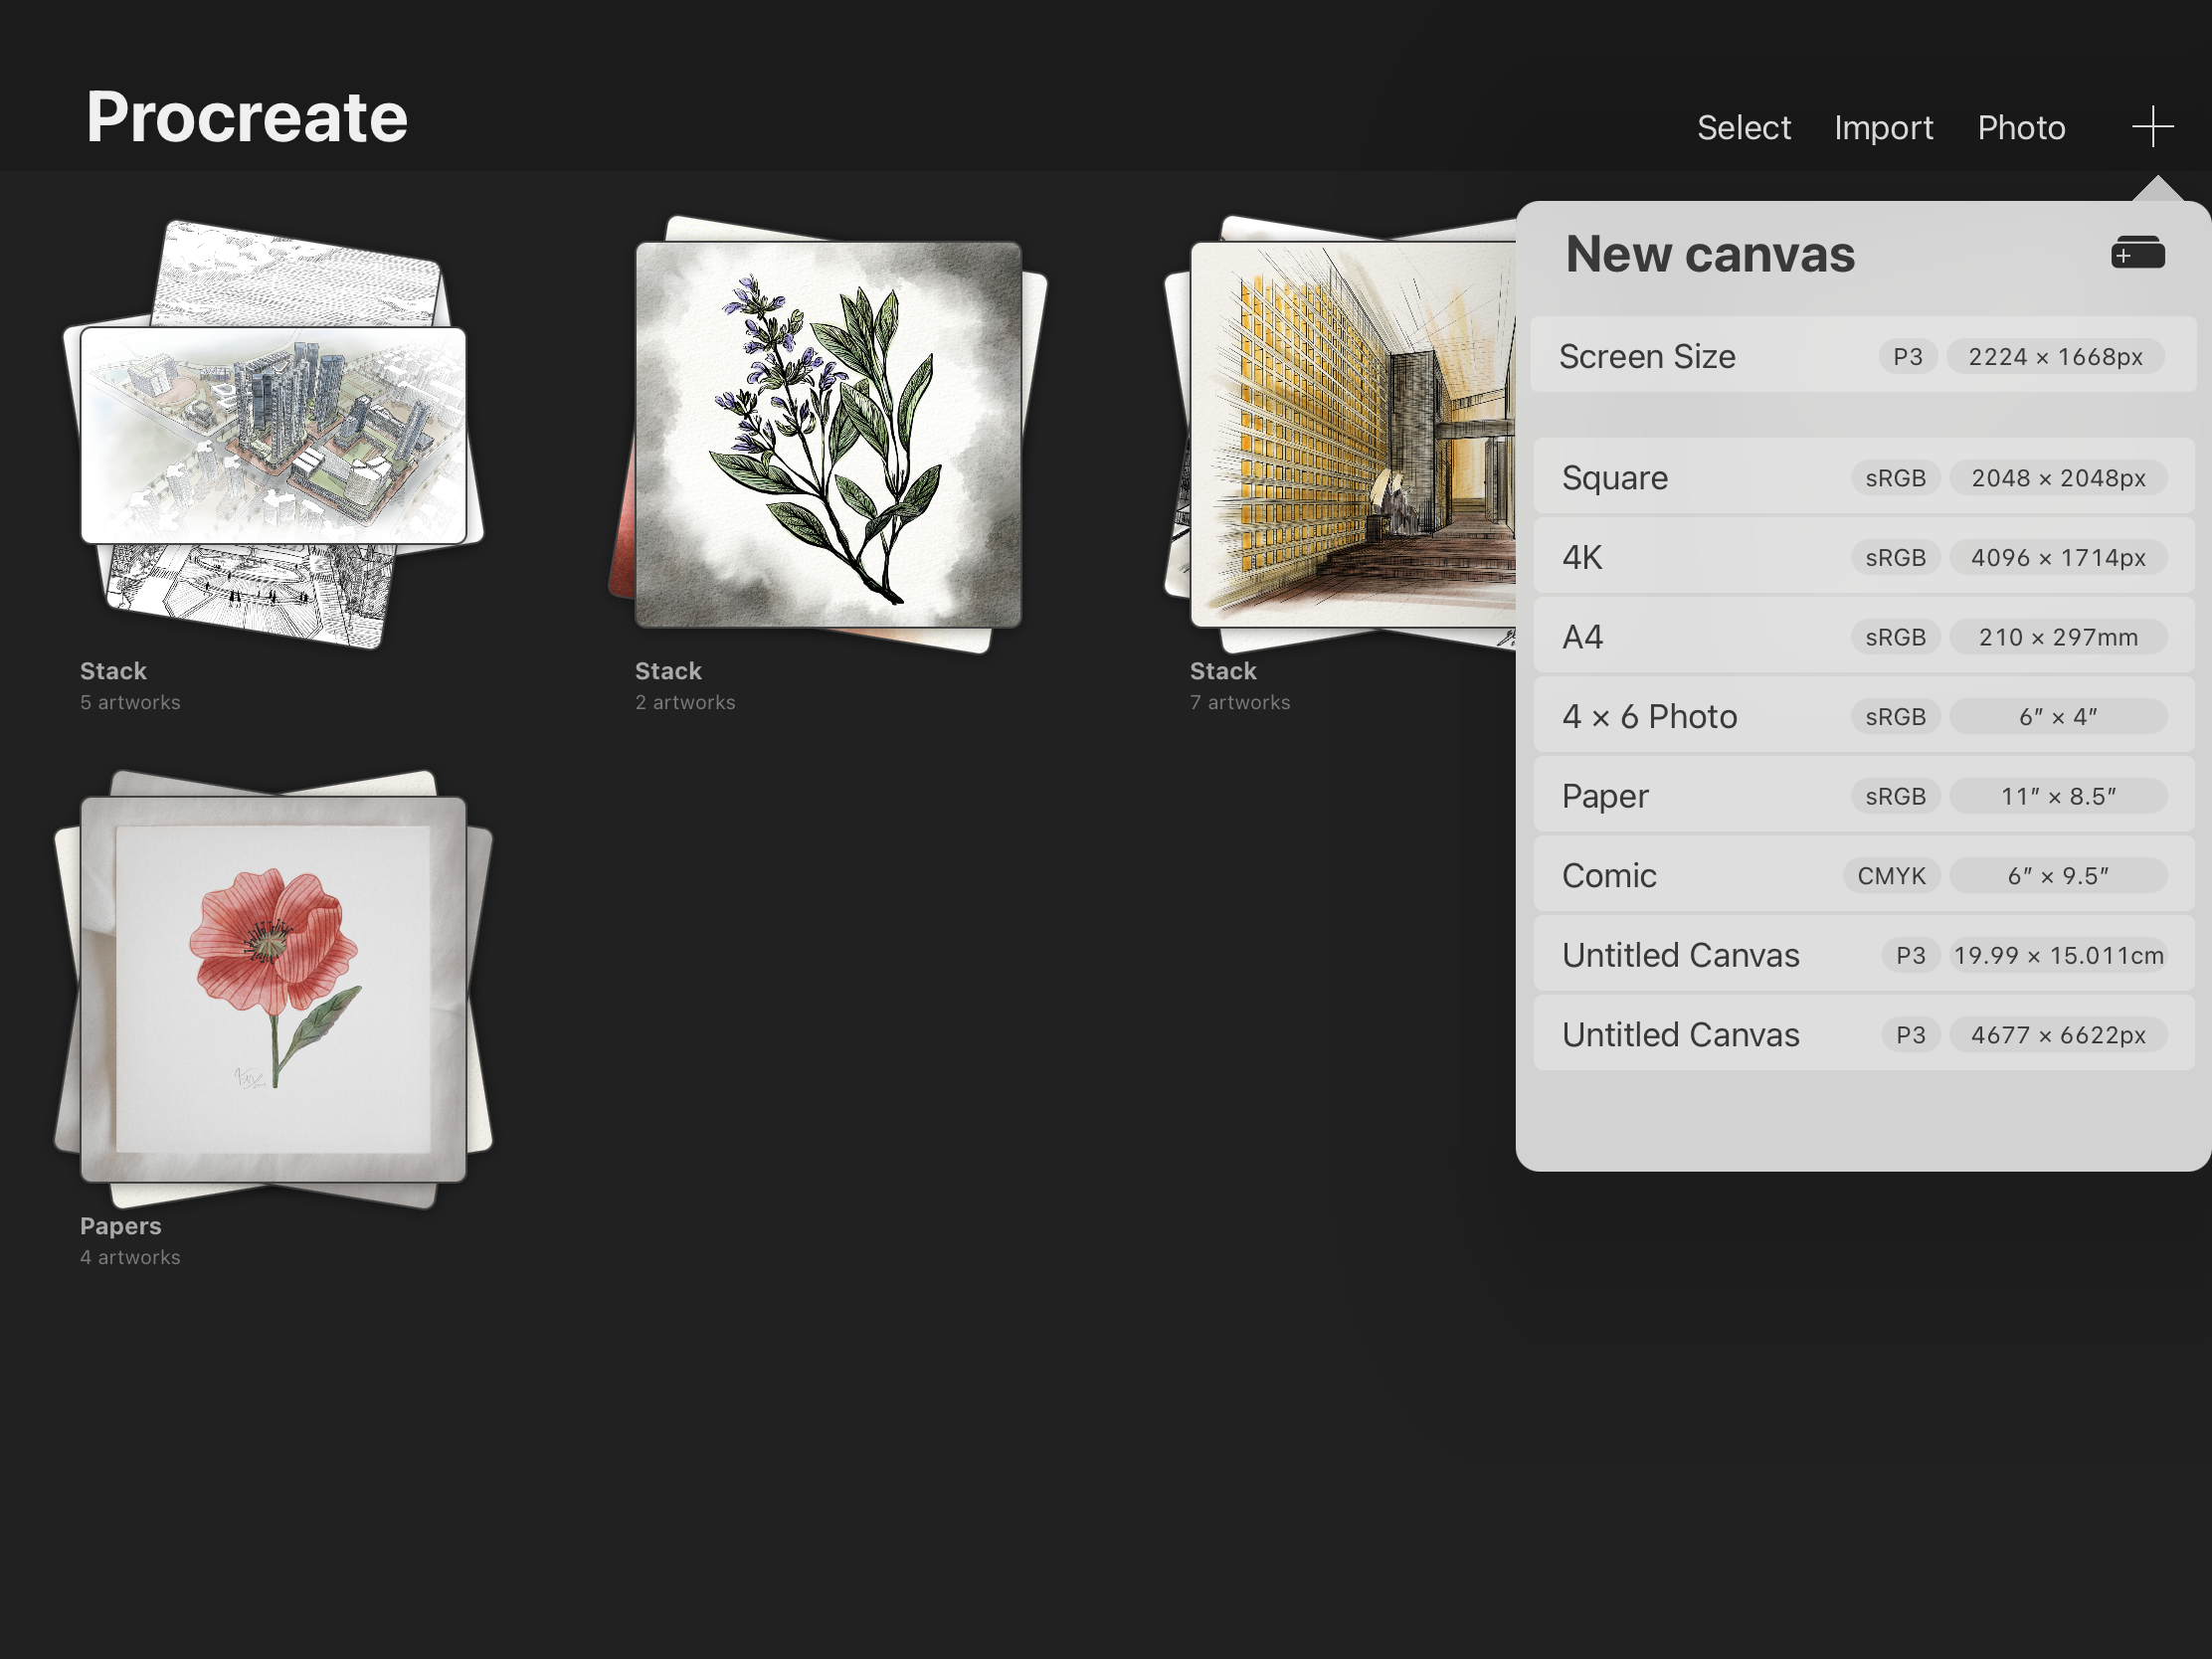
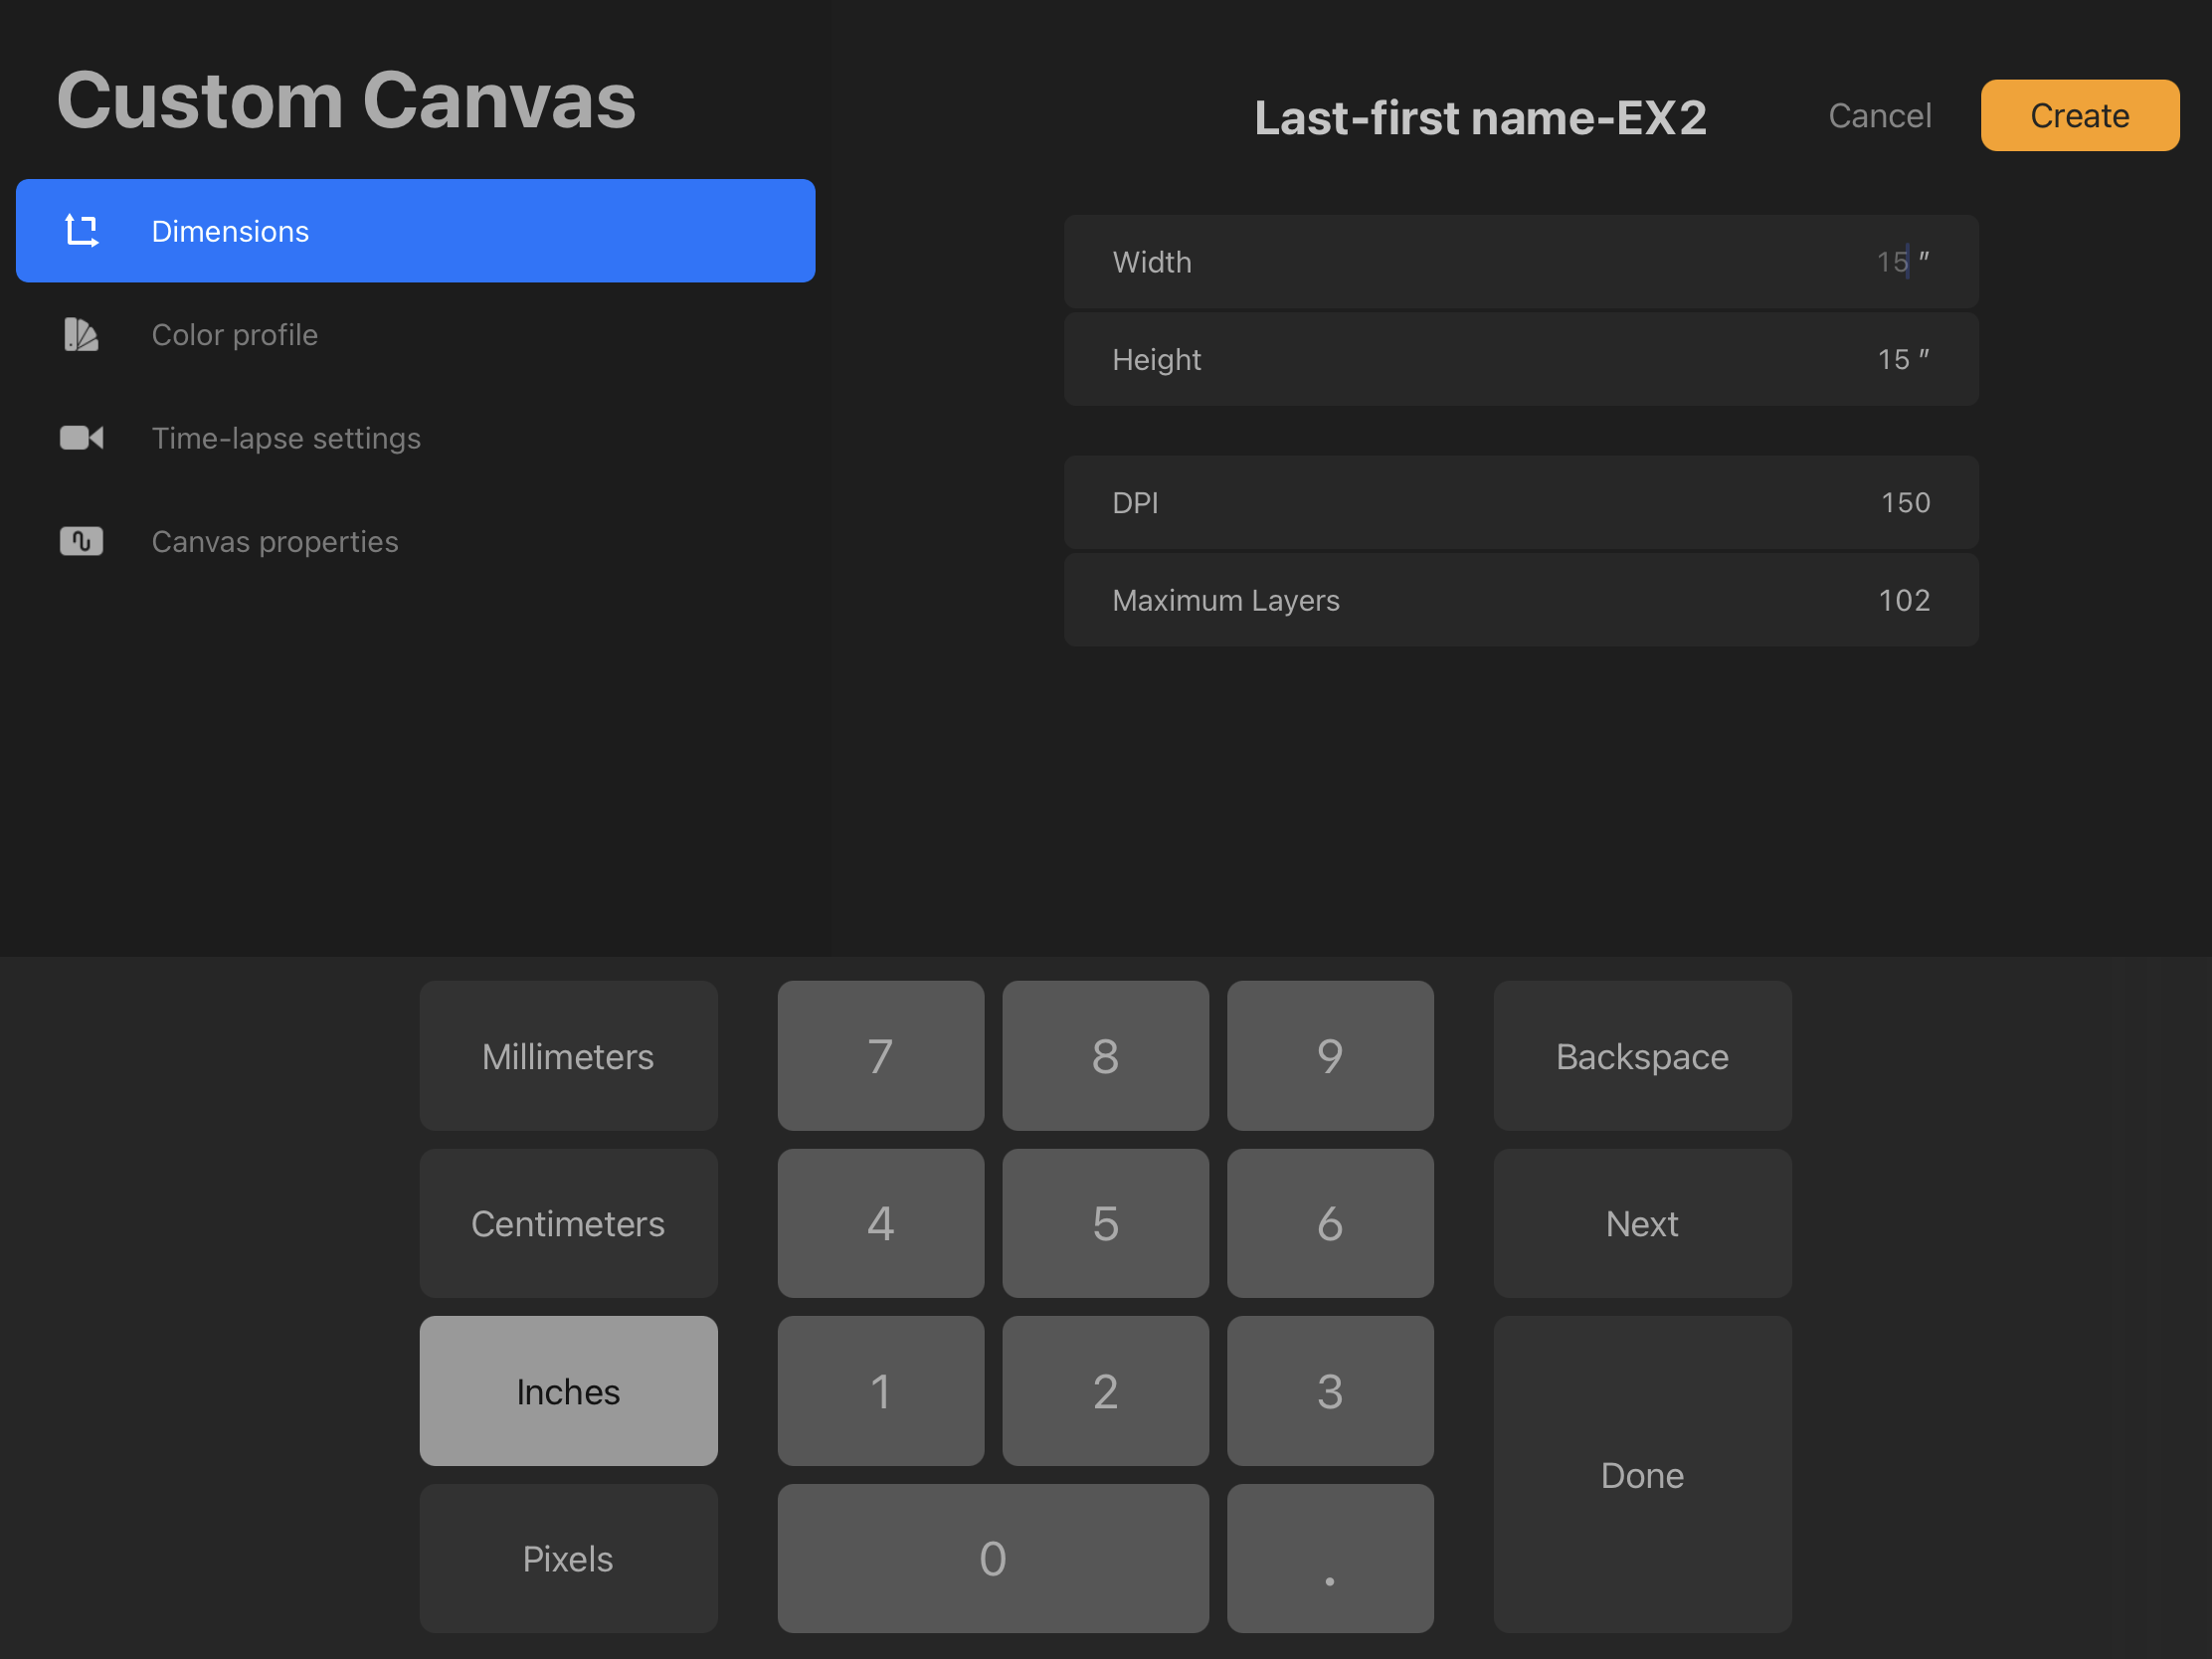
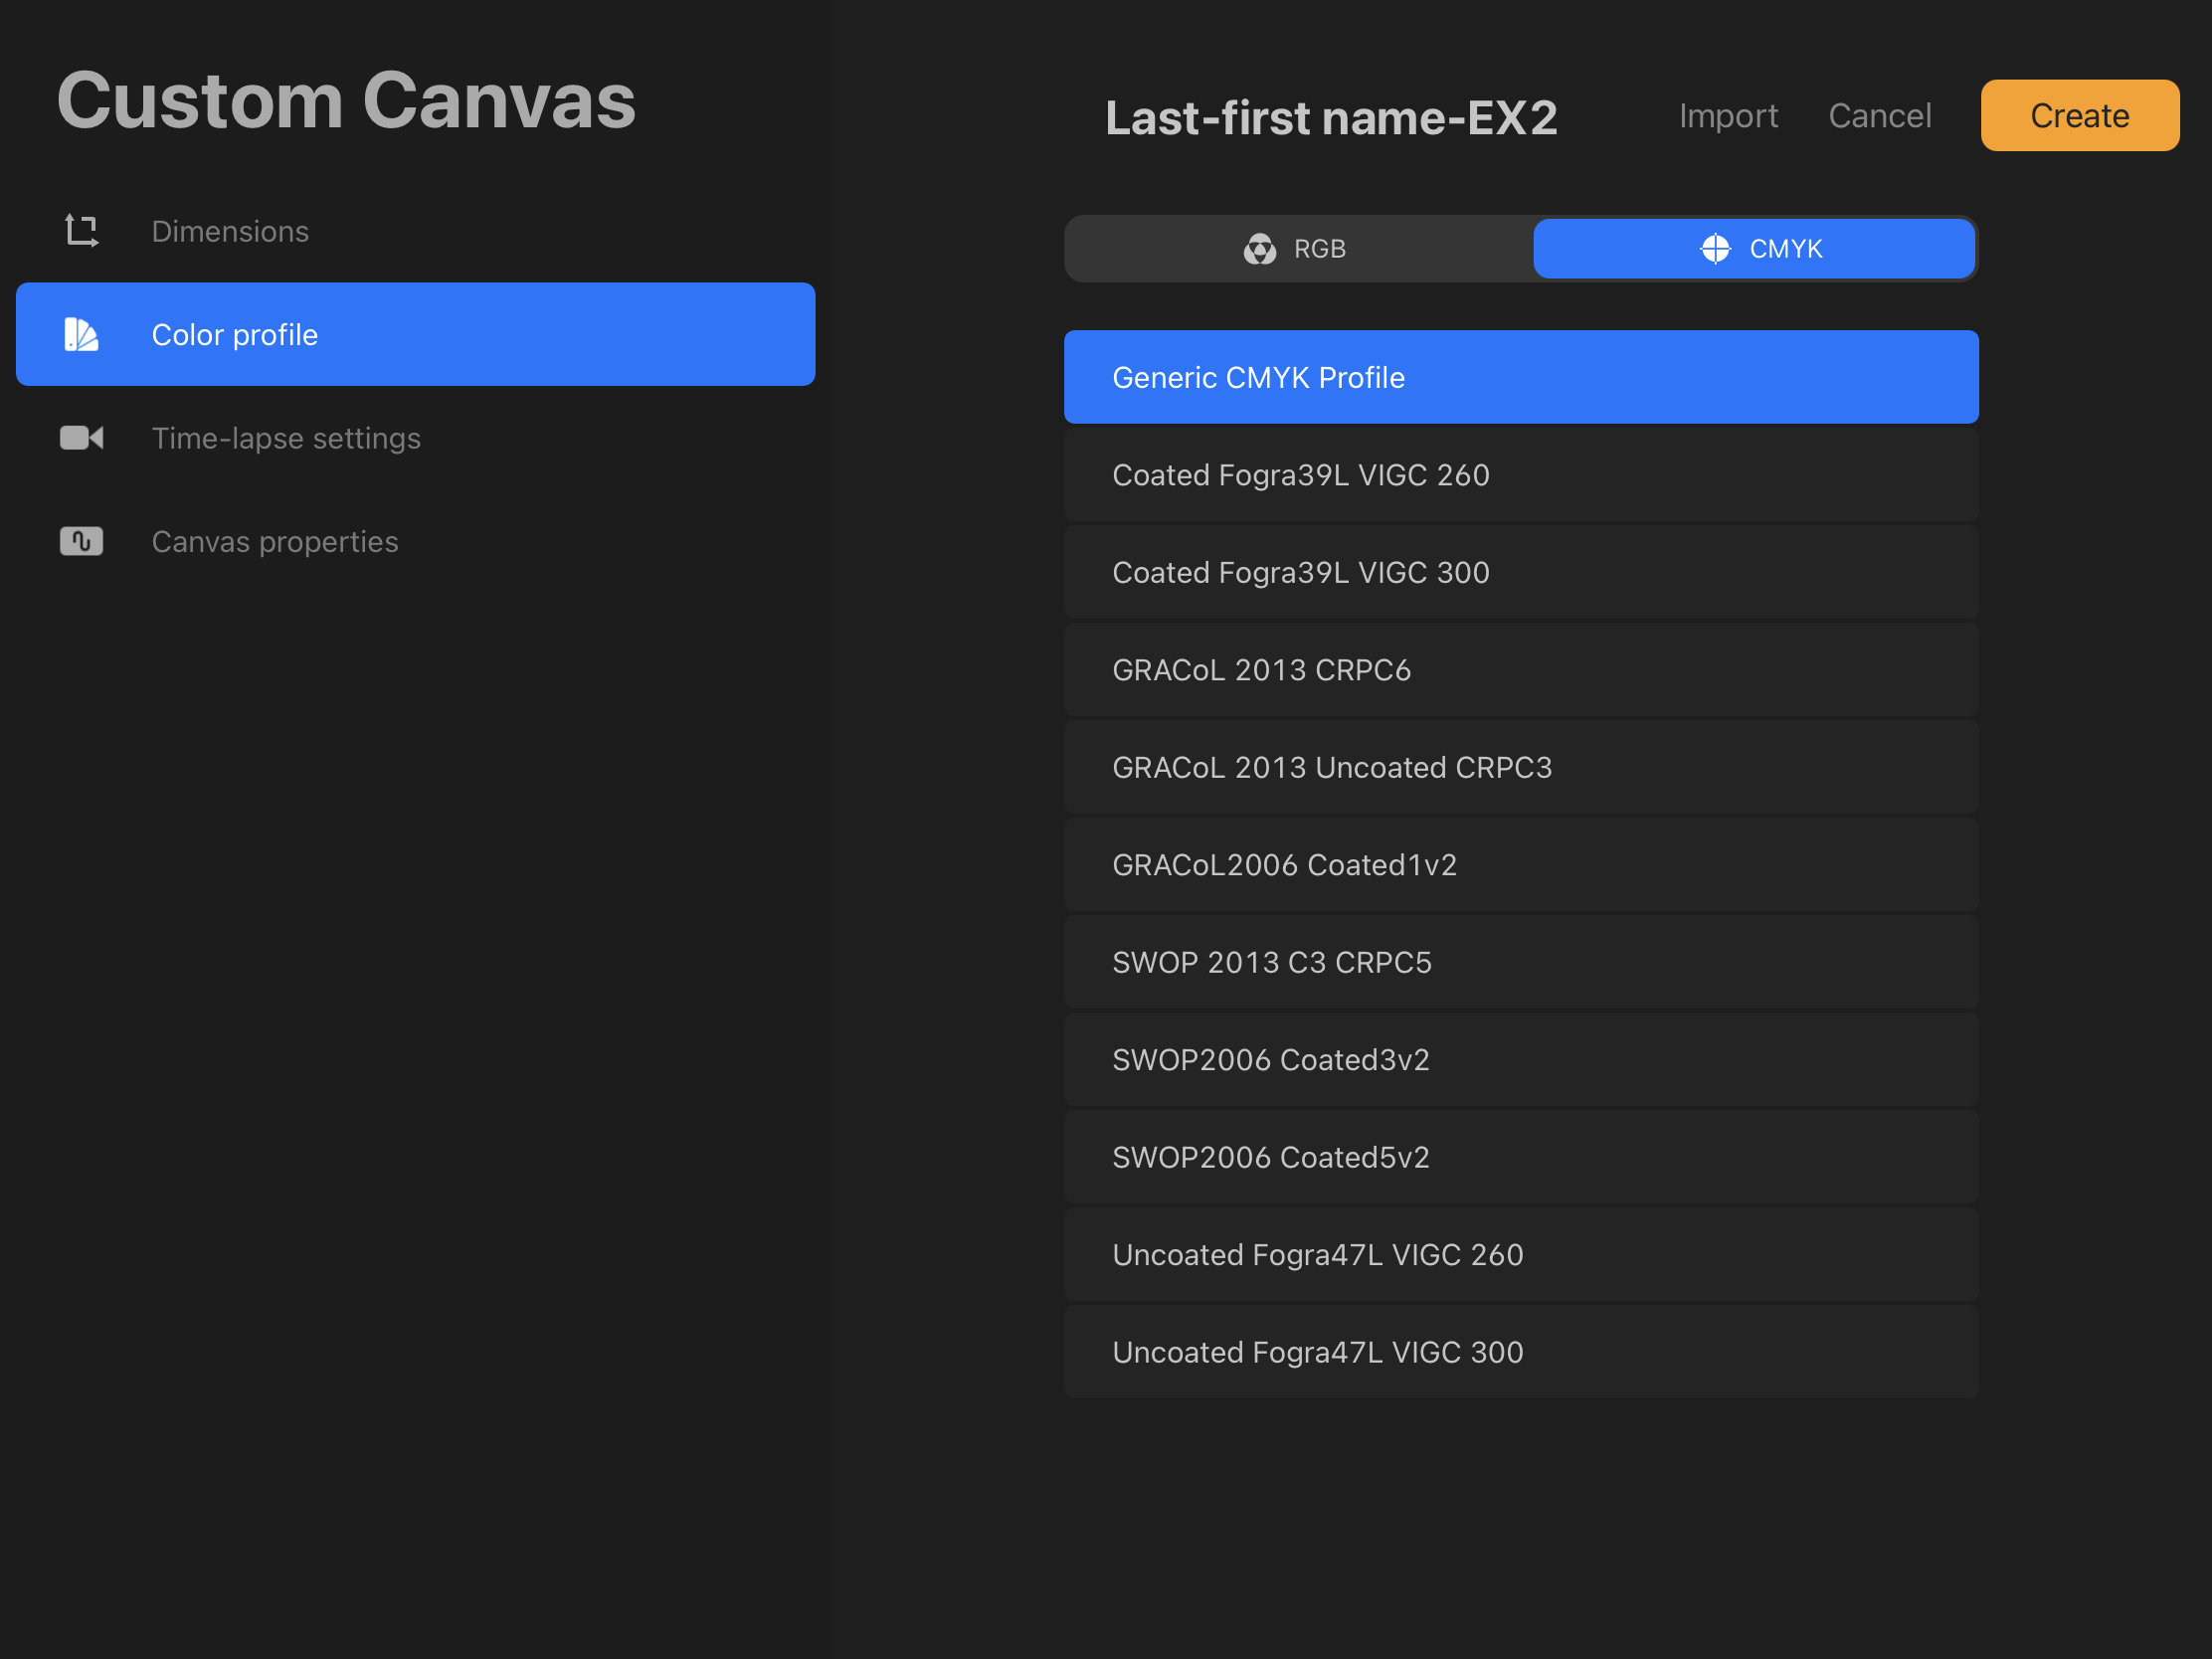
Create a new project.
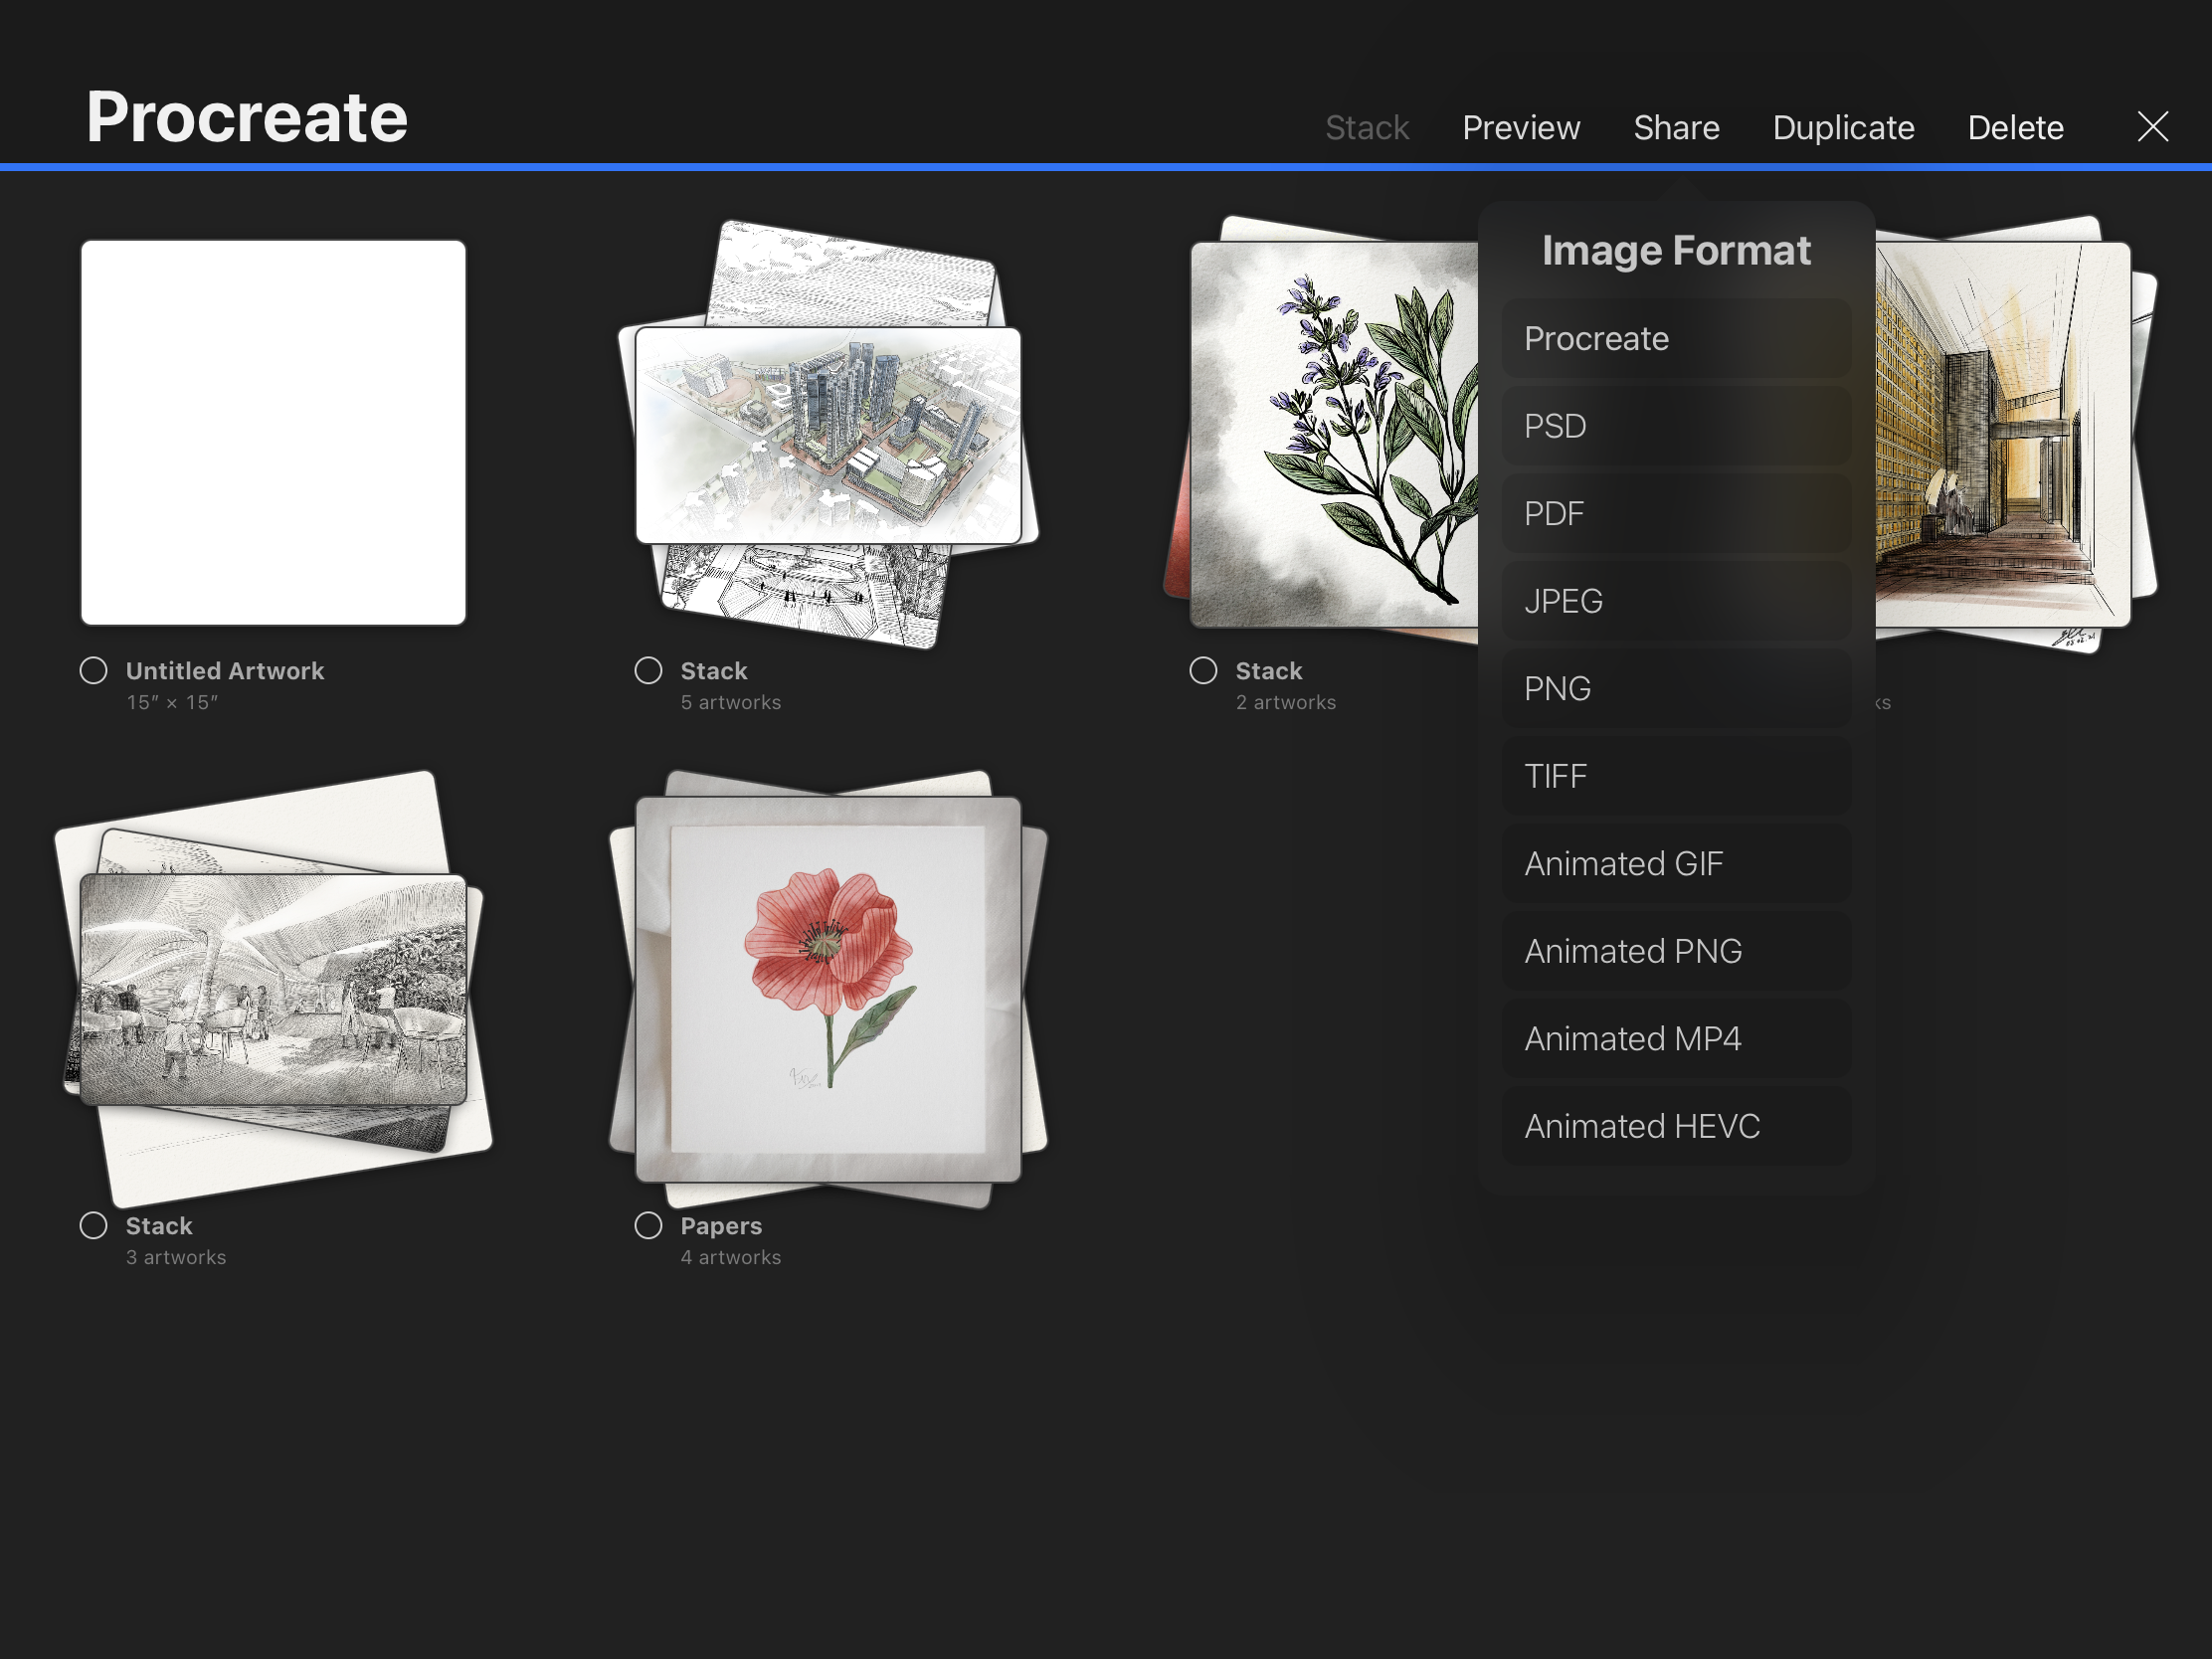
Select and share a project in different formats.
Import photos/images from iCloud.
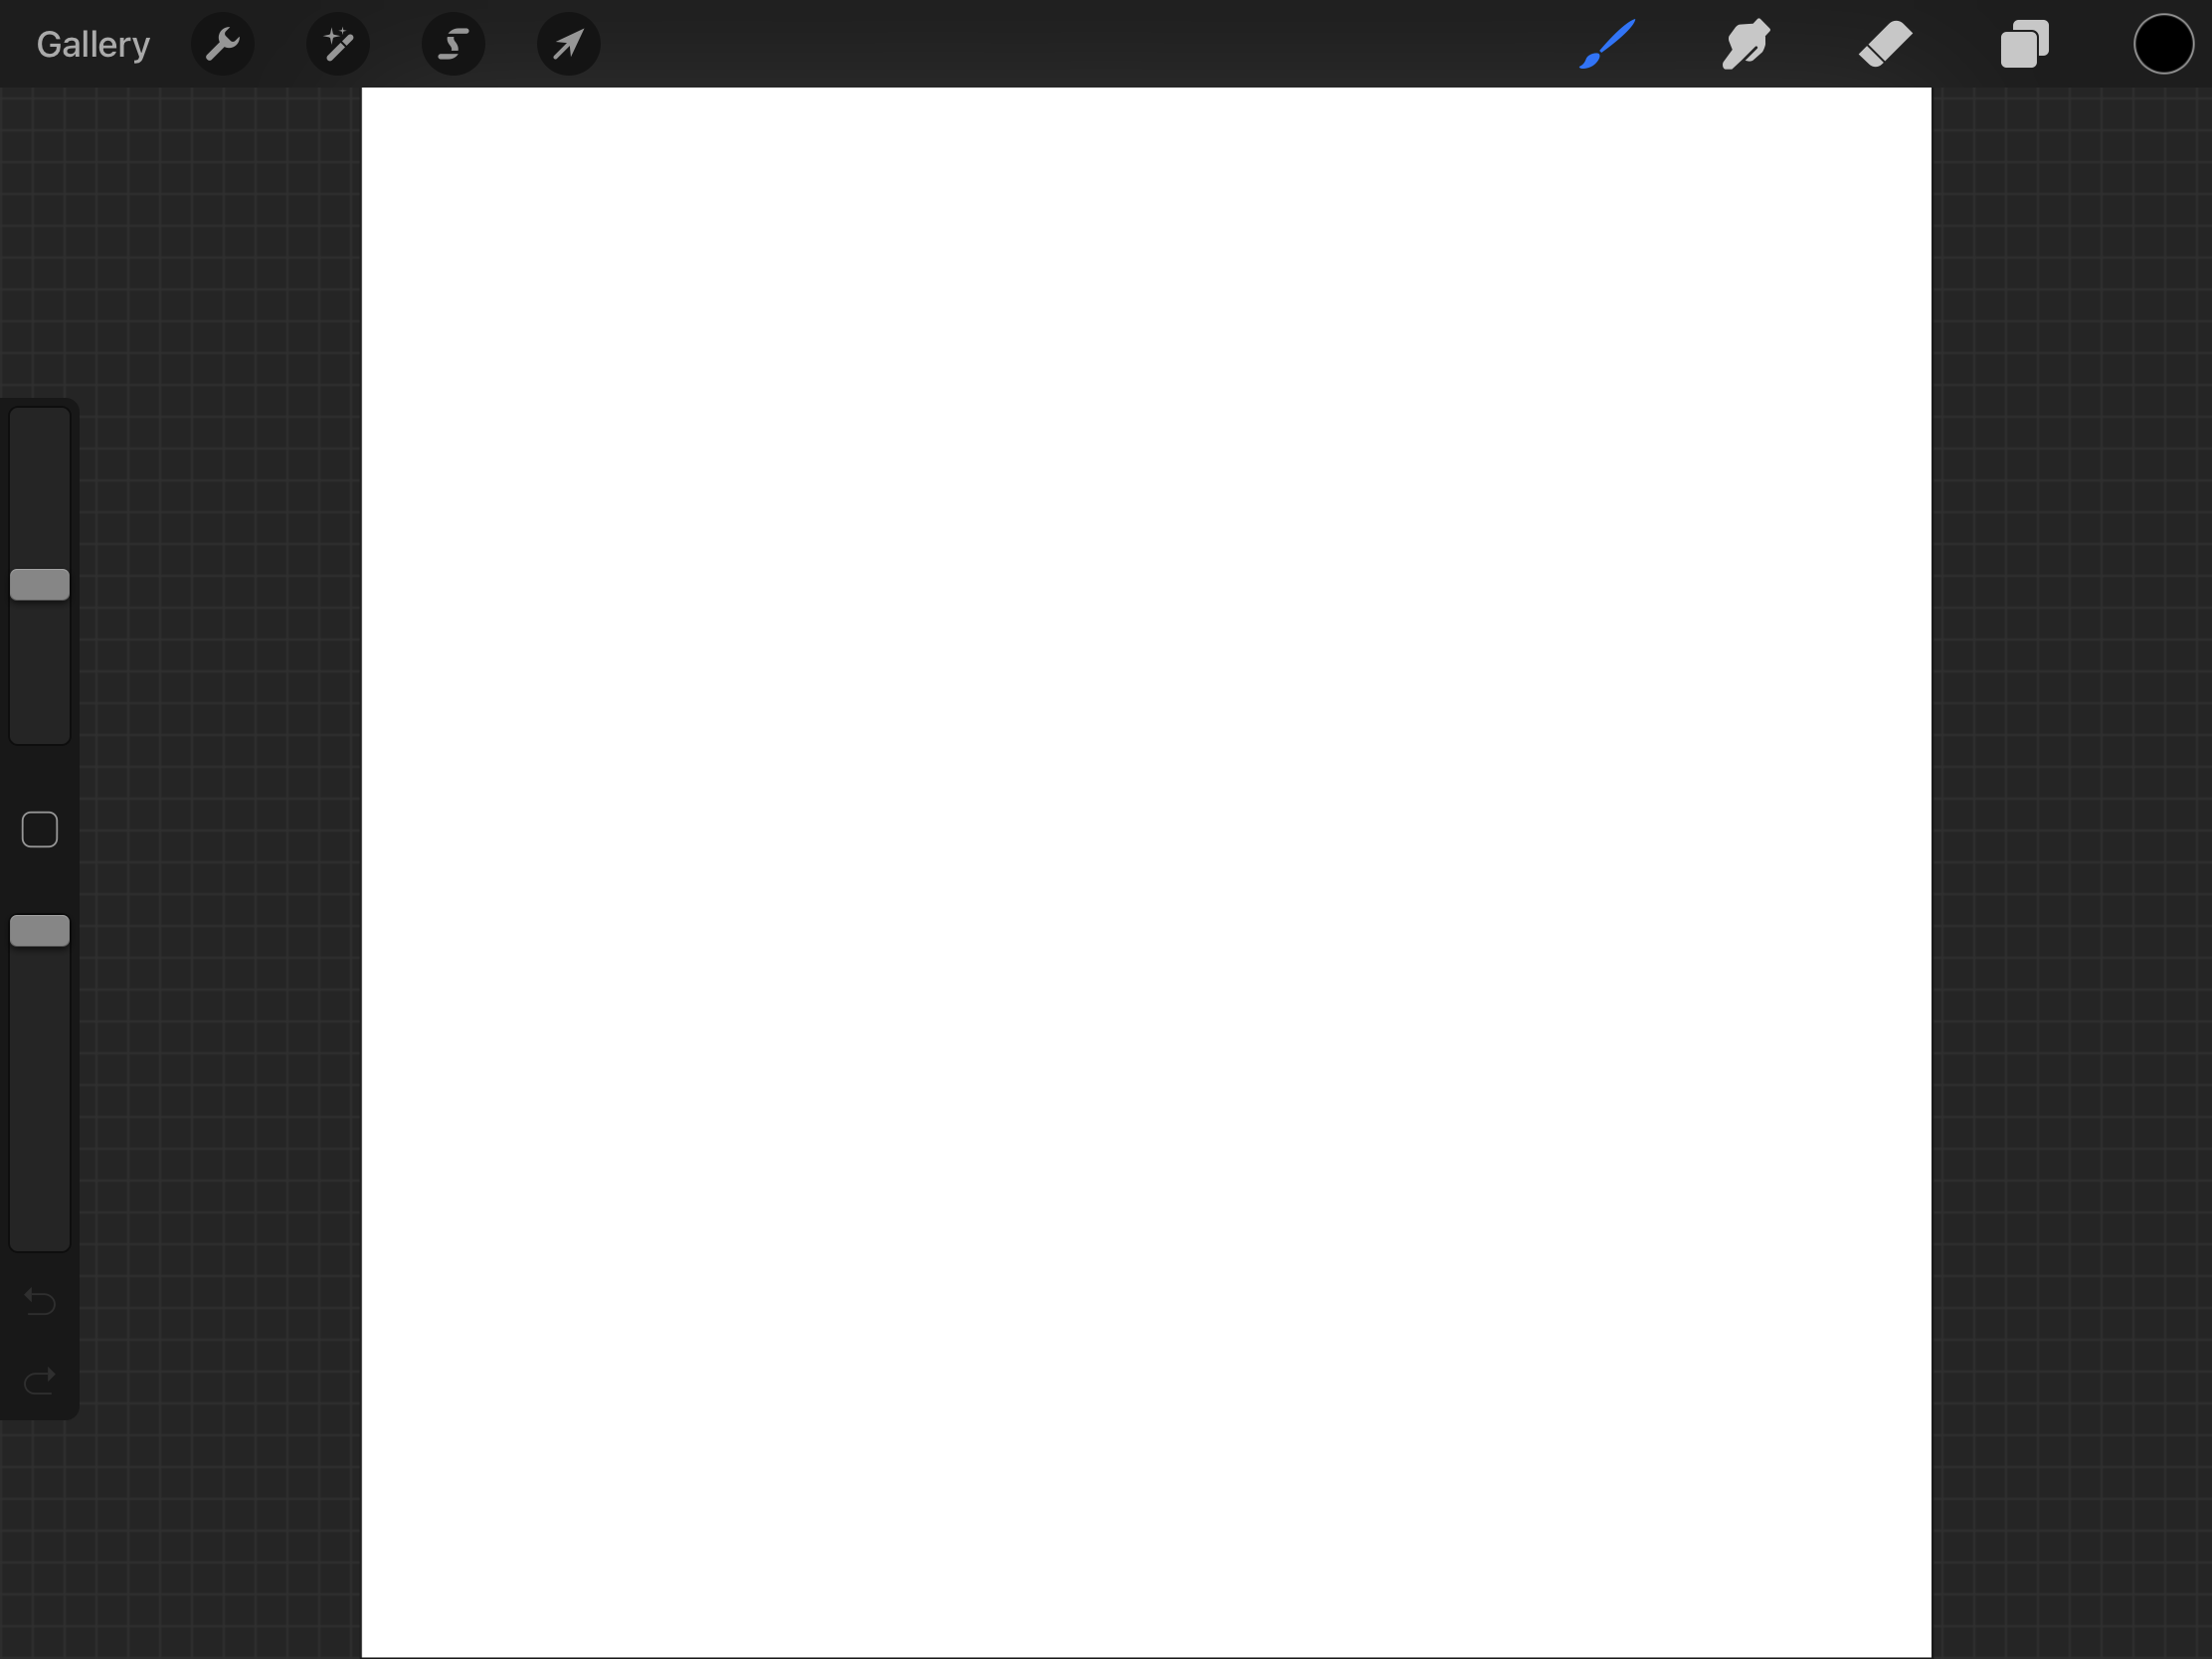
Project (called artwork or canvas)
Project is a working area of your artwork. There are three main parts to the interface. Painting Tools on the top right, Sidebar on the left side, and Editing Tools on the top left.
Painting tools
- Paint
- Smudge
- Erase
- Layers
- Colors
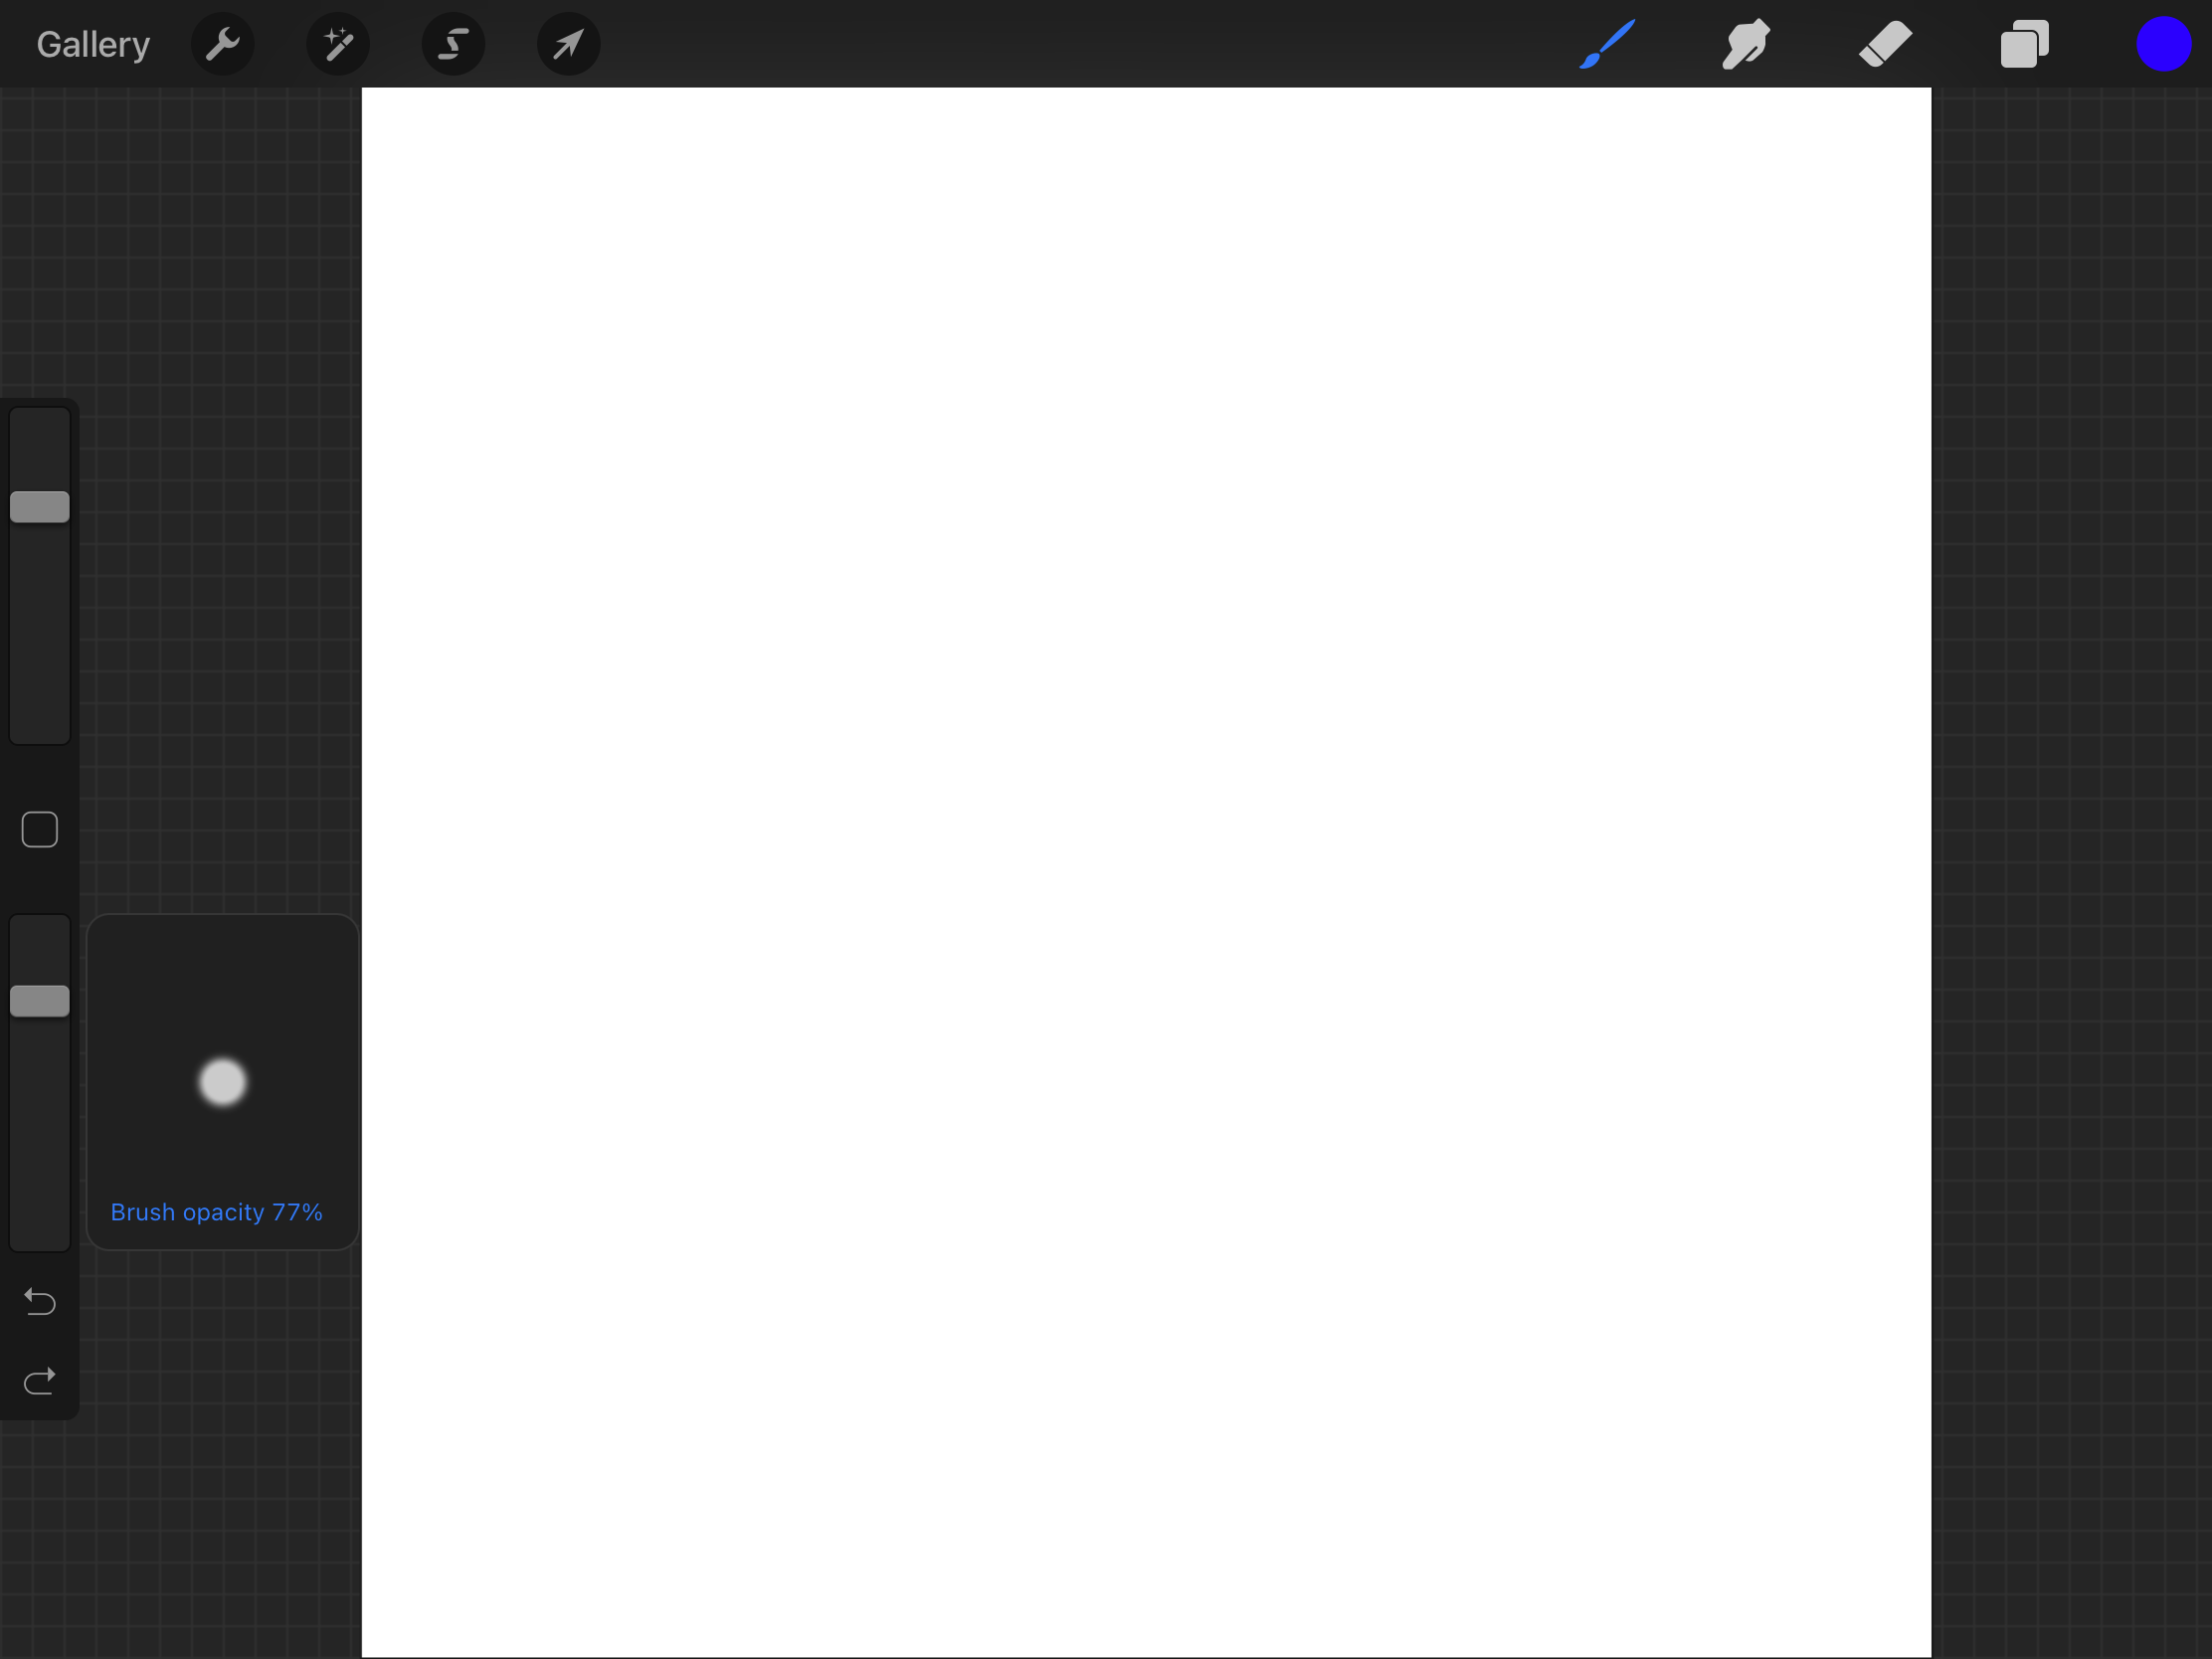
Sidebar
- Brush size
- Modify button
- Brush opacity
- Undo/Redo arrows
Editing tools
- Gallery
- Actions
- Adjustments
- Selections
- Transform
Gestures and Apple pencil
Gestures
Based on the instructor’s experience, using an Apple pencil will get the best result in paint/smudge/erase because of the pressure and tilt sensitivity. But except for these three, using your figures will get the best controllability on the application.
- Pinch to Zoom
- Pinch-twist to Rotate
- Quick pinch to Fit to screen
- Two-finger tap to Undo
- Three-finger tap to Redo
- Three-finger scrub to Clear
- Three-finger swipe to Cut/Copy/Paste
- Draw and hold for QuickShape
- Hold a layer to Move the layer or Group the layer with another layer
- Two-figure tap on a layer for Layer Opacity
(CO3) Understand various brushes, layers, and colors
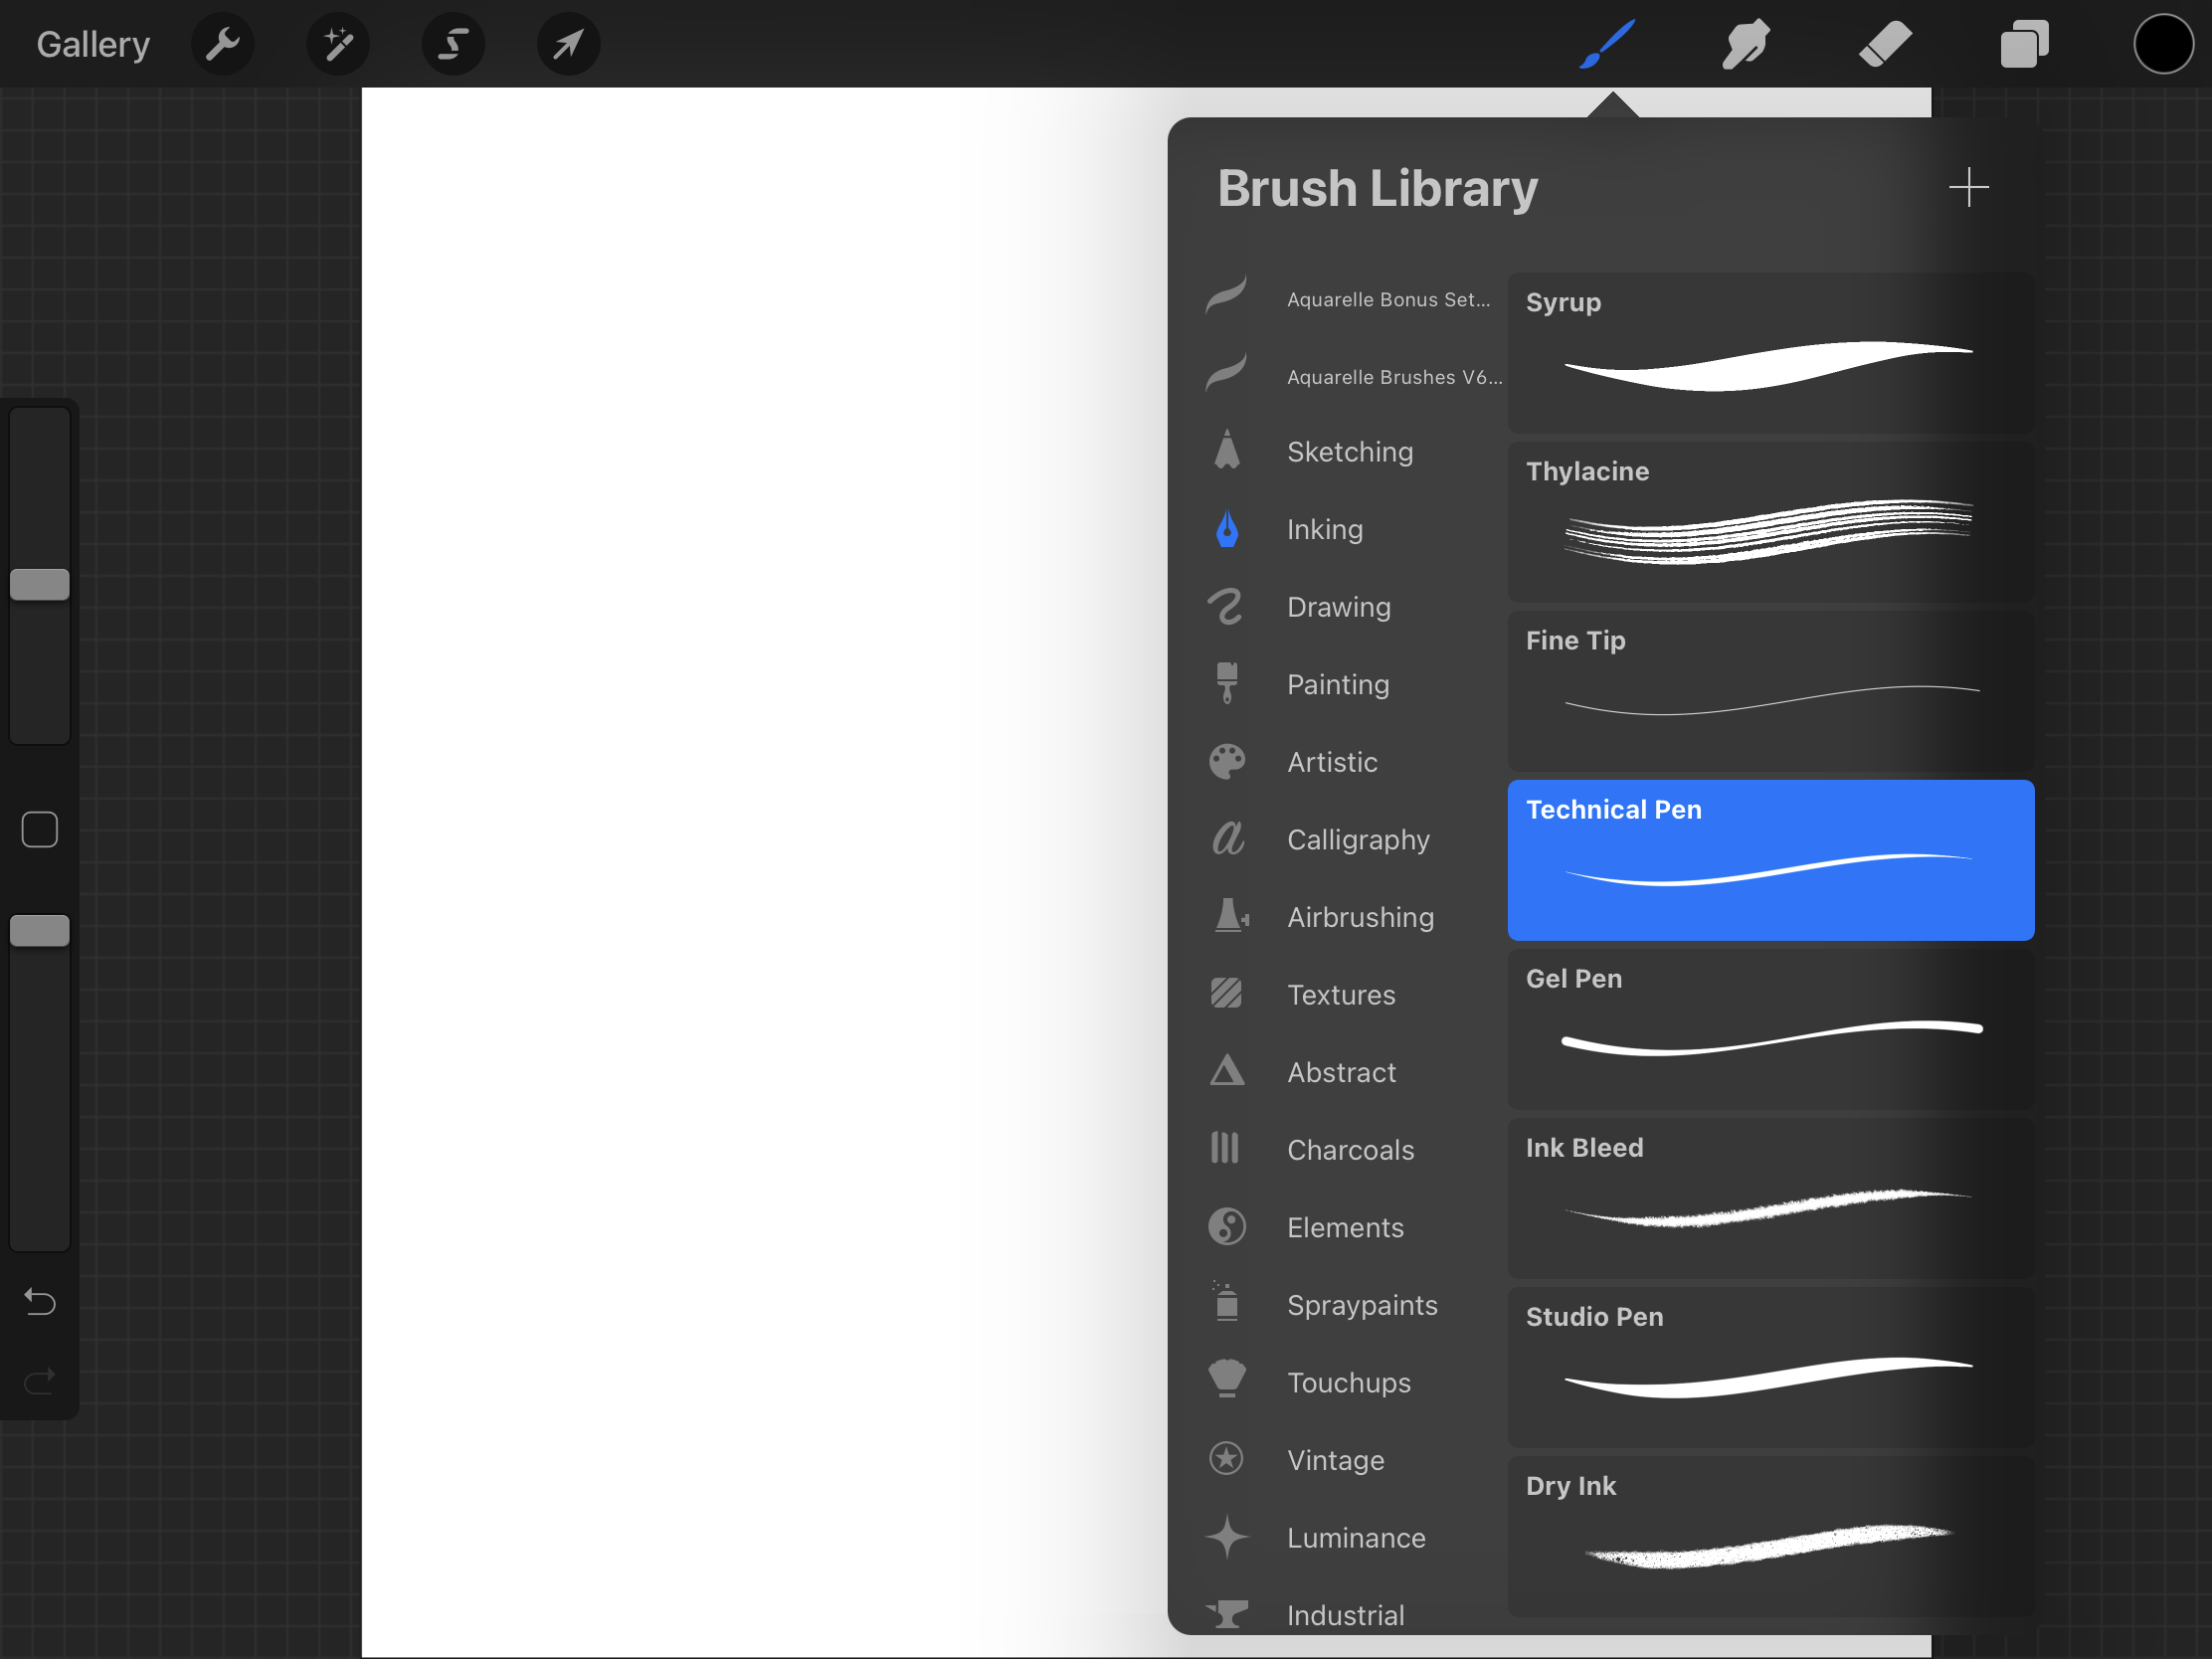
Brush Library for Paint, Smudge, and Erase
- Paint – Sketch, ink, paint, color, shade, and texture in a variety of mediums.
- Smudge – Blend your artwork, smooth out strokes, and mix color.
- Erase – Paint away mistakes, remove pigment, carve out areas of transparency, and soften your artwork.
- [STEP 01] Confirm the current layer.
- [STEP 02] Tap the brush tool > Select a brush set from the Brush library > Select a Brush.
- [STEP 03] Select color from the Colors tool.
- [STEP 04] Check the size and the transparency of your brushstrokes
Brush Sets
The left panel of the Brush library lists the Brush Sets sorted by medium style.
Custom Brush Sets
You can create your own Brush sets by tapping [+] on the top of the Brush sets and dragging and dropping on the settings you made.
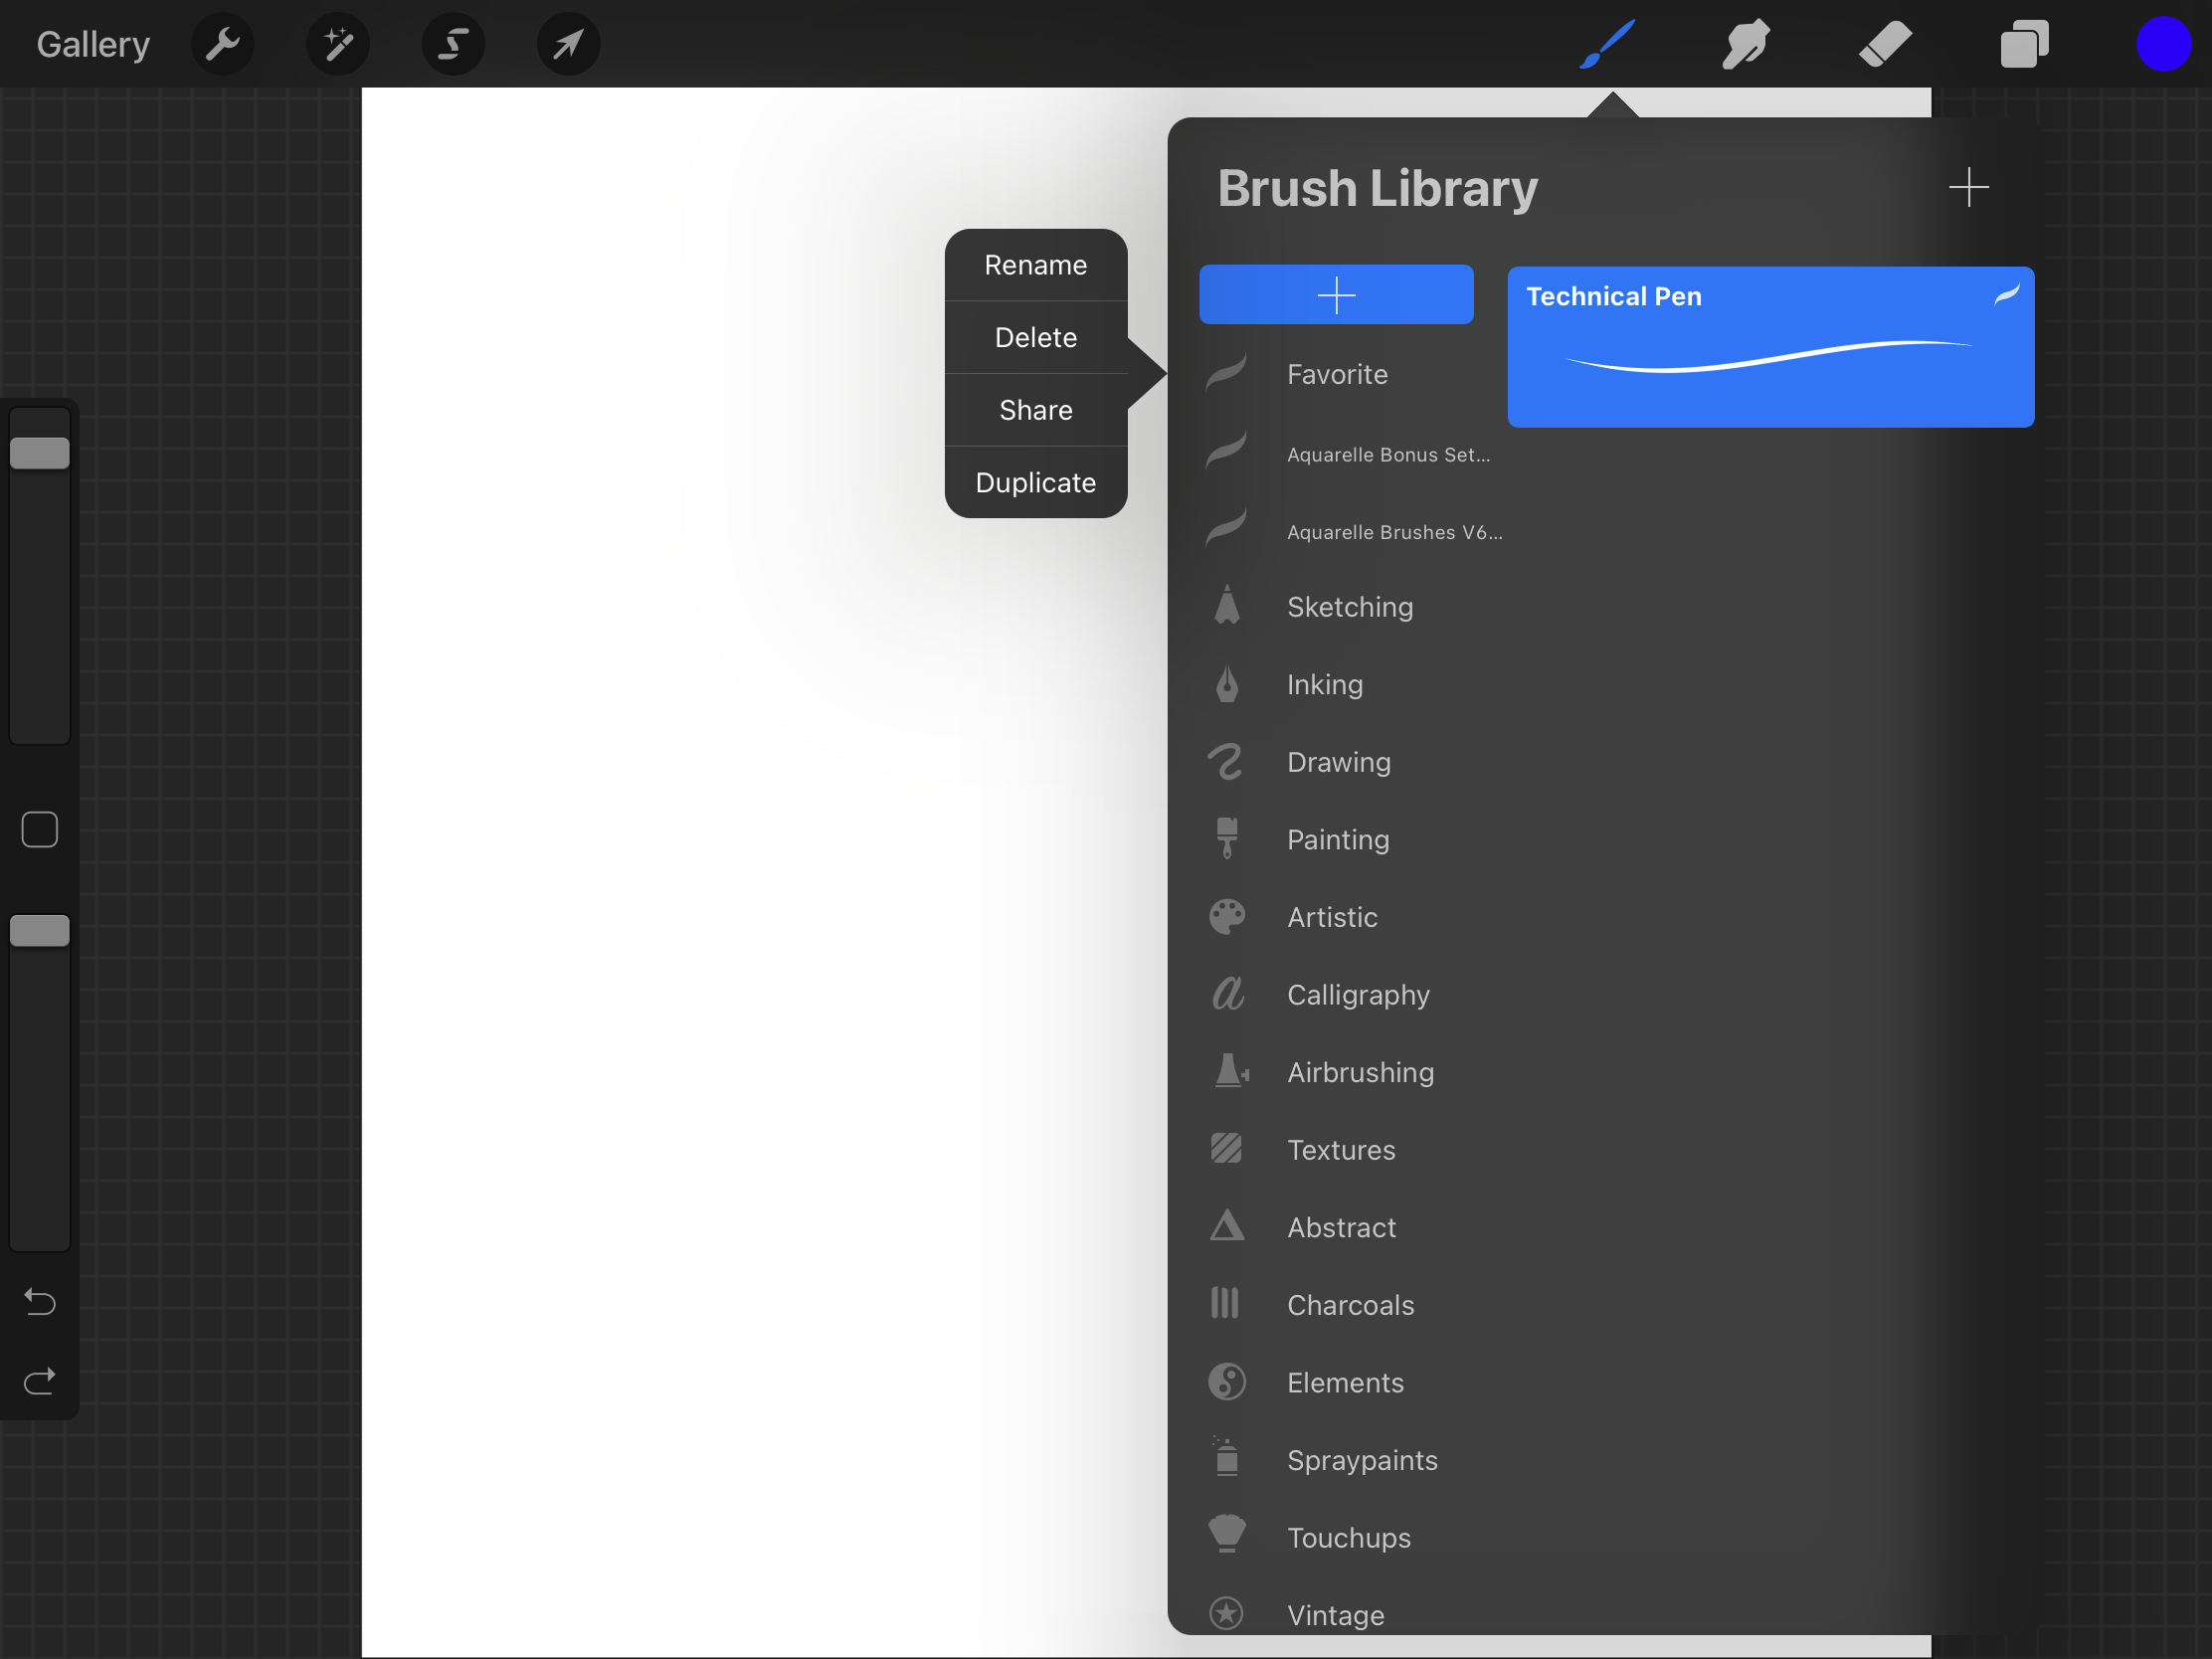
Import Brush Sets
You can also import Brush Sets that you purchased and downloaded. There are many great brush sets for Procreate users. After you download the brush set file (filename.brushset) on your iPad, you can import the set by opening the file. The set will automatically import to your Procreate.
Please refer to Creative Market’s tutorial on installing Procreate brushes for more information.
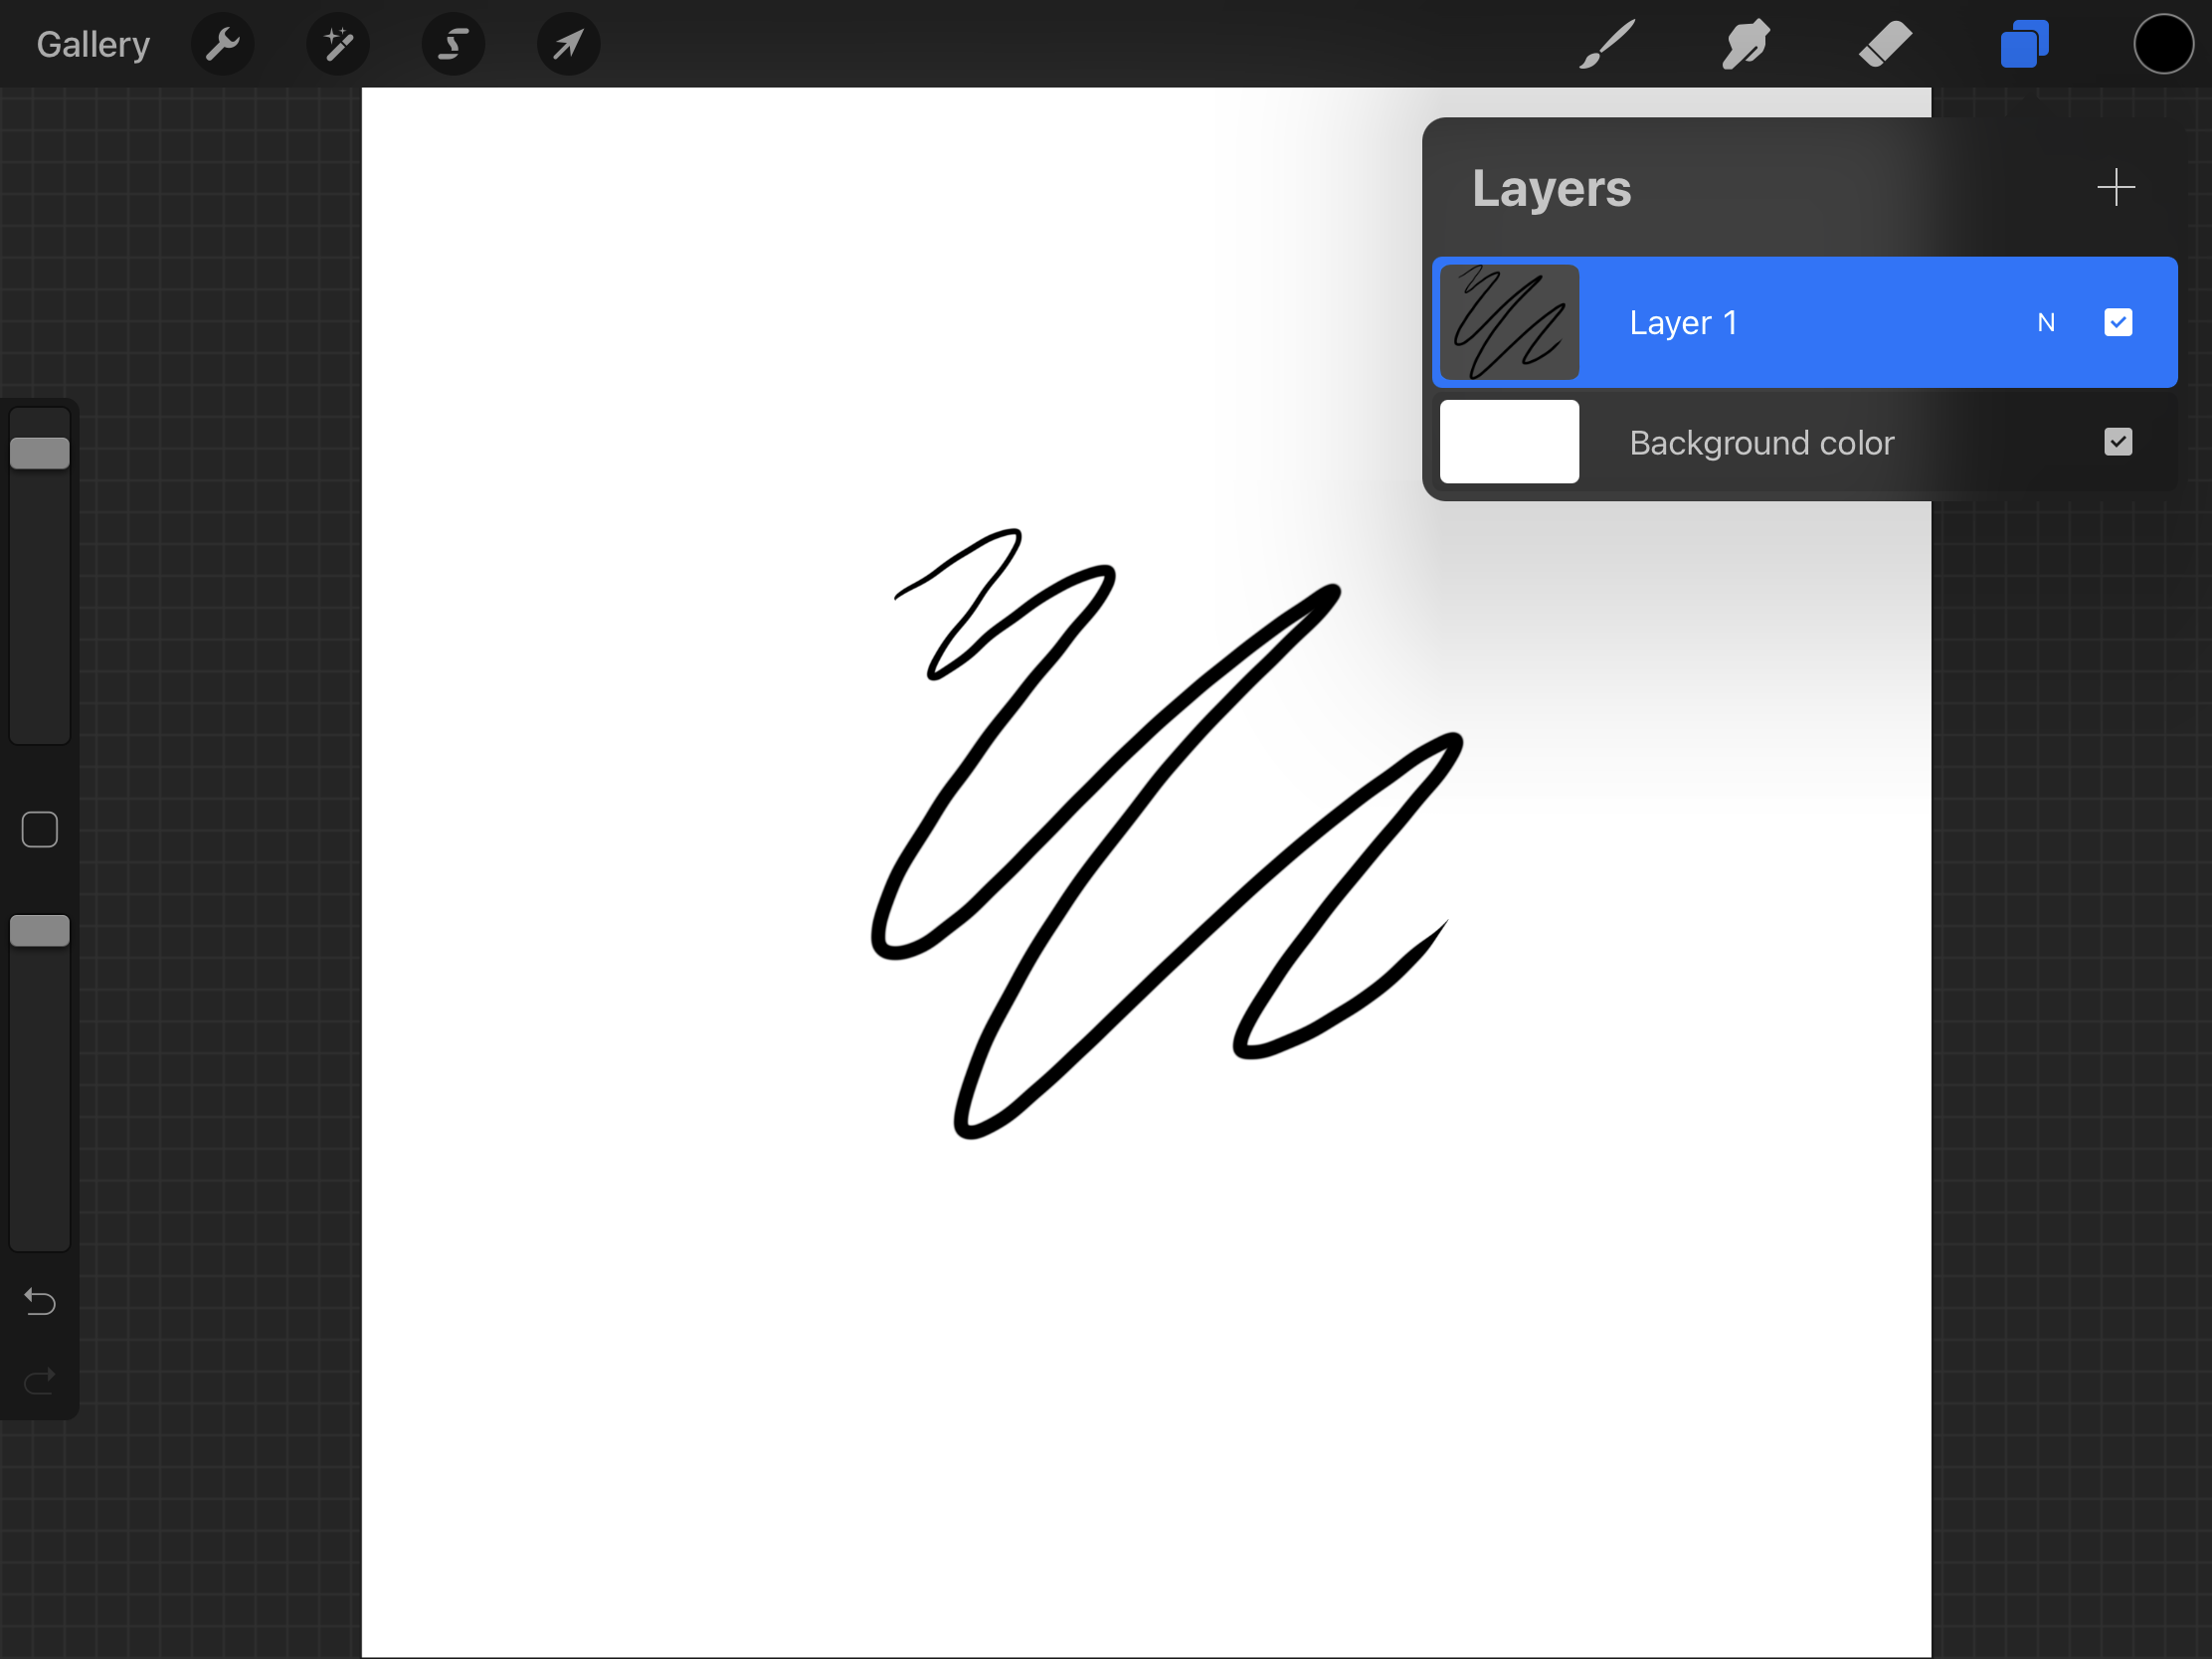
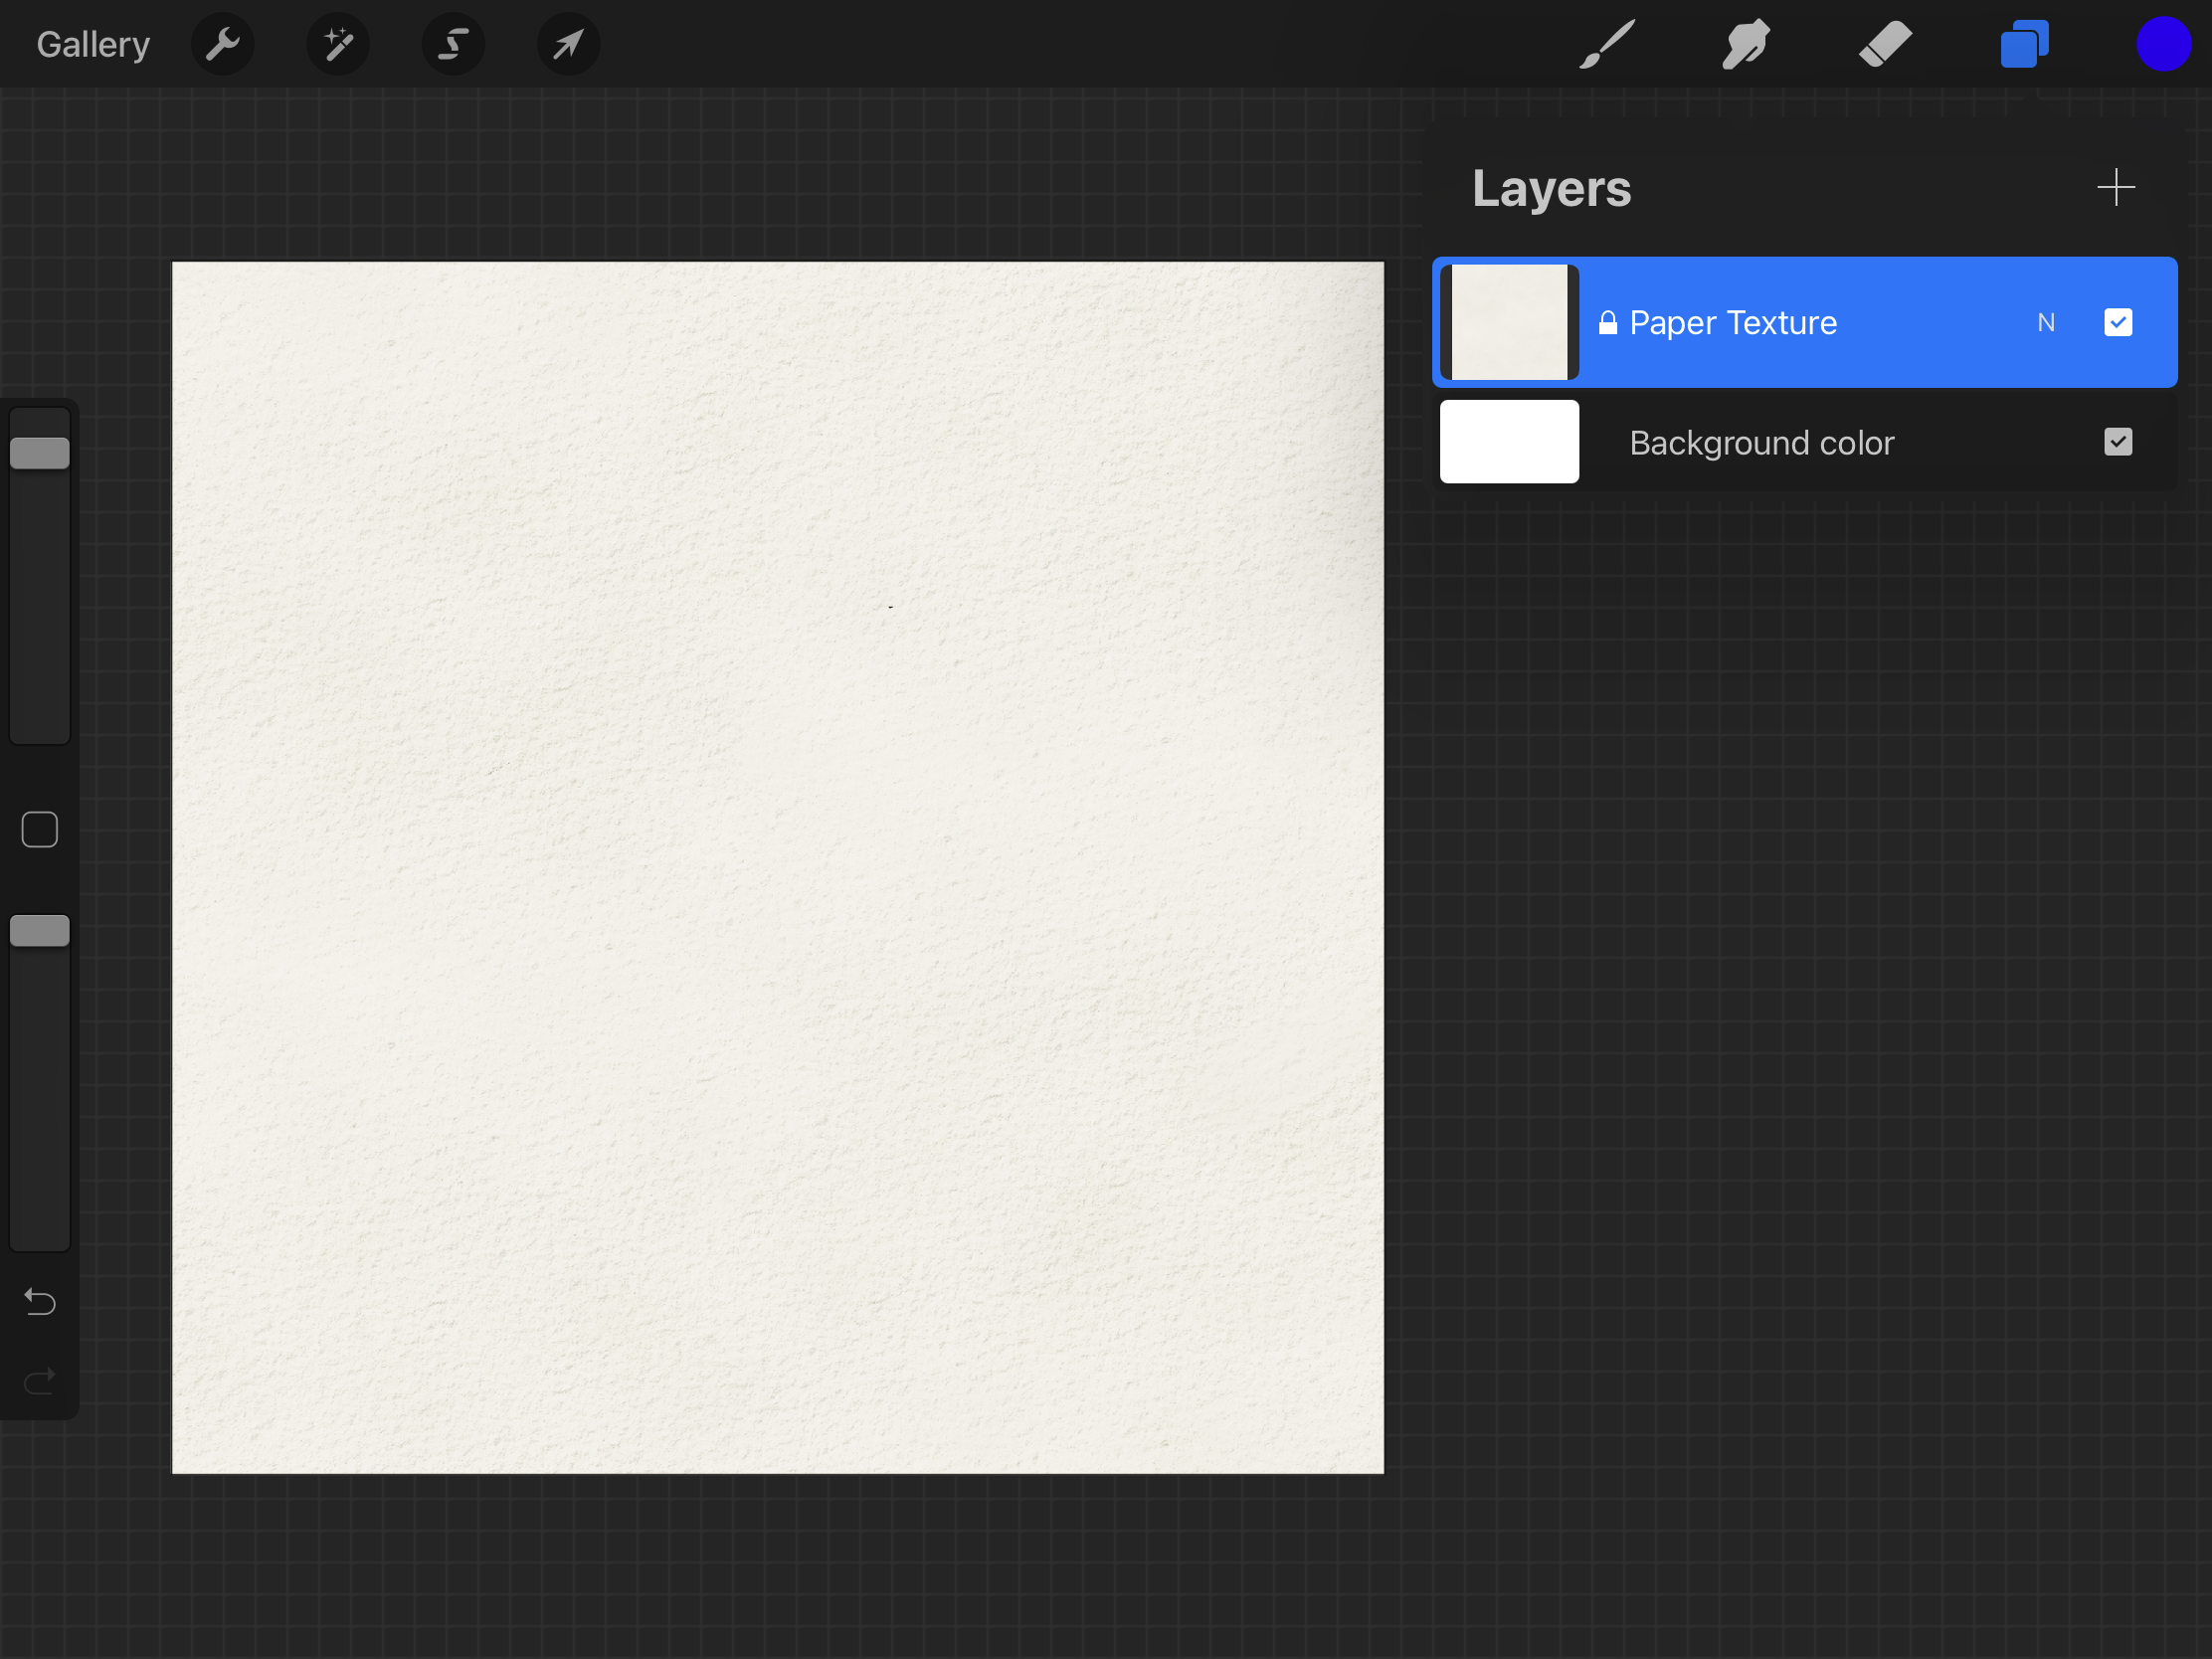
Layers
Background color
The default setting of the background color is white [#ffffff]. You can change the background color by tapping the Background color layer. If you want to make a transparent image, you can turn off the visibility.
Tip. Typically, the instructor adds a textured background image (e.g. watercolor paper, canvas, or craft paper) on a vary bottom layer and locks the layer to prevent any accidents.
Layers
Layers let you stack image elements on top of each other and adjust the element much easily. You can create a new layer by tapping the [+] on the top right corner of the Layers panel.
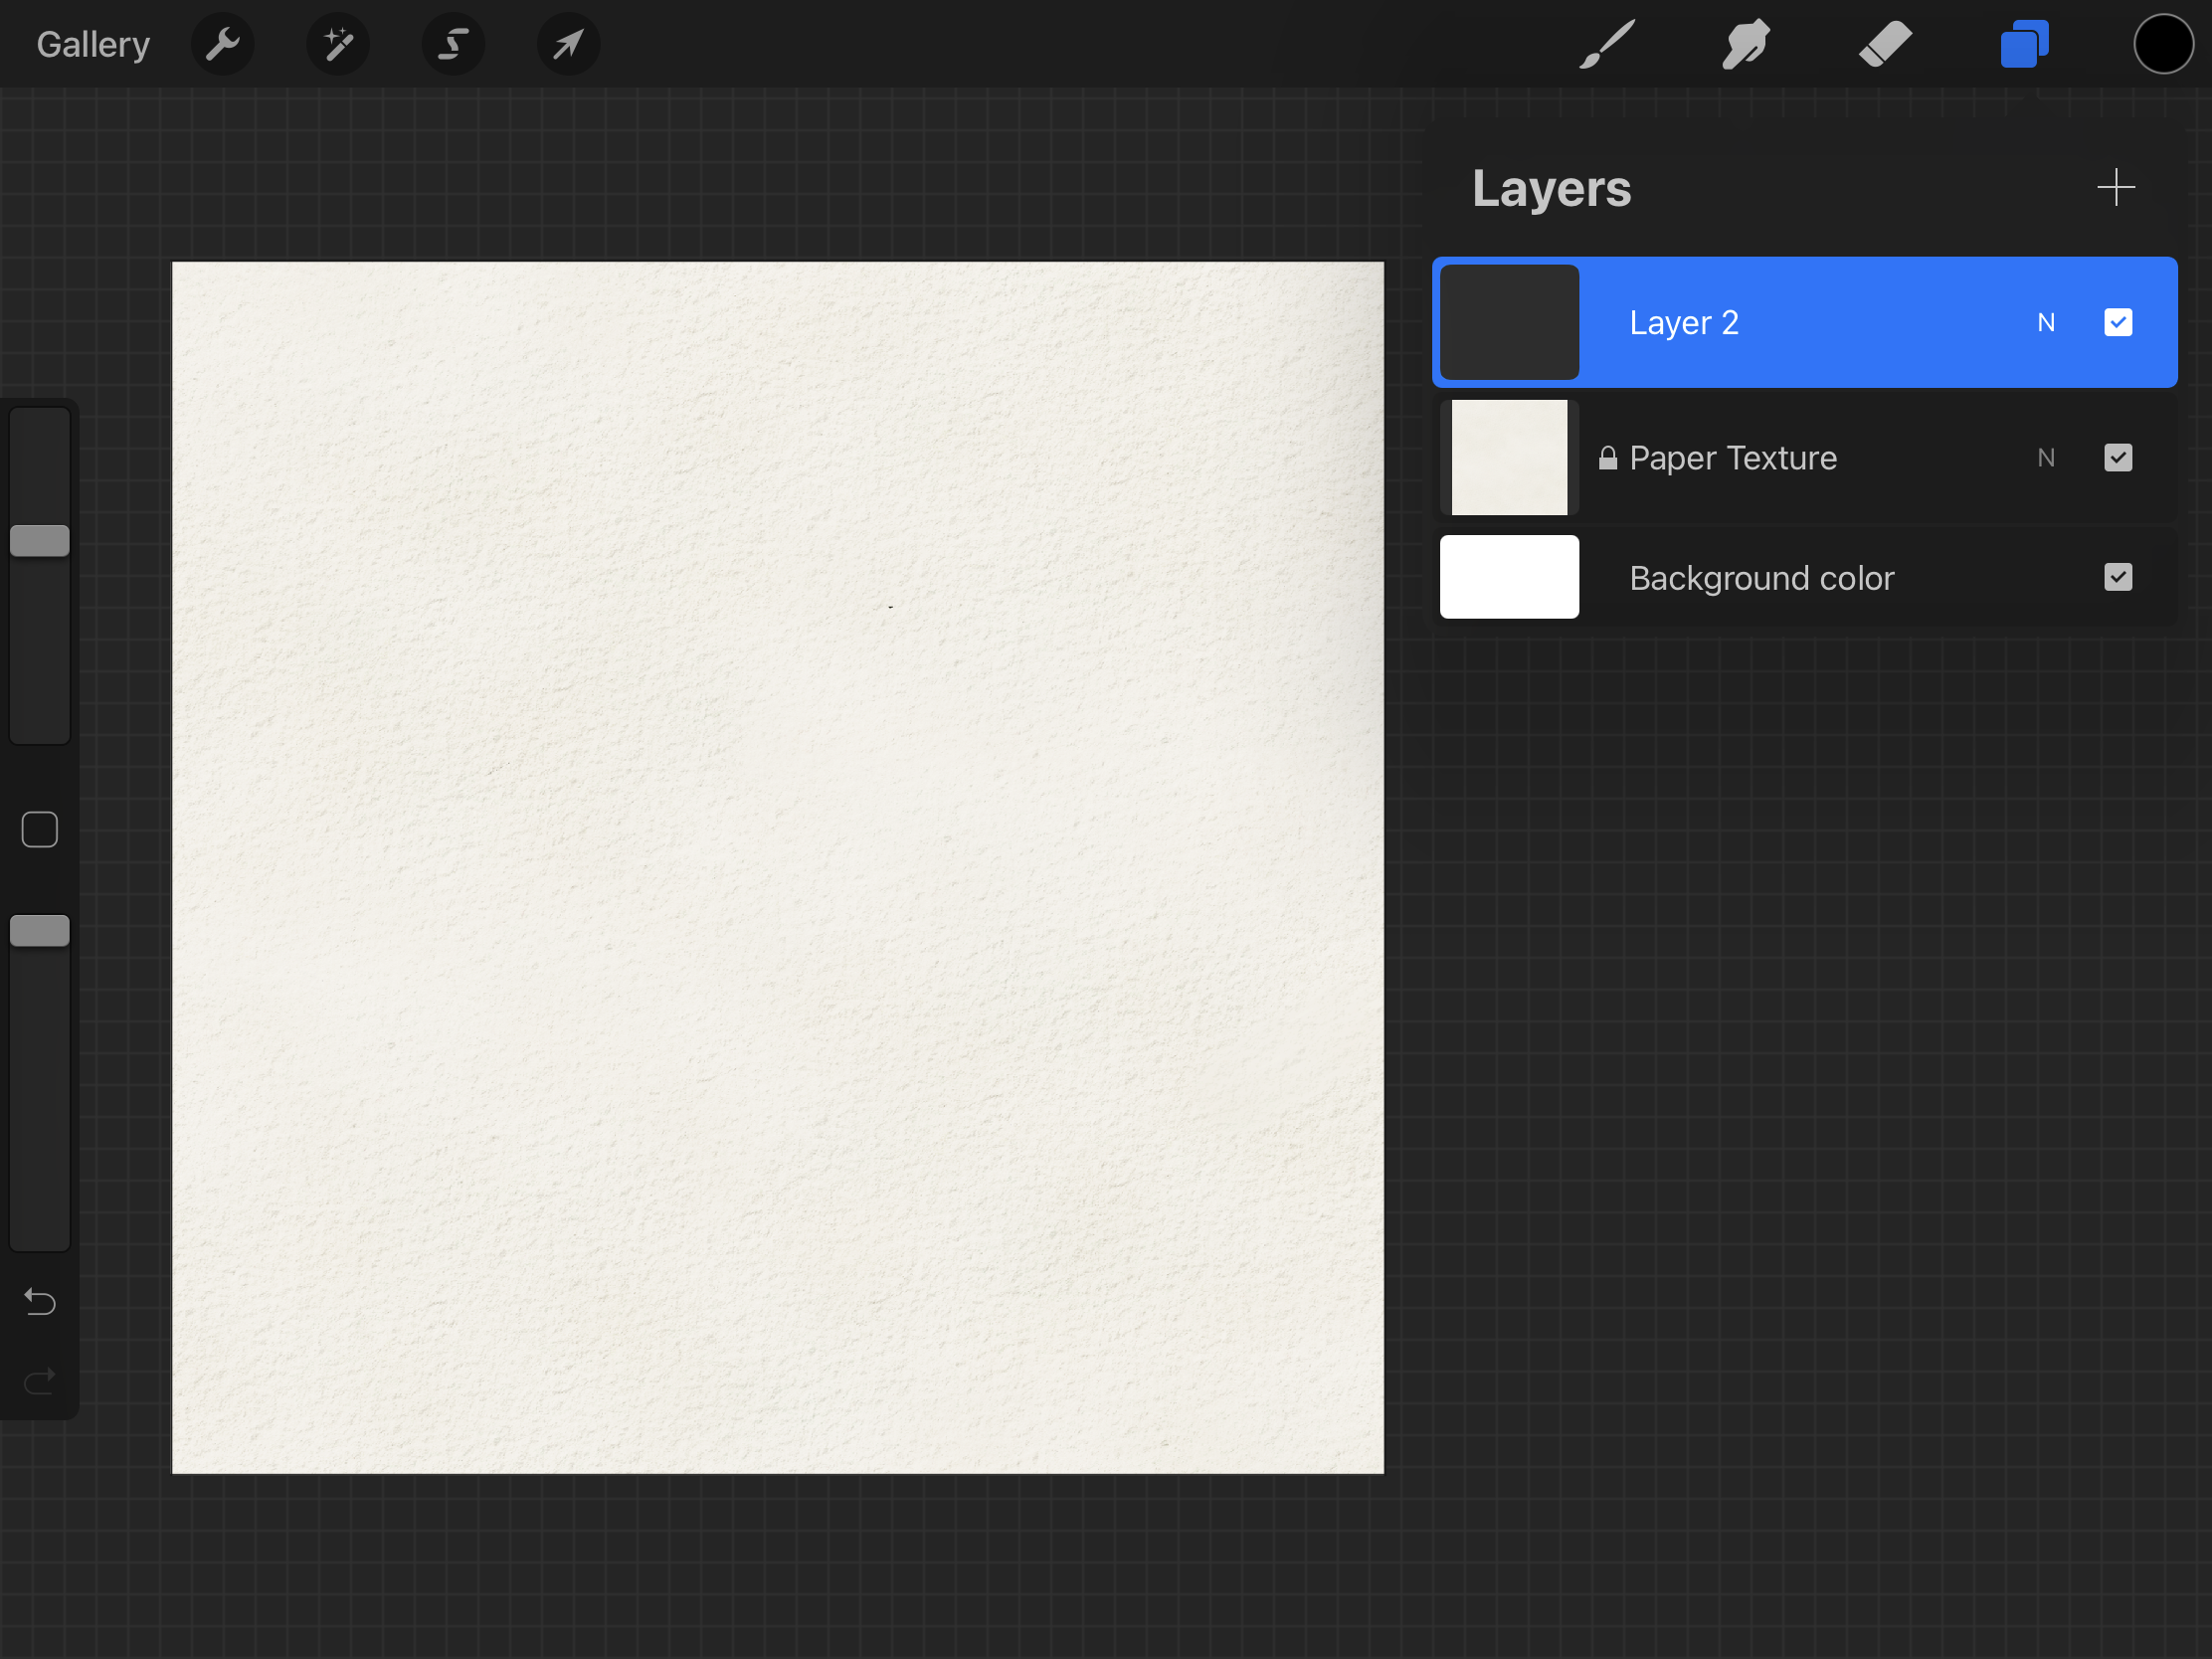
If needed you can move by holding the layer
If needed you can lock, duplicate, and delete the layer by sliding the layer to the left side.
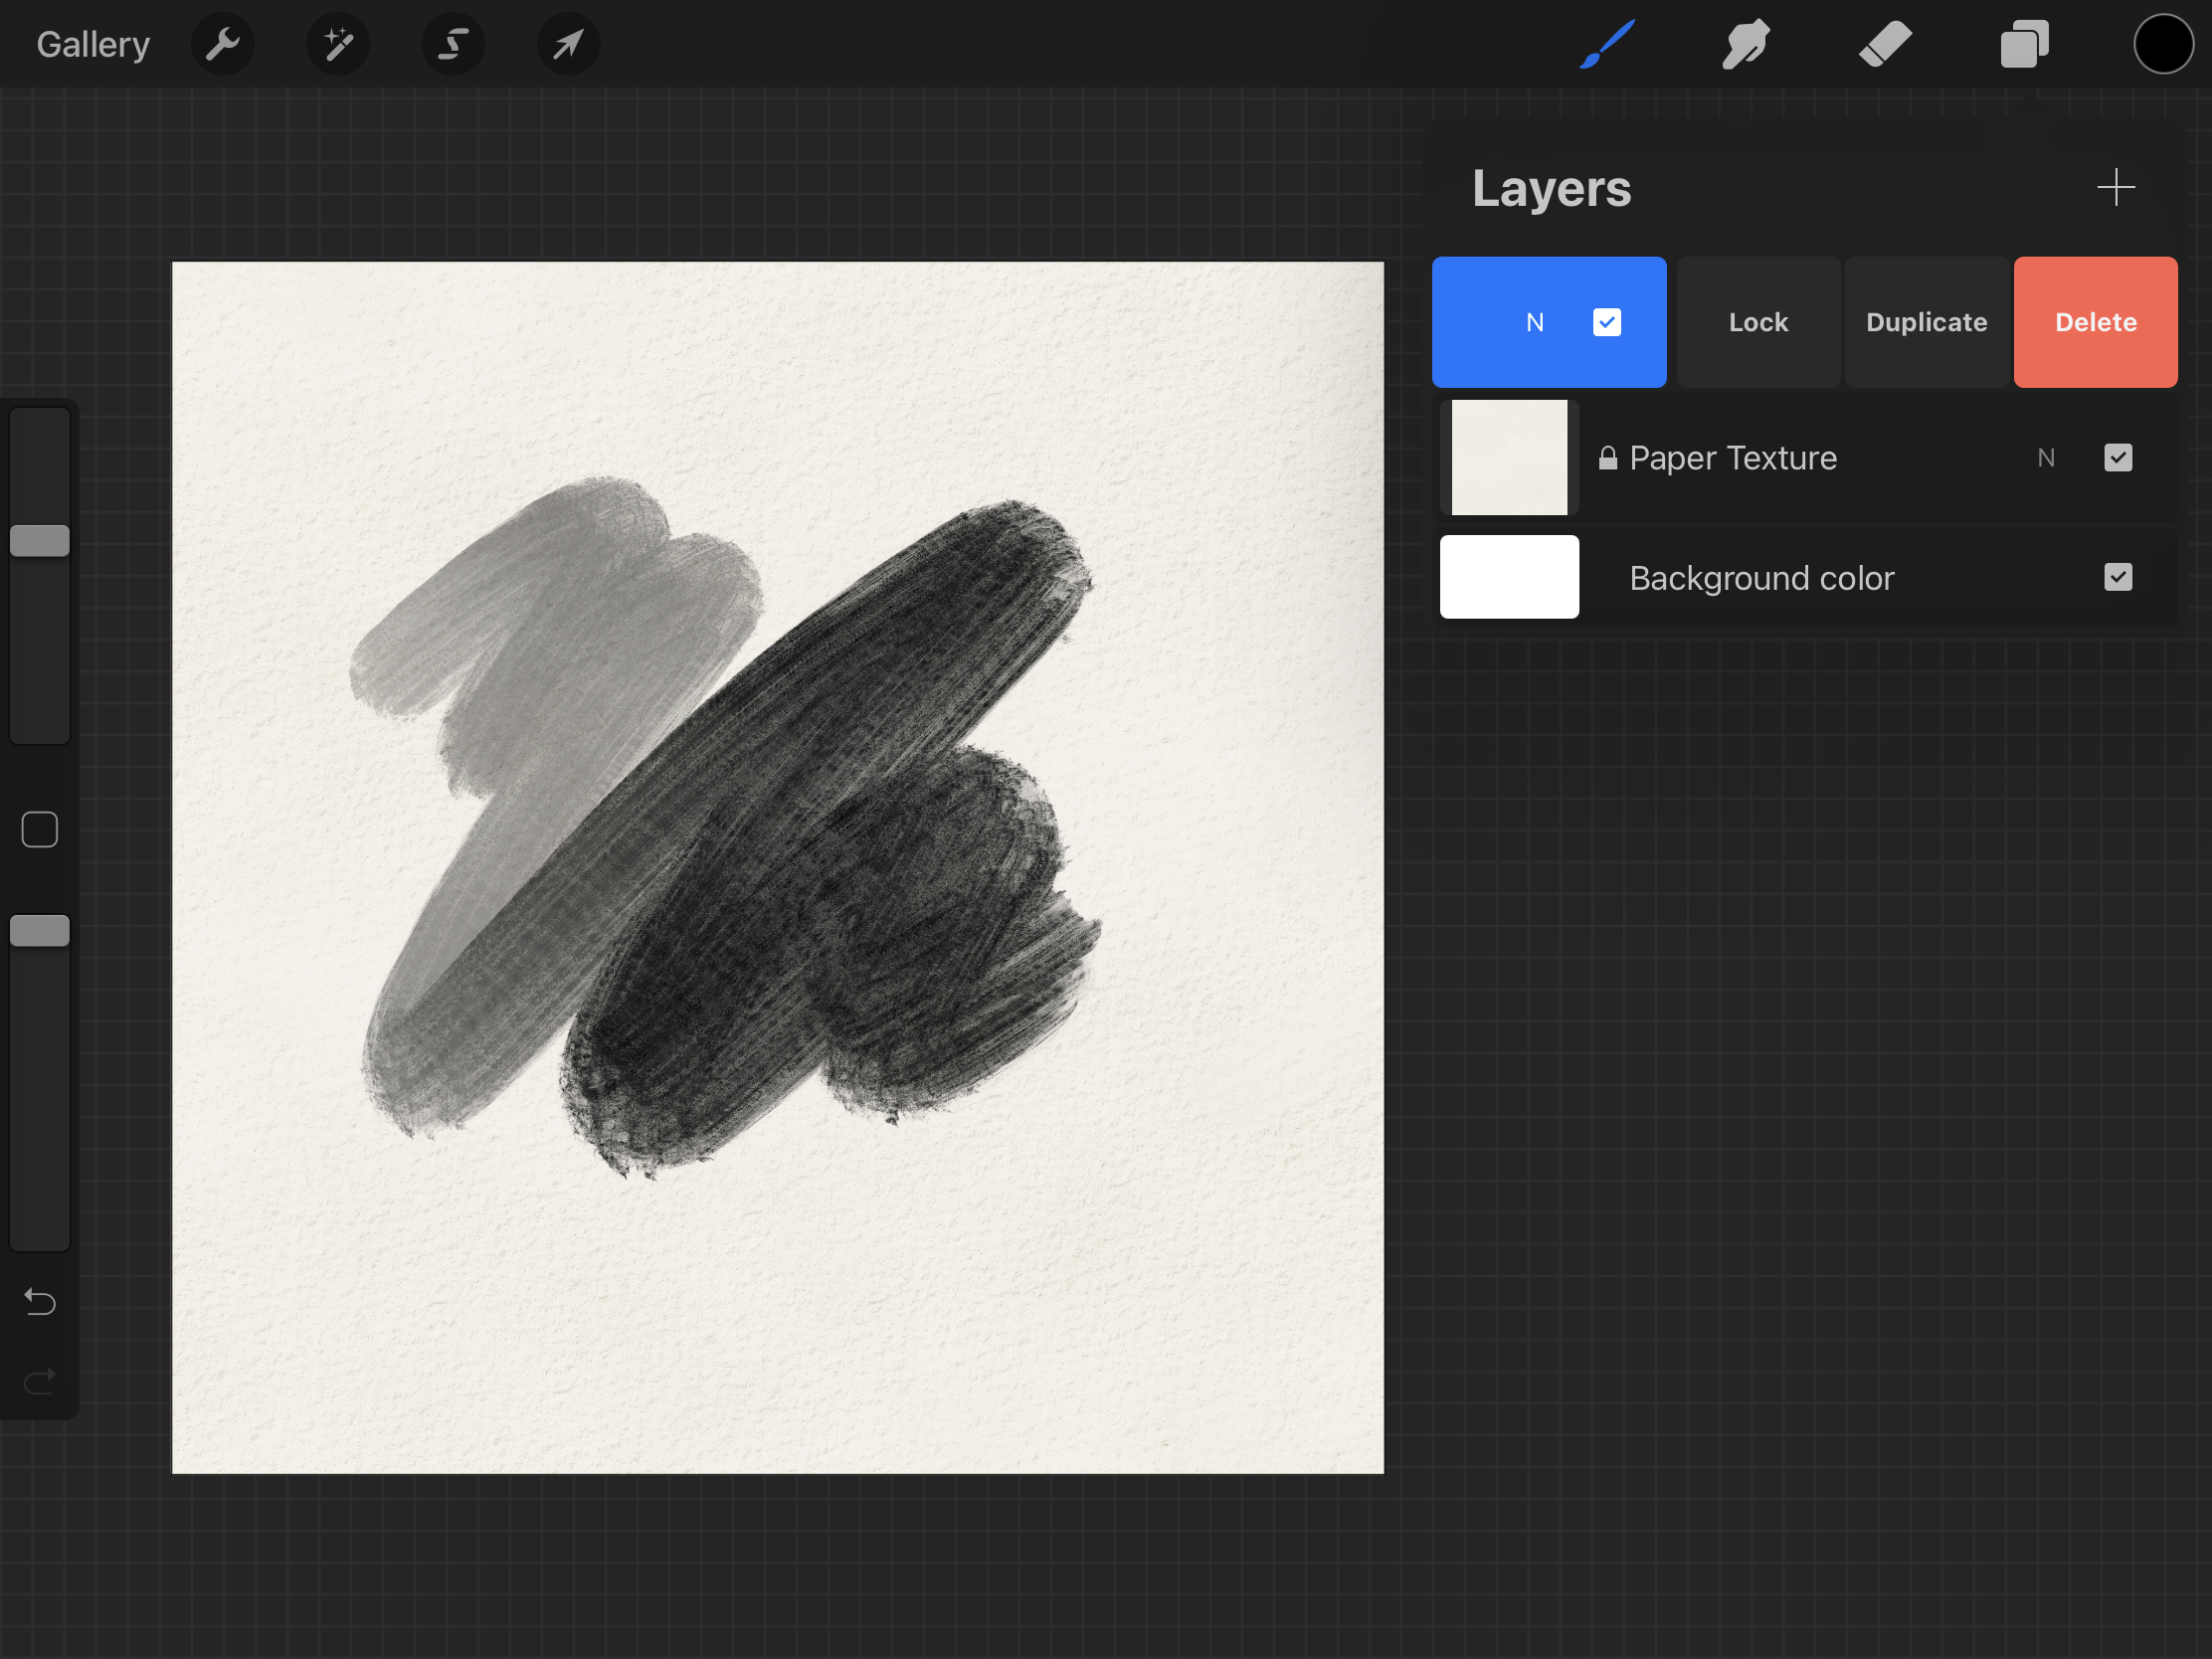
Once you tap the layer thumbnail, you have more options for the layer.
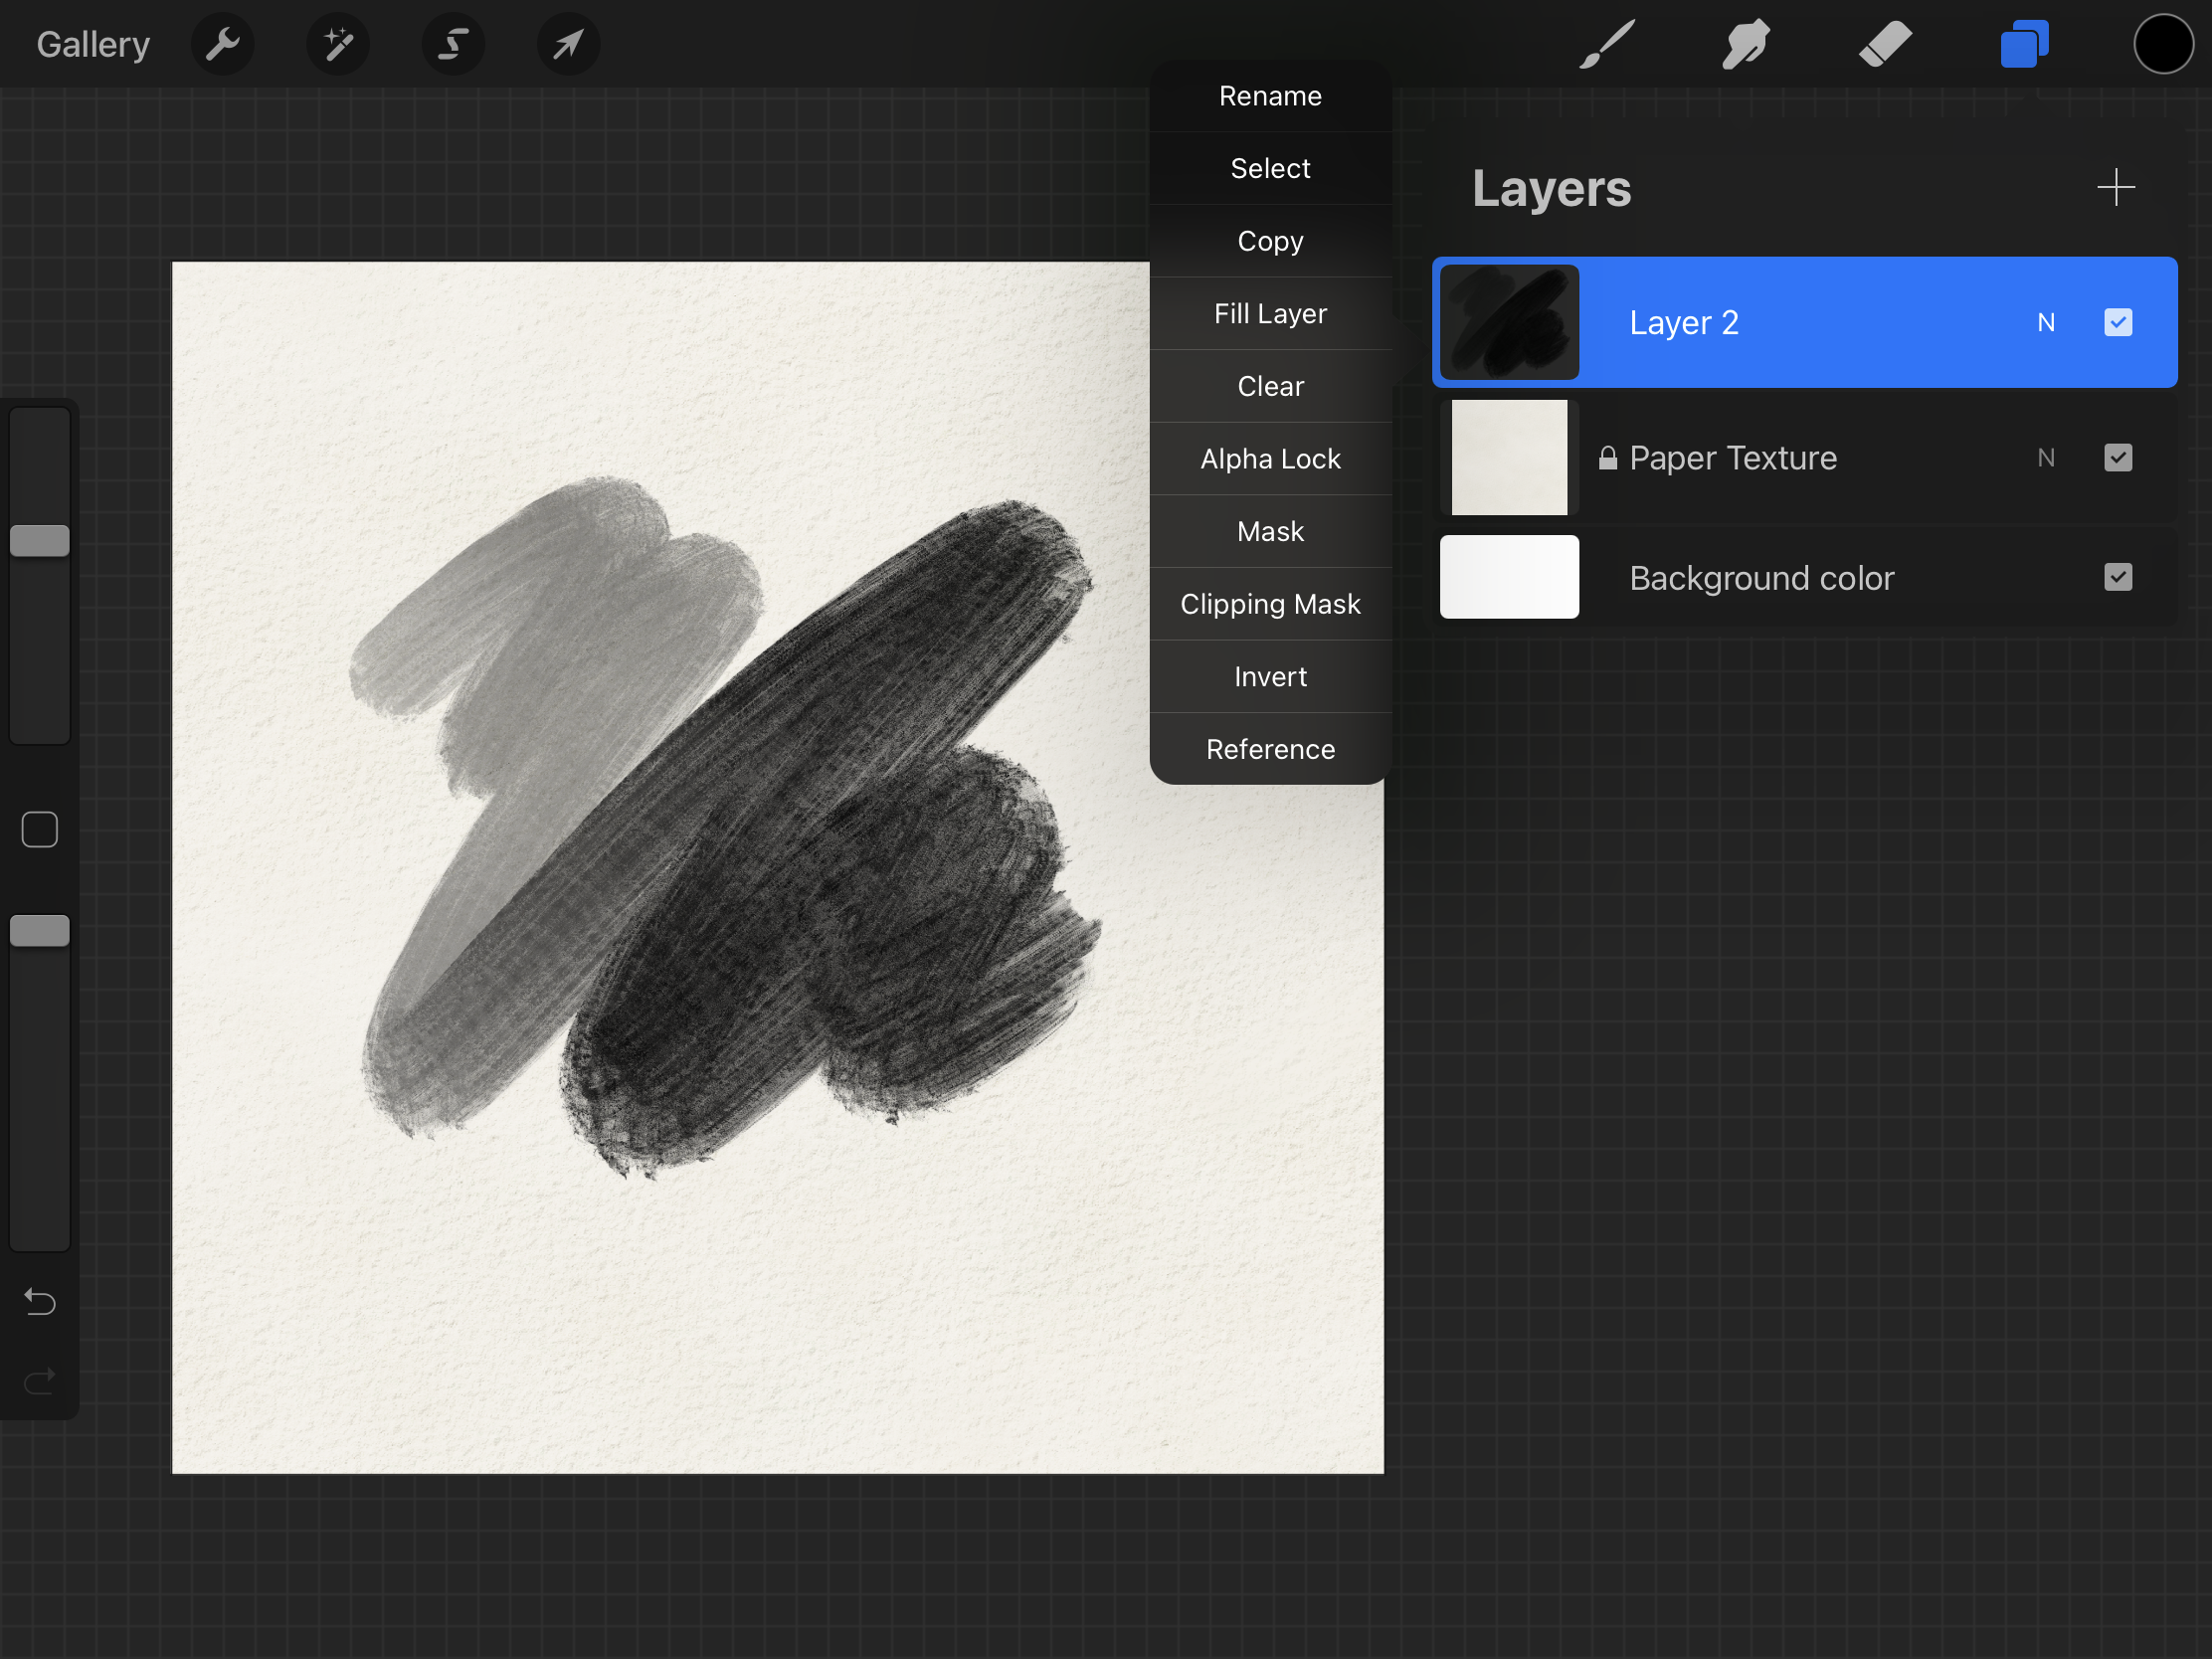
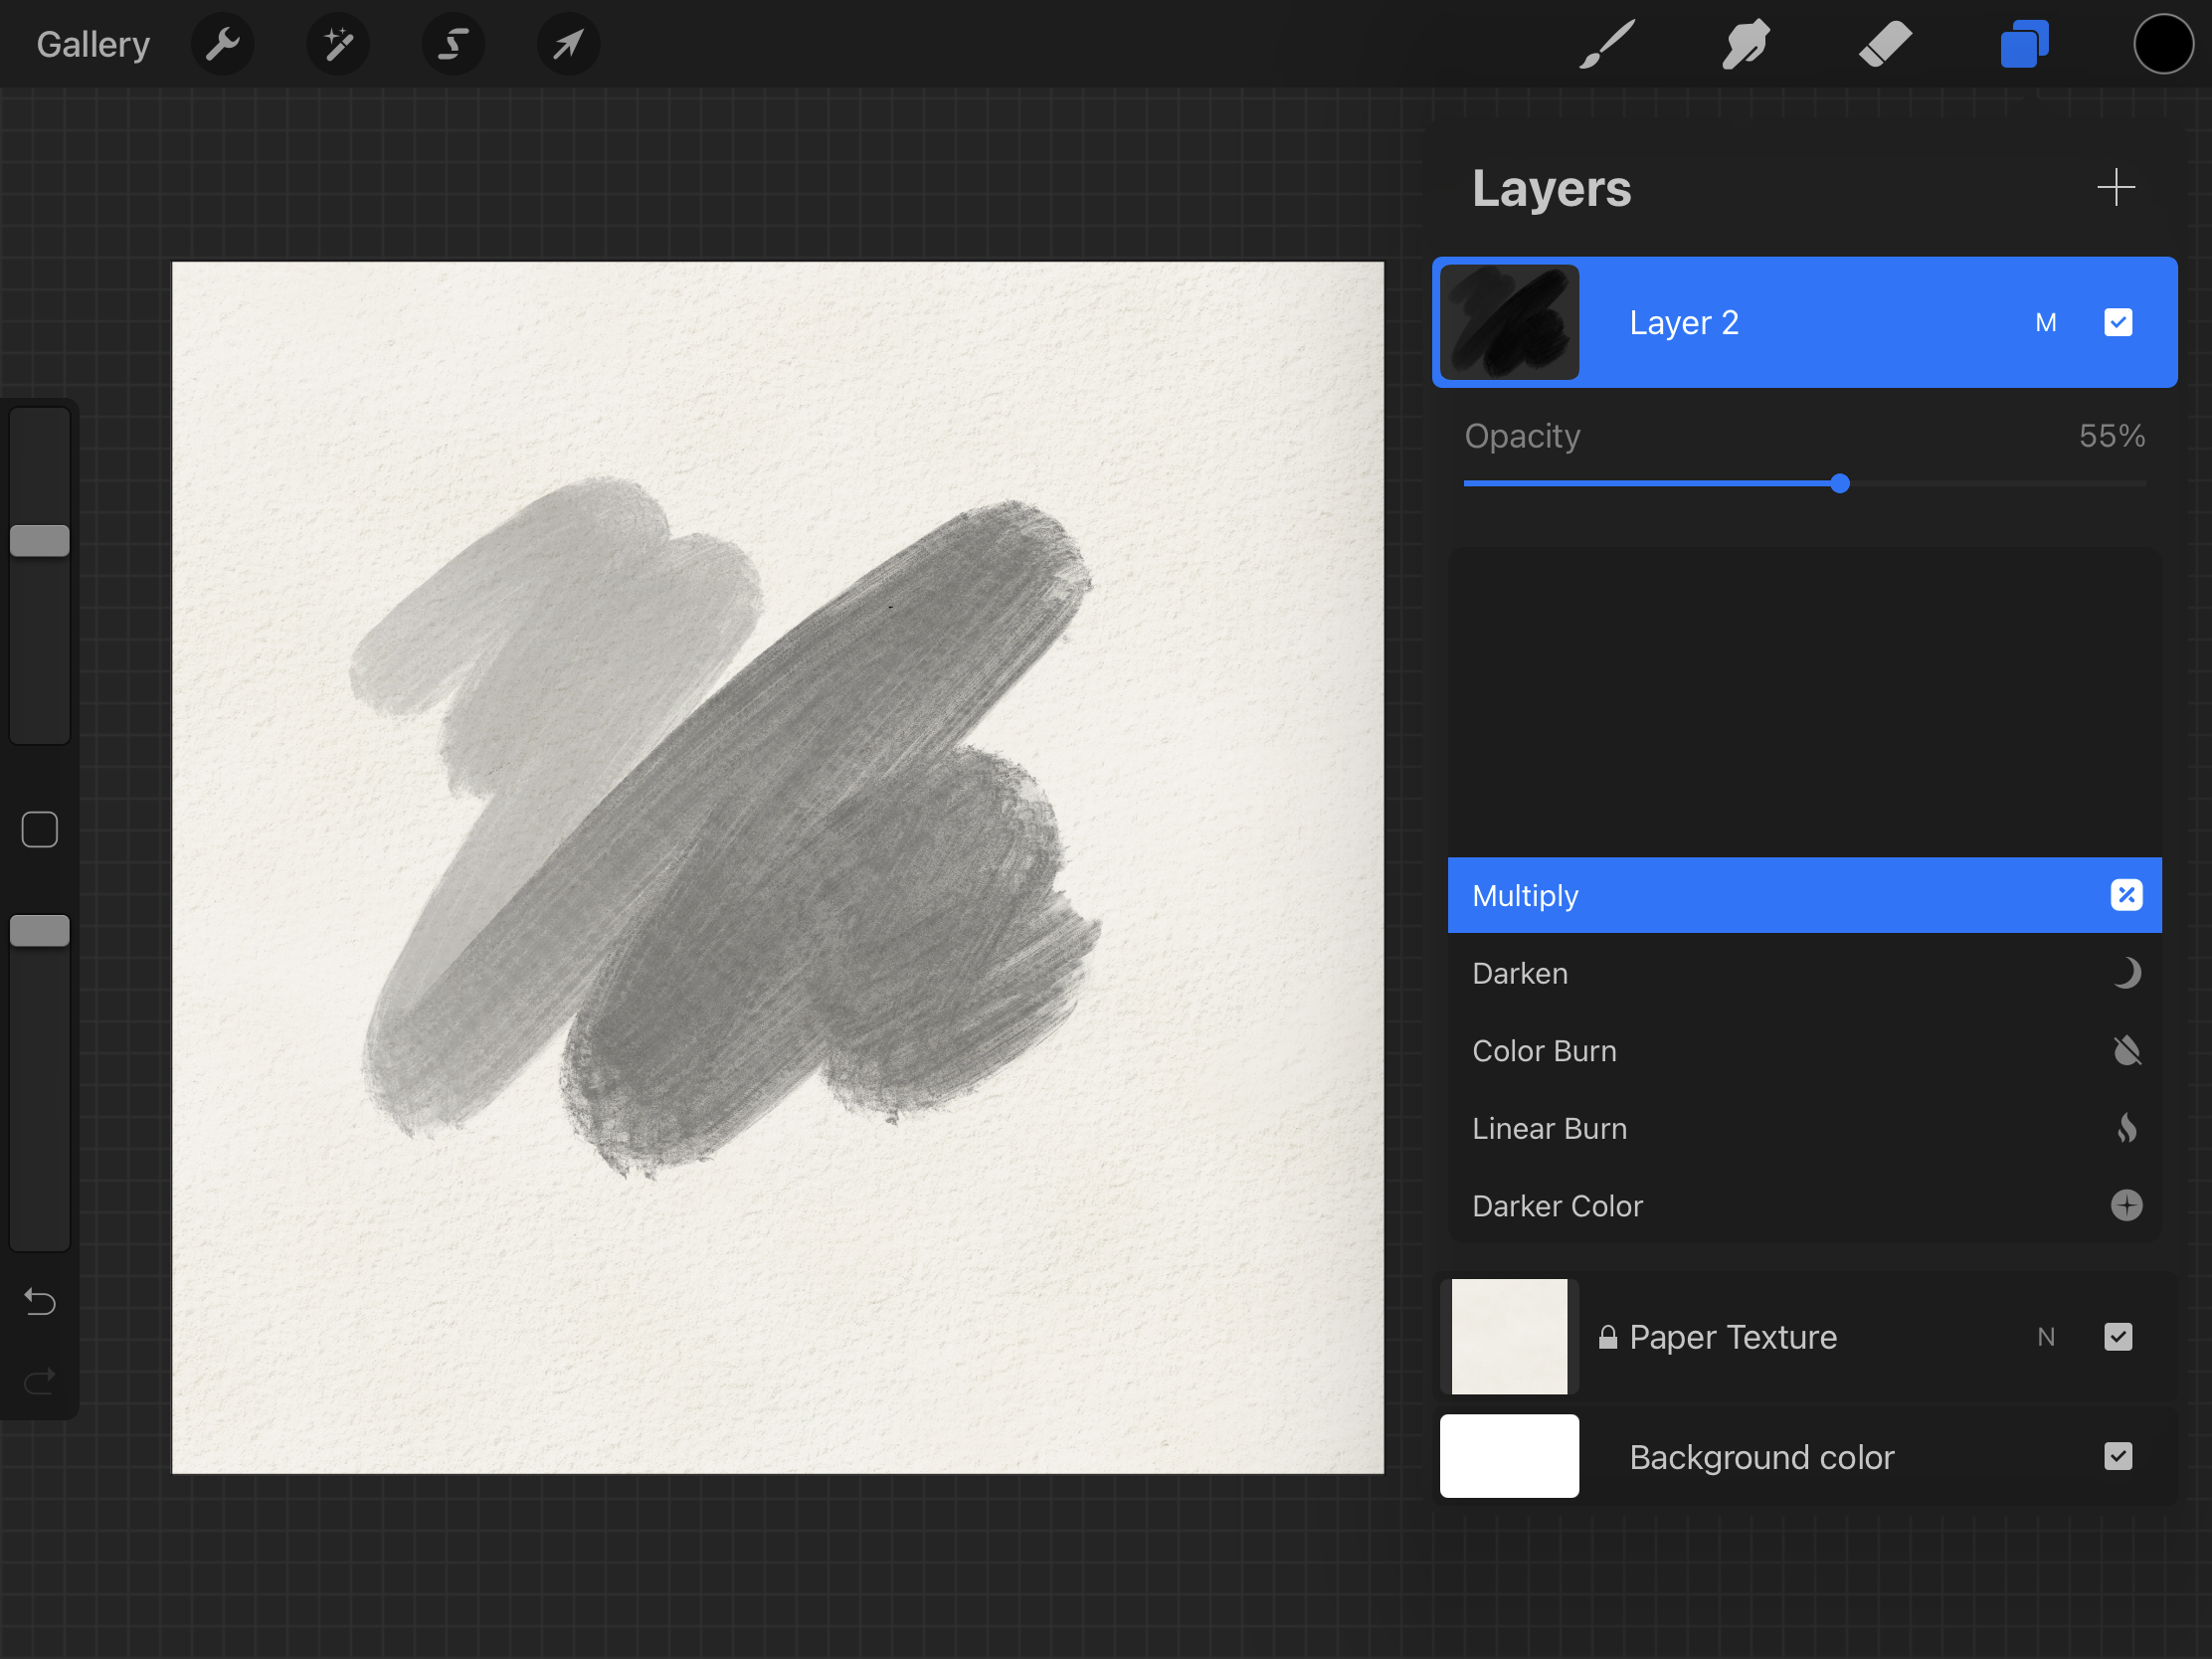
If you adjust the transparency of the layer or change the layer blend mode, tap the current blend mode. By default, Normal mode is active, shown by the letter ‘N’
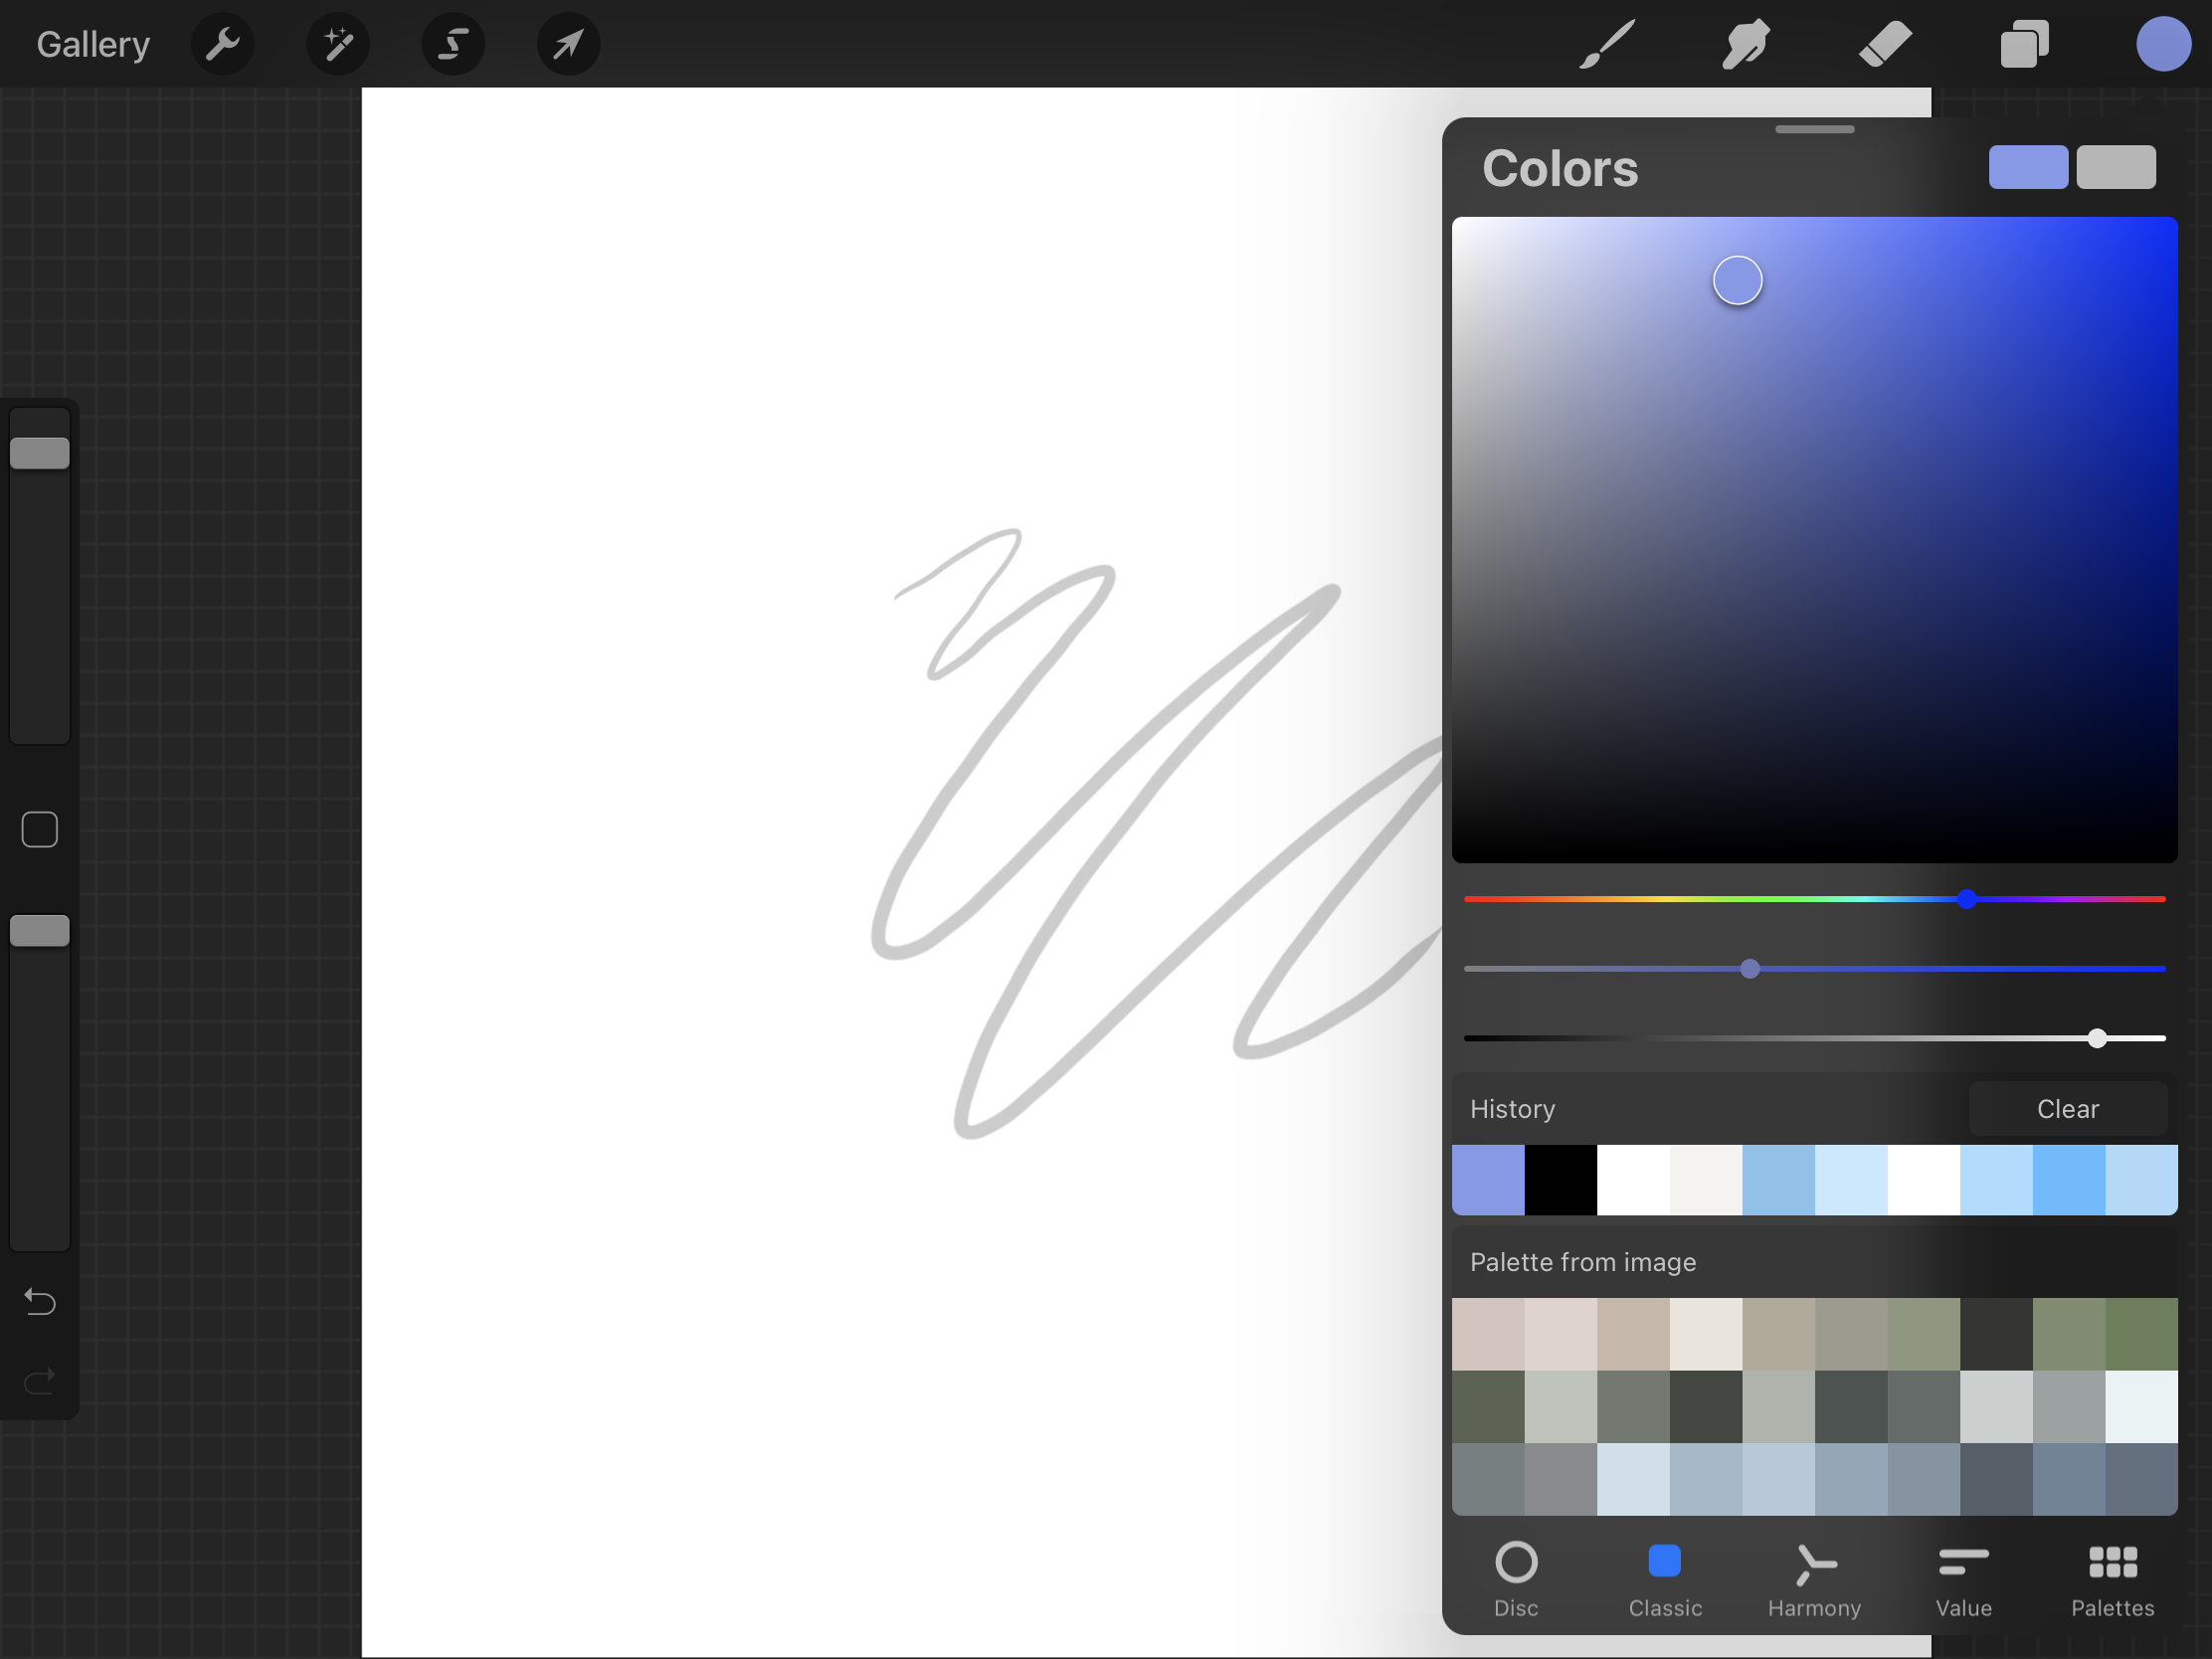
Colors
Select, adjust, and harmonize the color in your art.
Once you tap the active color on your screen, the Color Panel will open. There are four modes of the panels – Disc, Classic, Harmony, and Value.
You can select color one of the modes that you are most familiar/comfortable with.
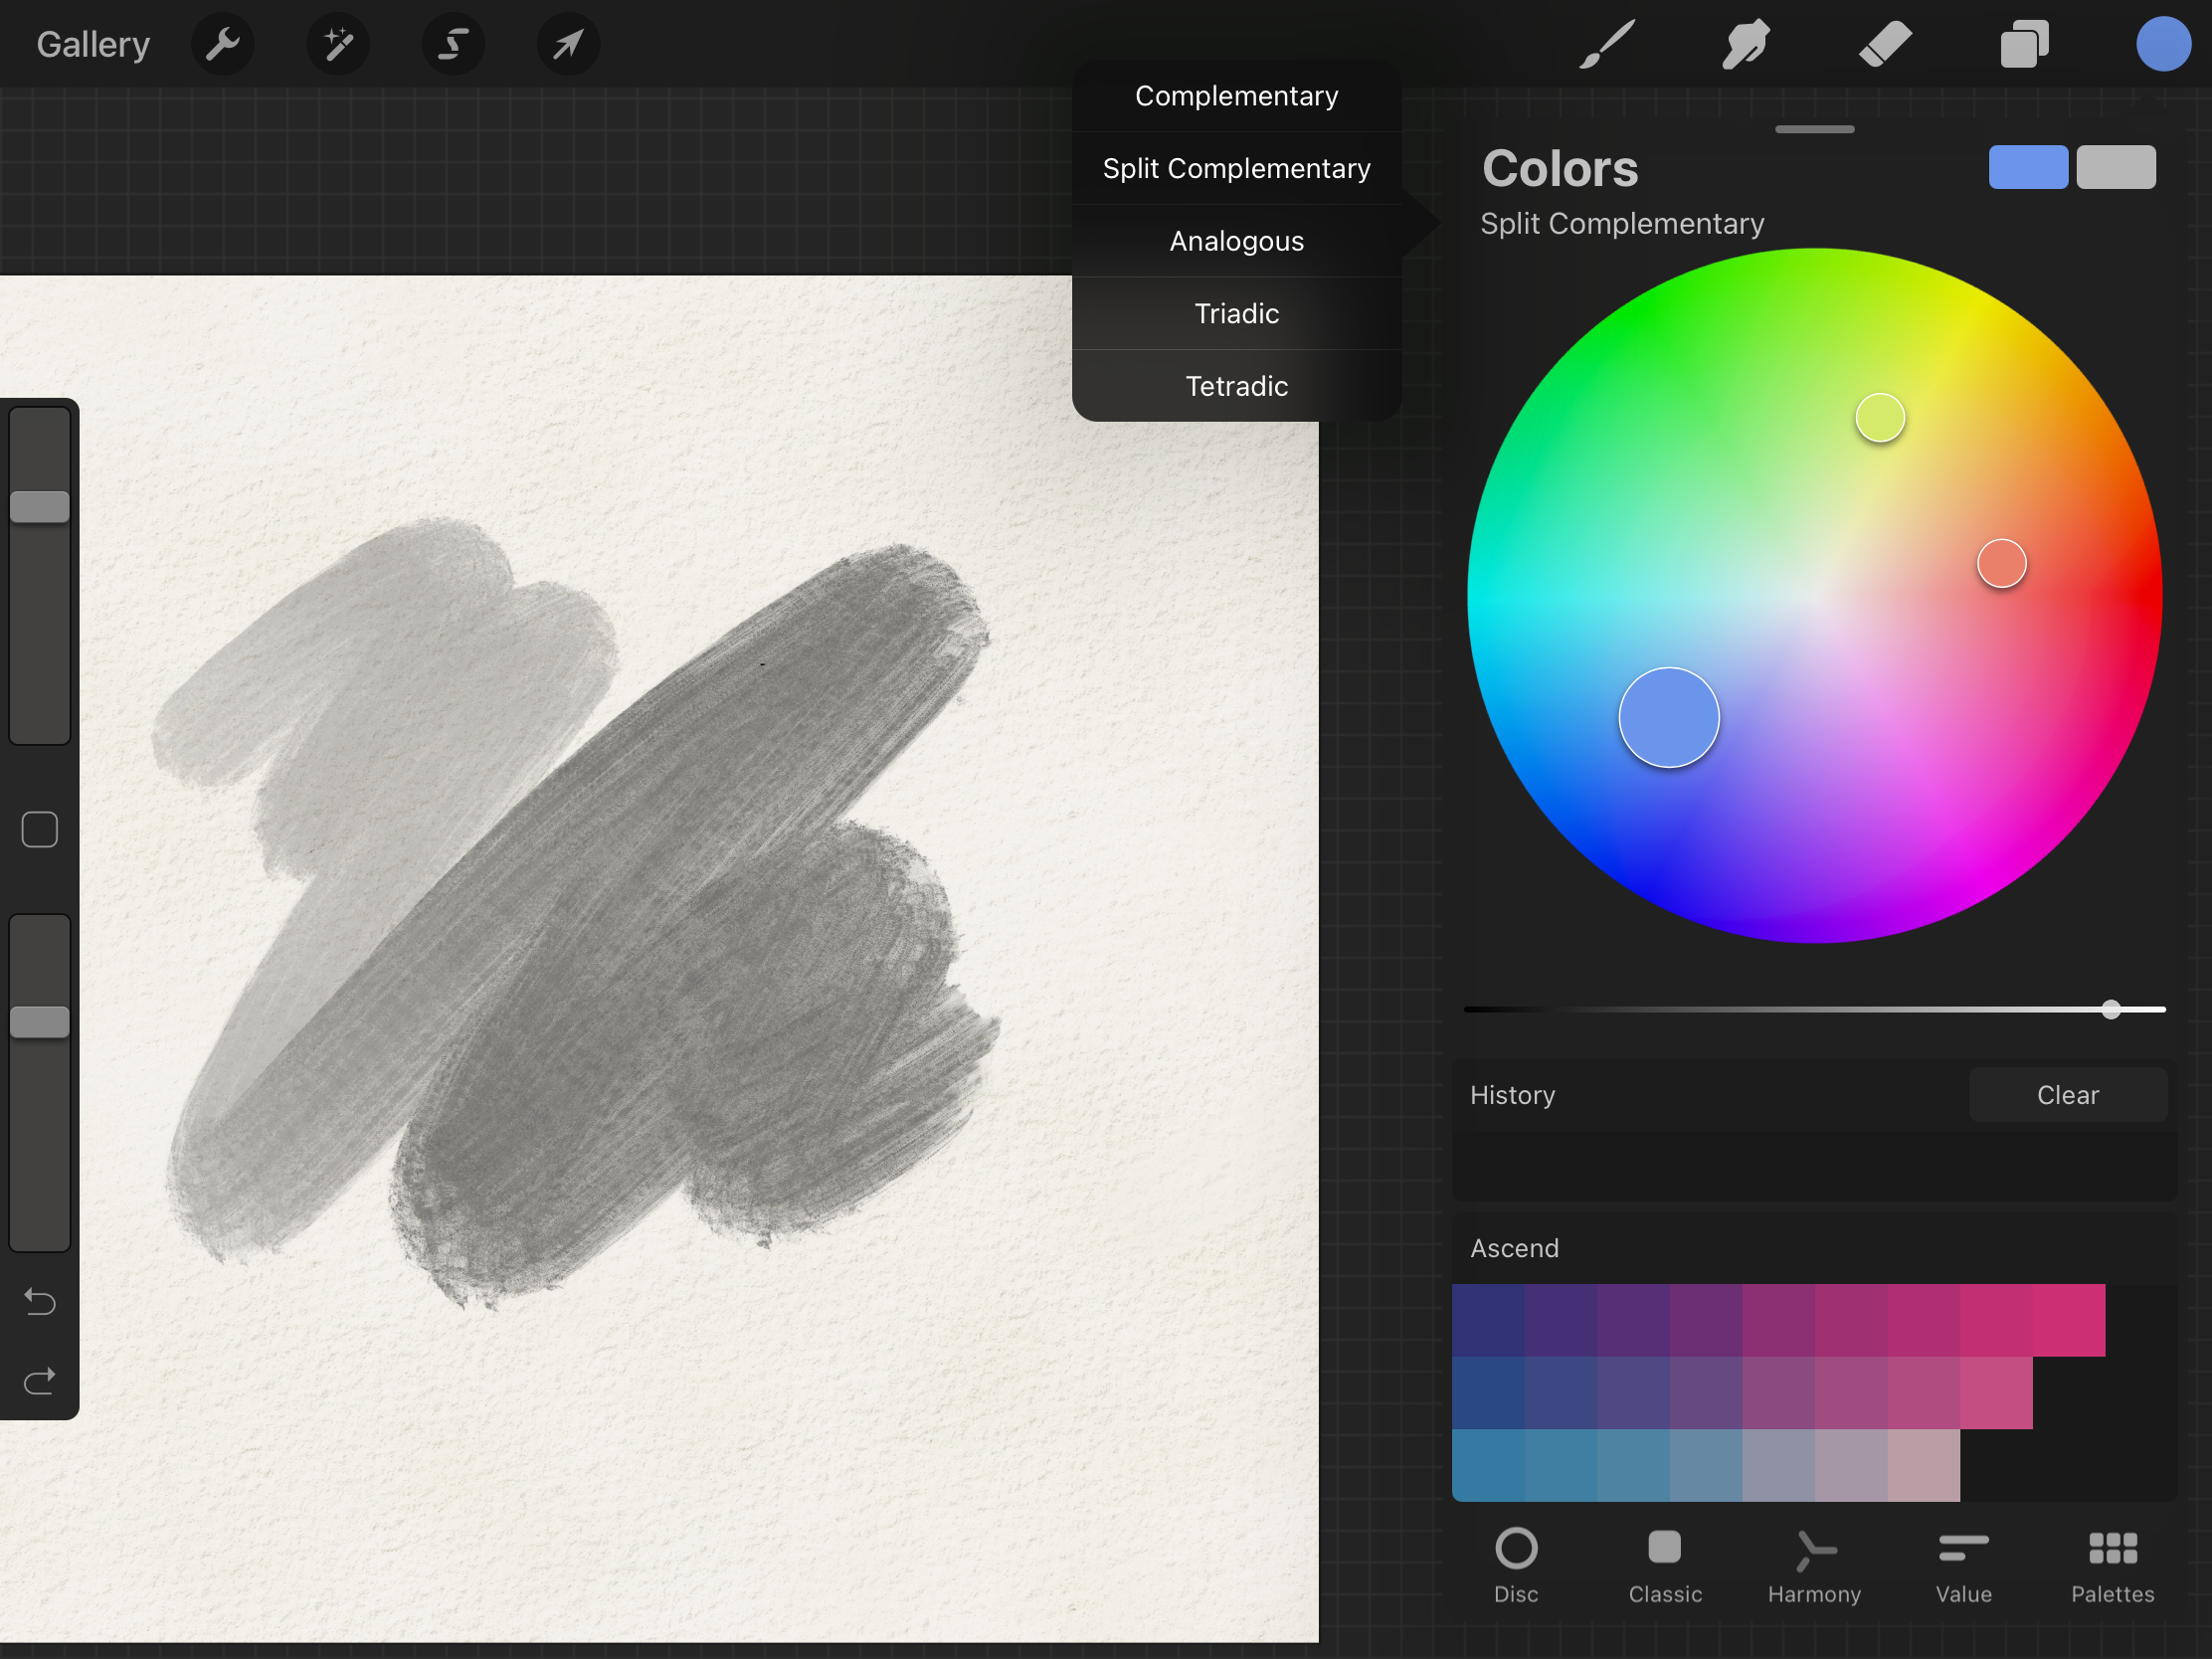
Additionally, you can use Palettes. Procreate also save the previously selected color on the History. You also can create a color palette in your own selection and from an image.

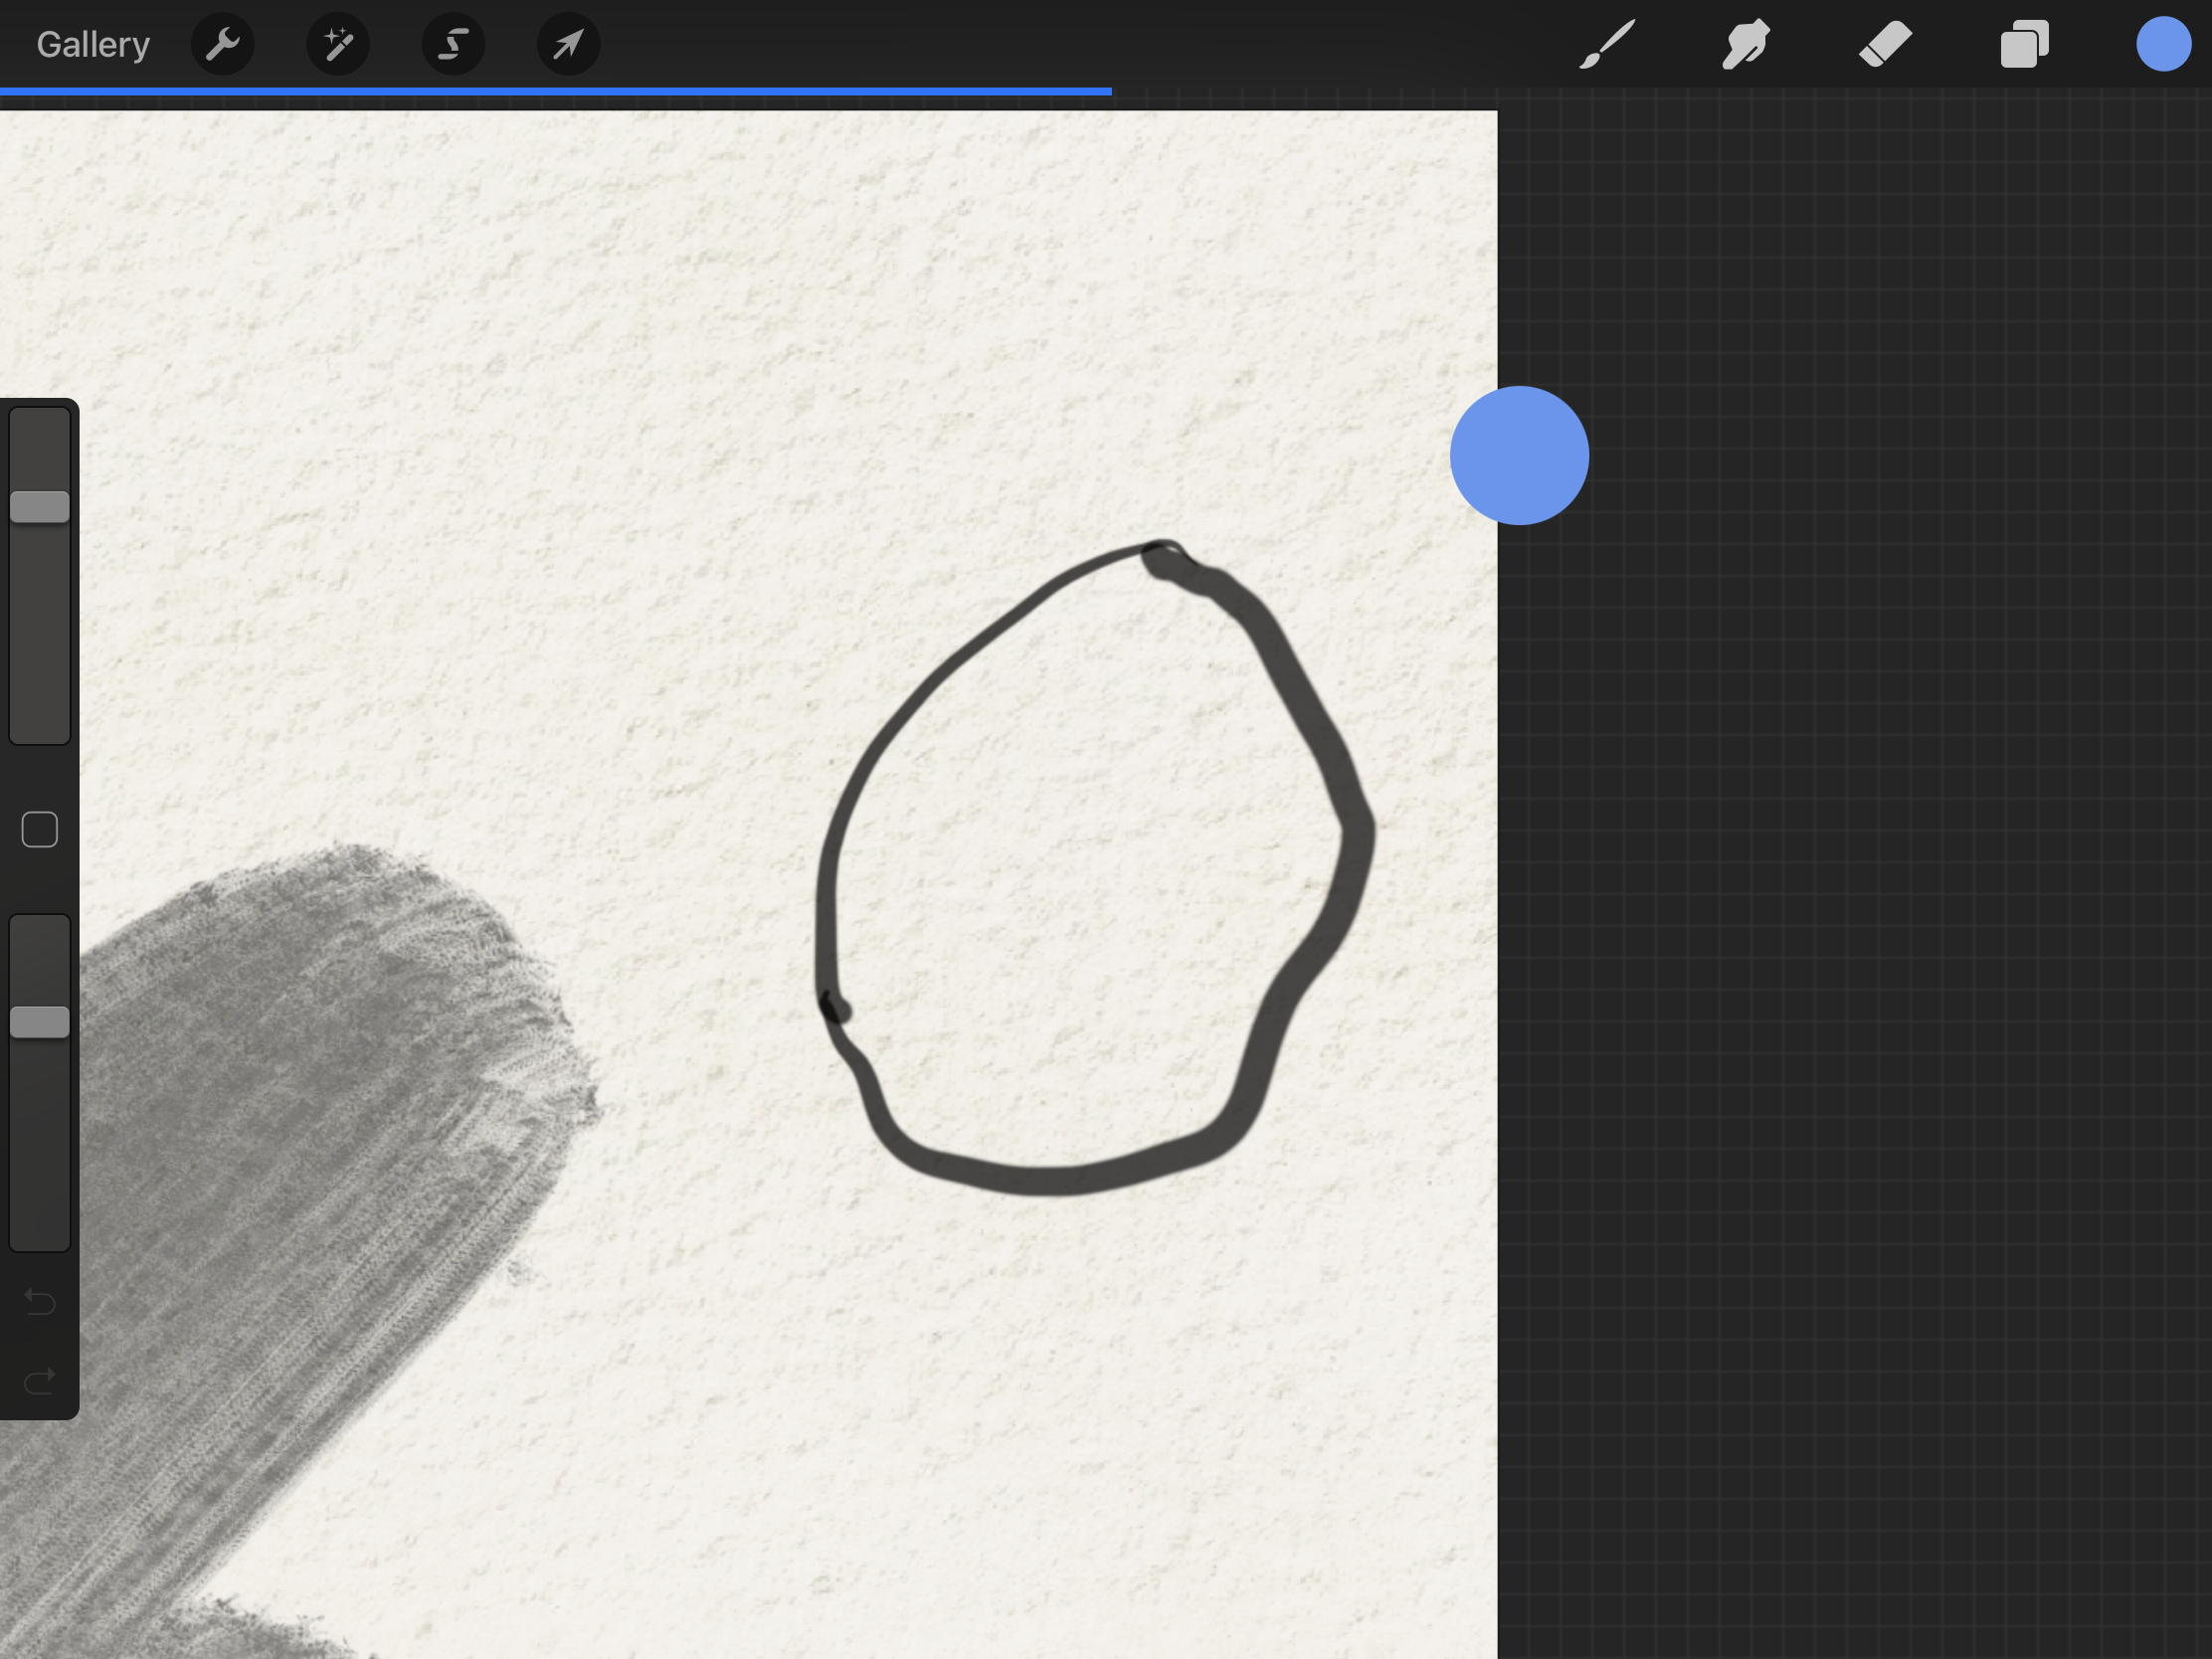
If needed, you can fill color in a closed object by dragging and dropping off the color to the closed object.
(CO4) Understand various tools in the app
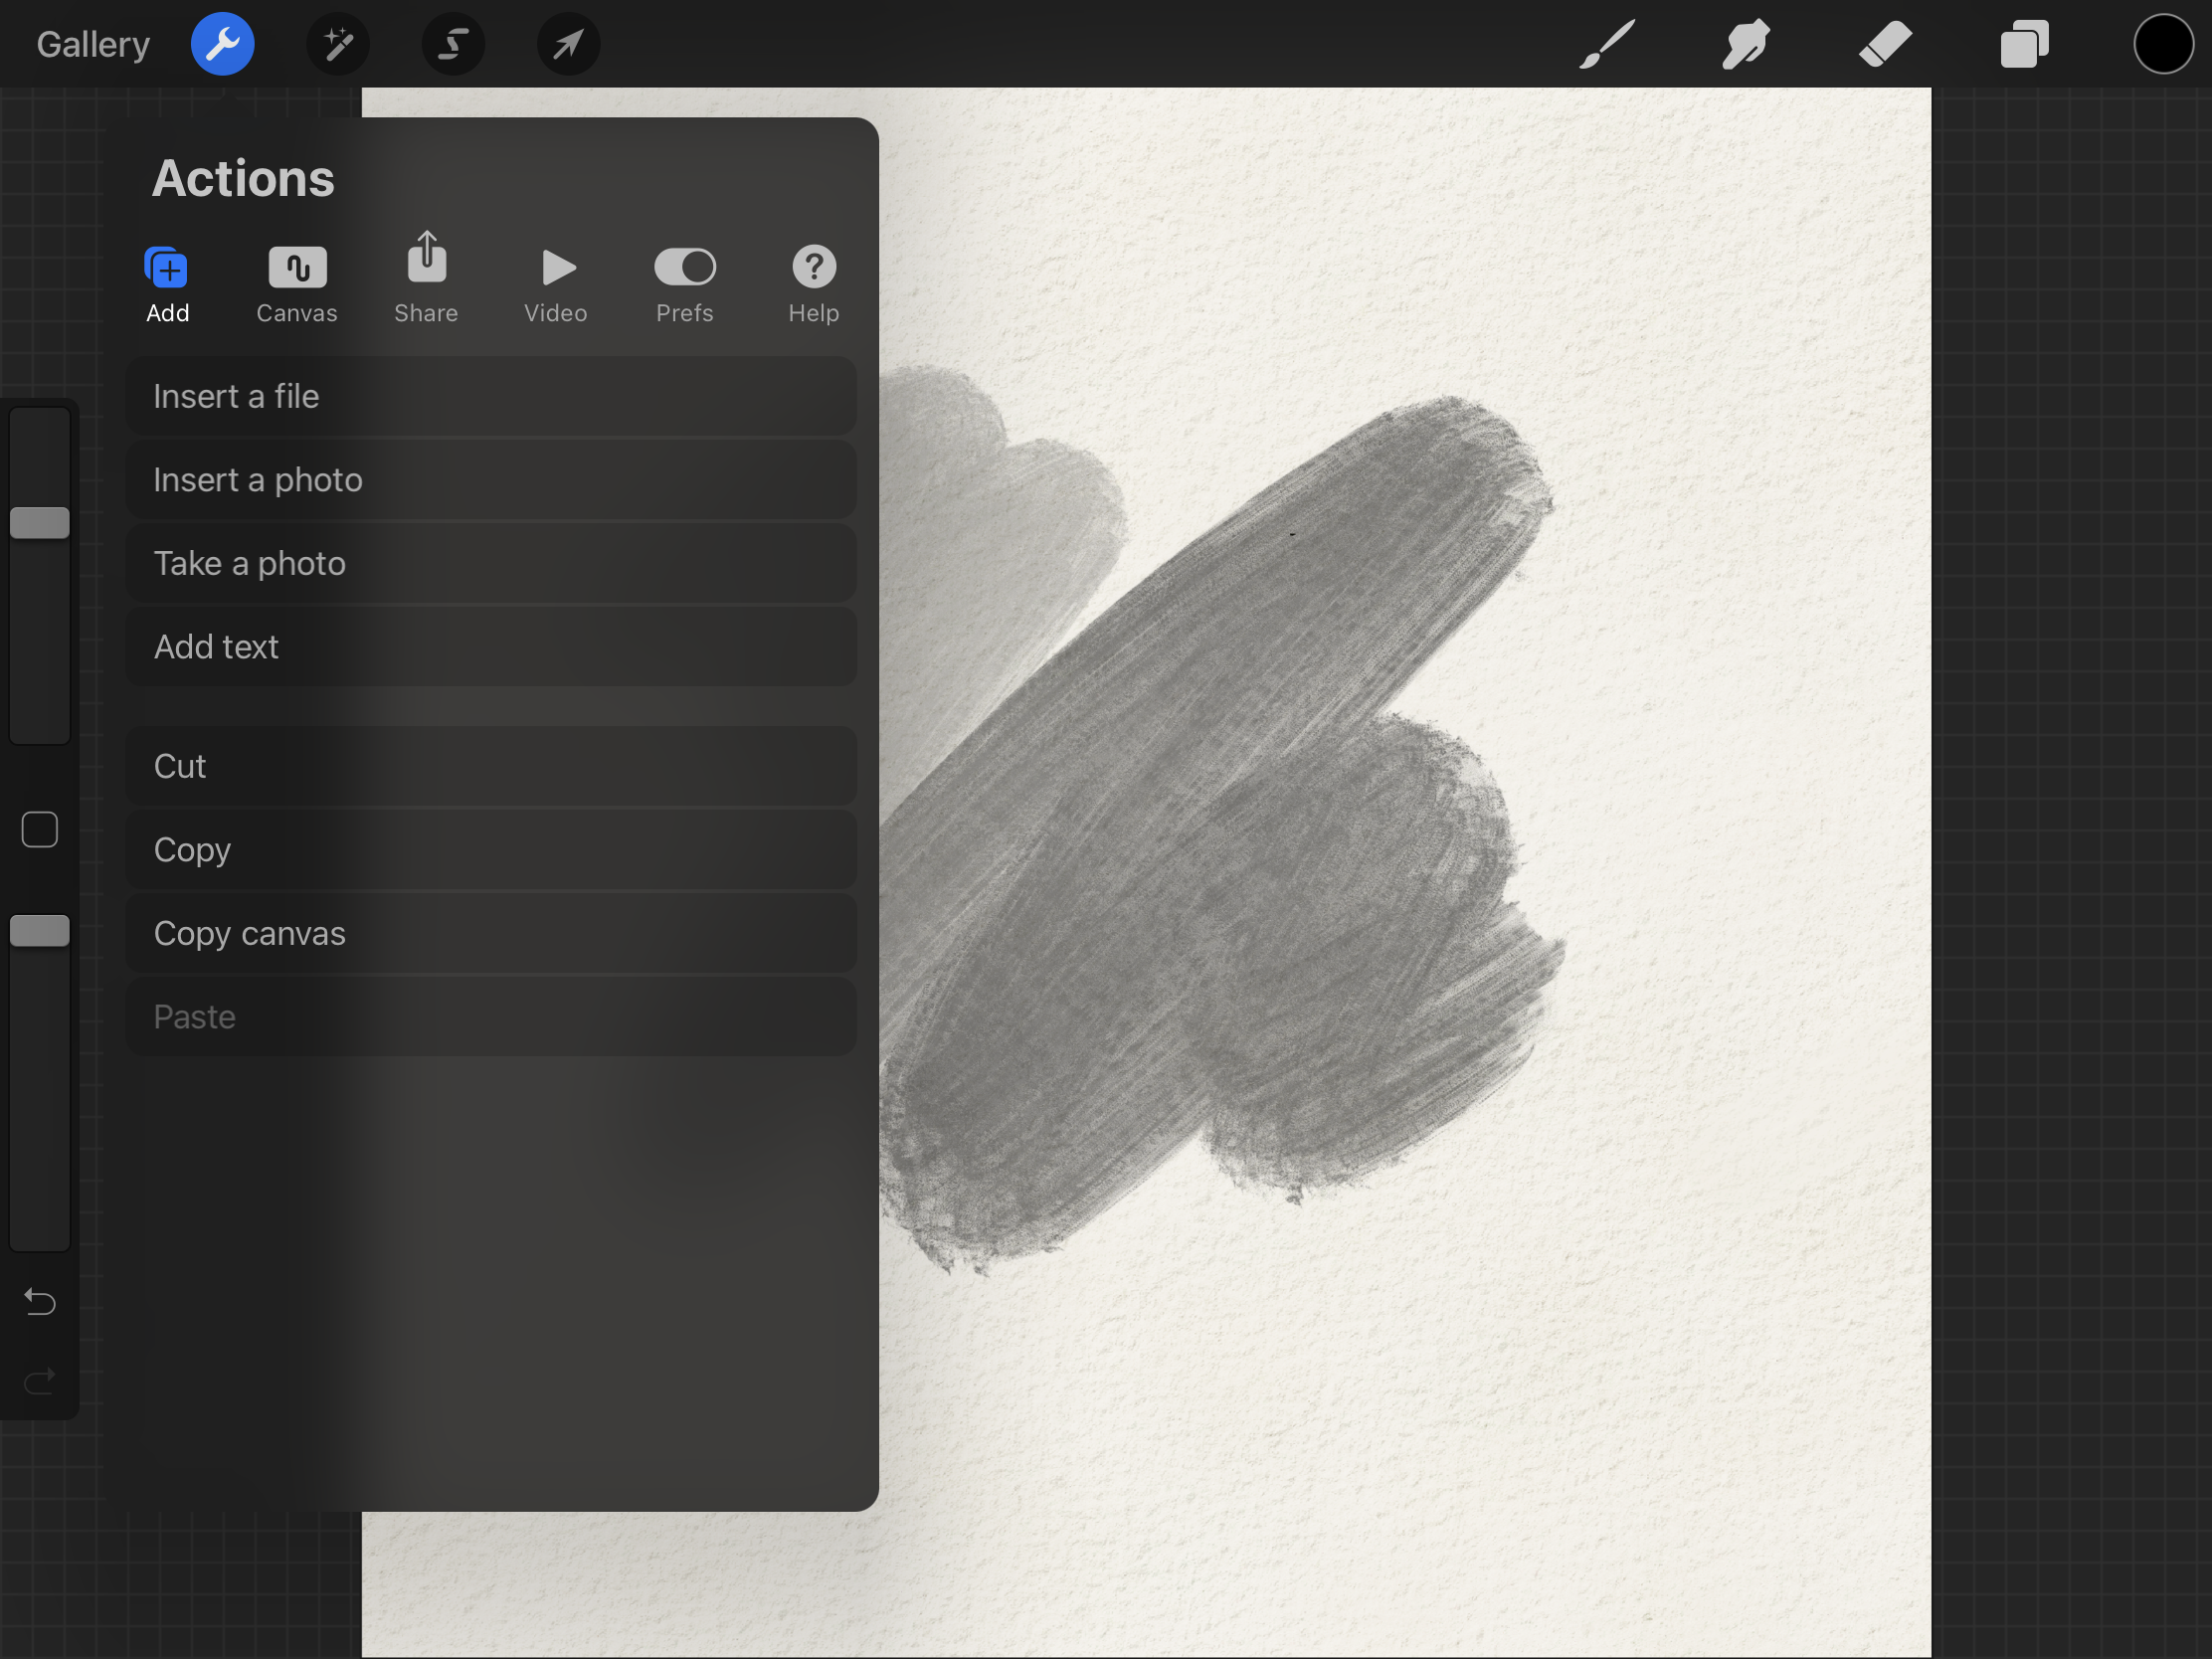
Actions
Actions menu has all the practical features you need to insert, share, adjust your canvas and any of the elements within it.
Add tab
Add/edit text
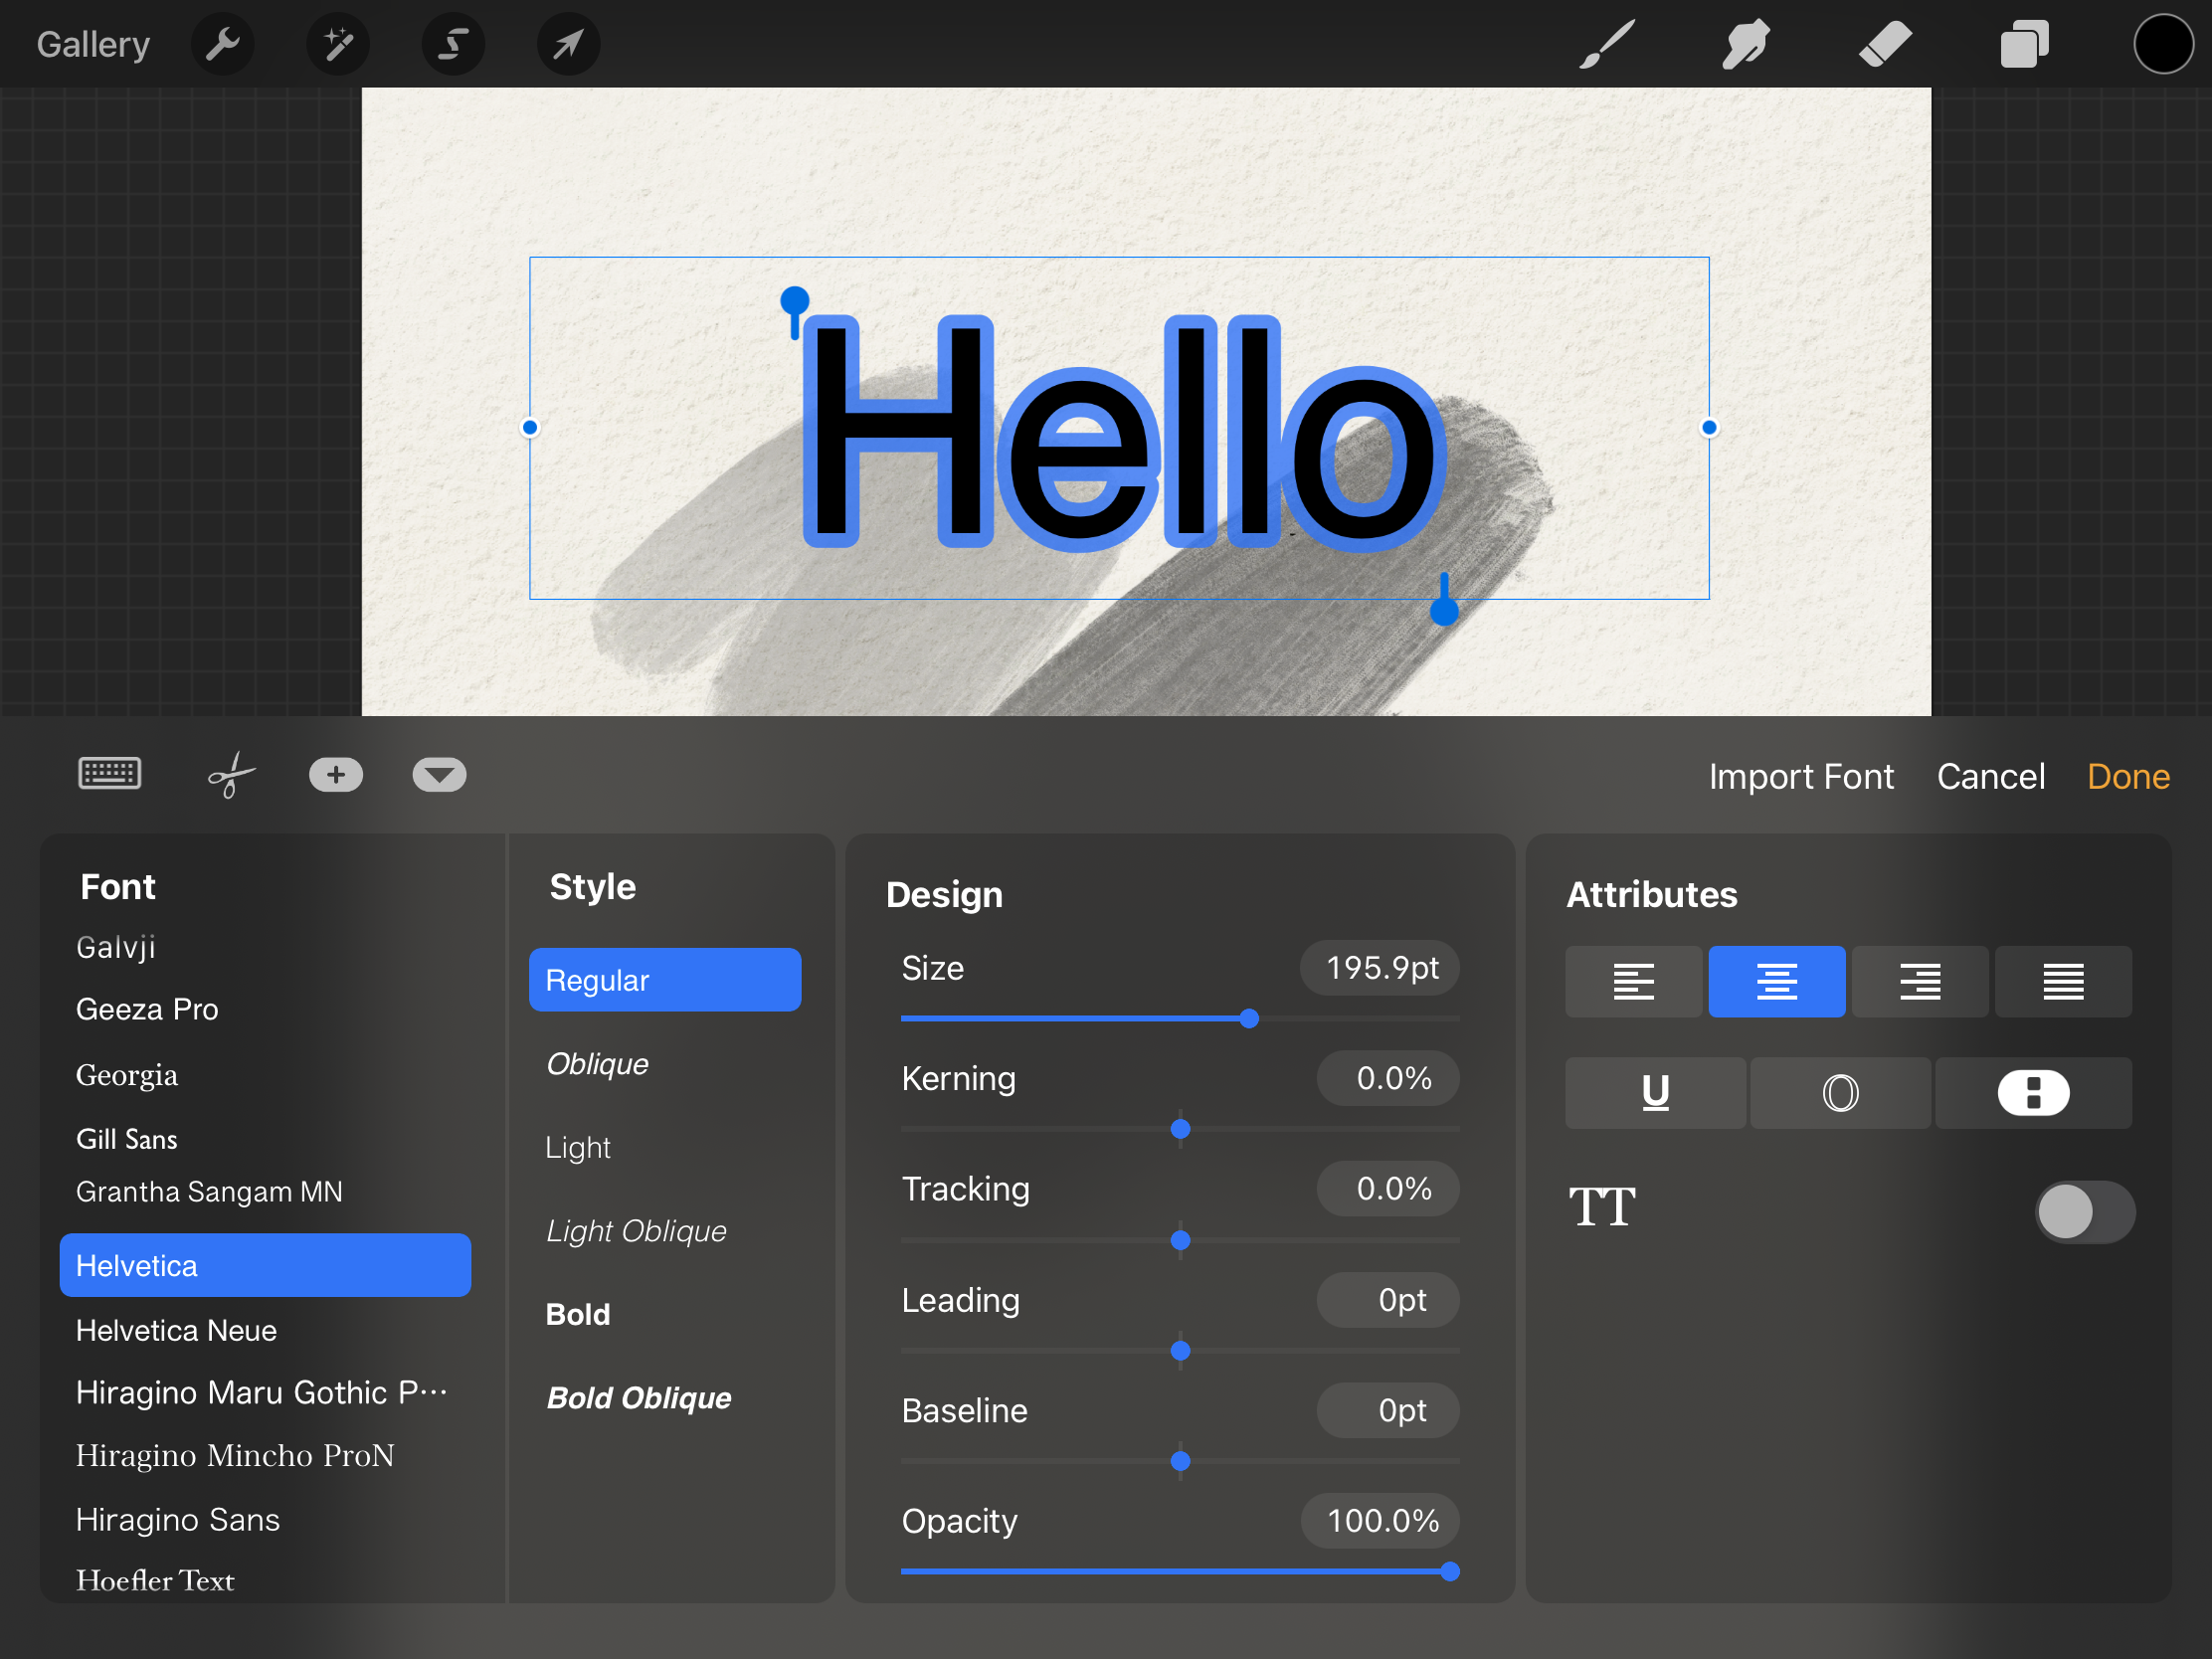
Edit text layer
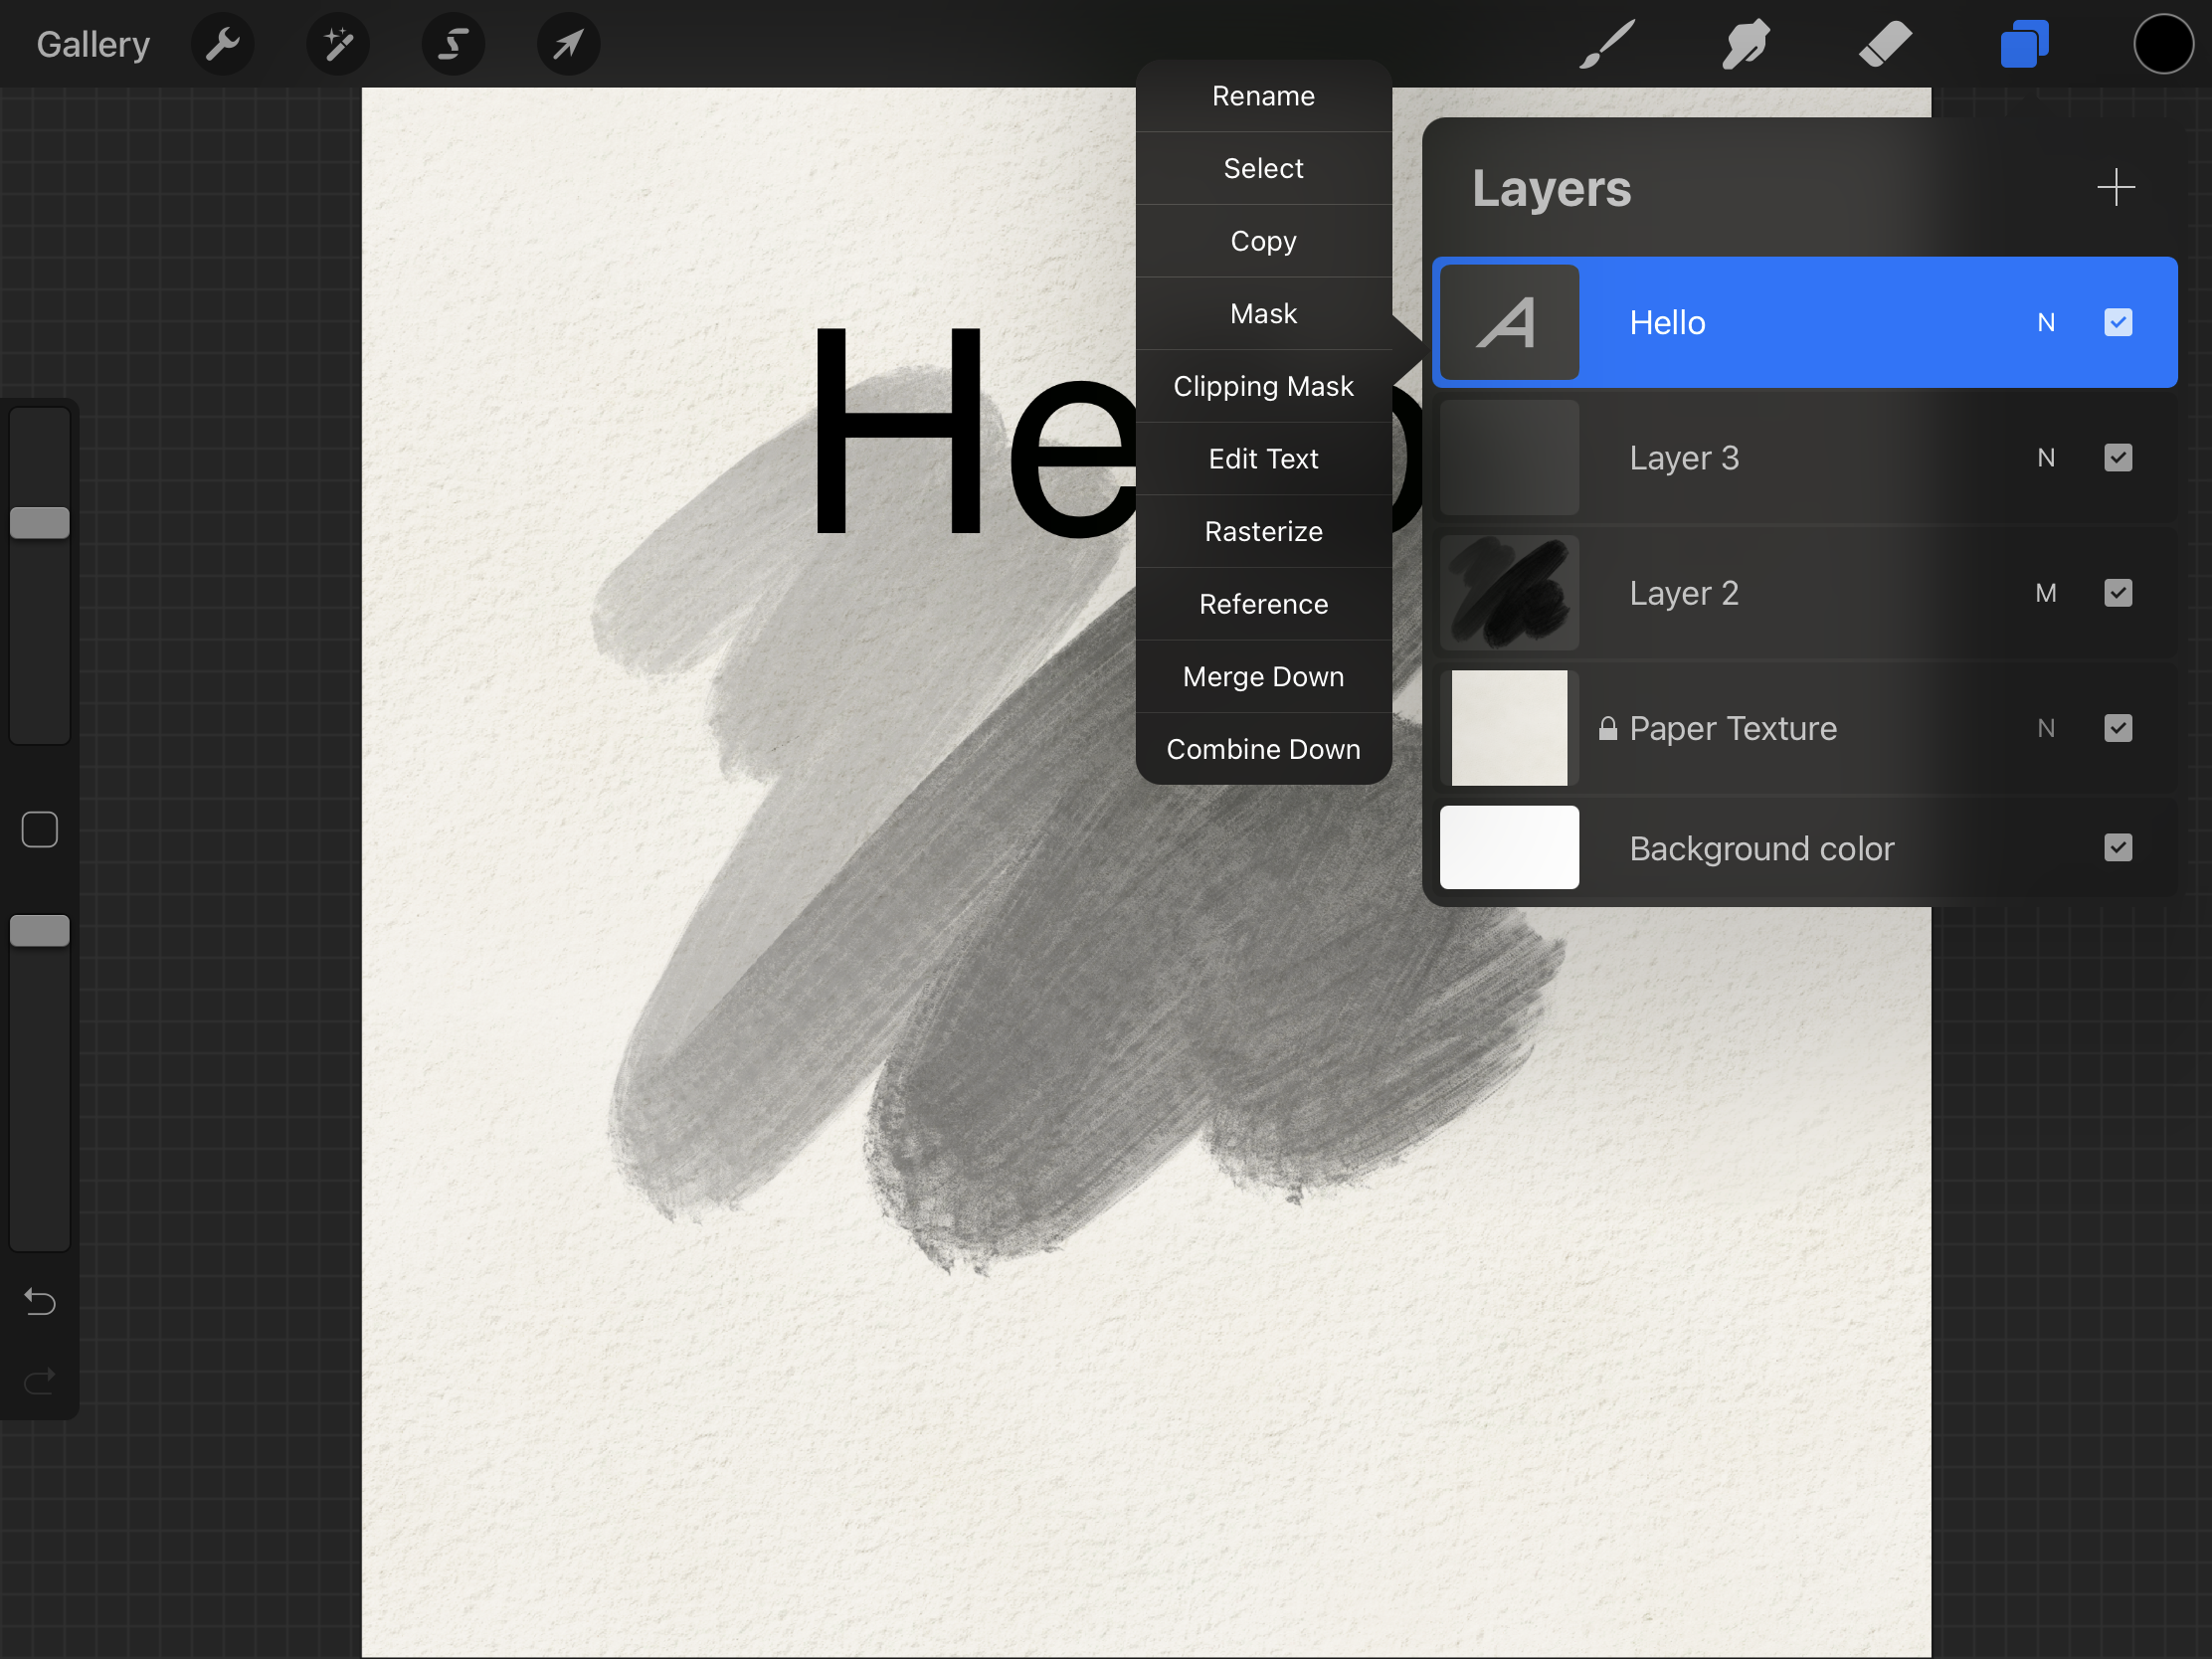
Edit text as an image
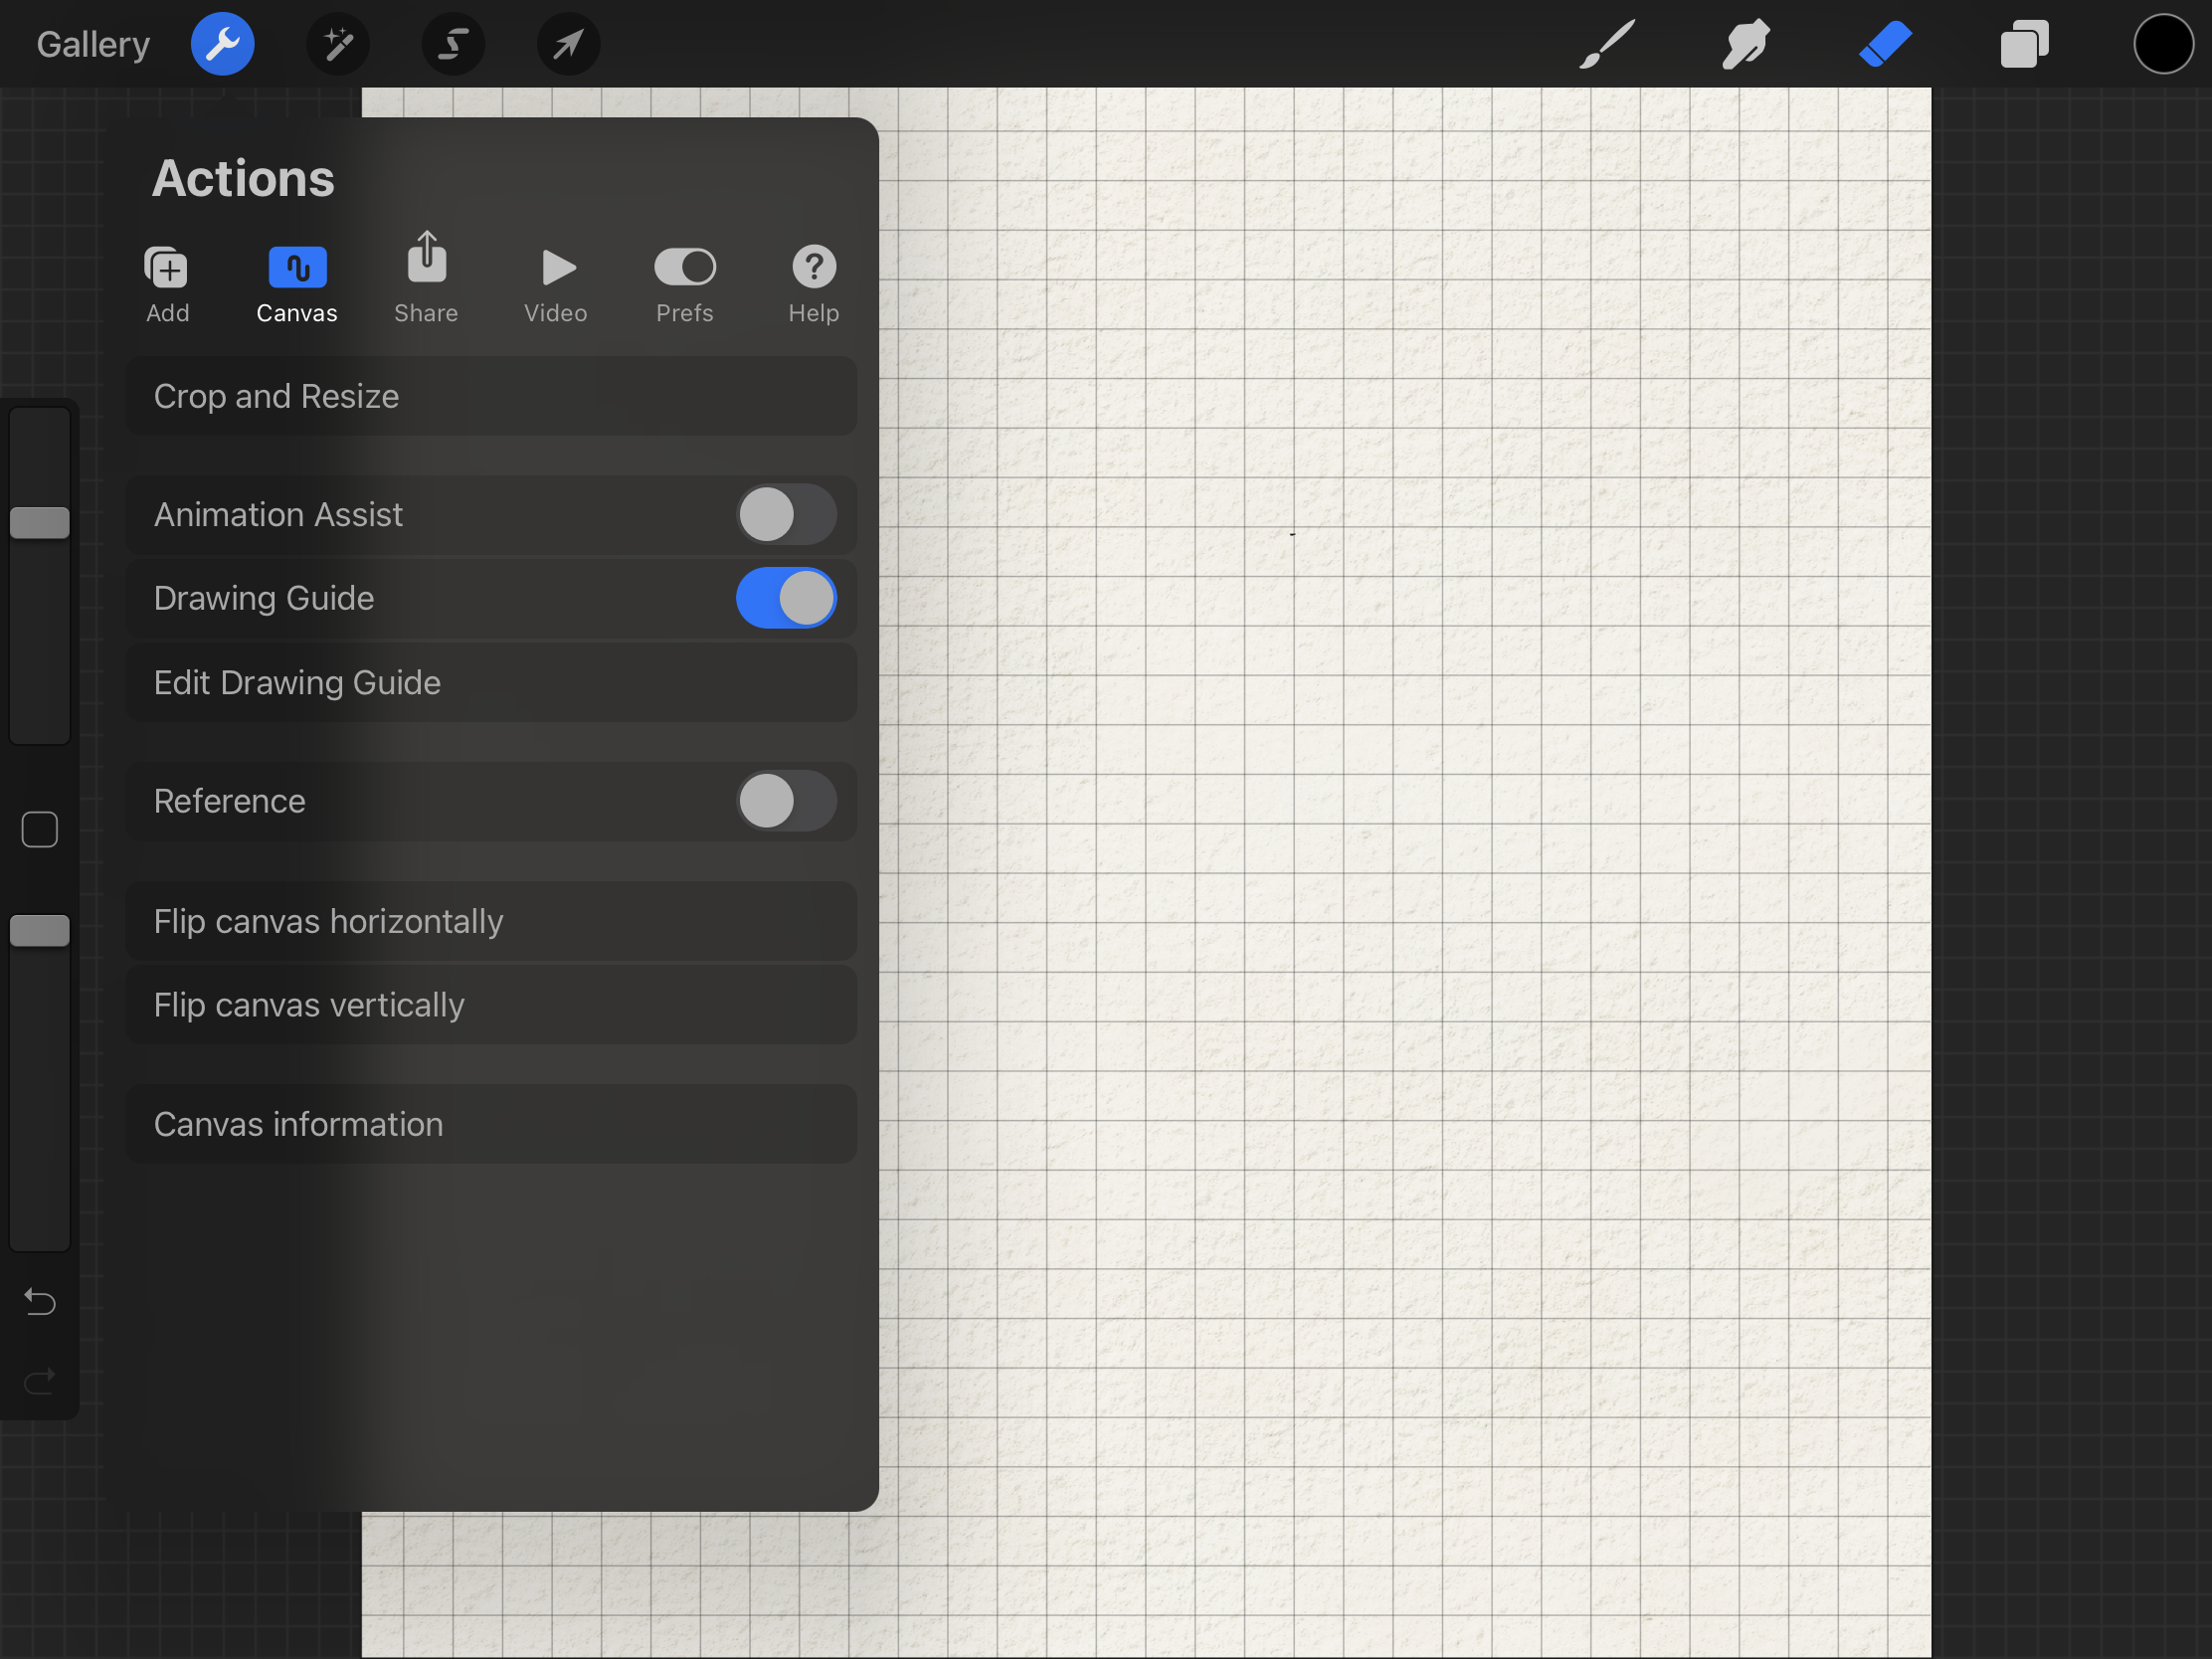
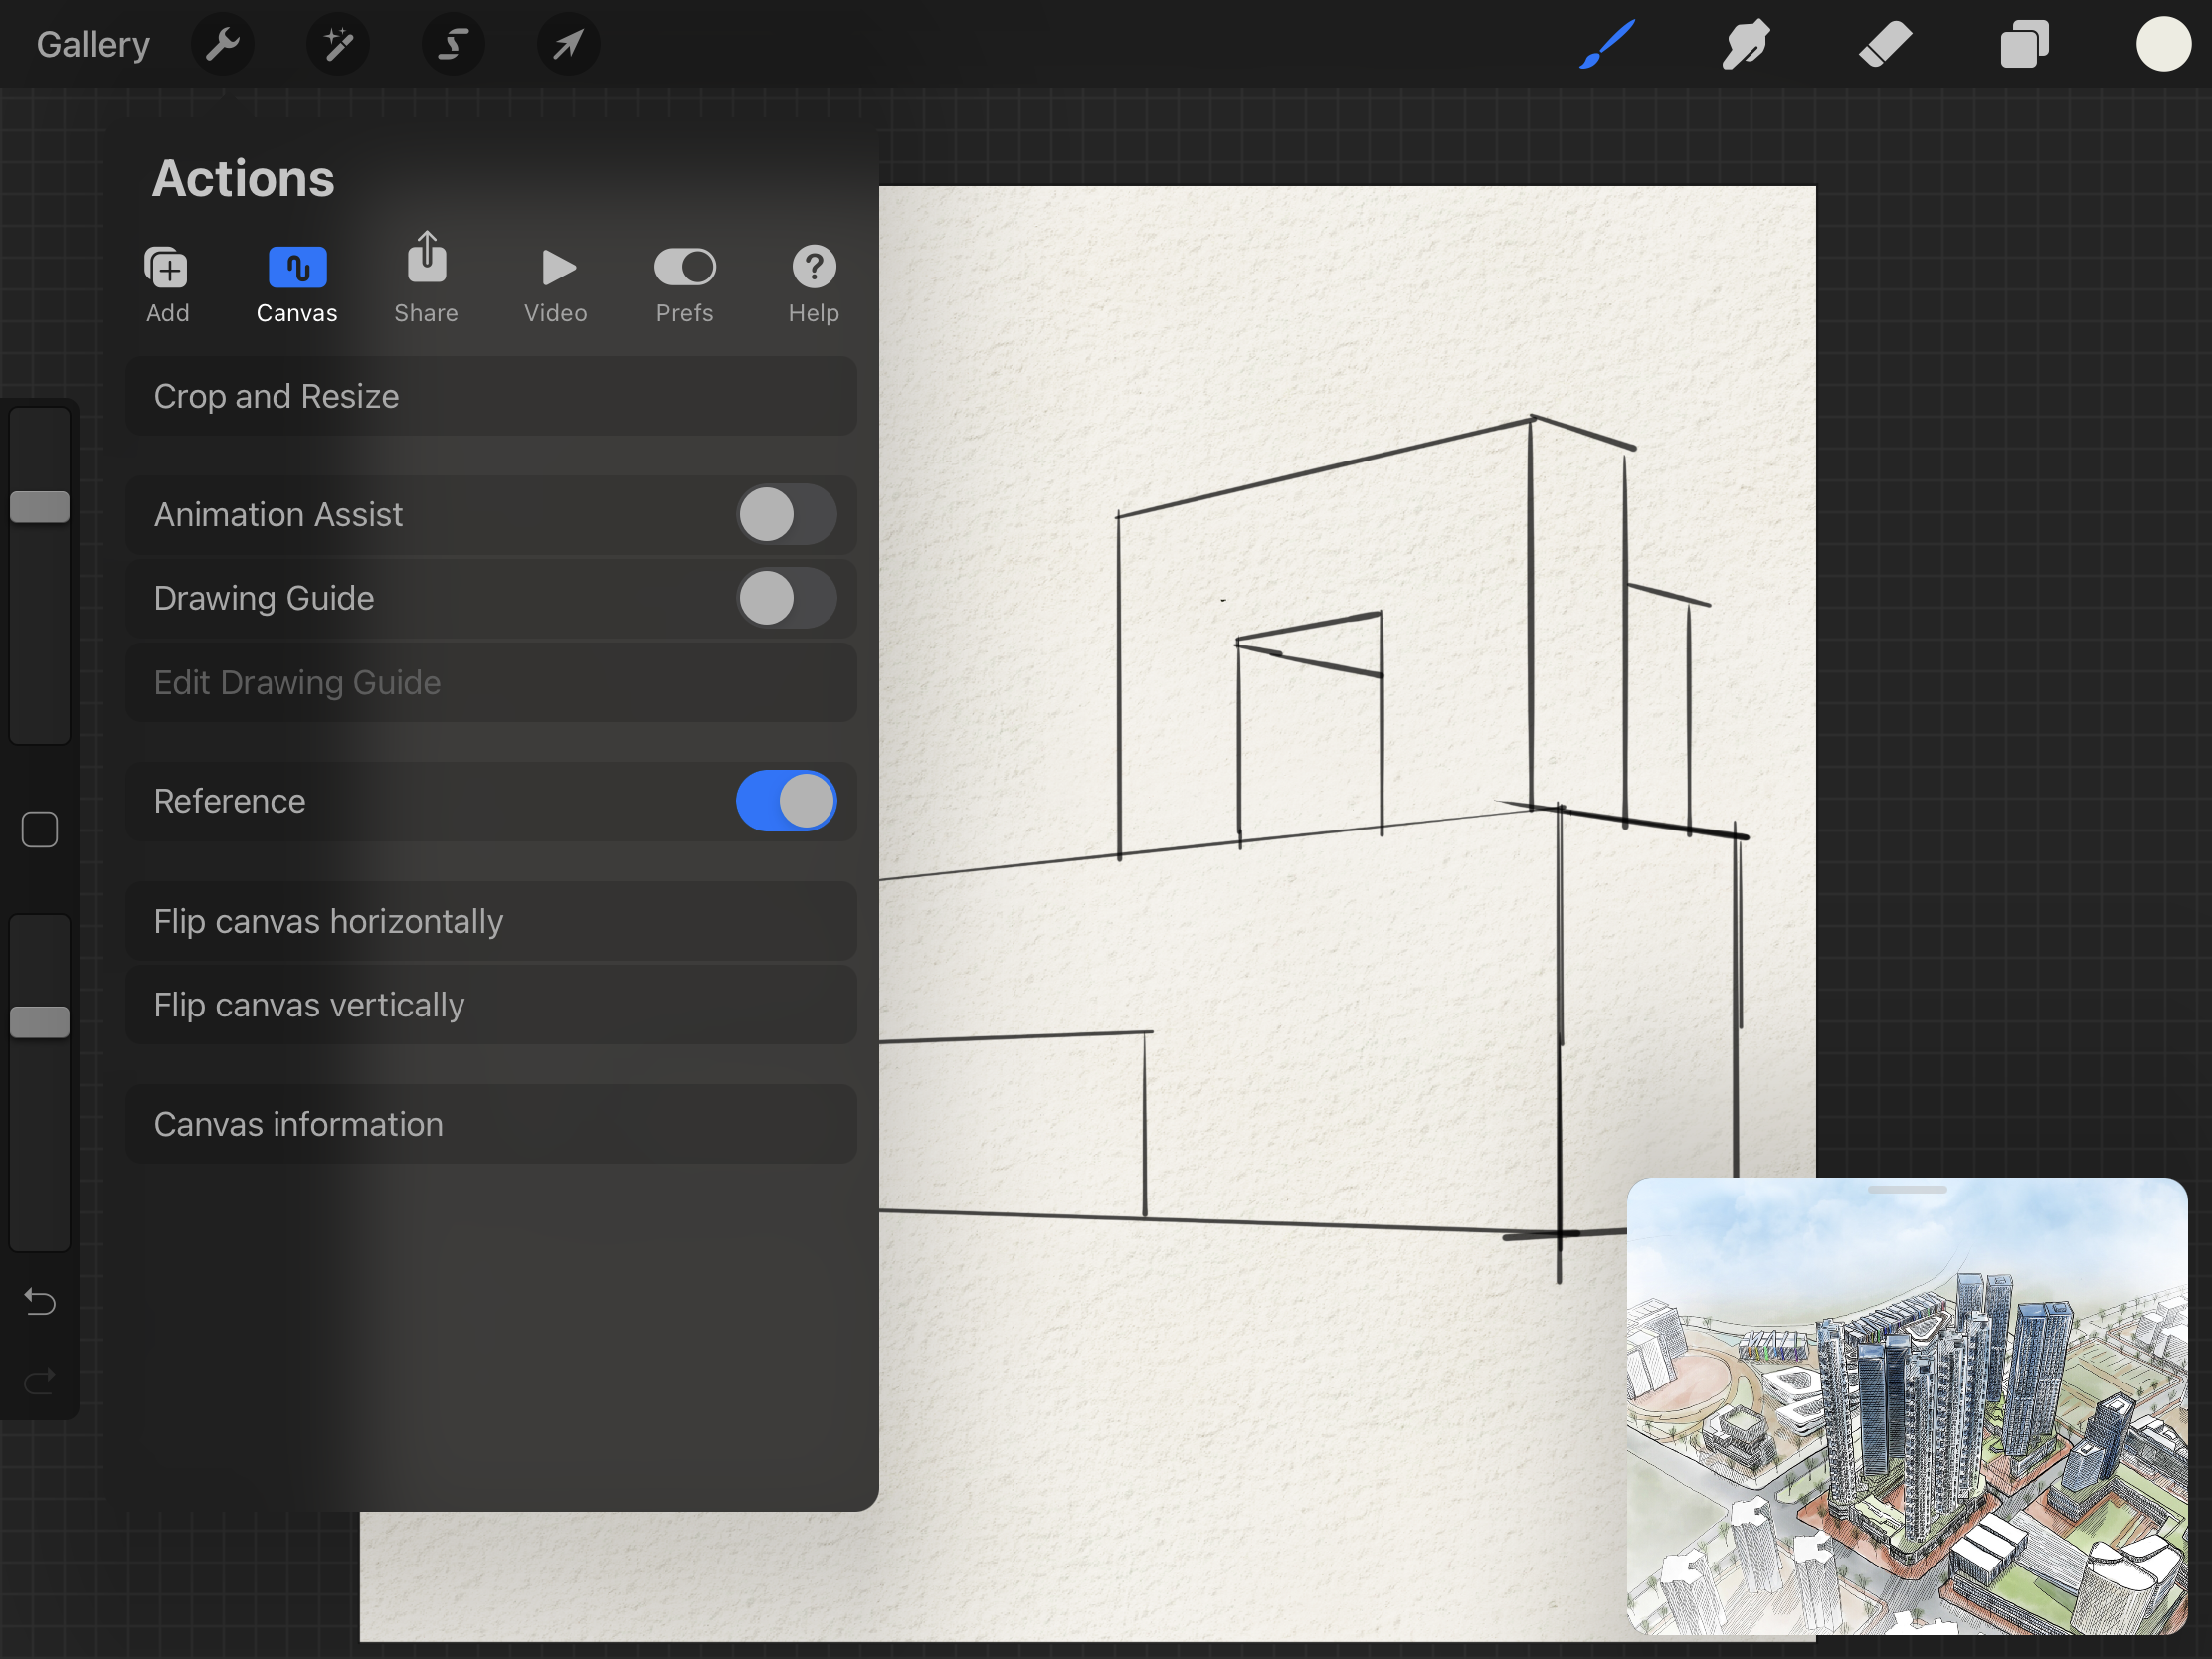
Canvas tab
In the canvas tab, you can adjust the size of the canvas, add a drawing guide (3D, ISO, 1 point perspective, 2 points perspective, and 3-points perspective), add a reference image on a separate window, and more.
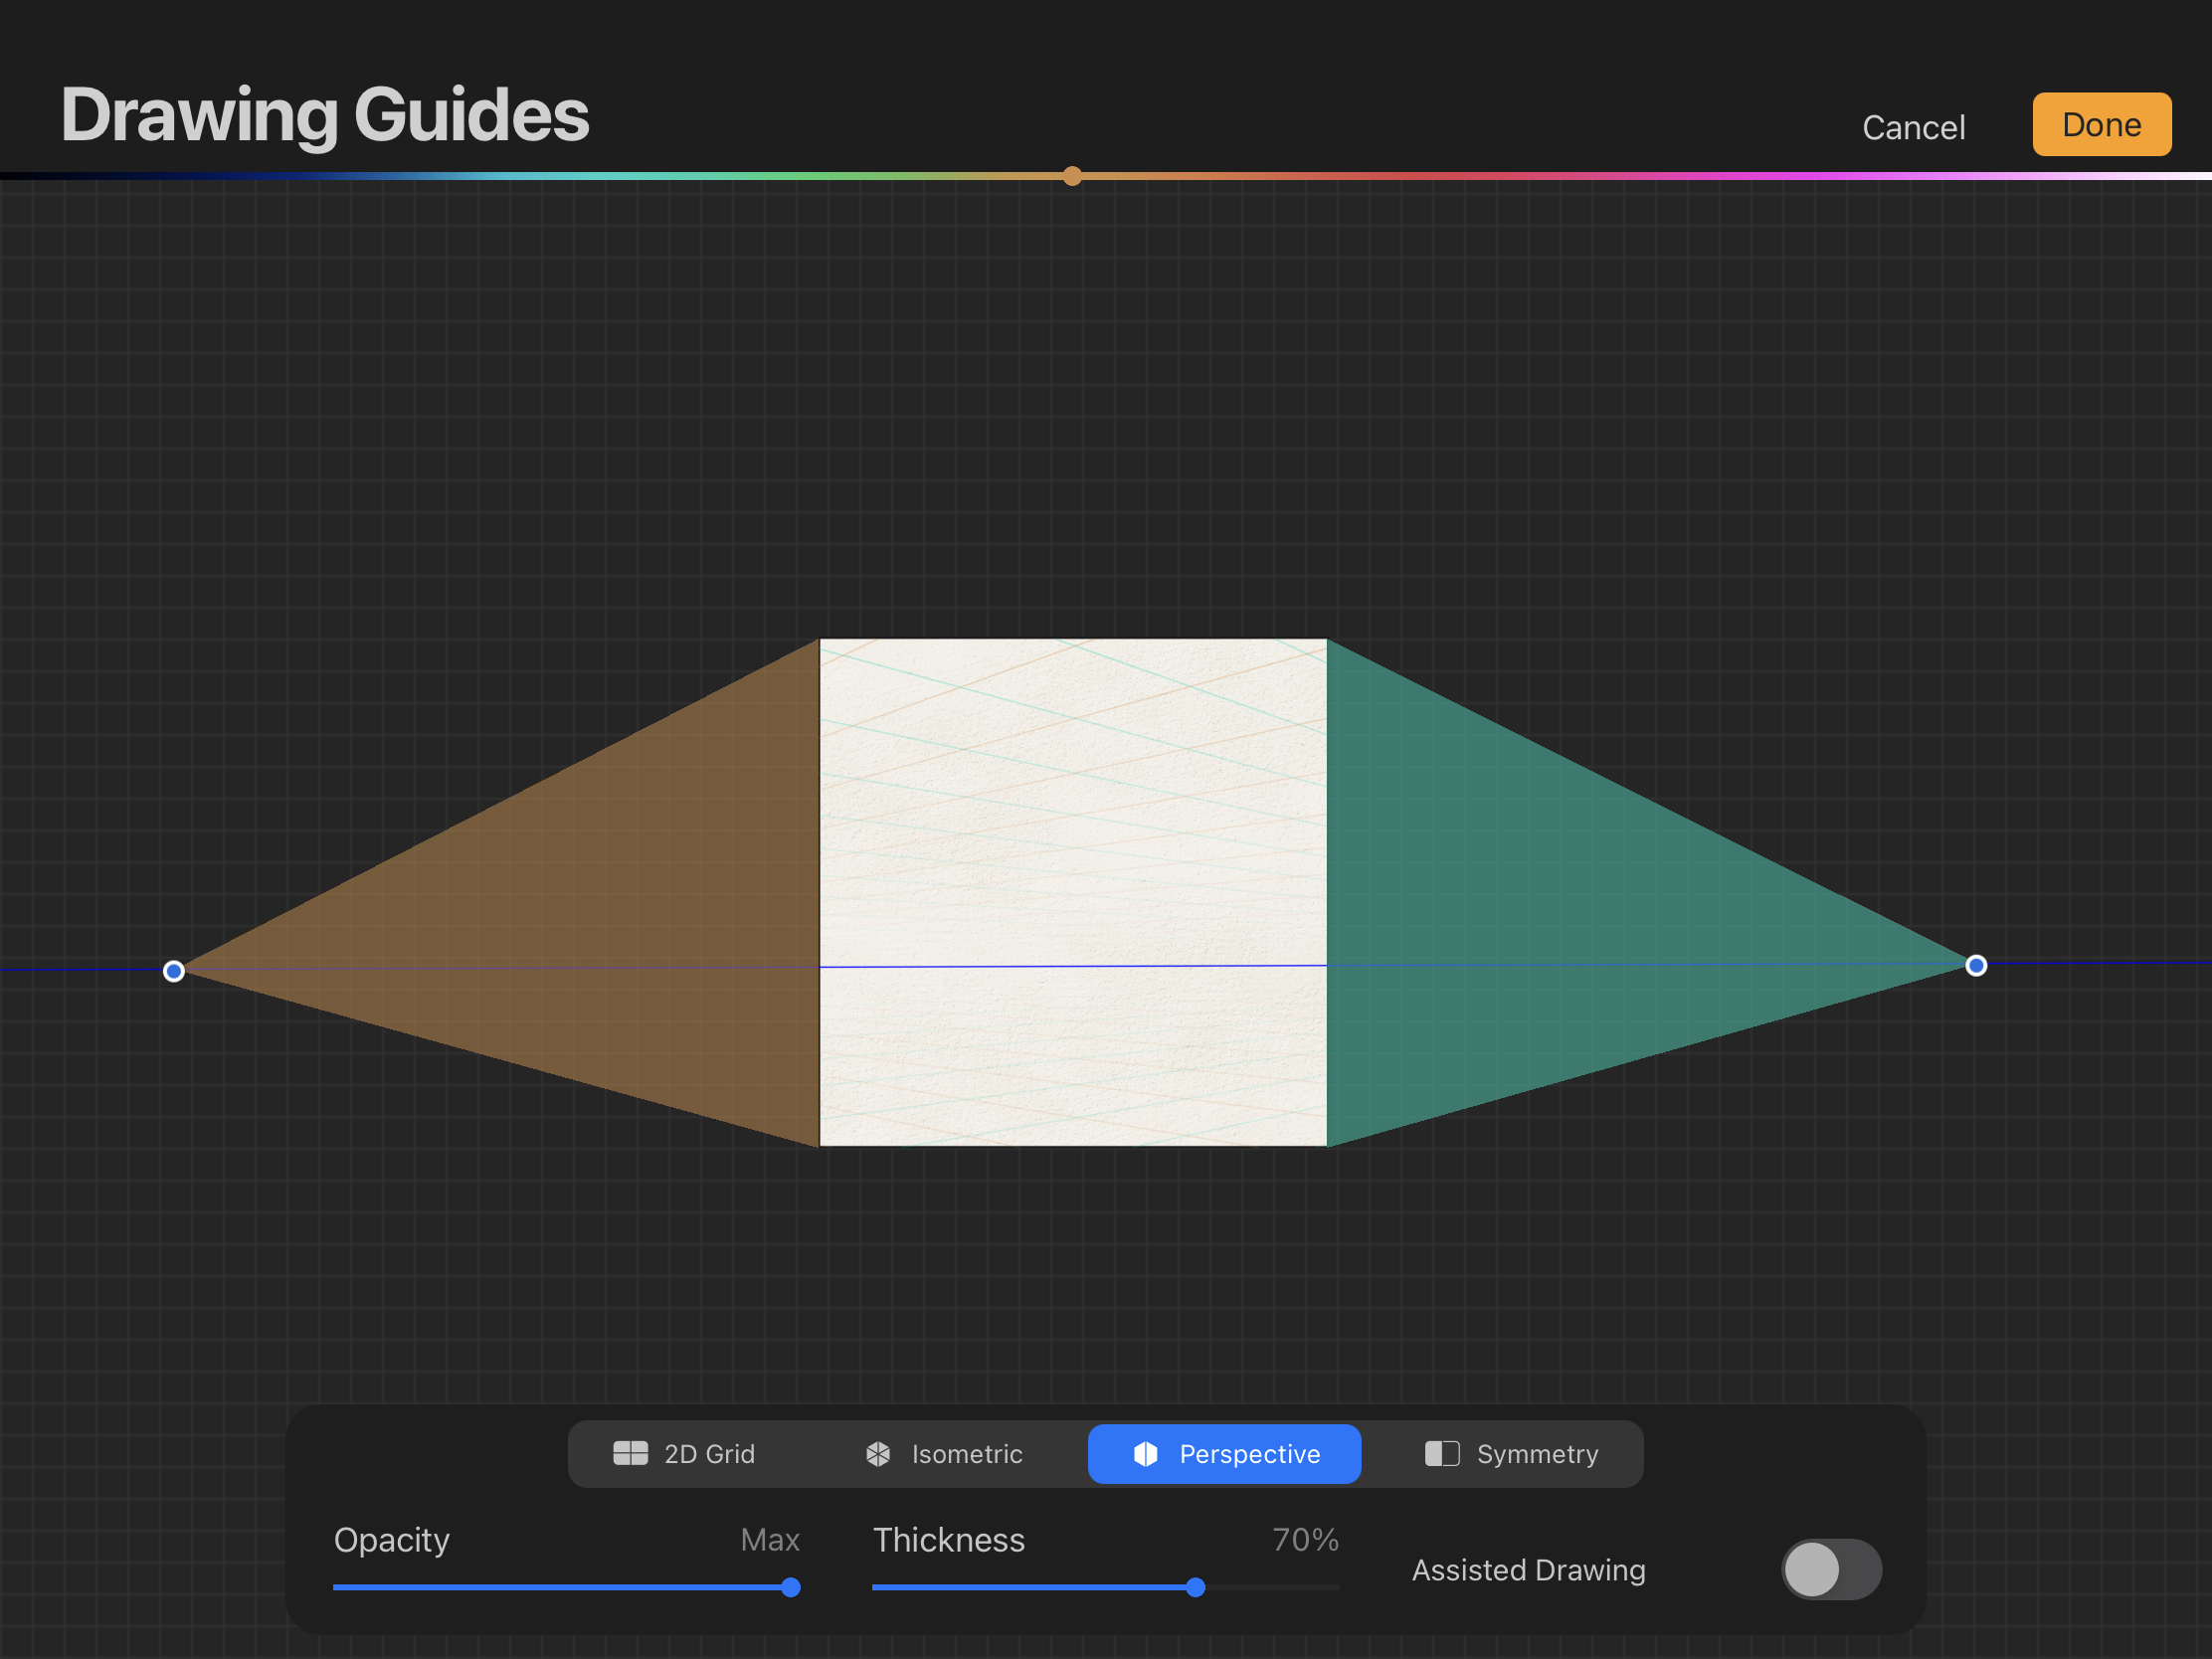
Drawing Guide
Edit Drawing Guide
Activate Drawing Assist from the layers
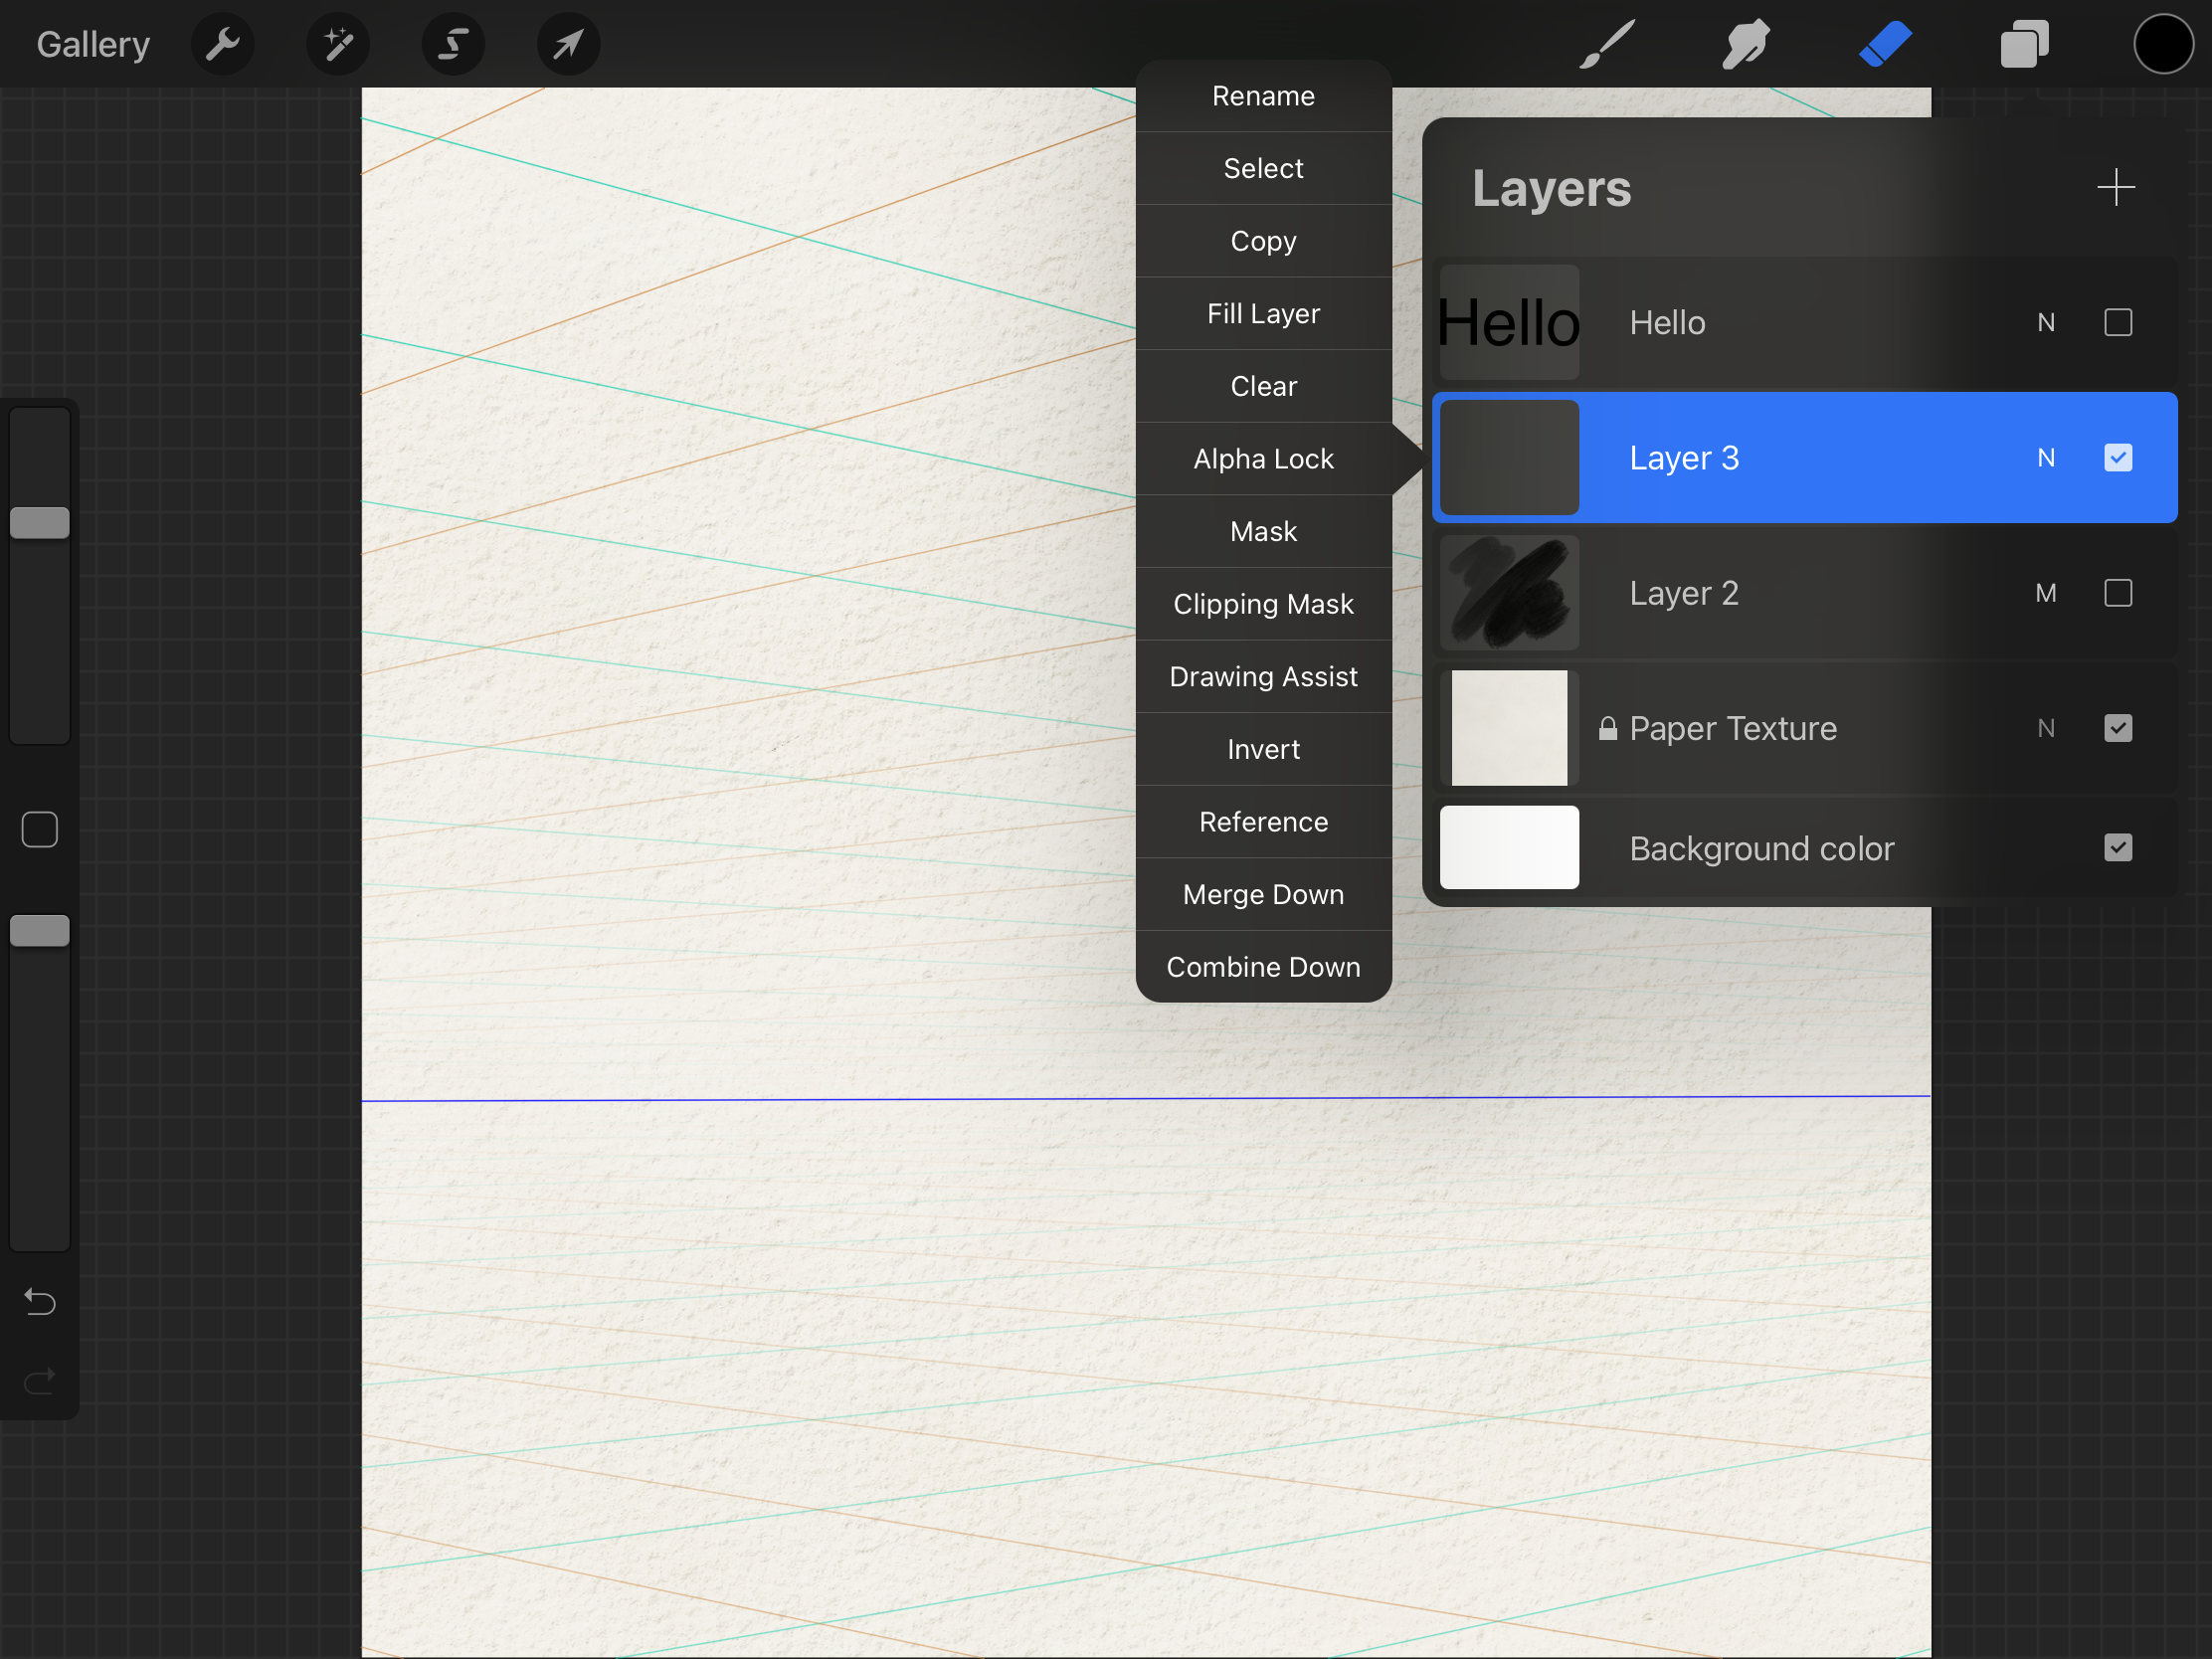
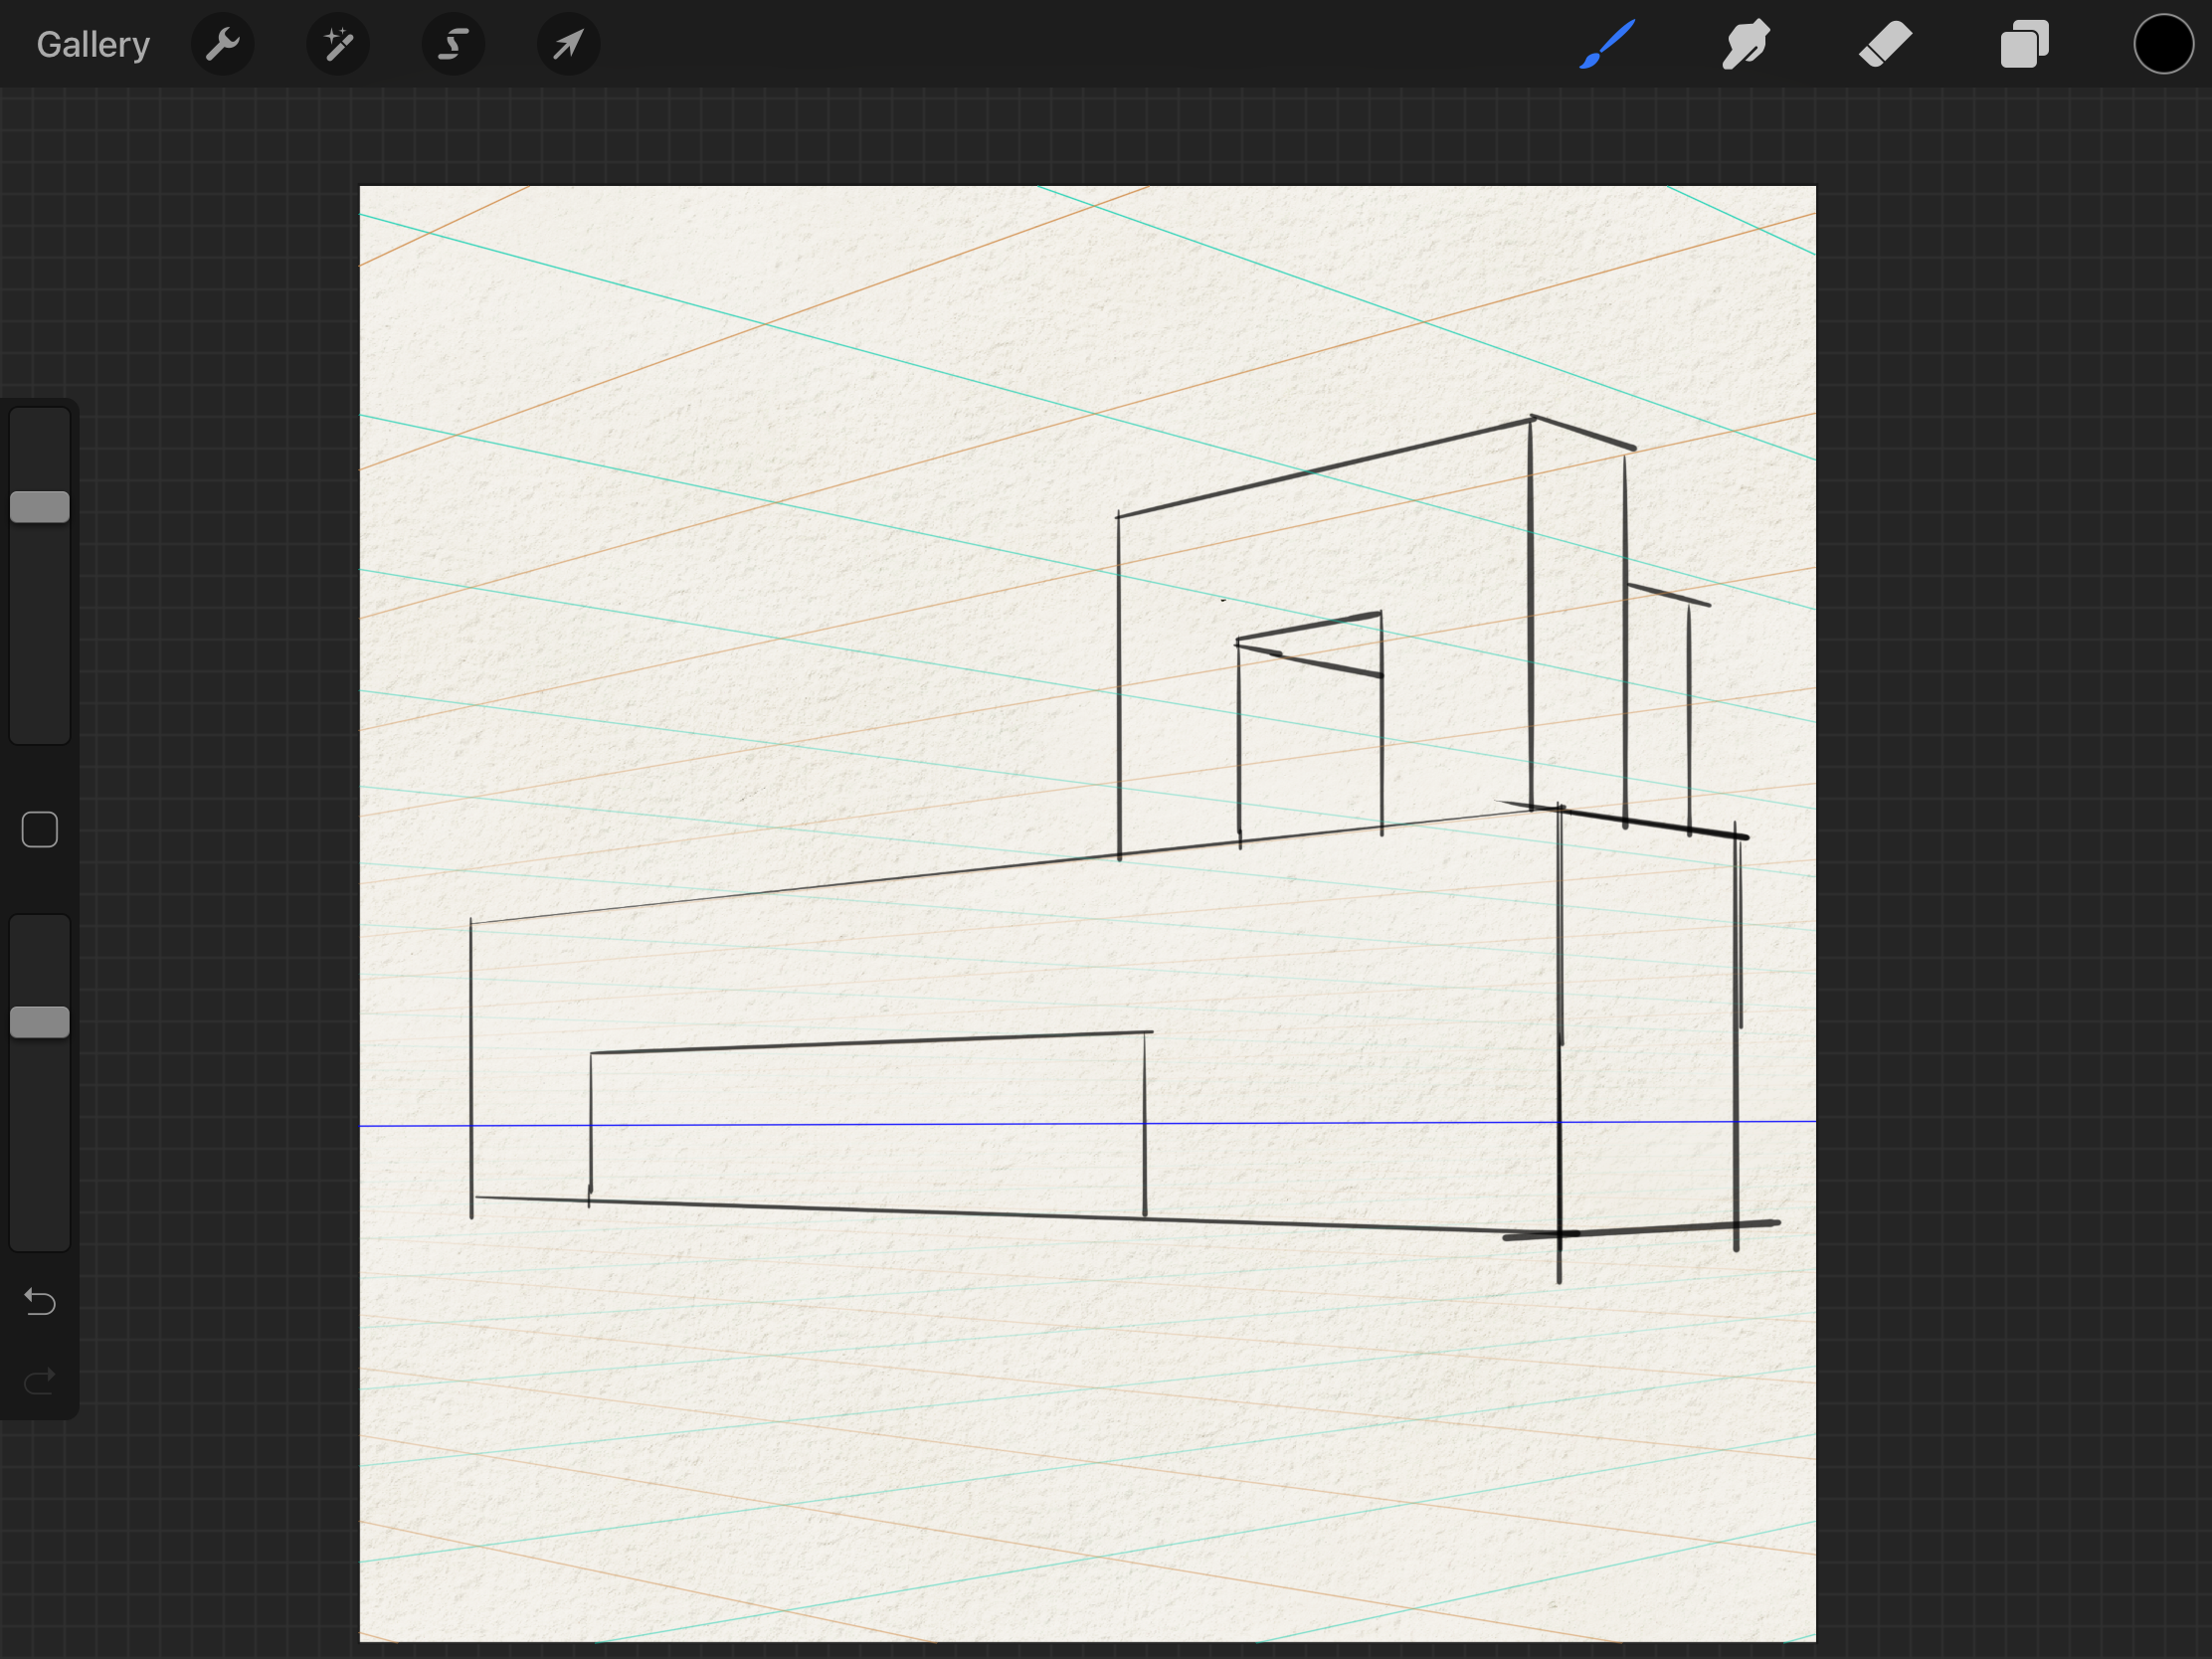
Draw lines with the Drawing Assist function
Reference
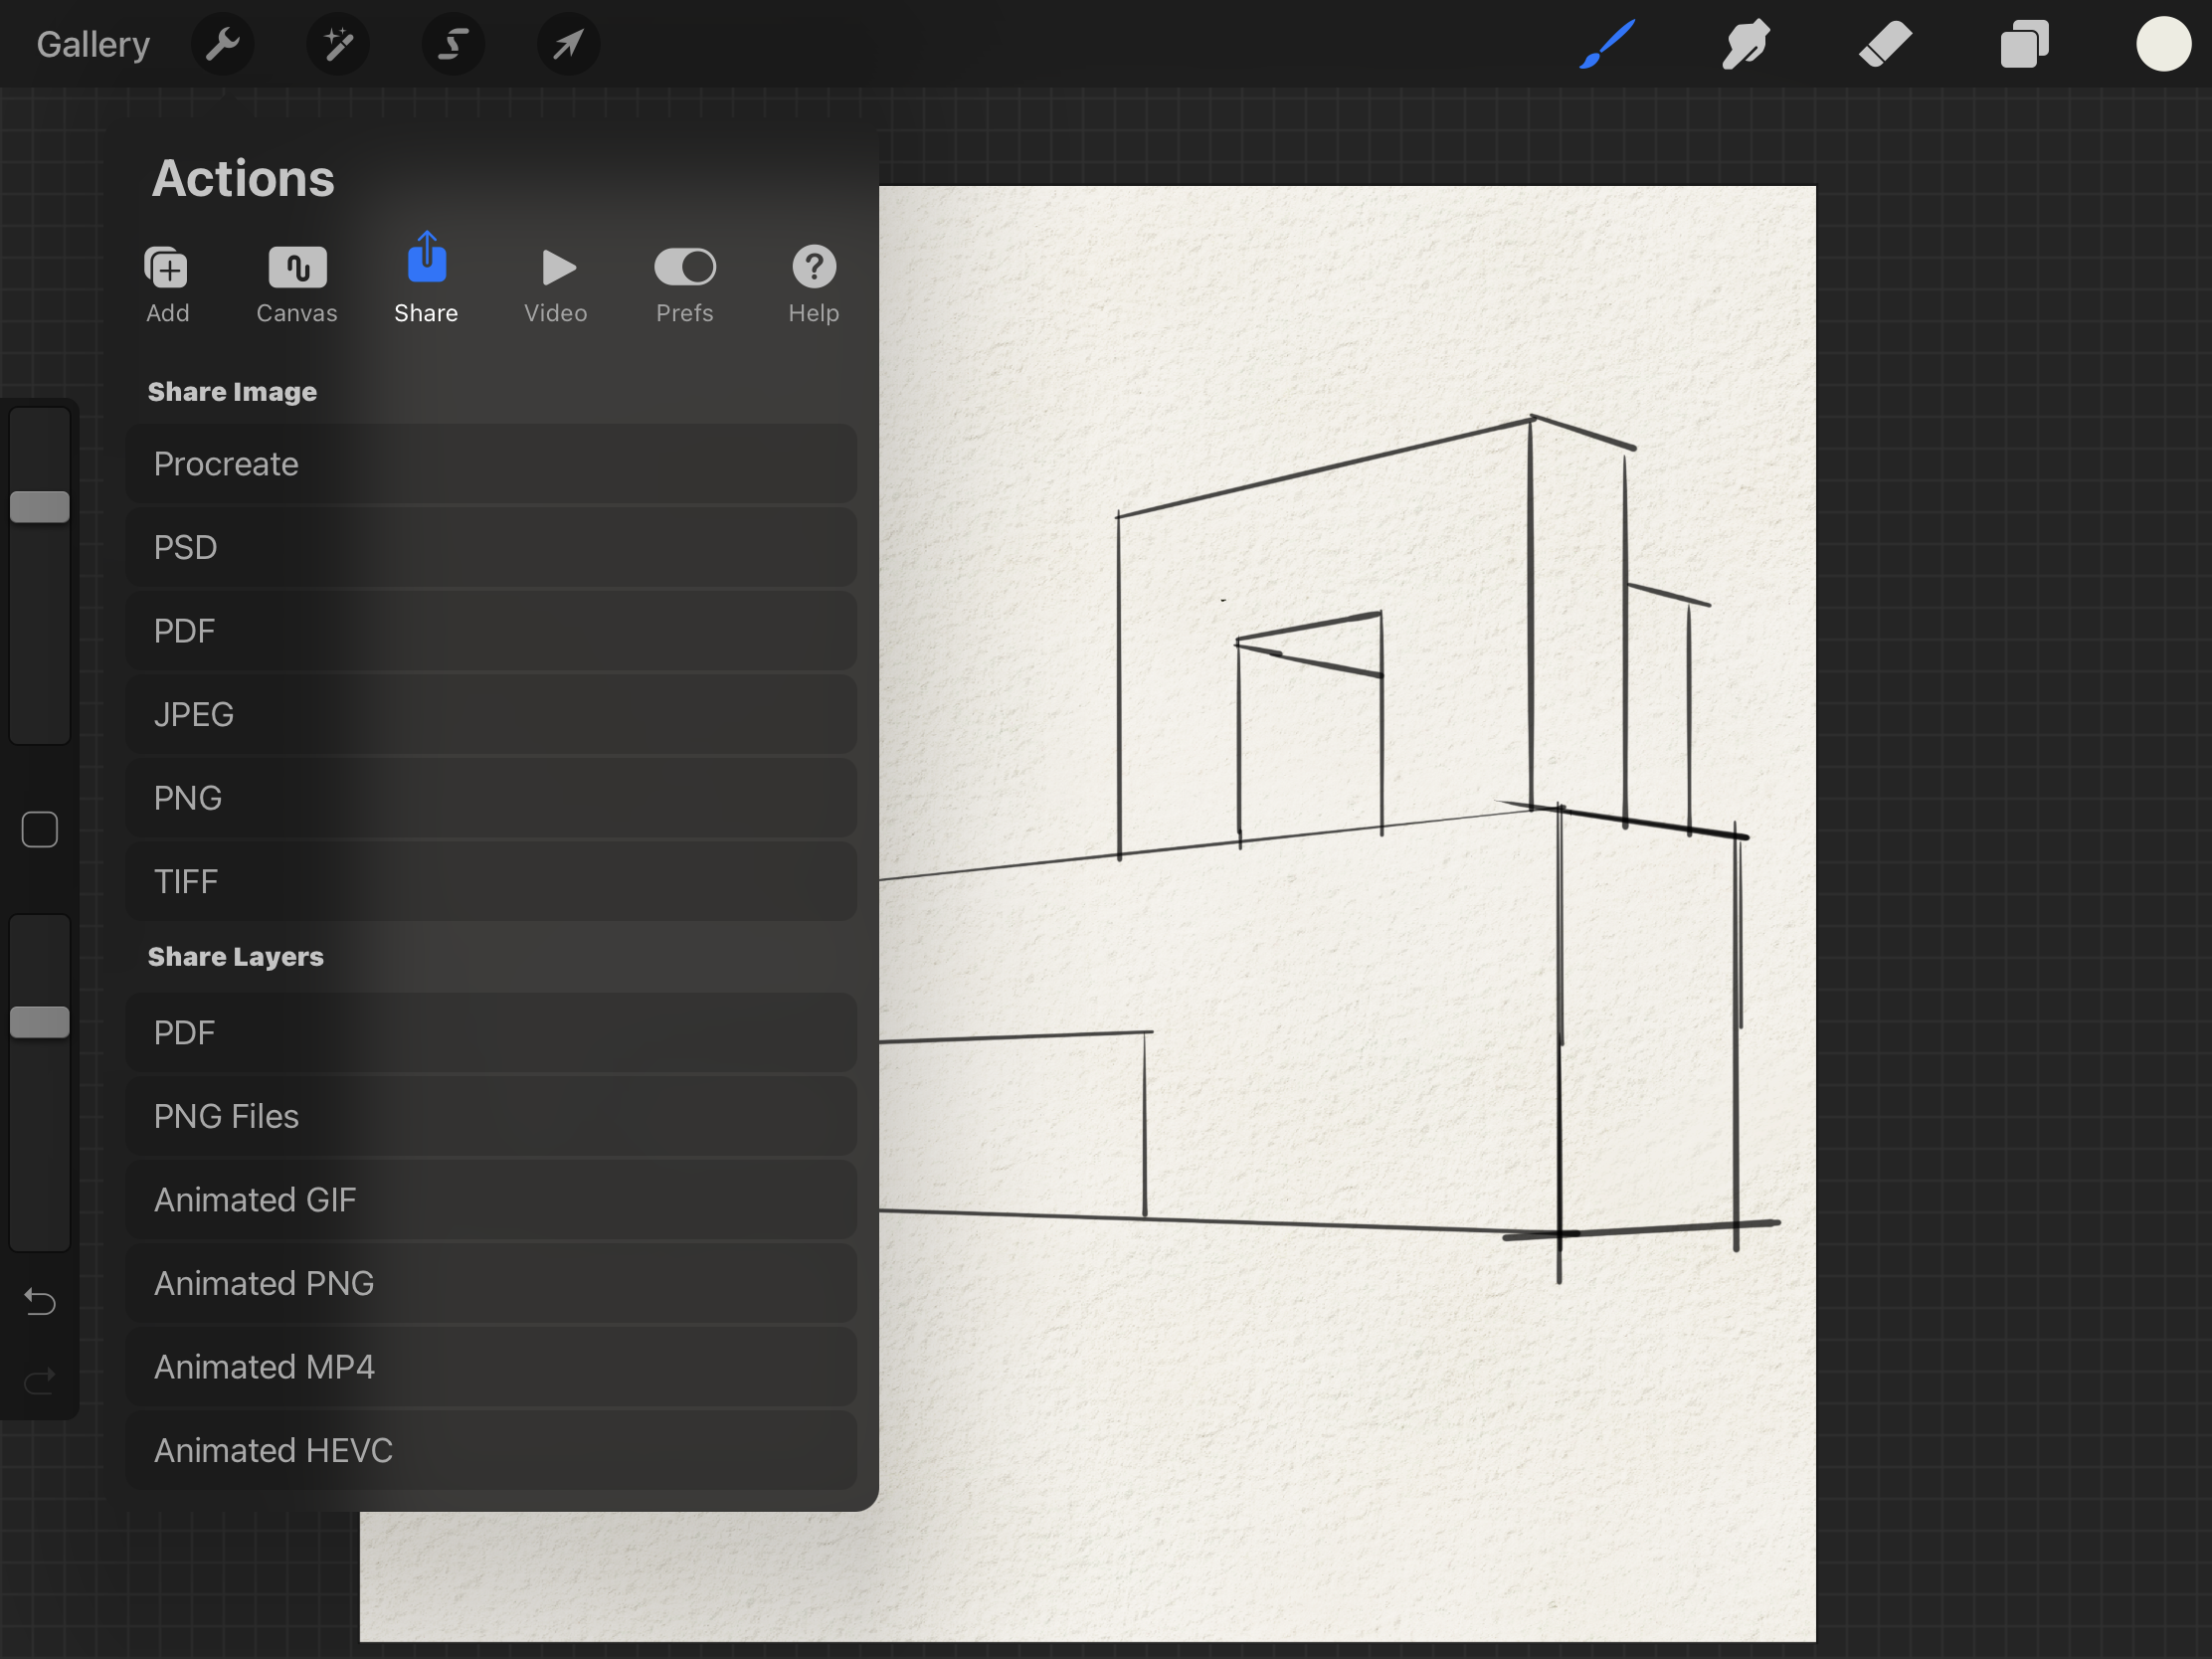
Share tab
Share your work in a variety of image formats.
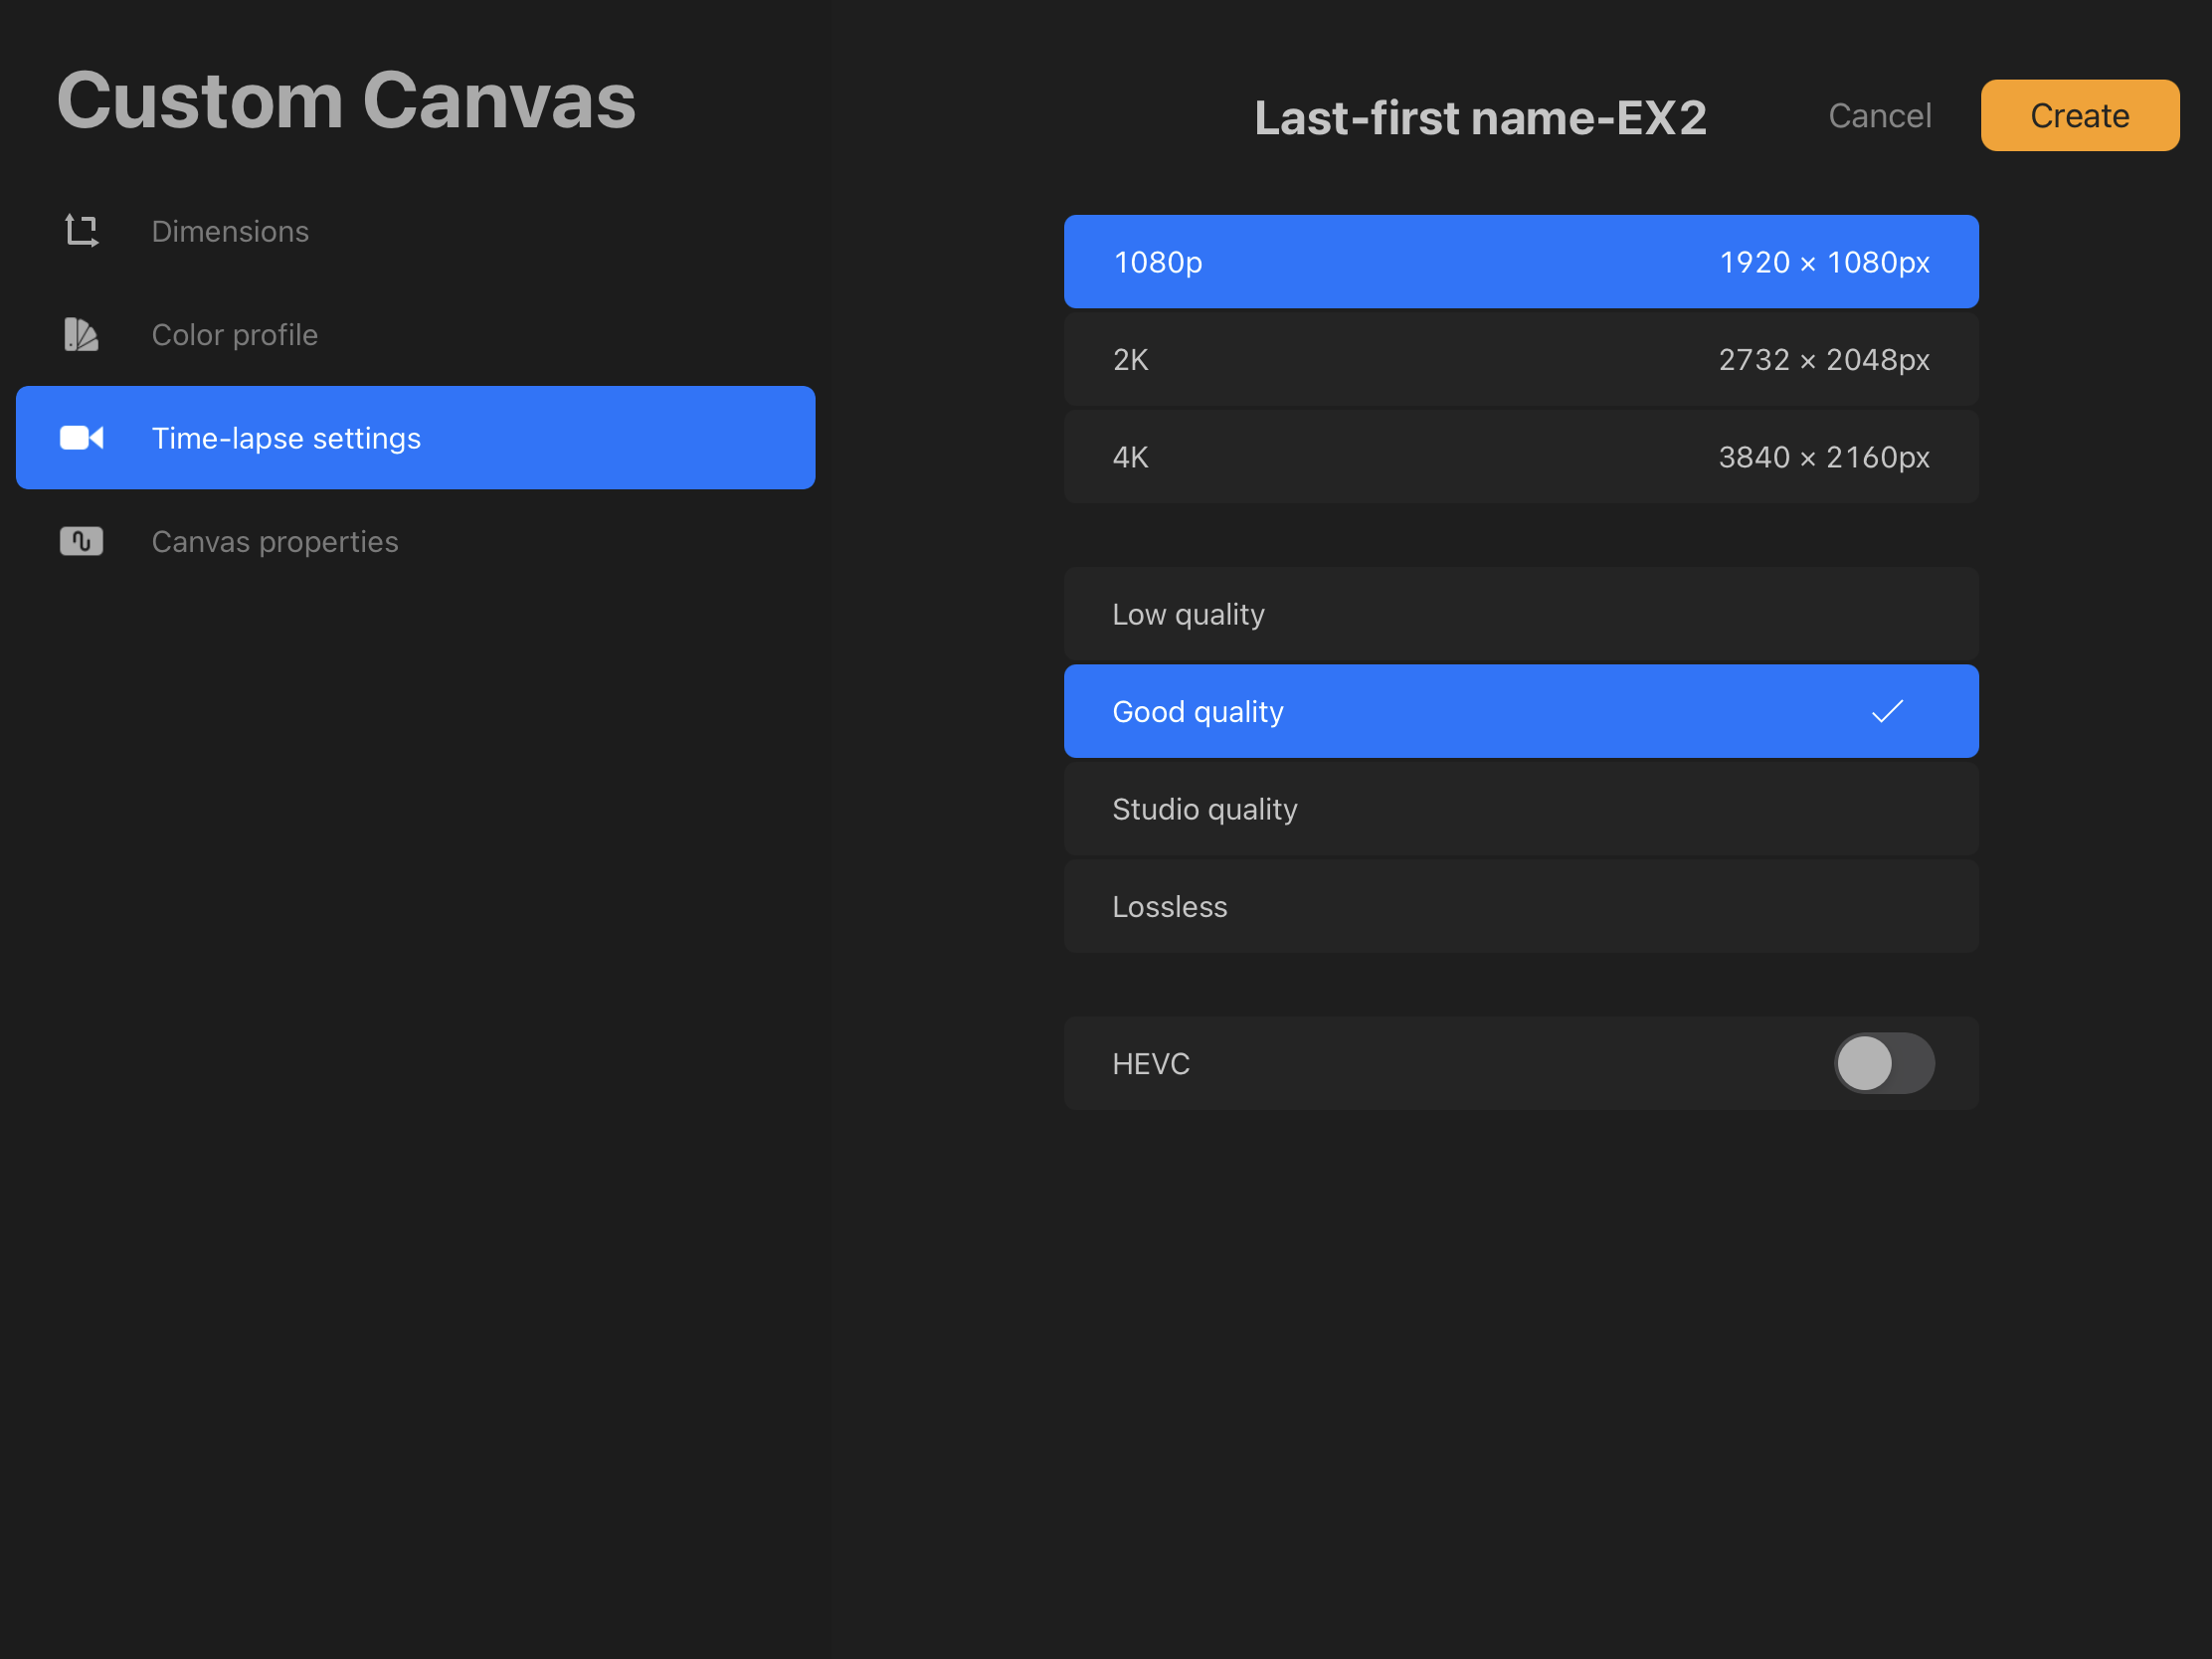
Video tab
Record your work process to a Time-lapse video and share it.

Preferences tab
Customize the workspace to suit your workflow.

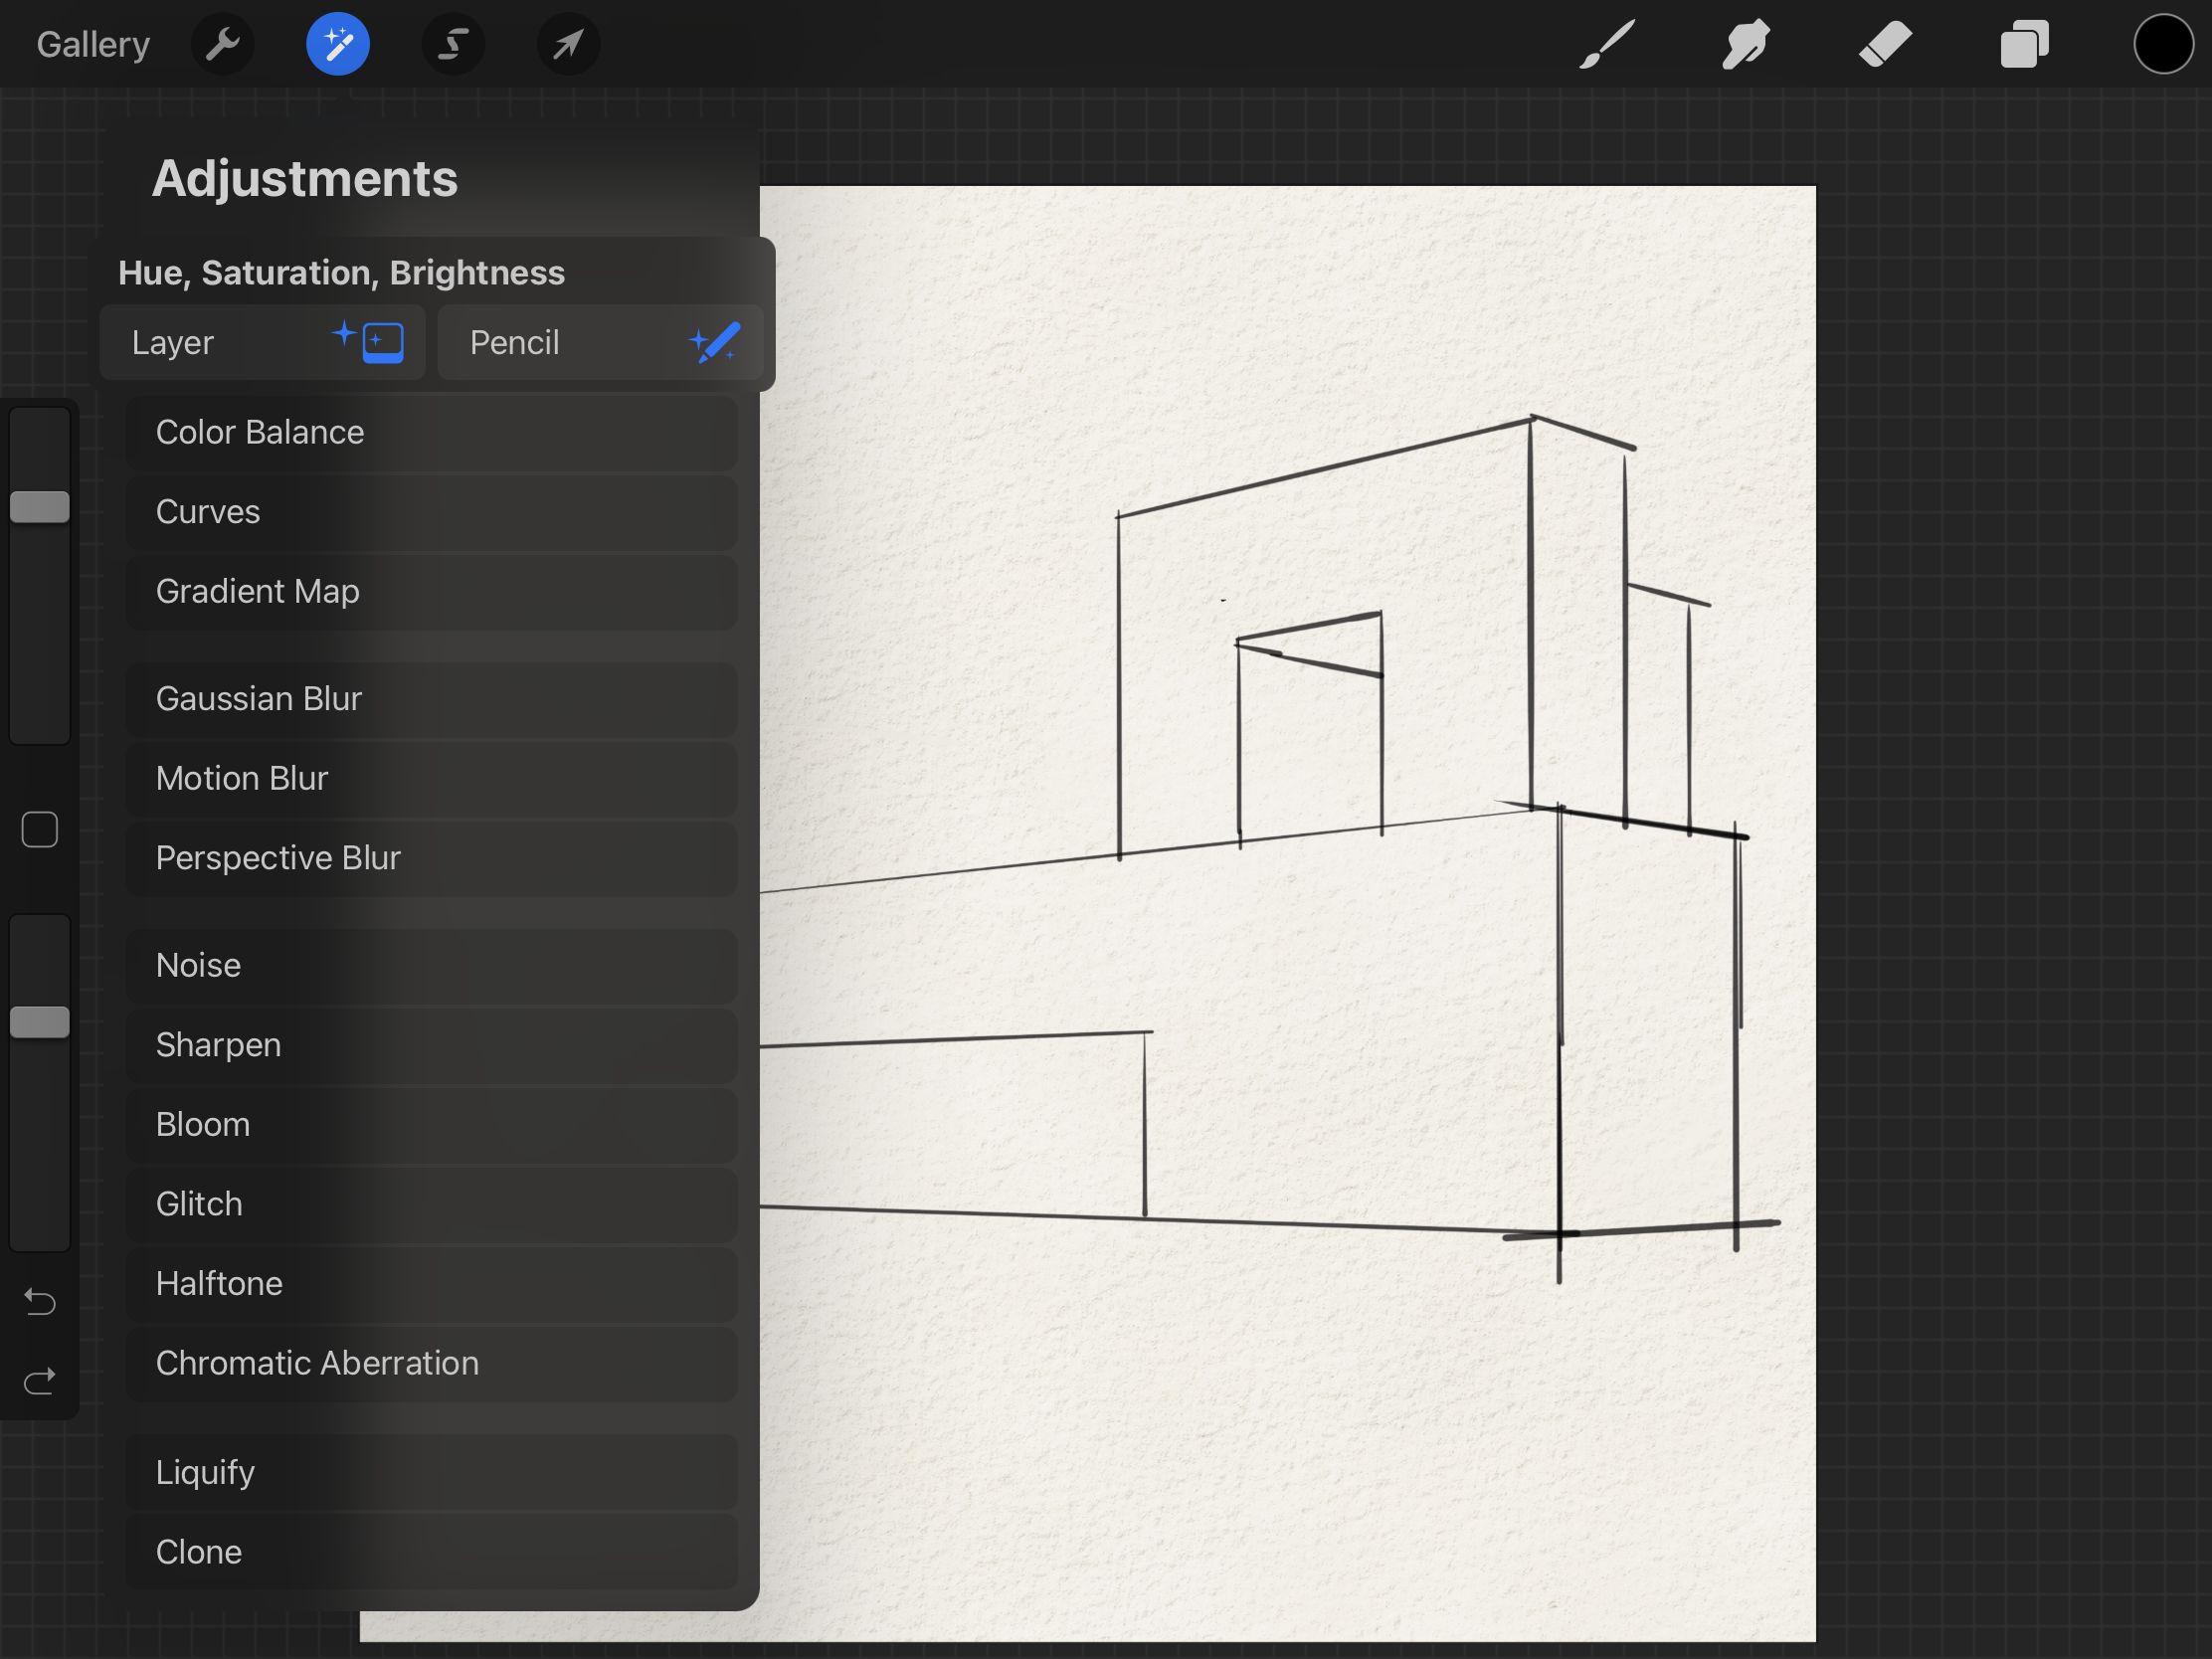
Adjustments
Adjust your image with Sharpen, Noise, Blur, Color changes, apply effects like Liquify, Bloom, Glitch Halftone, and Chromatic.
You can apply these adjustments to a layer or with a pencil tool.
Selections
If you need any part of your image to control, use this selection tool.

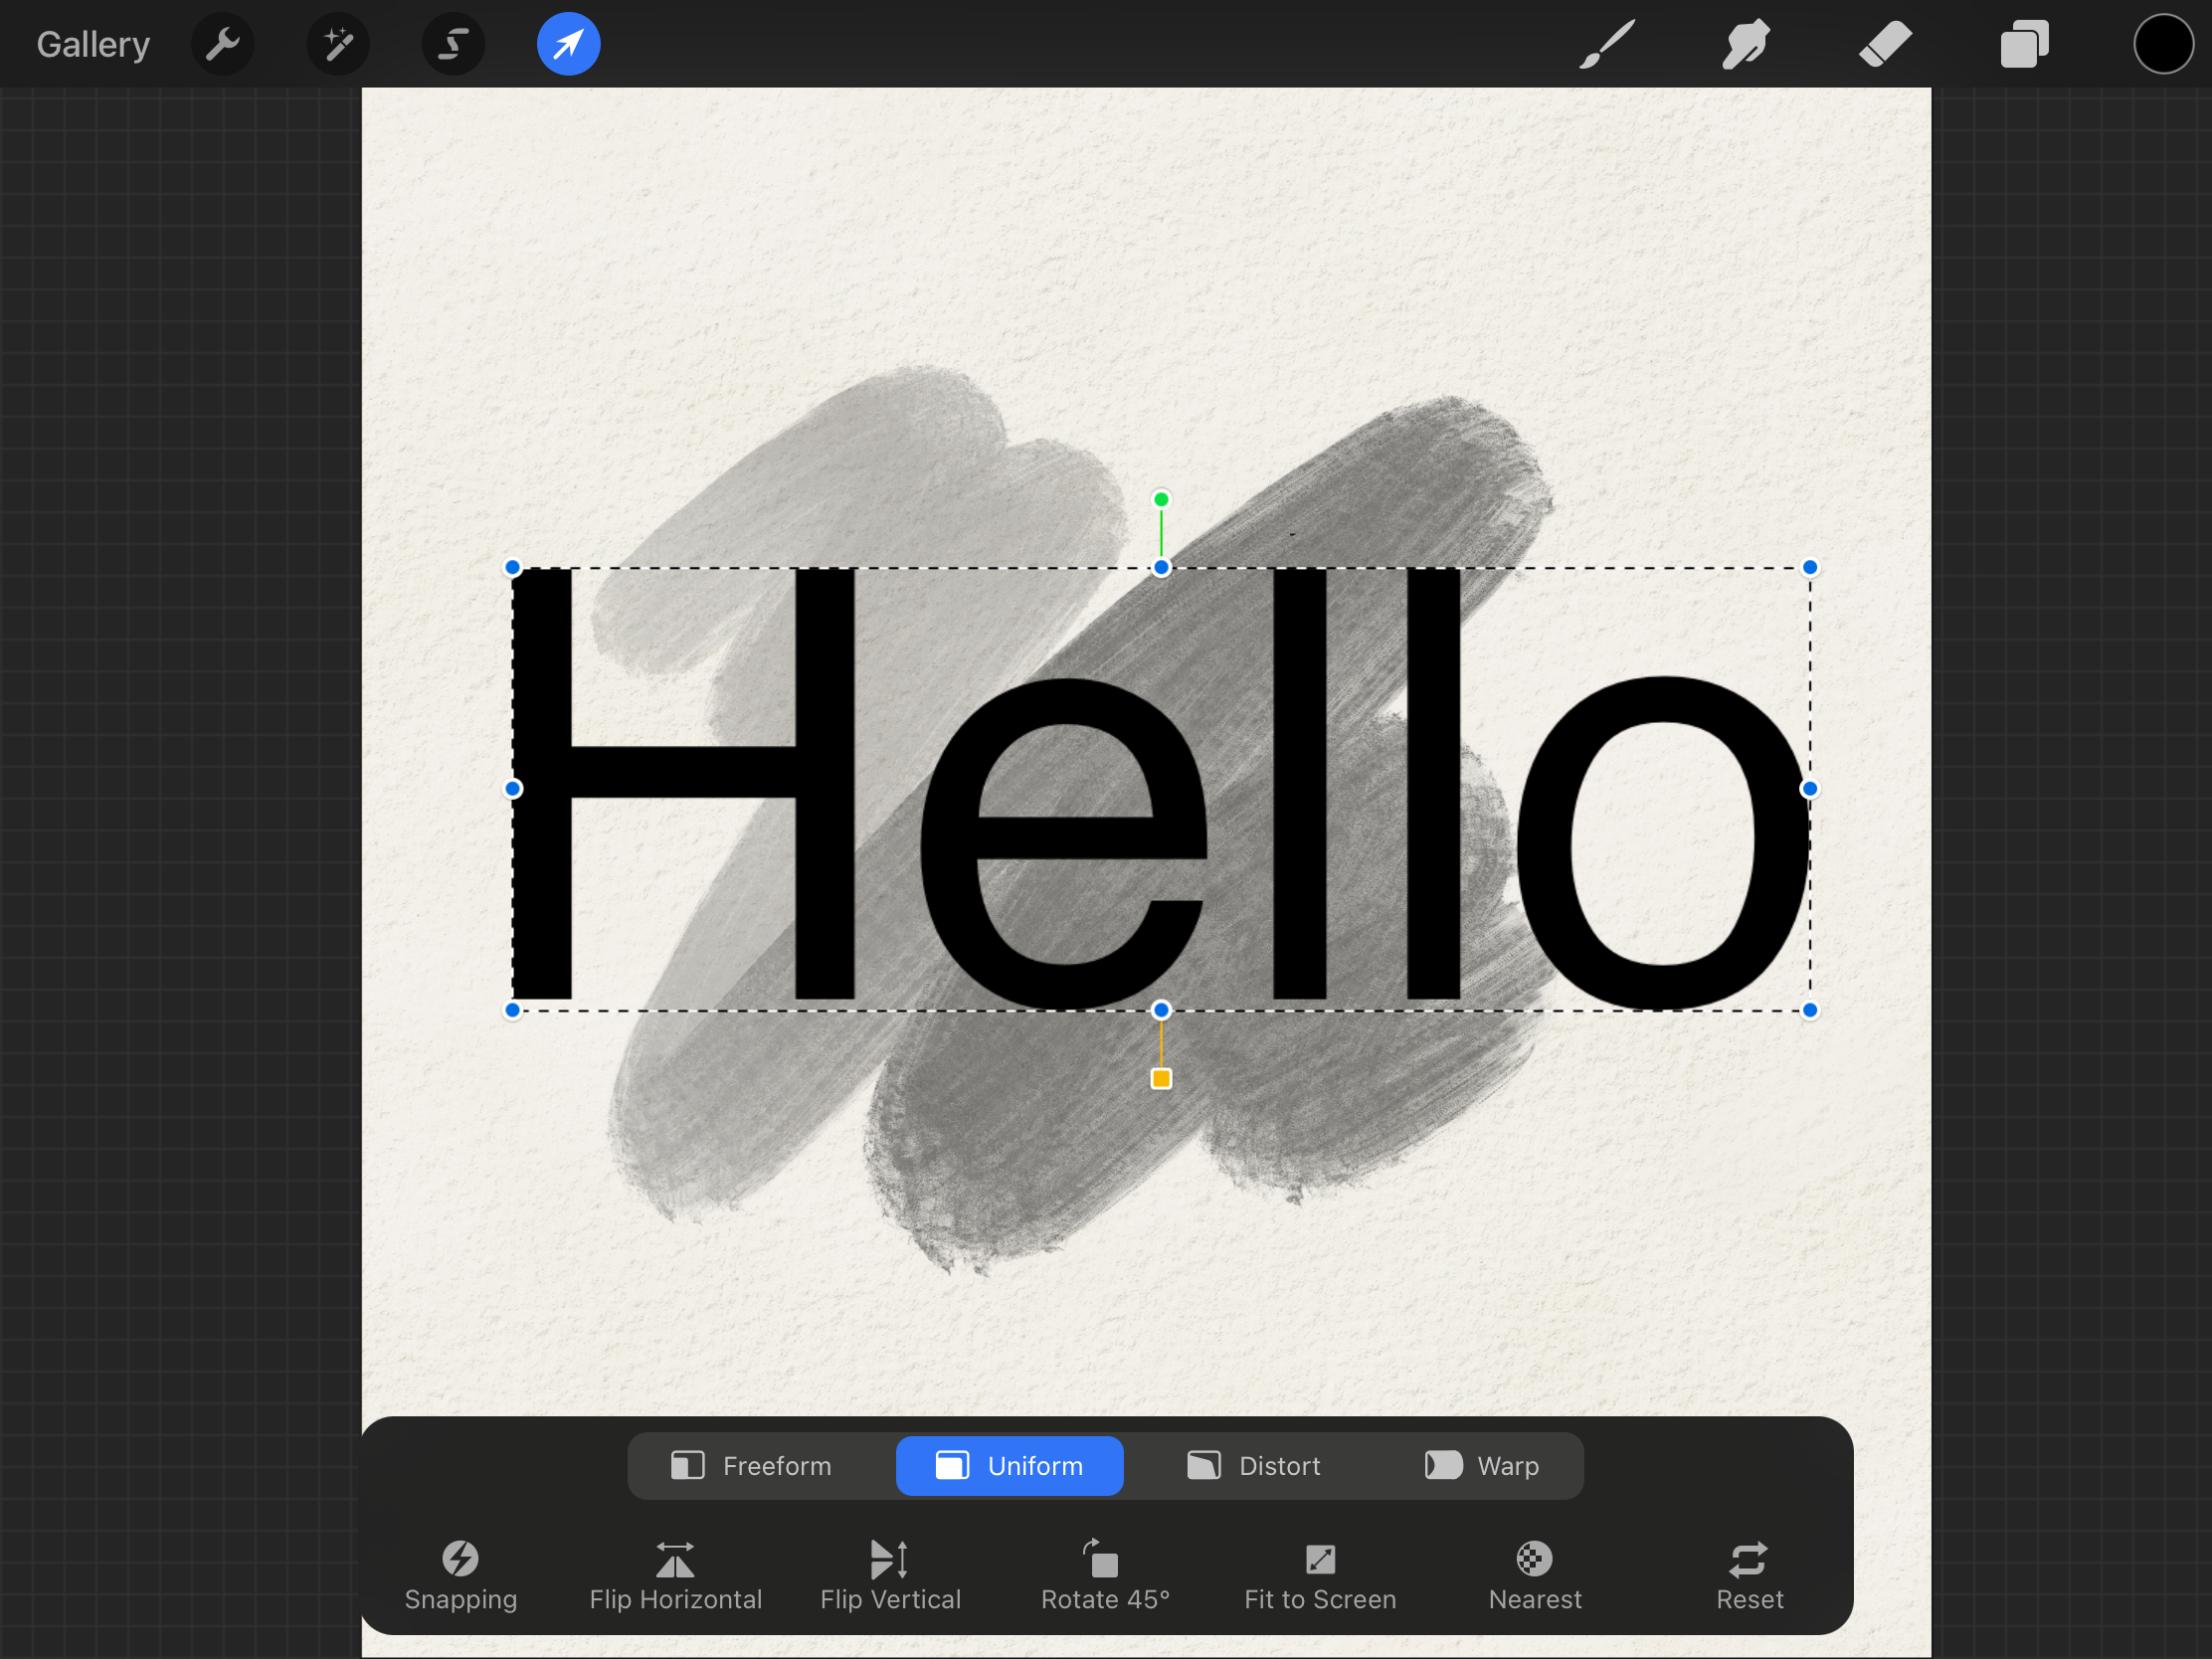
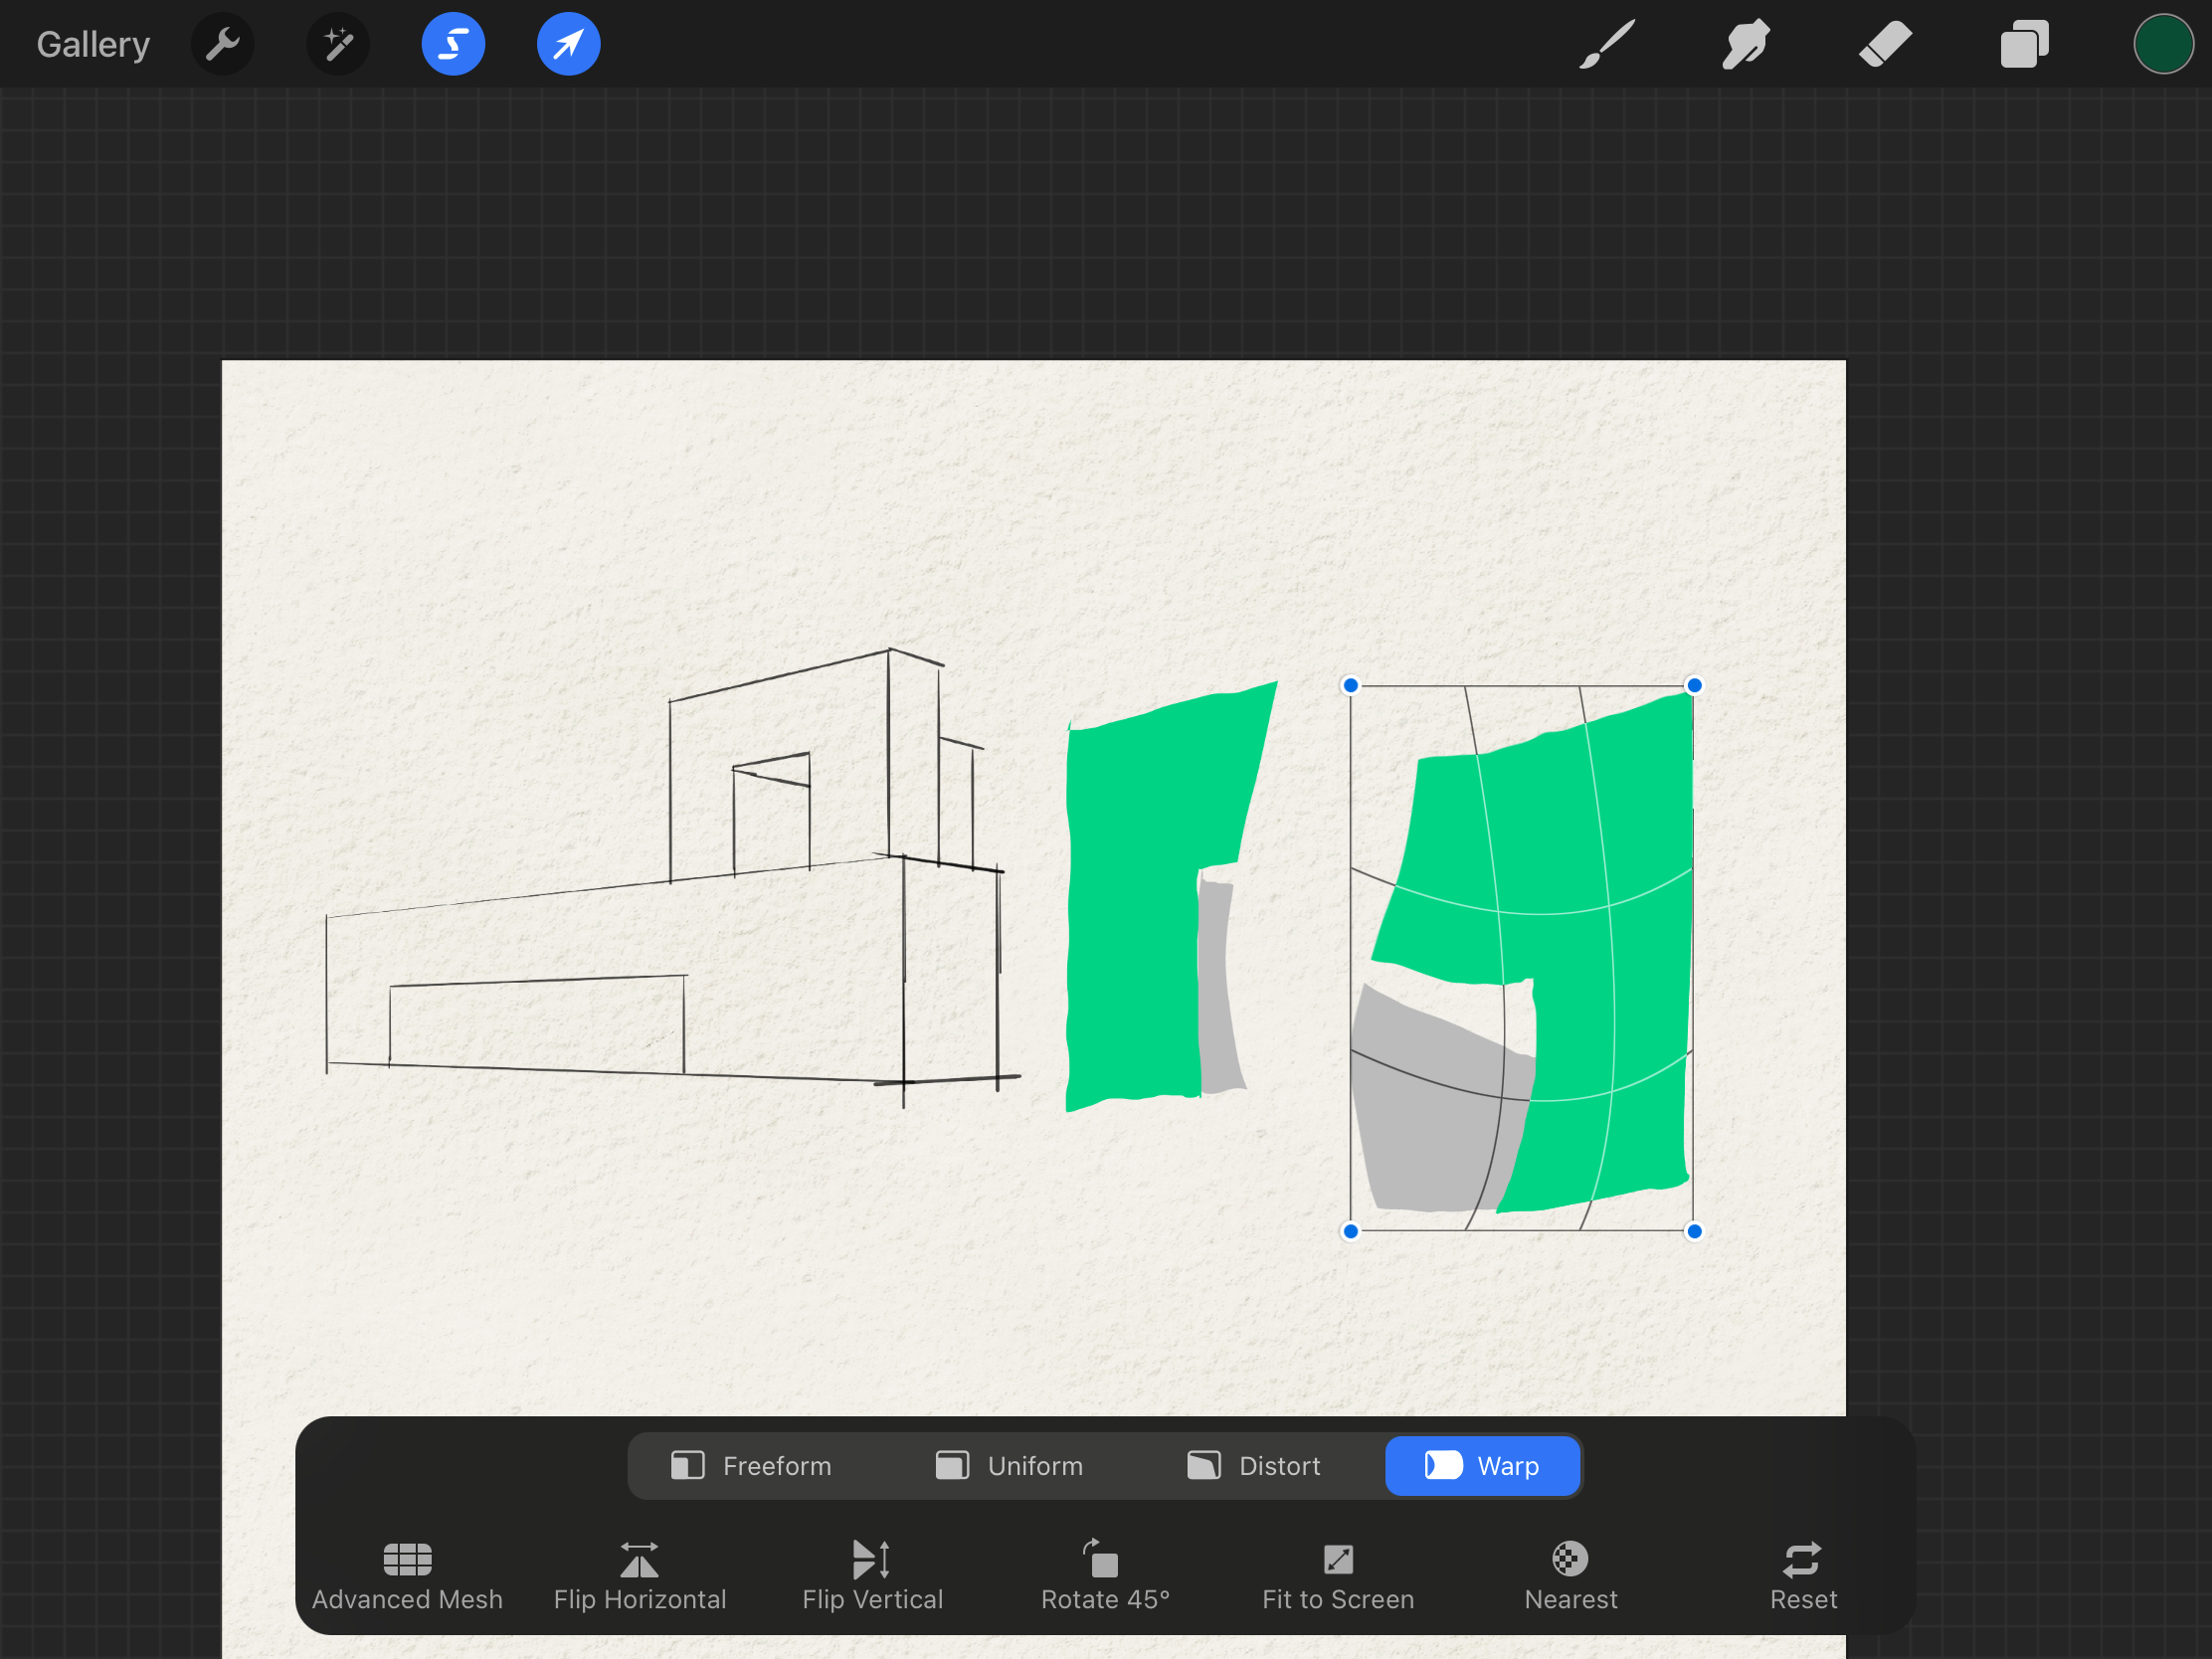
Transform
Stretch, move, and manipulate any part of your image for fast and easy edits.
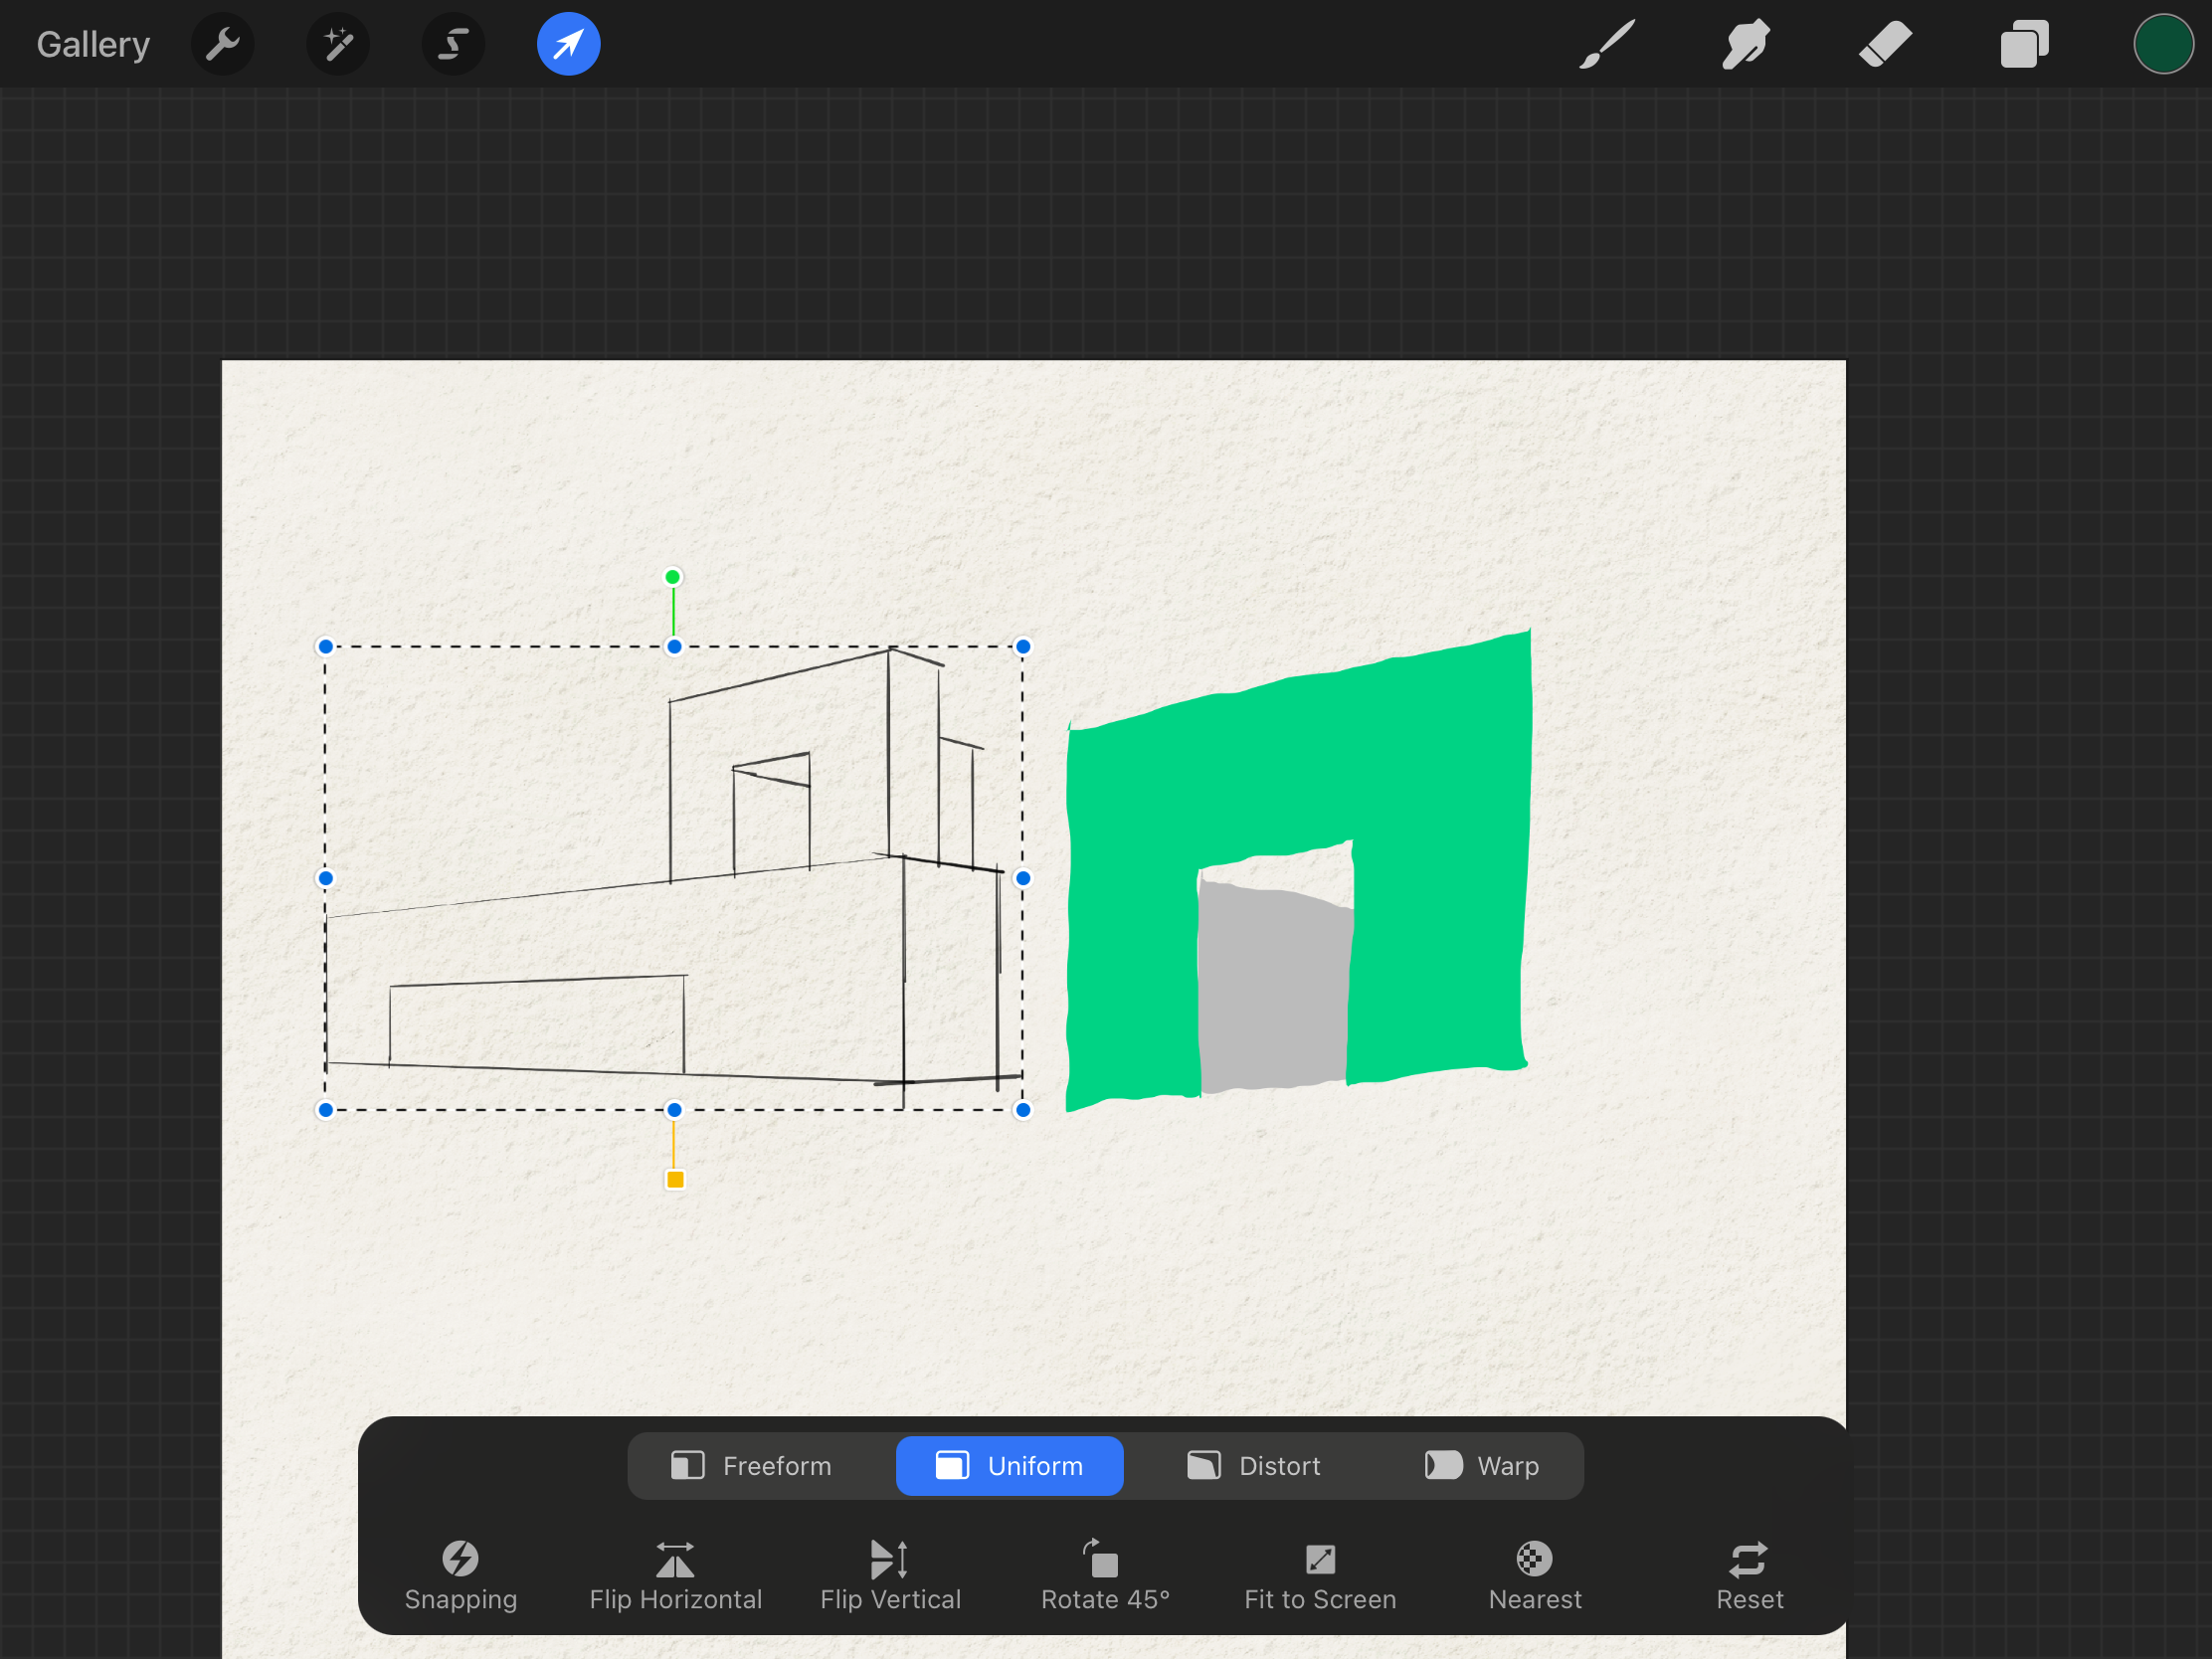
Tip. You also can use the transform tool for the selected area only.
(CO5) Be introduced various working processes for perspective views
Below five videos present the working process of the digital drawings. The author tried to use different mediums for each drawing.
 References
Wikipedia 2021. Procreate (software) – Wikipedia. [online], Accessed 7 September 2021, https://en.wikipedia.org/wiki/Procreate_(software).
James Akers. (2020, May 22). Why Procreate For Architects?: 10 Immediate Reasons for Architects & Designers to Use Procreate [Video]. YouTube. https://www.youtube.com/watch?v=KnydyjjHU7I
