Part Four. Advanced Rendering
Chapter 18. Lumion – Lightings, scenes, and outputs
Upon completing this session, students will be able to:
- (CO 1) Add/edit lighting
- (CO 2) Add/edit scenes
- (CO 3) Render outputs
 Session Highlights
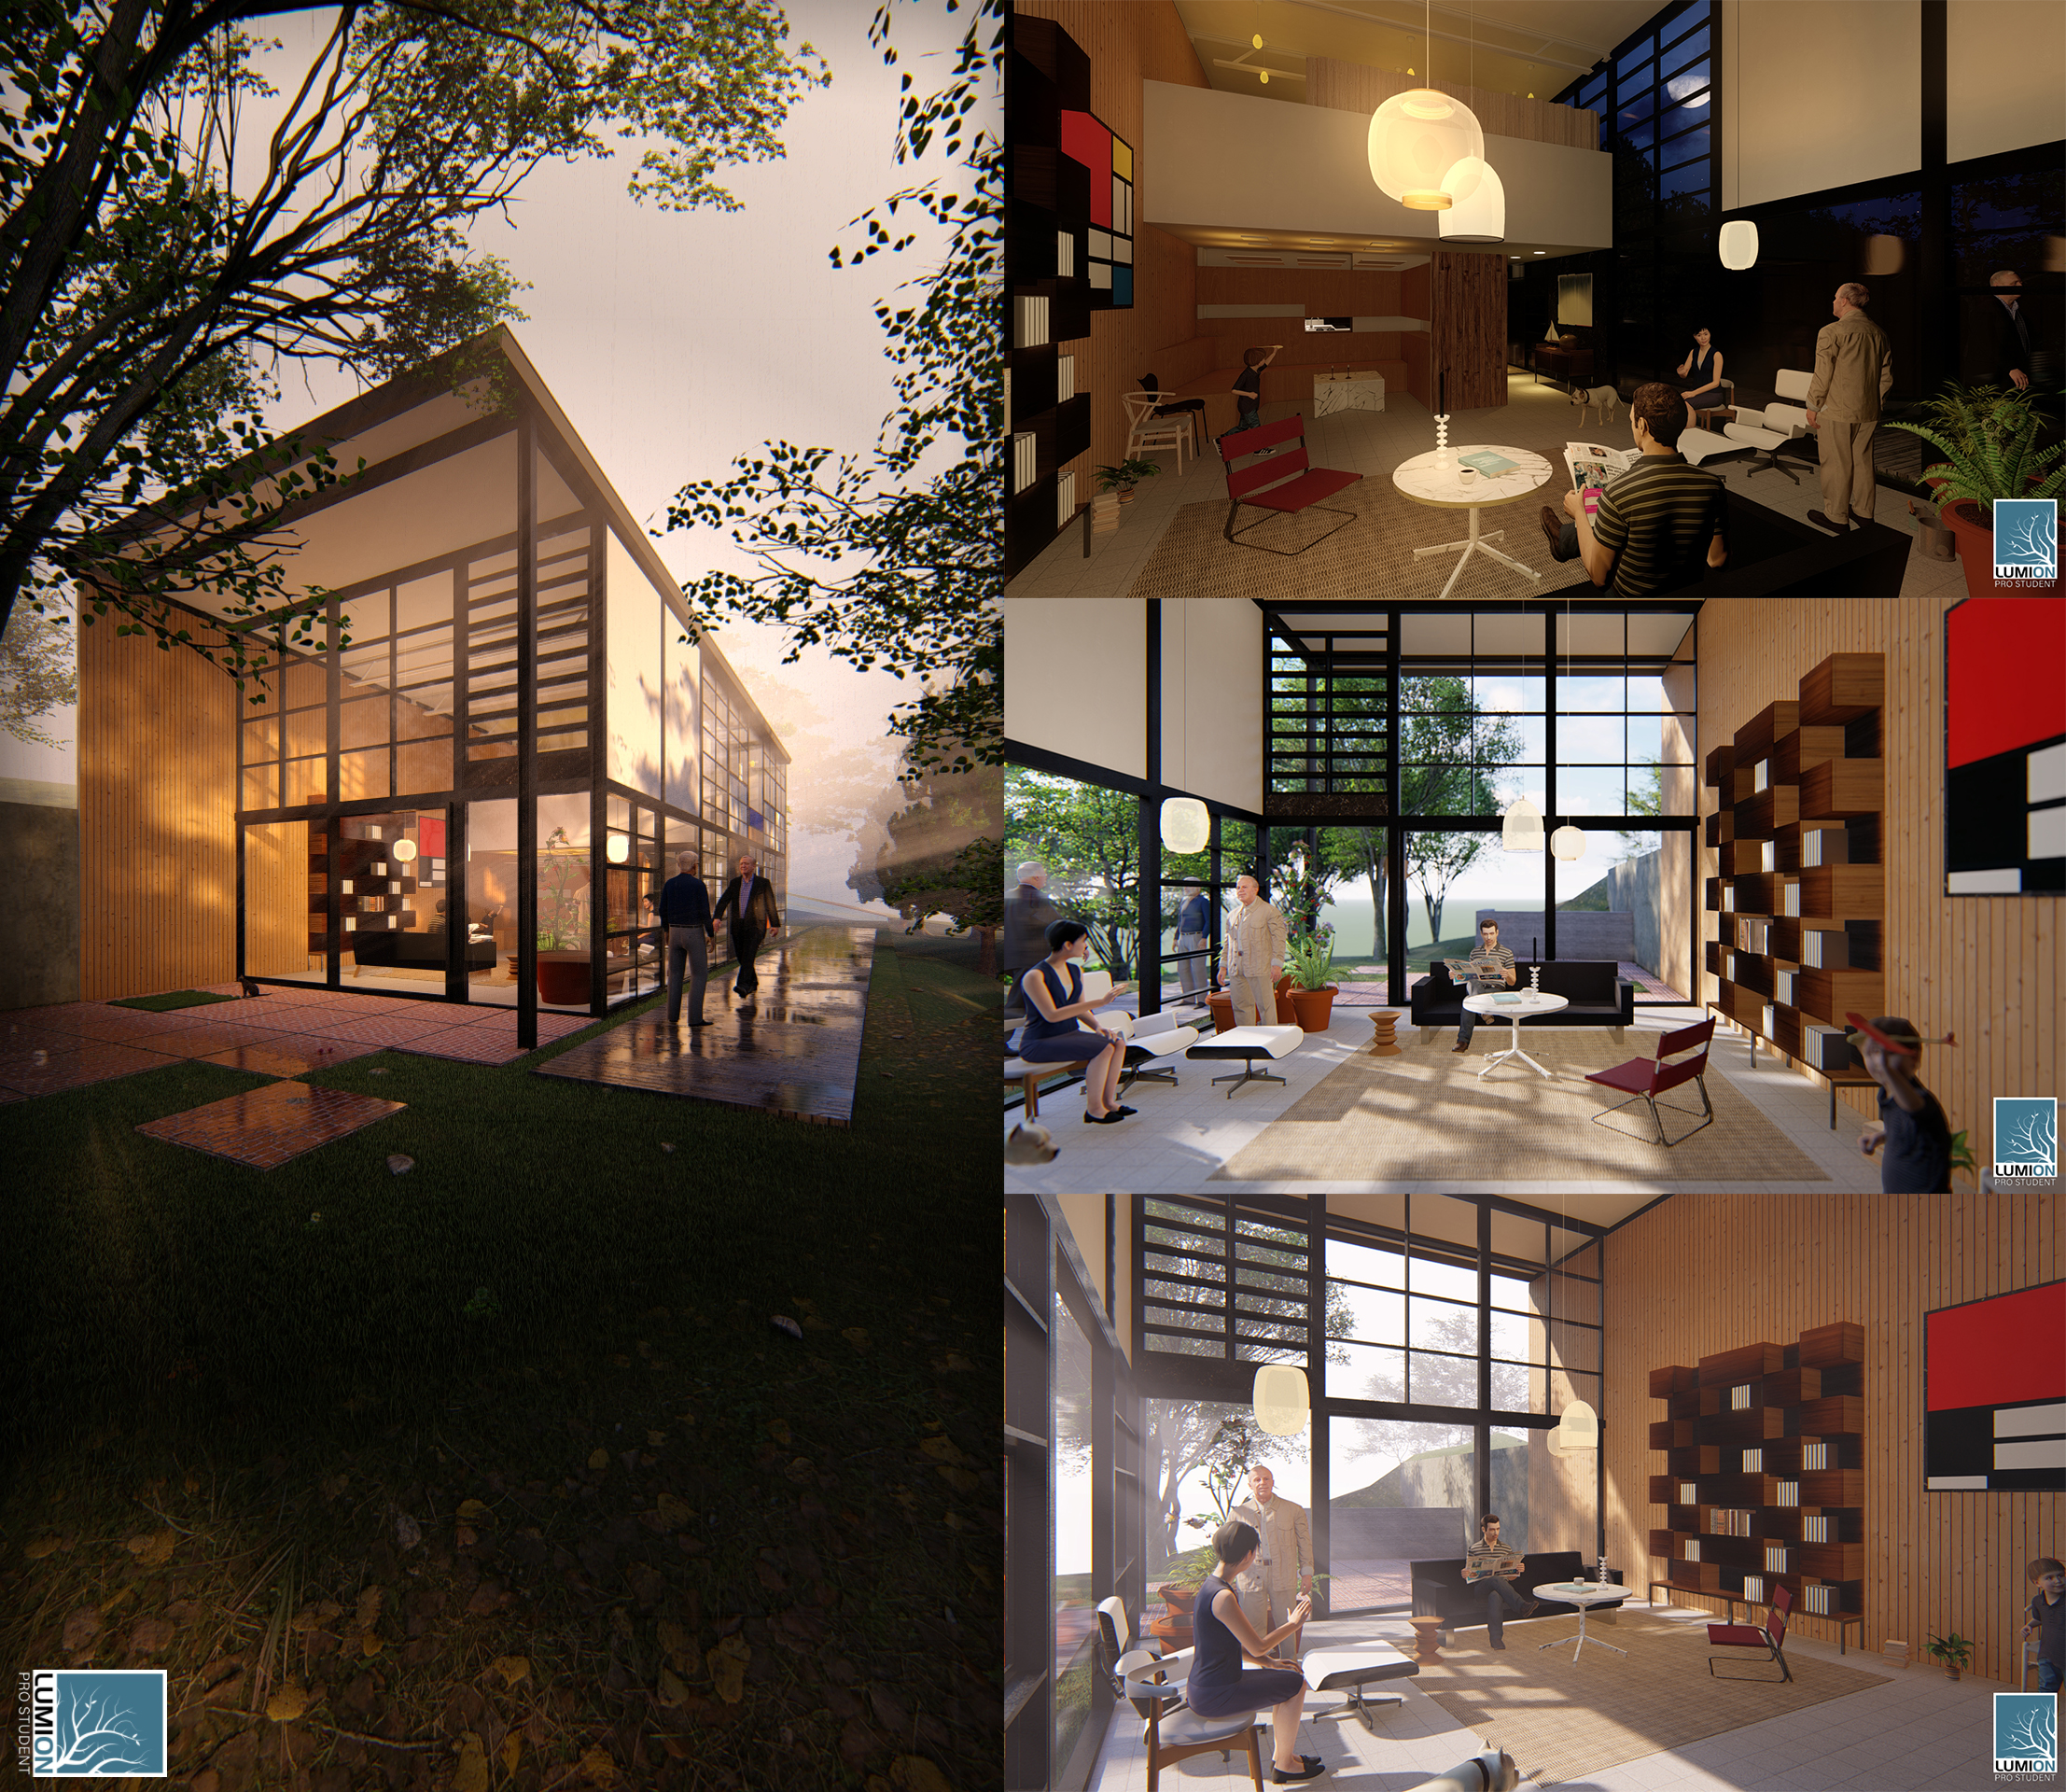
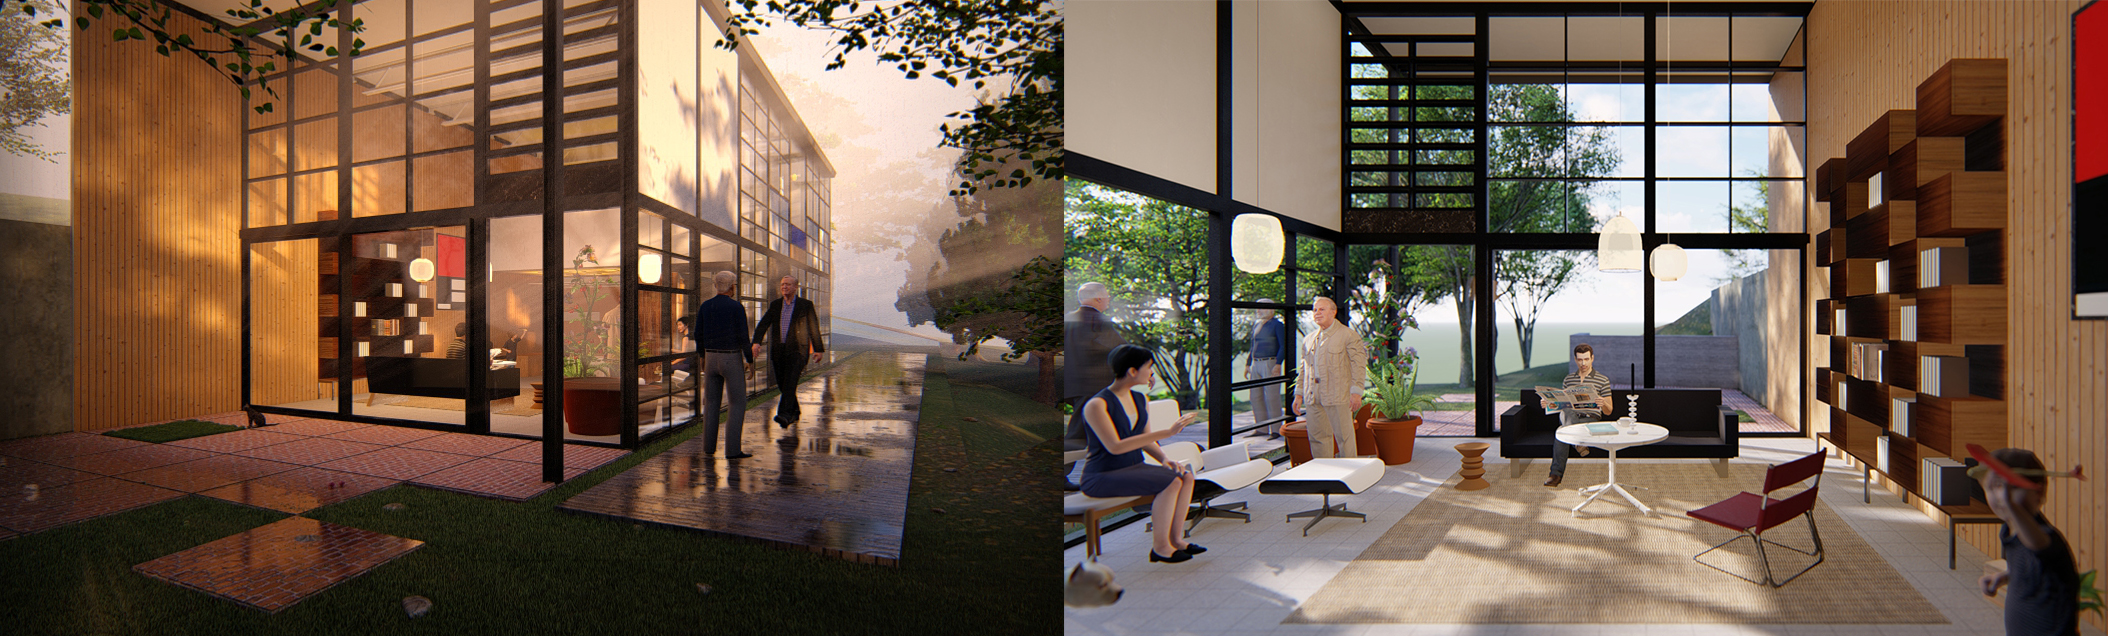
At the end of the session, students will be able to create the graphics below.
 Lecture Contents
(CO1) Add/edit lighting
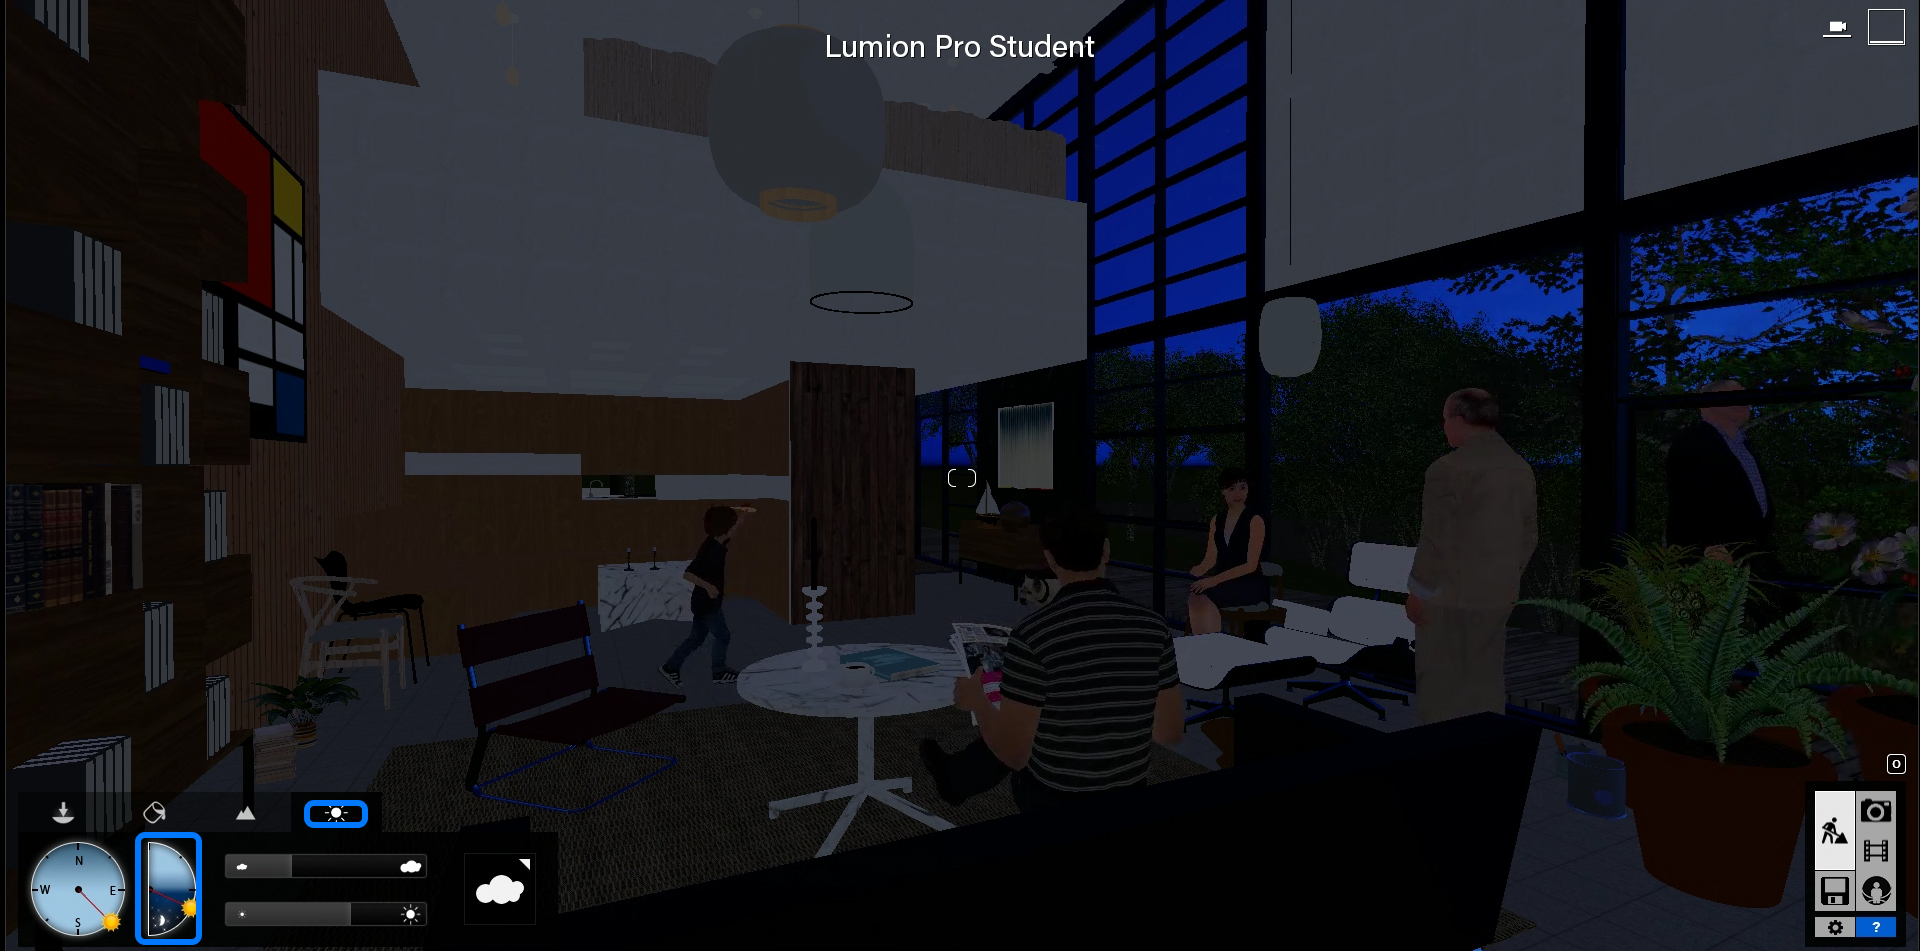
In order to work on the lighting in a scene, it is the best practice to change the time of the date to night time like sunset time.
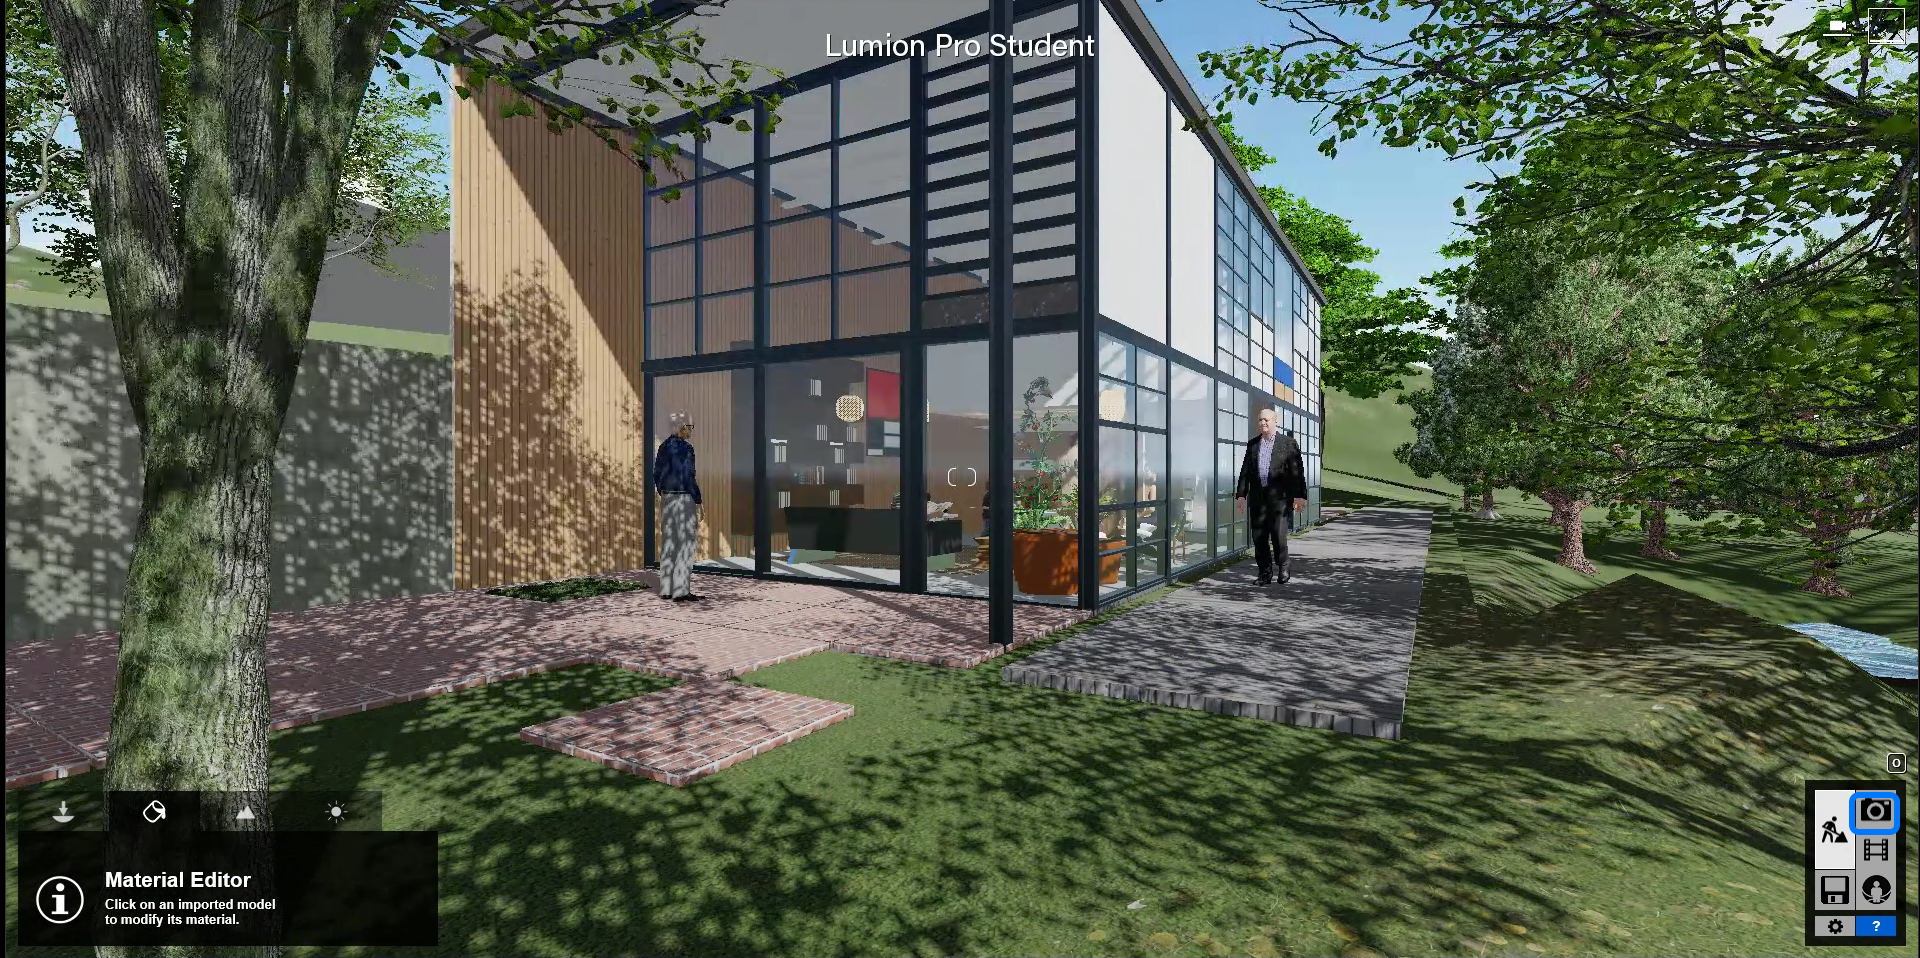
Change a Revit material to Emissive material
This Emissive material option your material source glow. However, this option is not enough to show the lighting effect.
- [STEP 01] Click [Material Editor] tab.
- [STEP 02] Click a material that you want to change to Emissive material.
- [STEP 03] Click [Standard] from the [Material Editor] > [Costom] tab.
- [STEP 04] Click [Advanced option] and click [Setting] tab.
- [STEP 05] Change the bar value for [Emissive].
If needed, change the transparency value, and the color of the object. - [STEP 06] Once the materials changed, click the [Checkmark] to complete these changes.

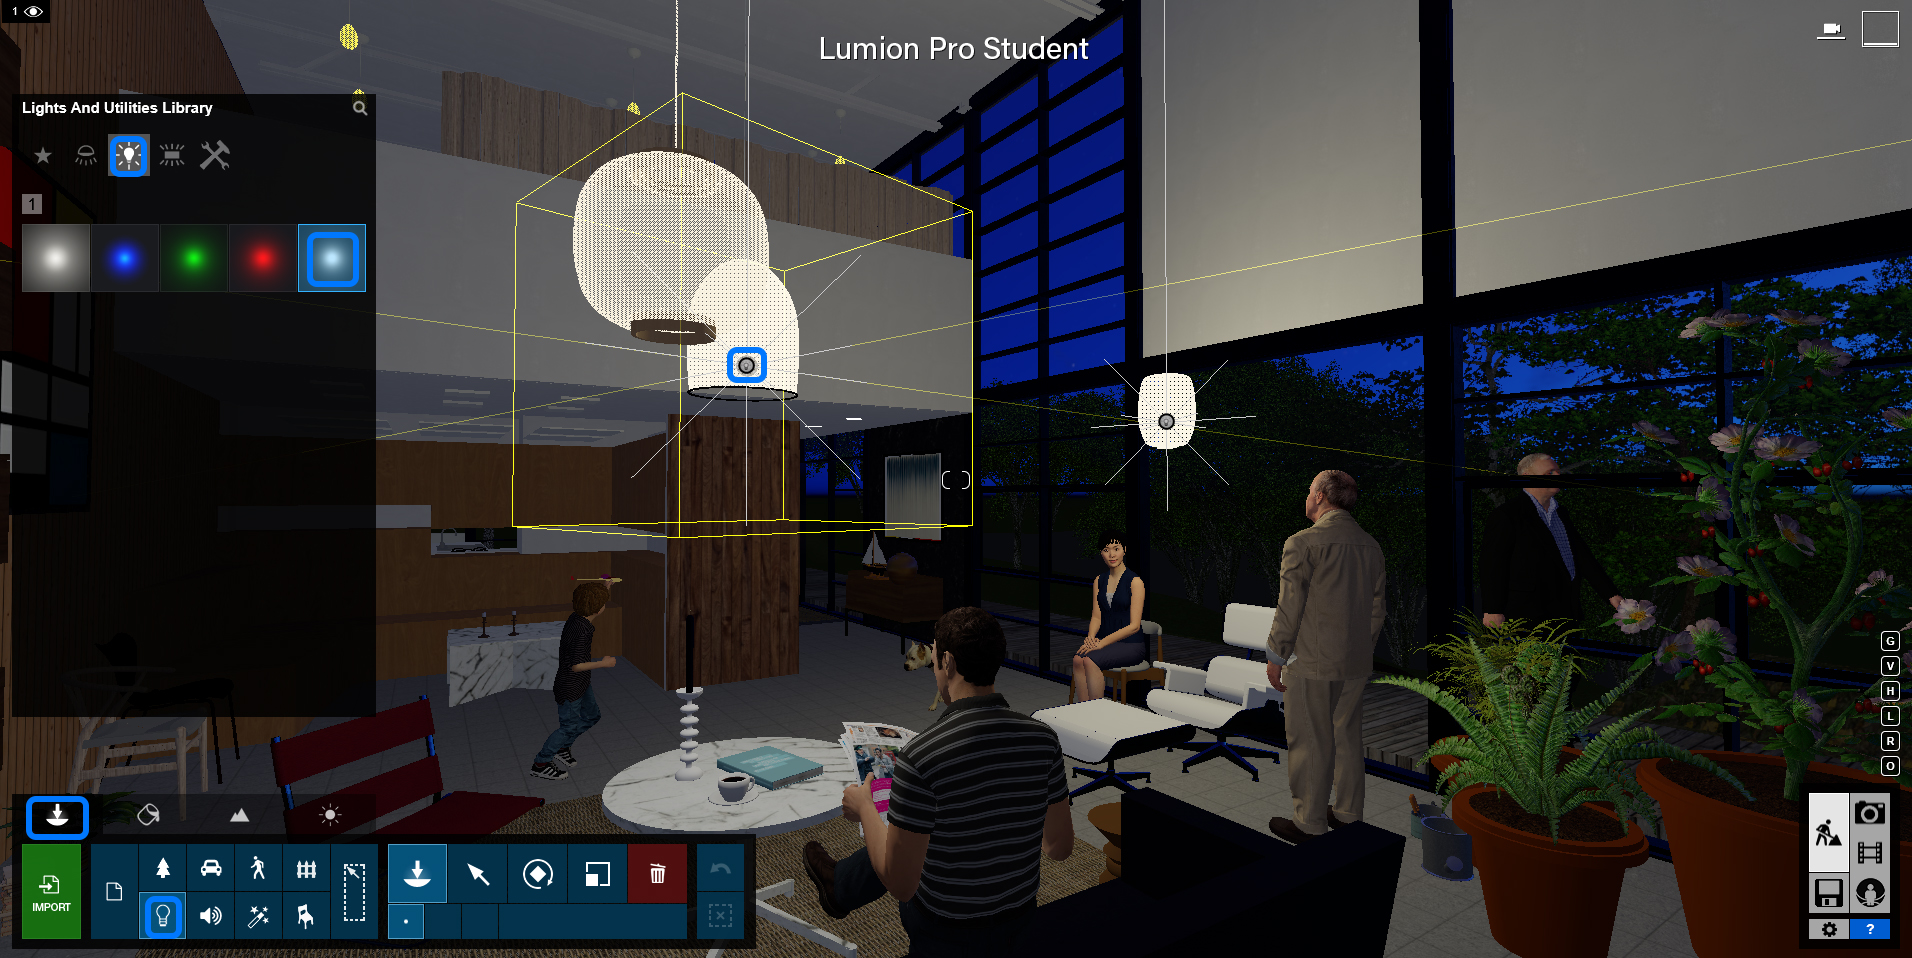
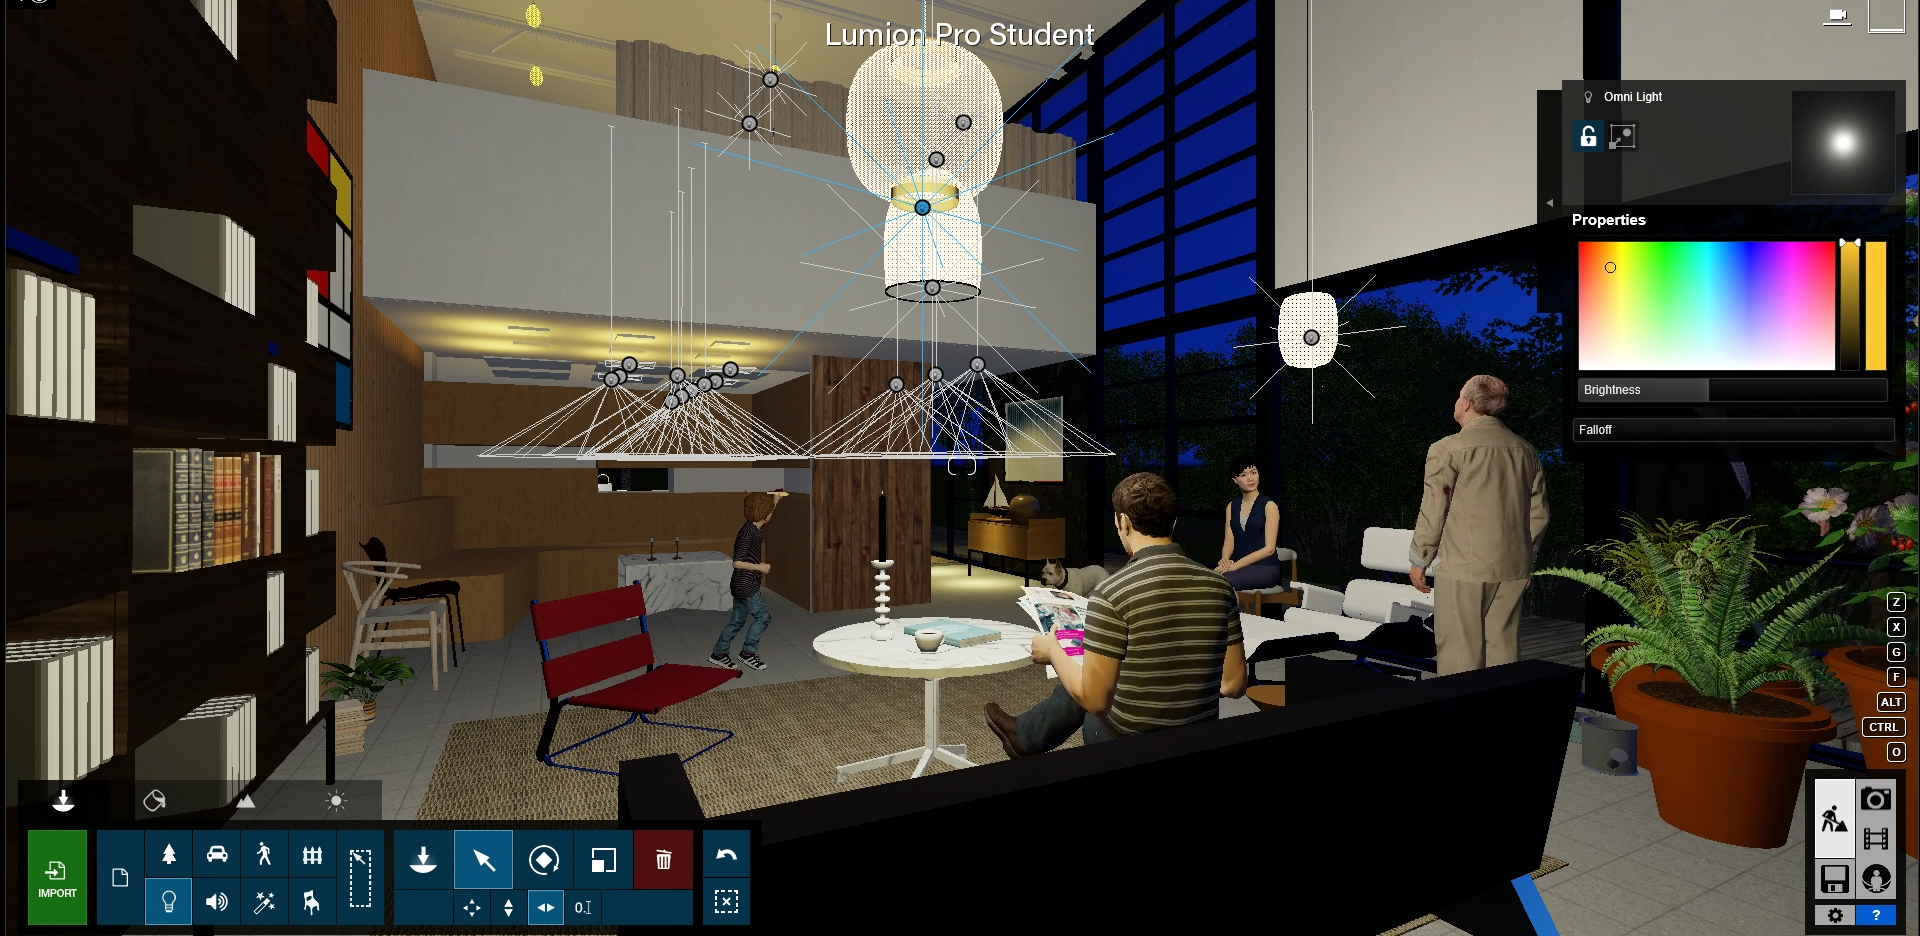
Add lights
Lumion supports three types of lighting sources, Omni light, spotlight, and Area light. Please practice all different types of lighting sources.
- [STEP 01] Click [Objects] tab.
- [STEP 02] Click [Lights and Utilities], then [Lights and Utilities Library] will open.
- [STEP 03] Select a type of light that you want to add.
- [STEP 04] Place the light on the view by hovering and clicking on a surface of an object.
Edit lights
- [STEP 01] Select the lights that you want to edit the color and brightness of the light. You can select individually, or you can also hold the [Ctrl] key to the window selection.
- [STEP 02] Adjust the setting on the right-top menu.
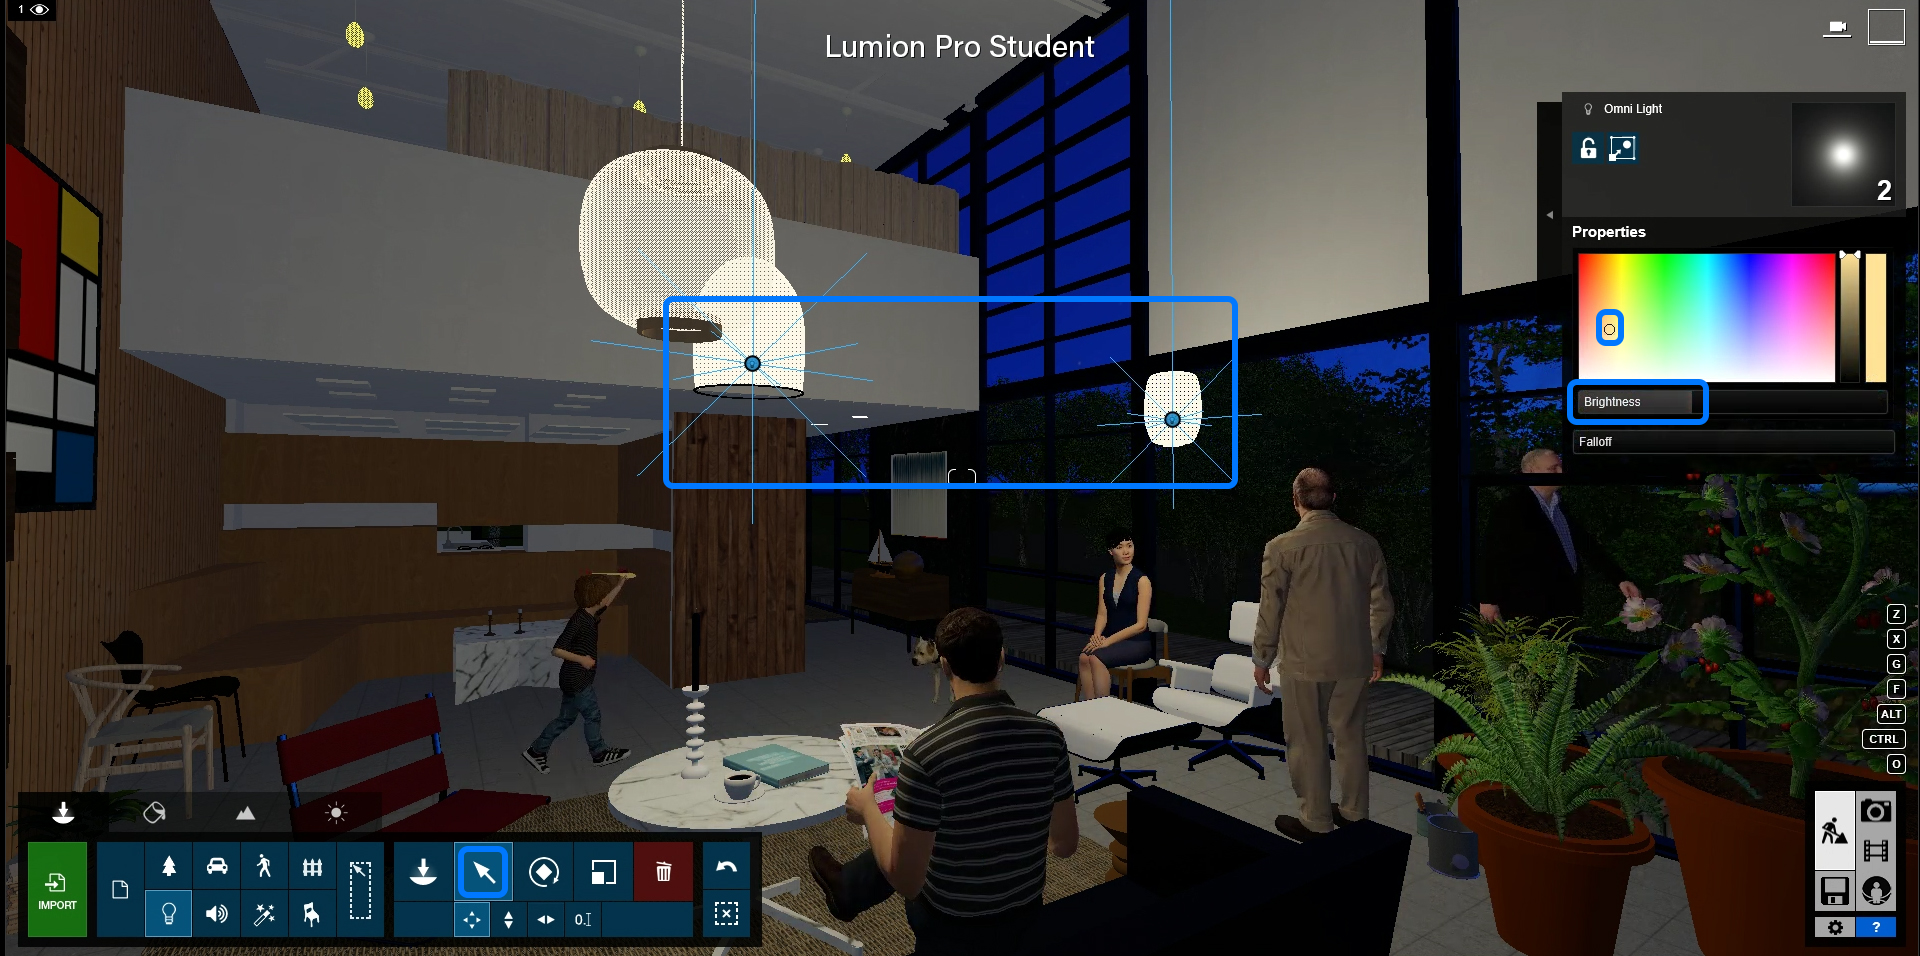
Repeat this add/edit light process for all other lights. To copy a light, hold the [Alt] key and move the light.
(CO2) Add/edit scenes
Before starting the rendering, you must set scenes (camera views) first.
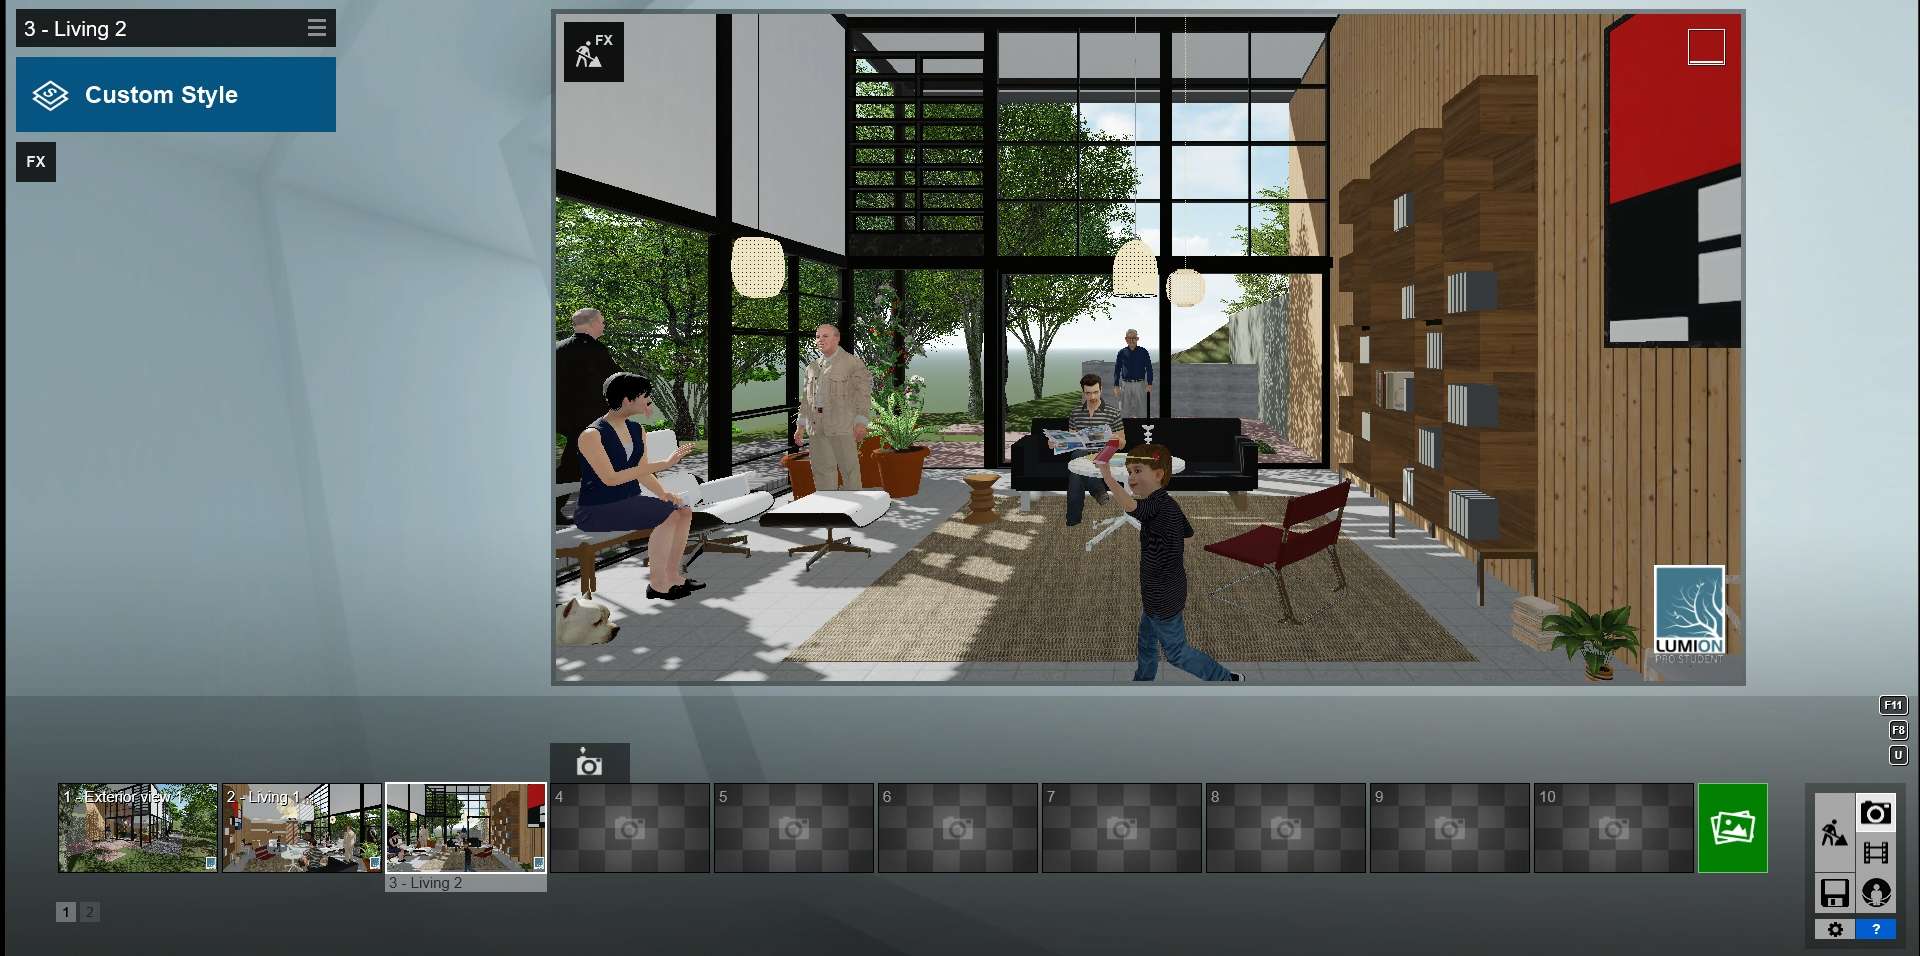
To add a scene
- [STEP 01] Stop at a position that you want to capture. Make sure the time of the date is what you want to render.
- [STEP 02] Click [Photo] from the main menu.
- [STEP 03] After the Photo view opens, adjust camera [Focal length], [Horizental eye level], and [Set eye level].
- [STEP 04] To save the scene, hover over the views on the bottom screen. And click [Store camera].
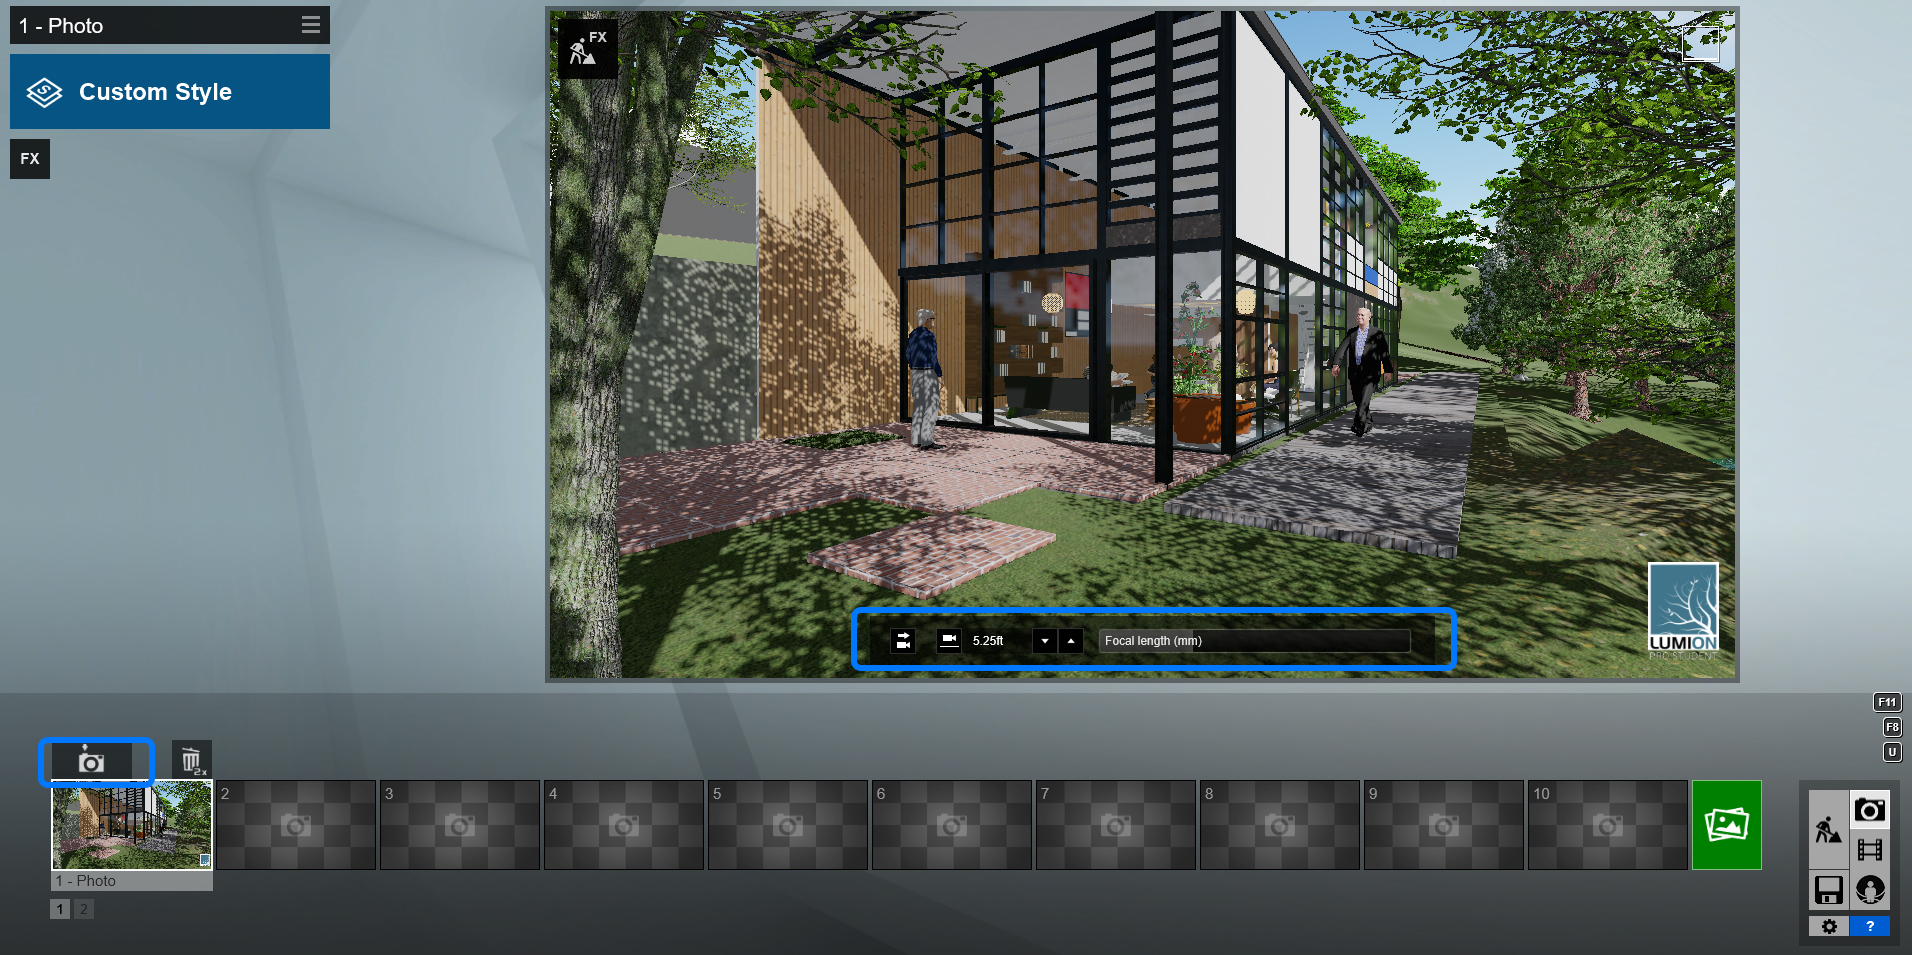
- [STEP 05] You can rename the scenes by clicking the photo below. And also, you can update the scene by clicking [Store camera].
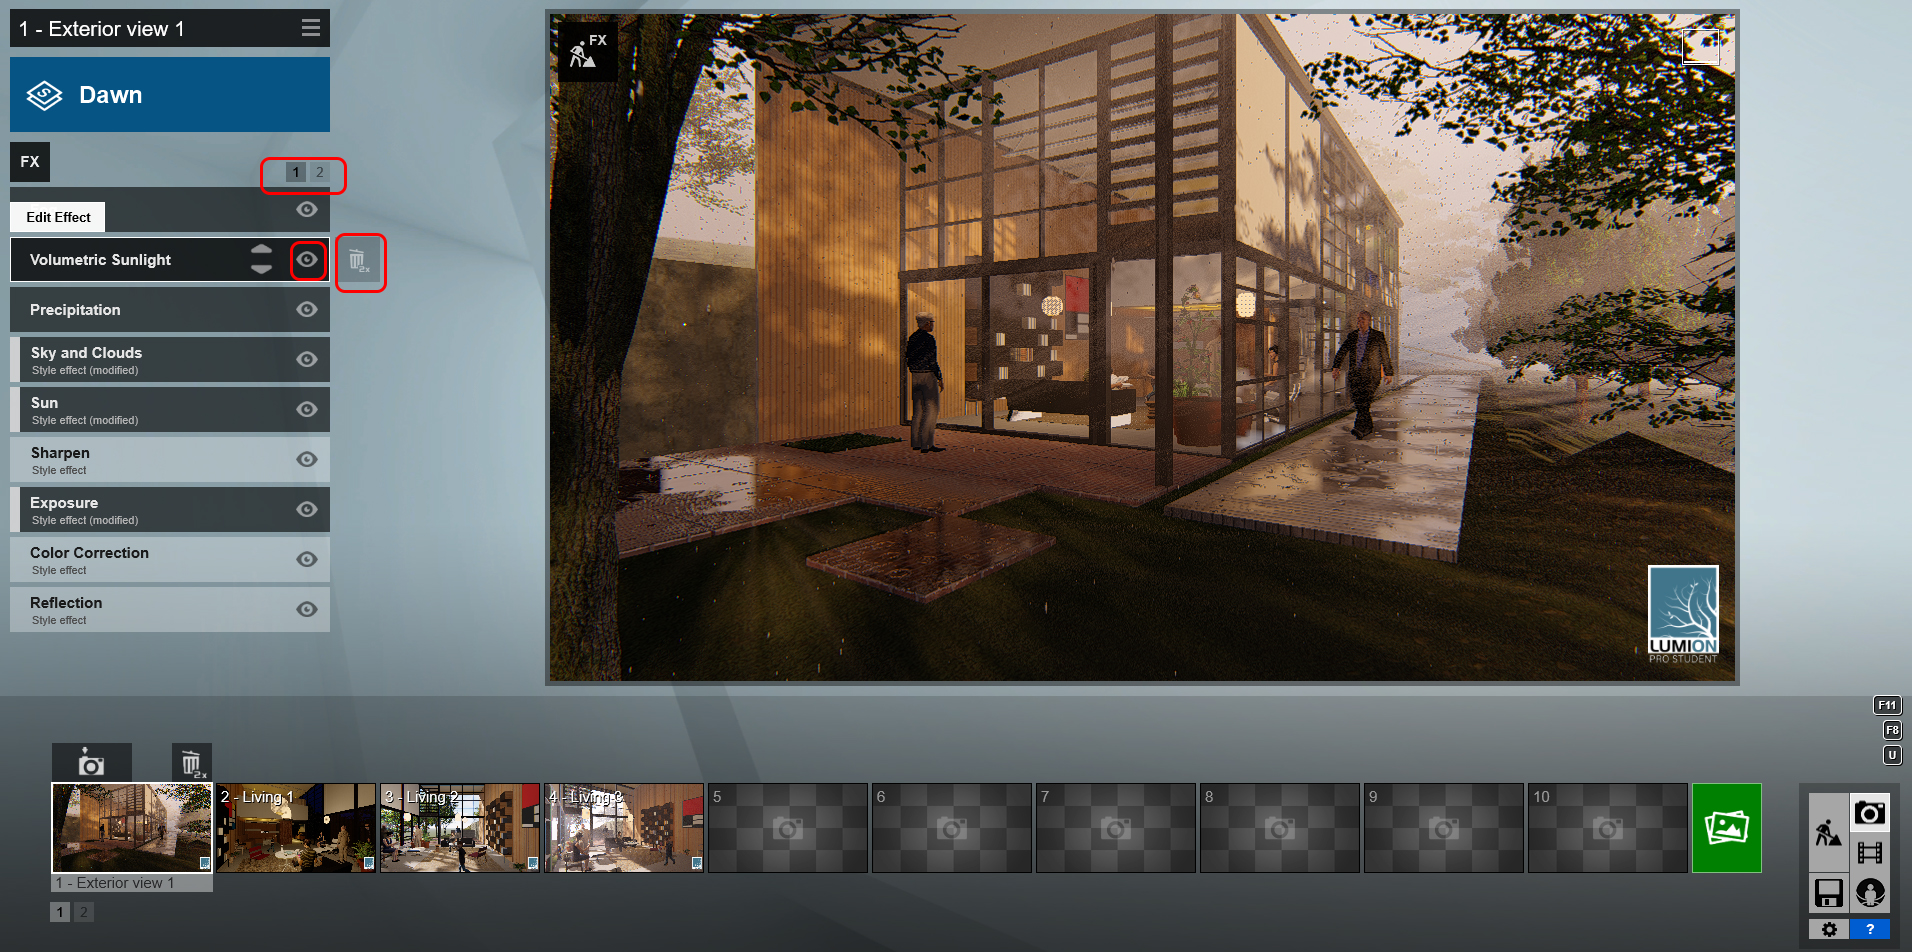
Styles and effects
Lumion provides eight distinct rendering styles and sixth-three photo effects for the rendering.
To change a render style
- [STEP 01] Select a view.
- [STEP 02] Click [Custom Style] on the left top corner.
- [STEP 03] Select one of the nine styles to start setting your rendering.
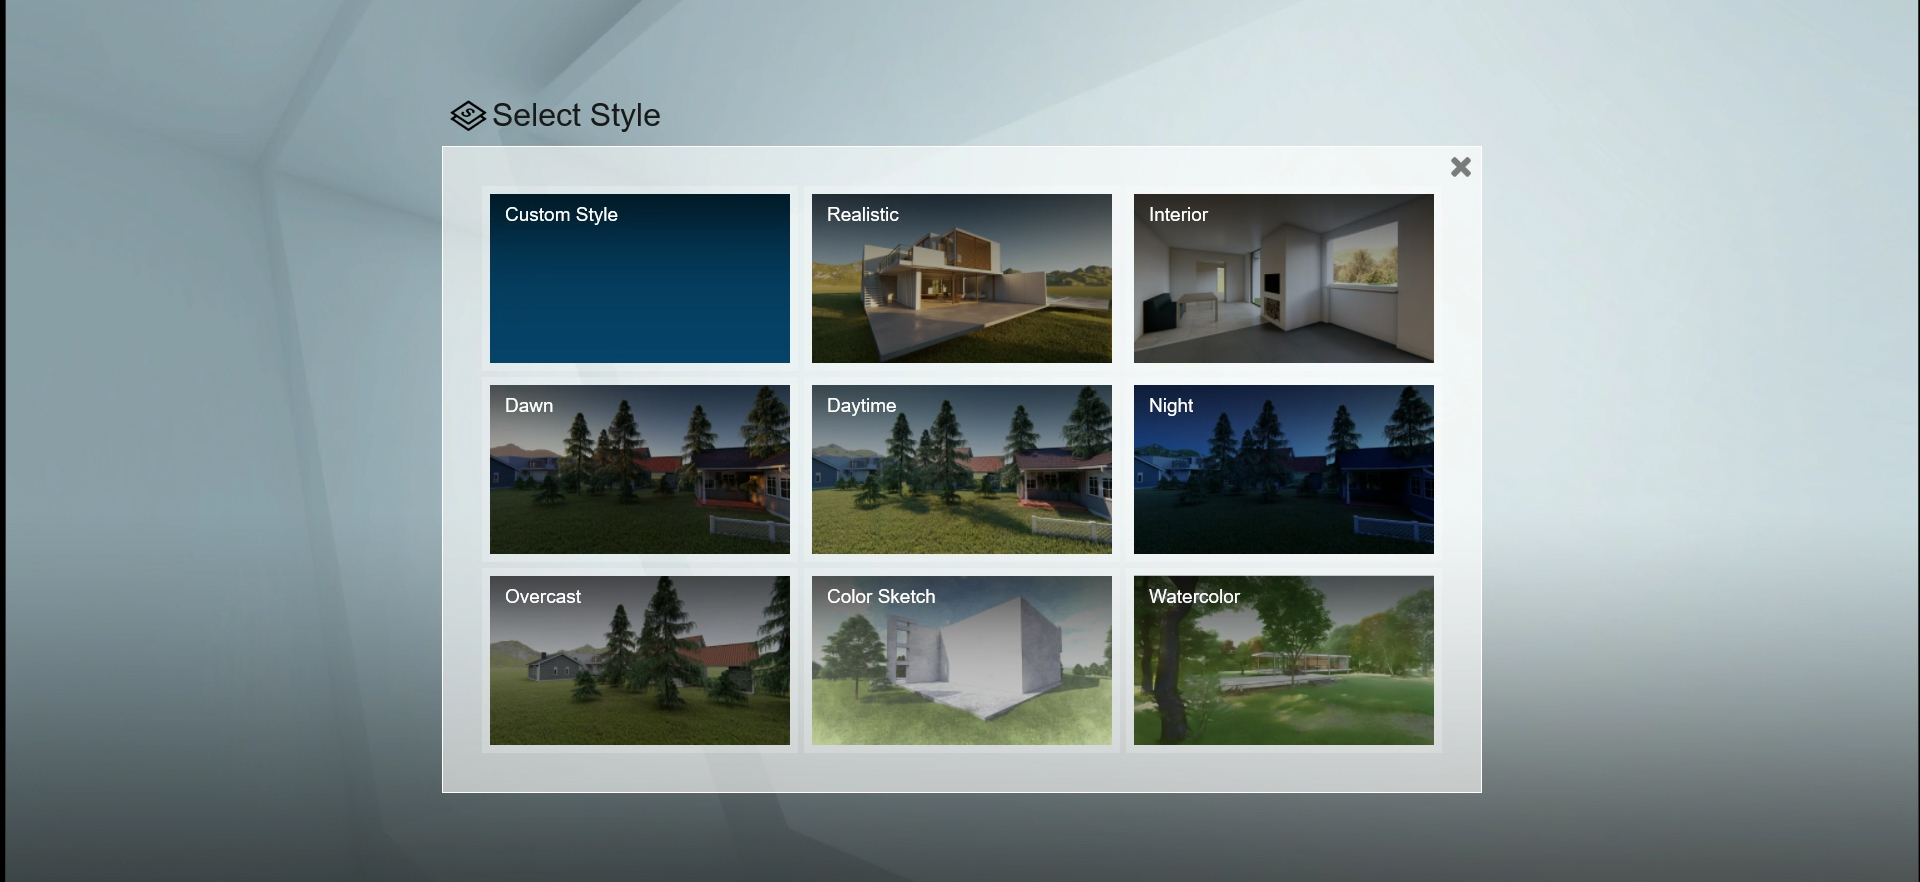
- [STEP 04] Once you add a style, you can adjust the effect detail by clicking each of the effects and changing the values.
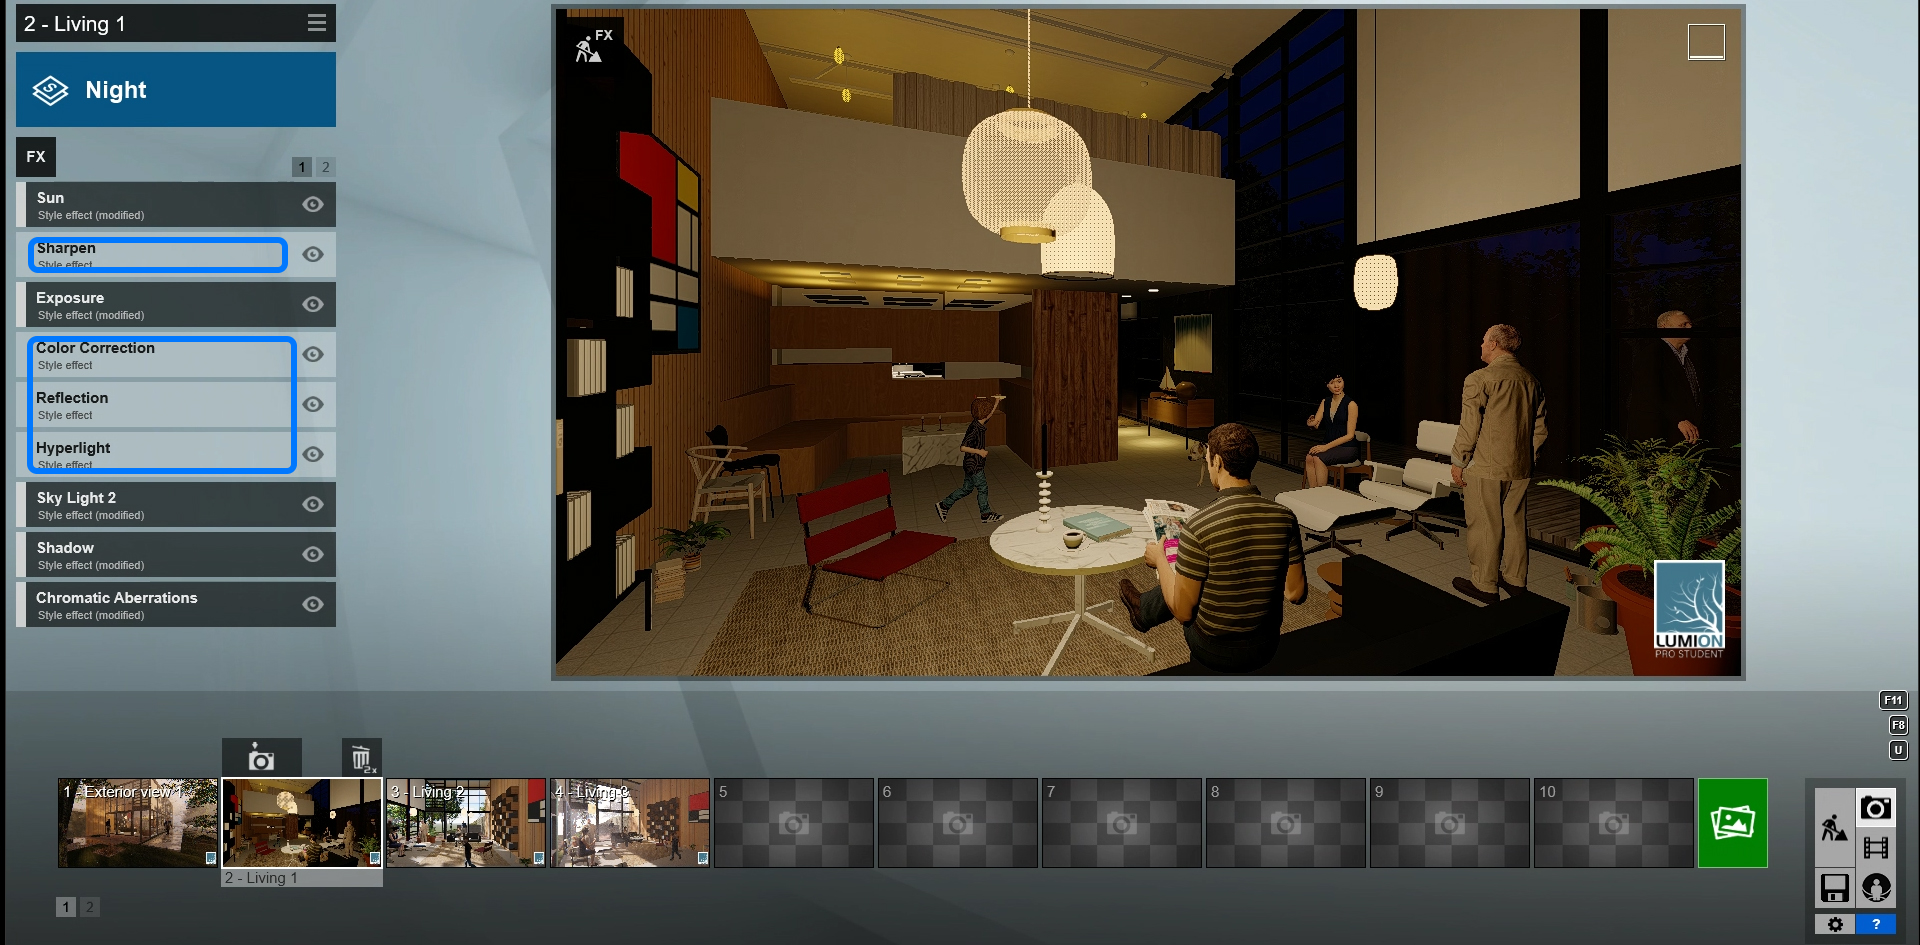
To add a new effect
- [STEP 01] On a photo mode, click [FX] under the rendering style.
- [STEP 02] See what effect under the Seven categories, and select a photo effect that you want to add.
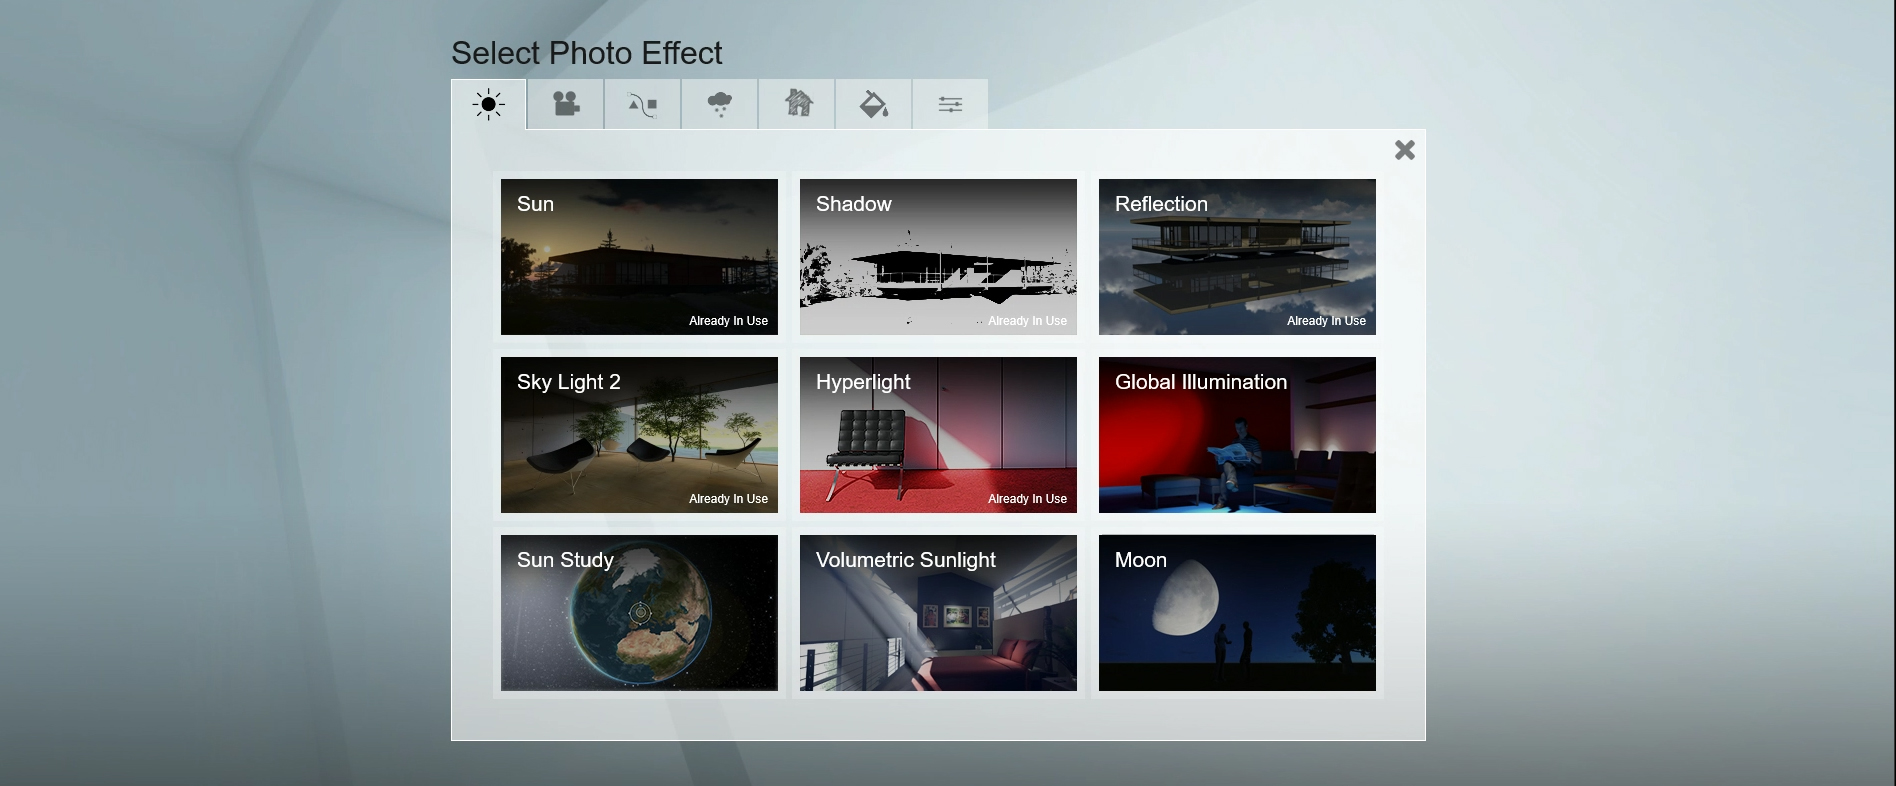
- [STEP 03] You can adjust the detailed value for your rendering. If you want to see the effect, you can turn it on and off by clicking the eye icon. Moreover,, you can delete the effect anytime.
Repeat step 1 to step 3 for all other scenes.
(CO3) Render outputs
Rendering scenes
- [STEP 01] Once all your scenes are ready for render, click the [Render Photo] icon to render.
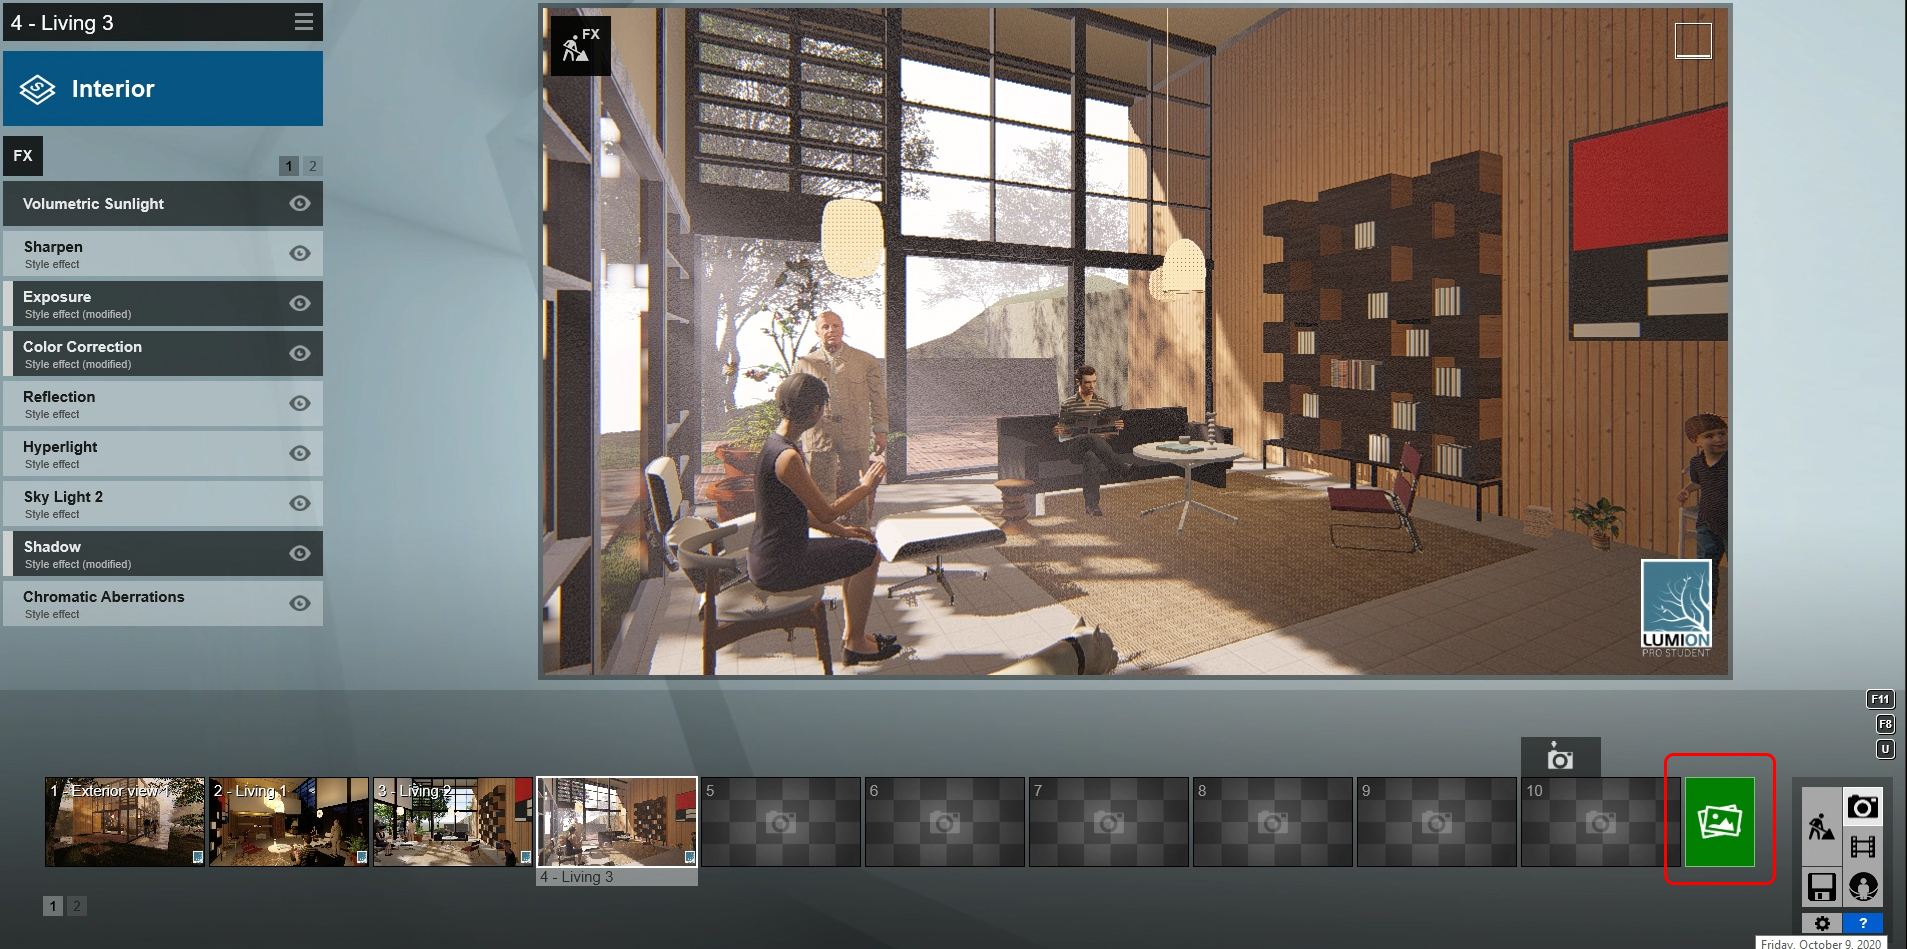
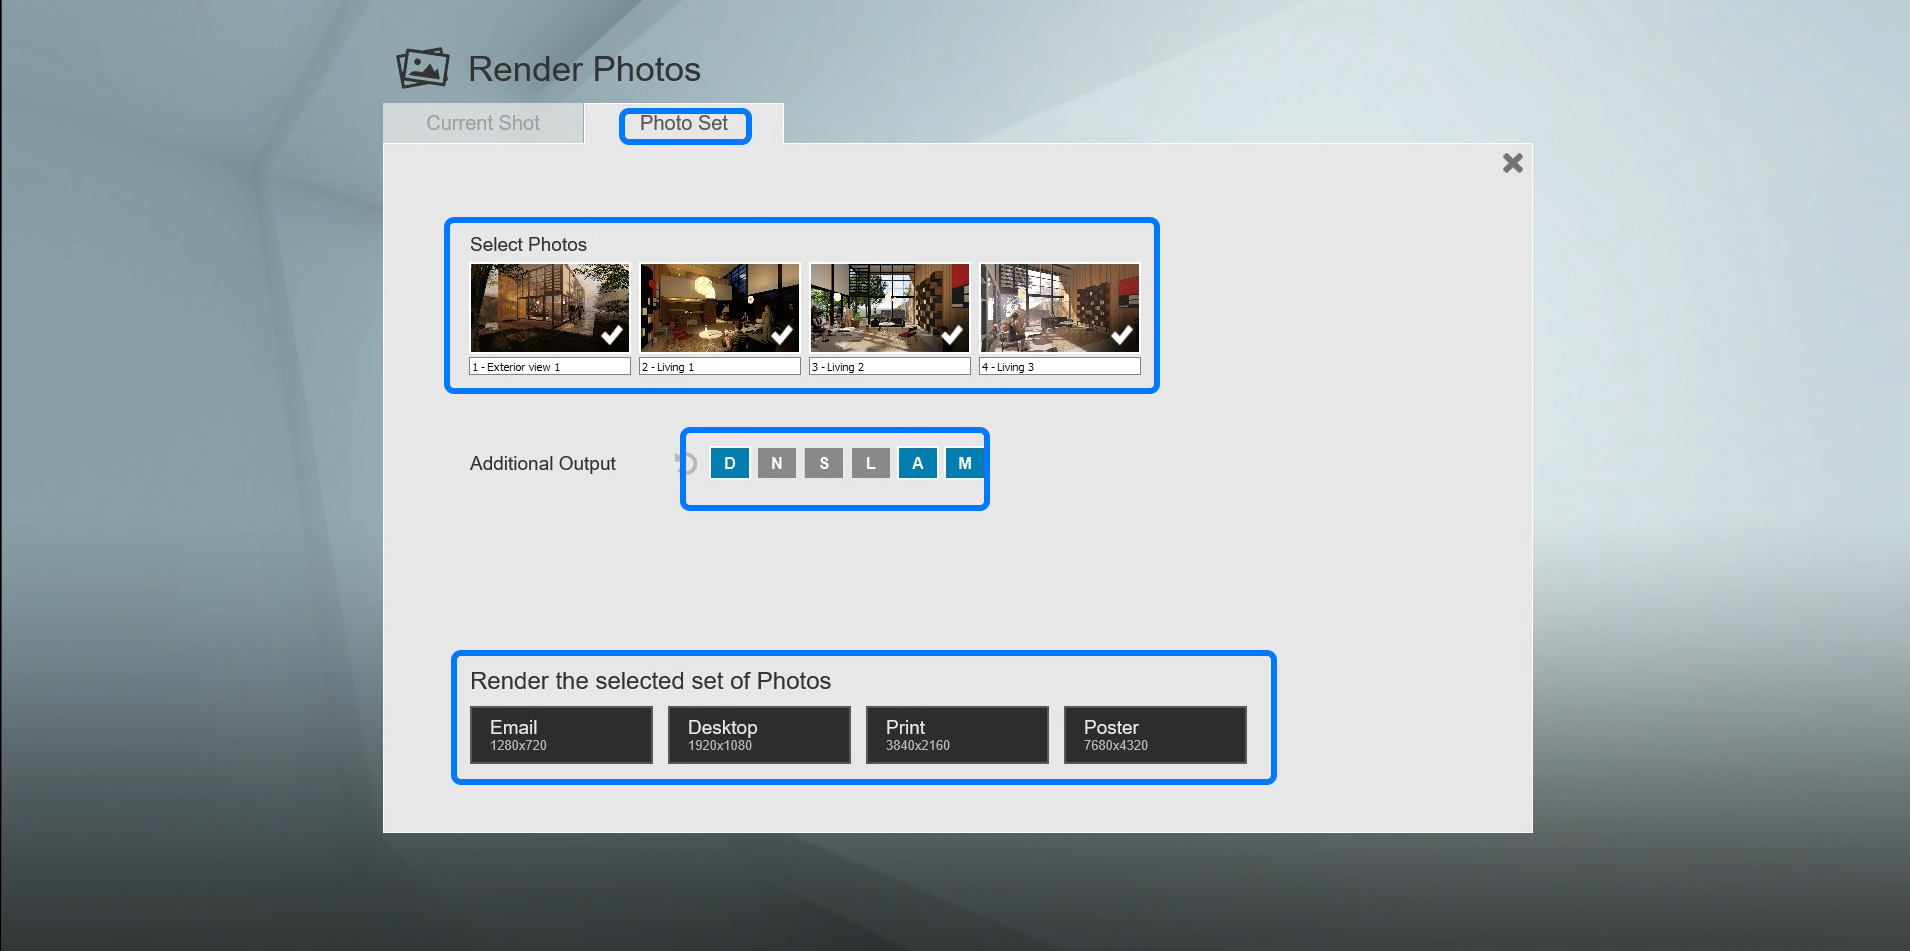
- [STEP 02] For a single rendering, use the [Current Shot] tab. For multiple renderings, click the [Photo Set] tab.
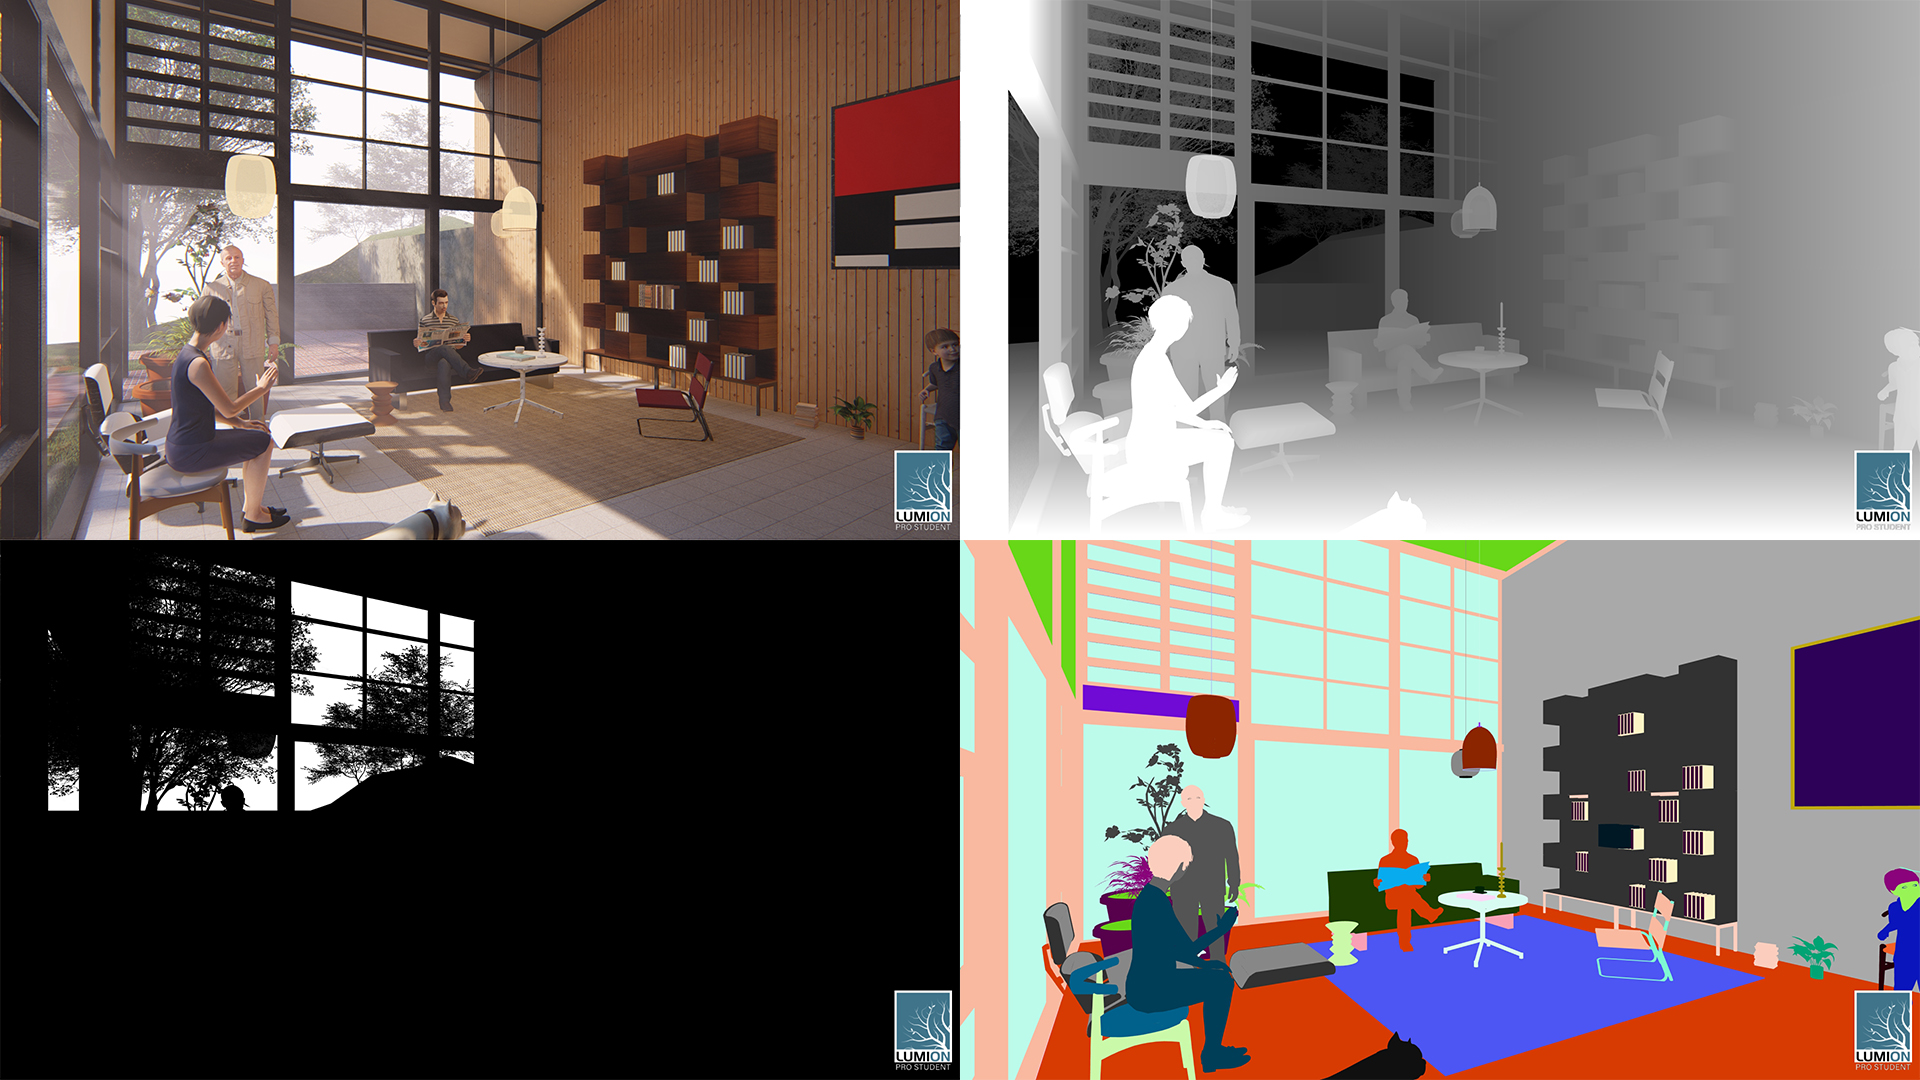
- [STEP 03] Select any additional output that you want to get. I prefer, D-Depthmap, A-Sky alpha map, and M-Material ID map for photoshop.
- [STEP 04] Select render size to start rendering.
The final renderings.