
Part Four. Advanced Rendering
Chapter 20. Photoshop – Advanced rendering post-production
Upon completing this session, students will be able to:
- (CO 1) Understand photoshop brushes and Wacom tablet
- (CO 2) Understand post-production for exterior perspective rendering
 Session Highlights
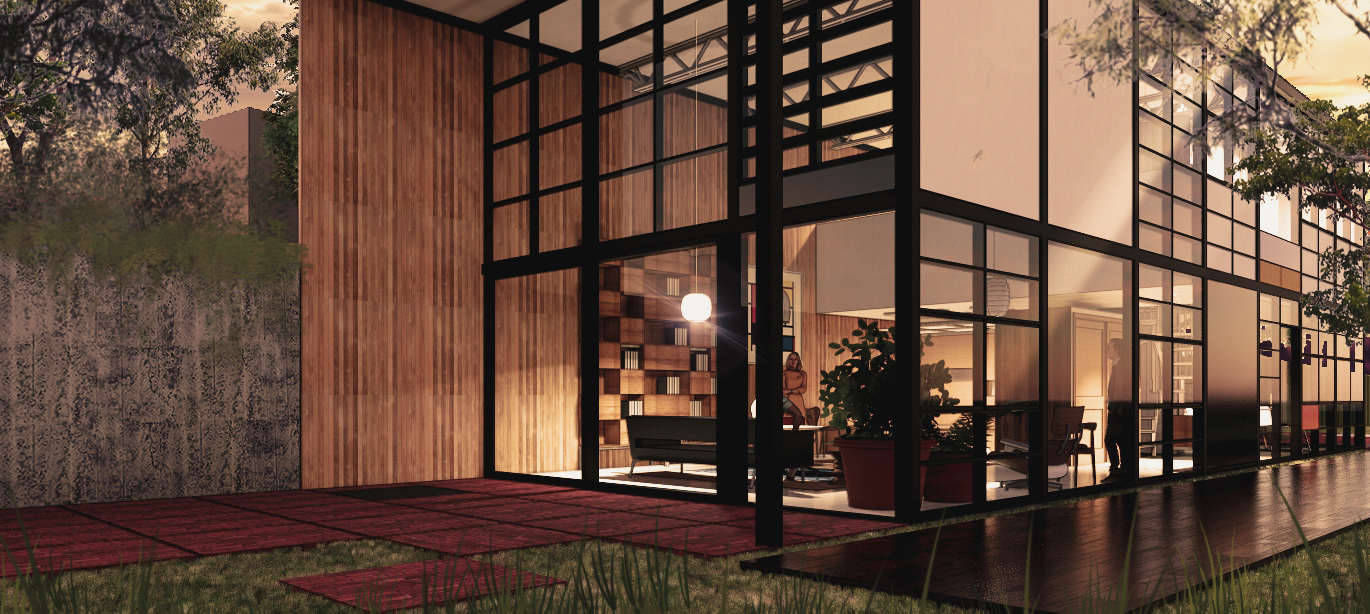
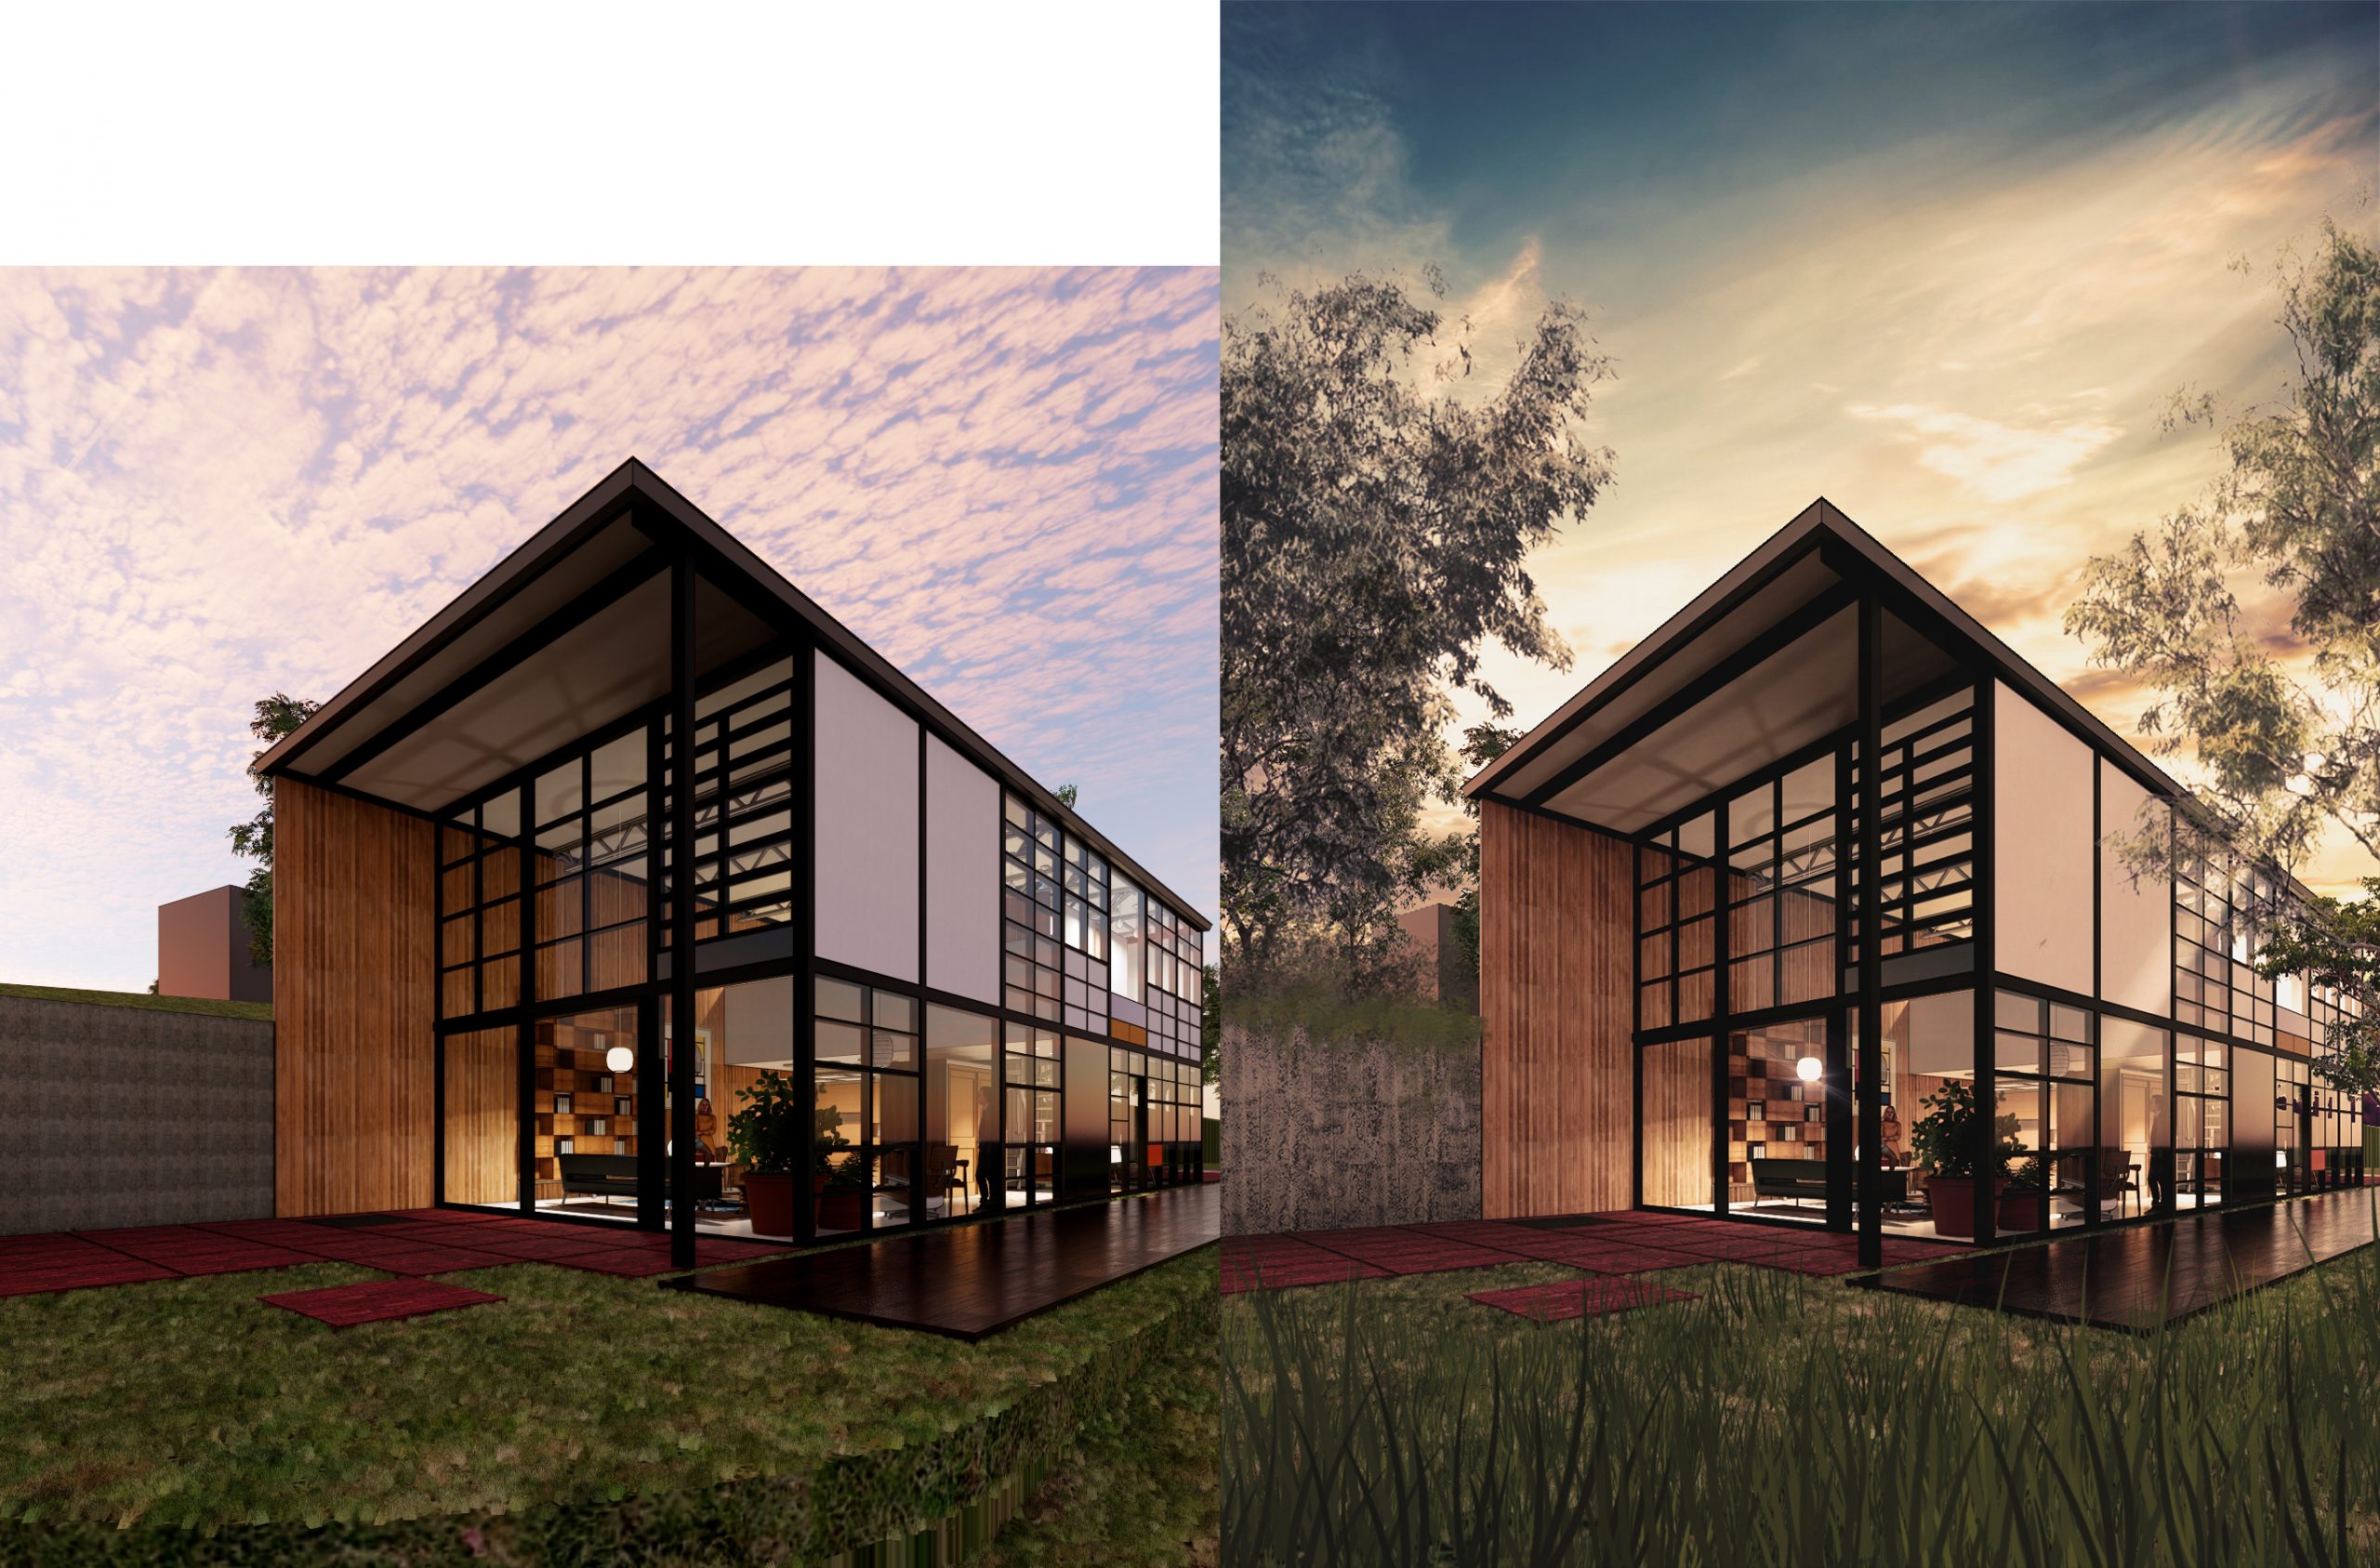
At the end of the session, students will be able to create the graphics below.
 Lecture Contents
(CO1) Understand photoshop brushes and Wacom tablet
Photoshop Brush
Designers use the [Brush] tool to draw any shapes and lines with their mouse and Wacom tablet. After selecting a brush, you can draw simply by clicking the left mouse button a single time, or by holding it down and dragging your cursor around the page to create multiple marks with a single stroke.
Despite the term “brush,” you can use brushes for much more than just replicating physical media like paints. In fact, brushes can be used for everything from textures and patterns to lighting. The ease of use and versatility of this tool makes it a handy resource for both the novice and the expert designer to add depth to your projects.
Photoshop supports basic brushes, but you can import/load brushes (ABR file).
Refer to Creative Market’s page on how to install Photoshop brushes for more information.
Useful photoshop brush sets (free resource)
- ARQUI9 – Architectural brush sets
- Show It Better – Architectural brush sets
- Clouds
- Light rays
- IES lights
- Lens flares
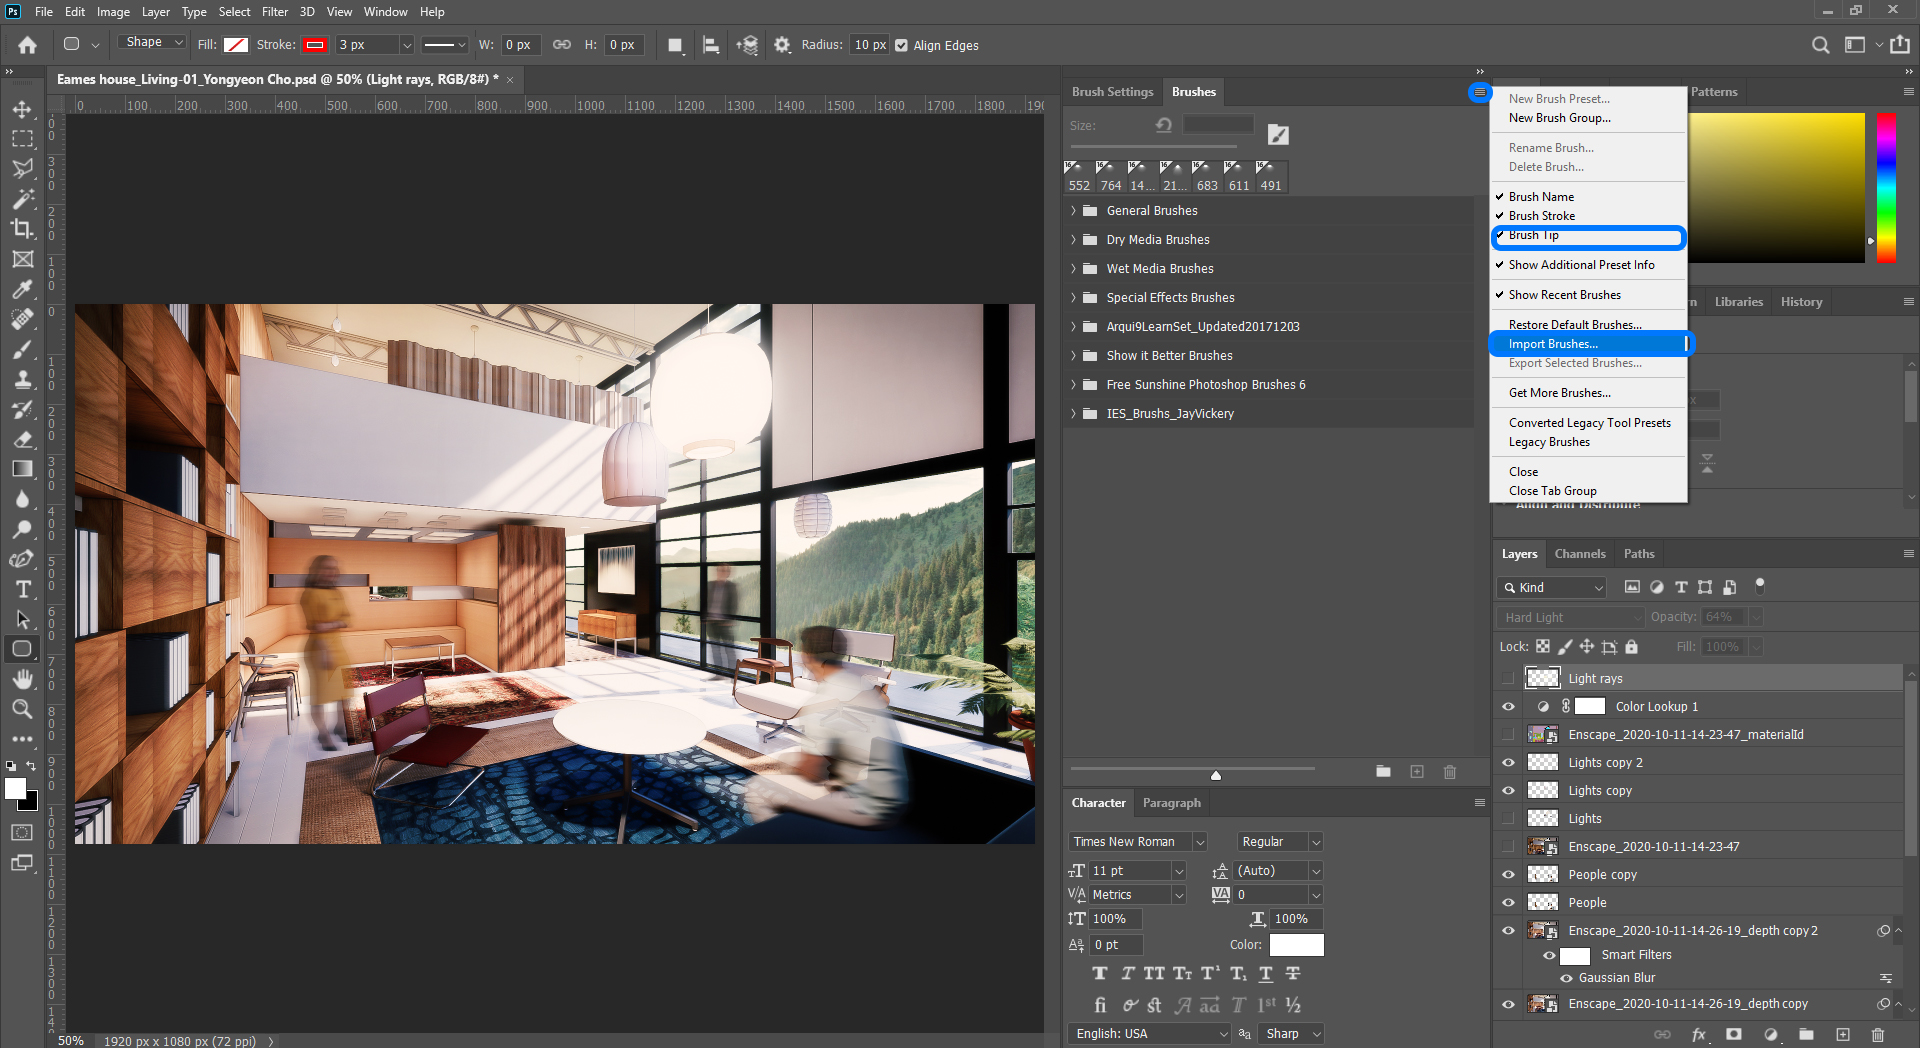
Import Brushes
- [STEP 01] Open [Brush] panel.
- [STEP 02] Click settings.
- [STEP 03] Select [Import Brushes] and check [Brush Tips] to see a single brush > Click an ABR file and click [LOAD].
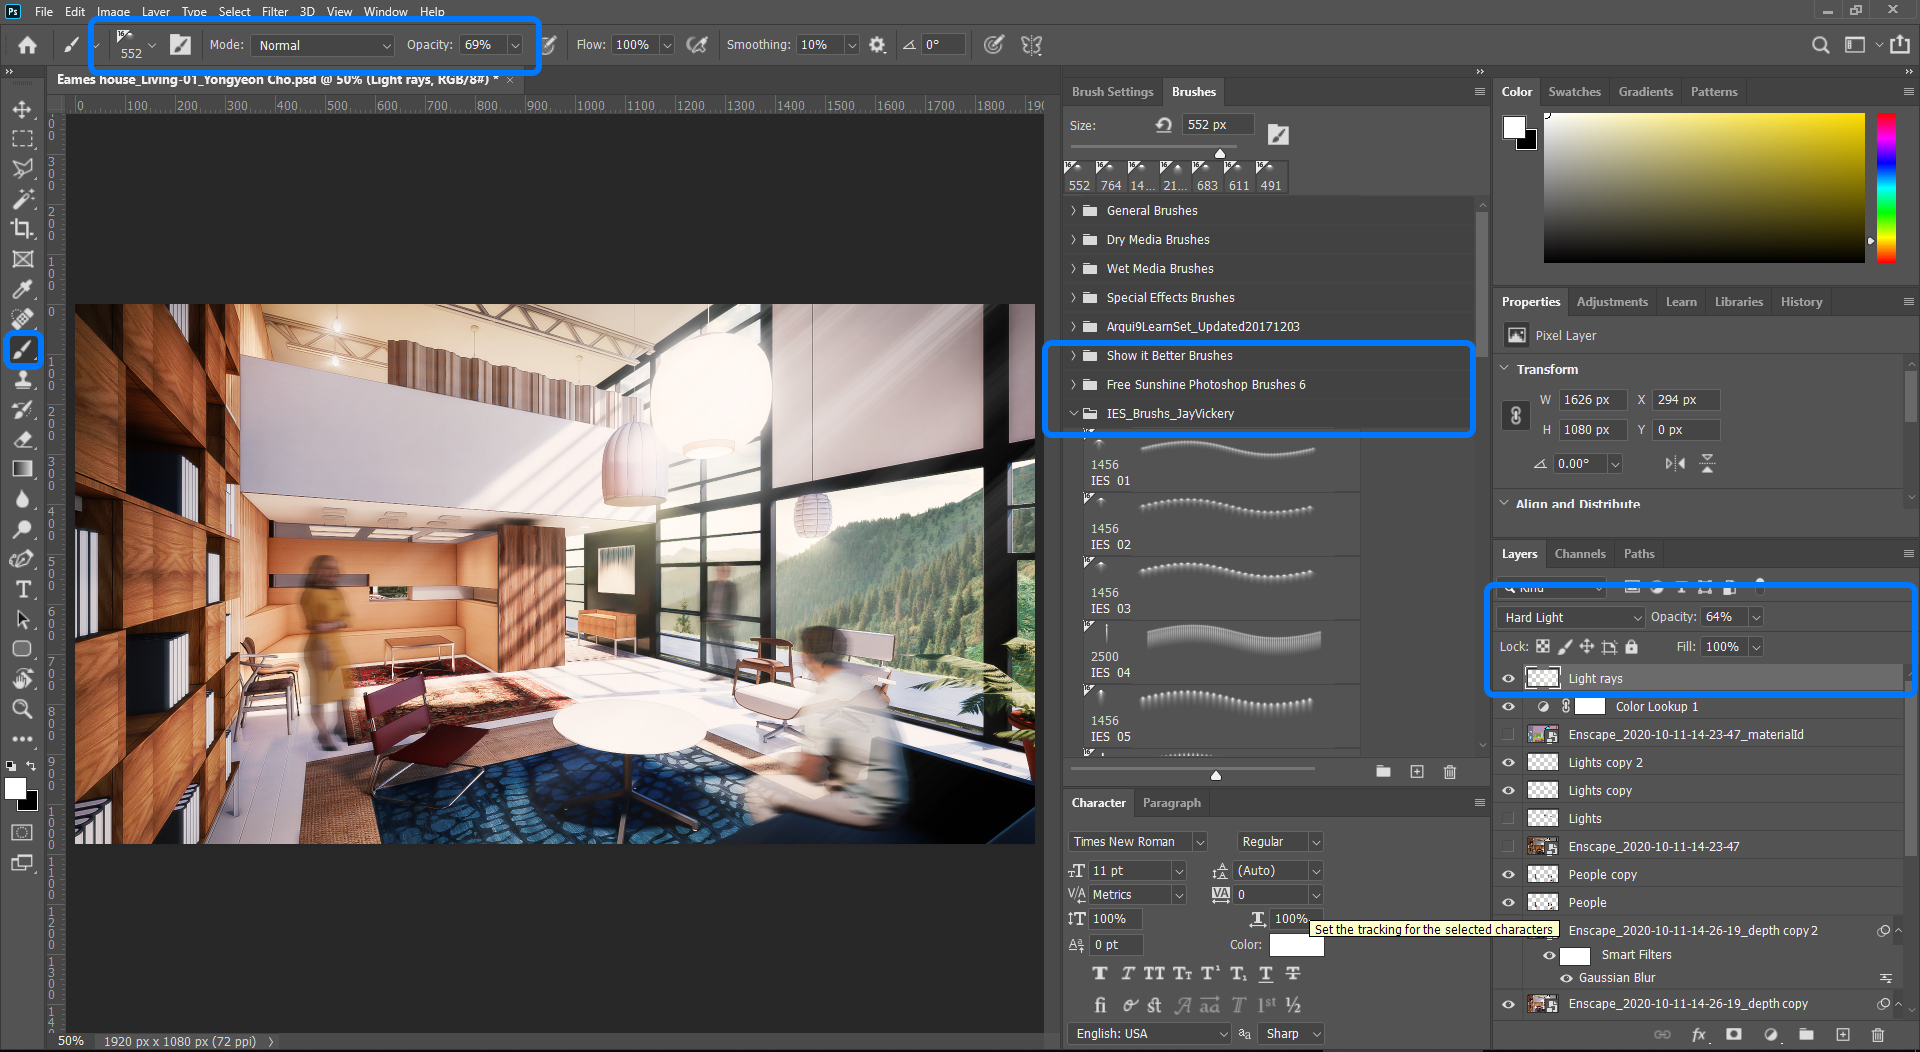
Use [Brush] tool
- [STEP 01] Click [Brush] tool, or press [B].
- [STEP 02] Select a brush.
- [STEP 03] Change the size, opacity, mode, hardness, and color.
- [STEP 04] Click or Drag to apply the selected brush.
(CO2) Understand post-production for exterior perspective rendering
In this tutorial, I will demonstrate a post-production process of exterior perspective rendering. Some of the information is the same as CO3 in session 19.
- [STEP 01] Render setting with [Export Object-ID, Material-ID, and Depth Channel], decide the best time of the day that you would like to show the concept of the space, and think the (CO 1) 8 tips for better perspective renderings in Session 19.
- [STEP 02] Open the rendered image in Photoshop.
- [STEP 03] Save as the file in PSD format.
- [STPE 04] Duplicate the background layer by mouse-right clicking and selecting [Duplicate Layer…] or Select all [Ctrl+A] and [Ctrl+J].
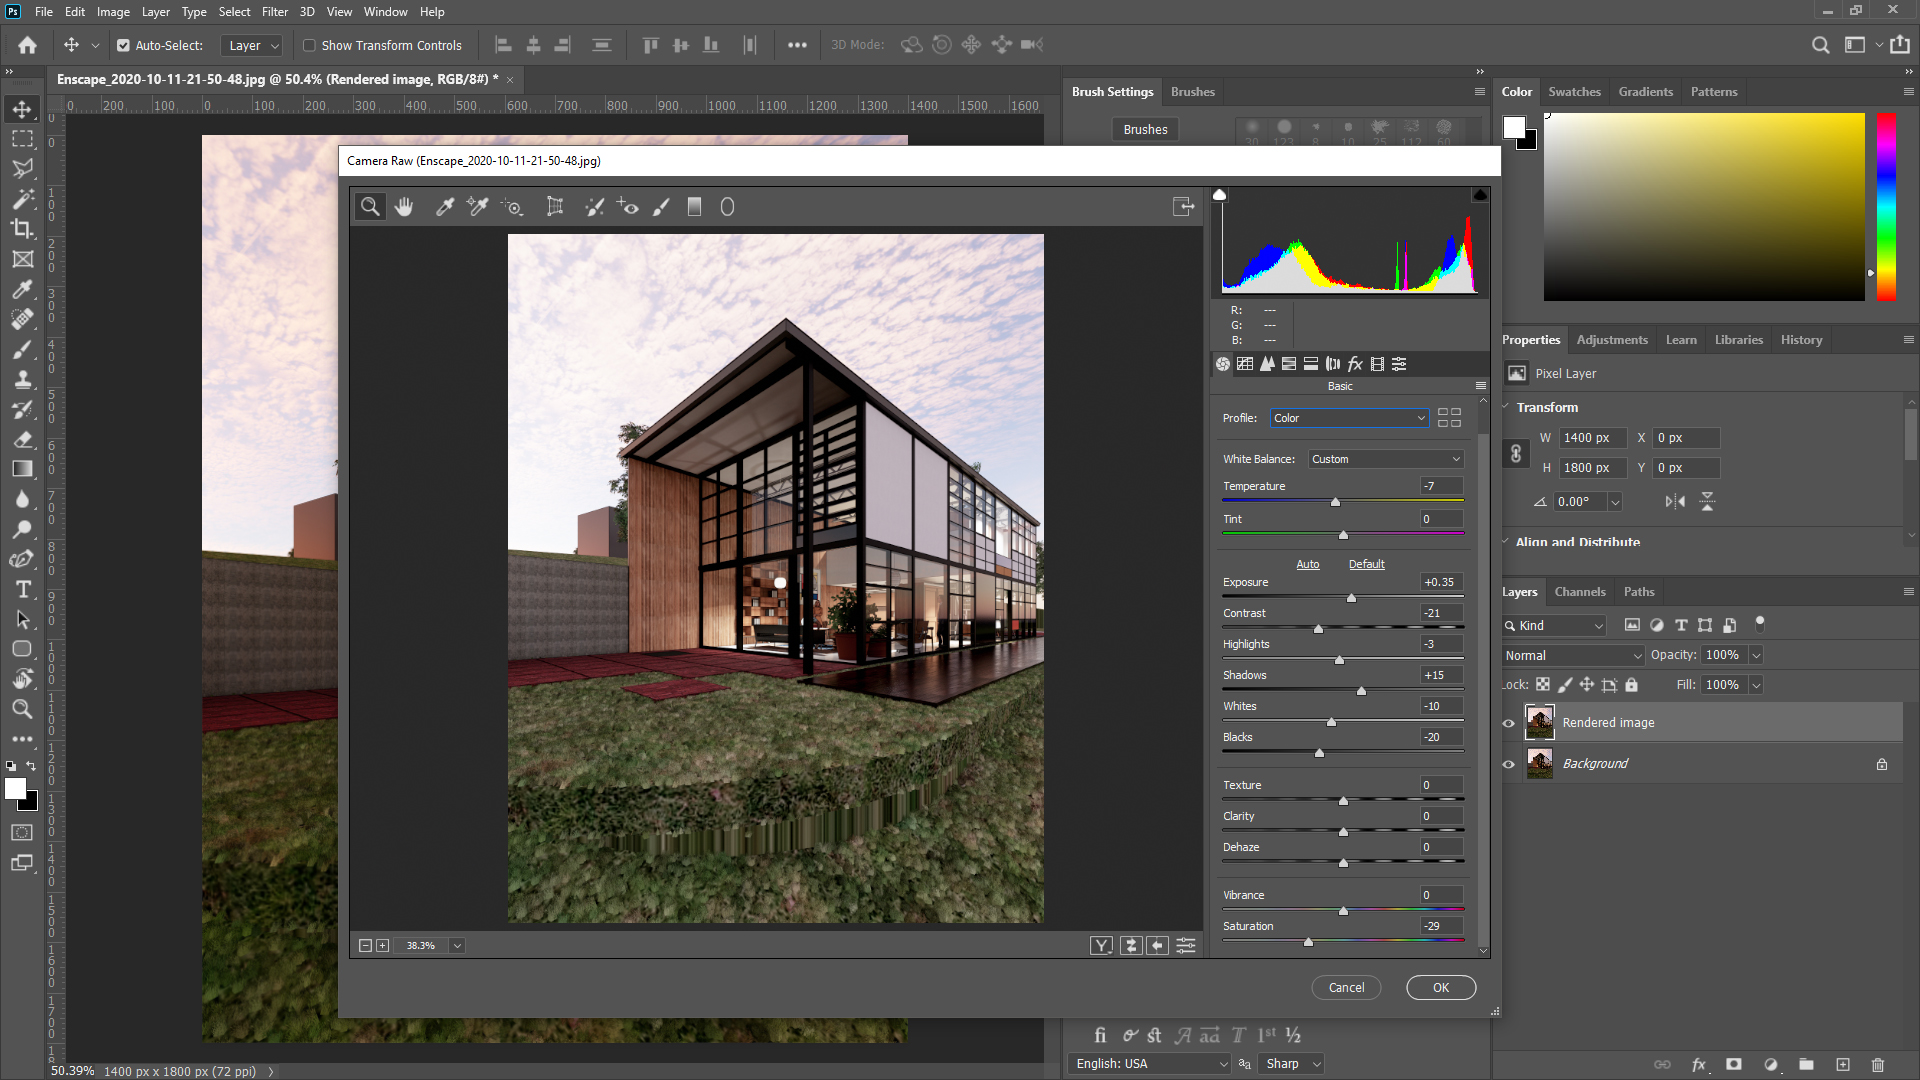
- [STEP 05] Click [Camera Raw] from the [Filter] menu. The [Camera Raw] setting is a combination version of image adjustment settings.
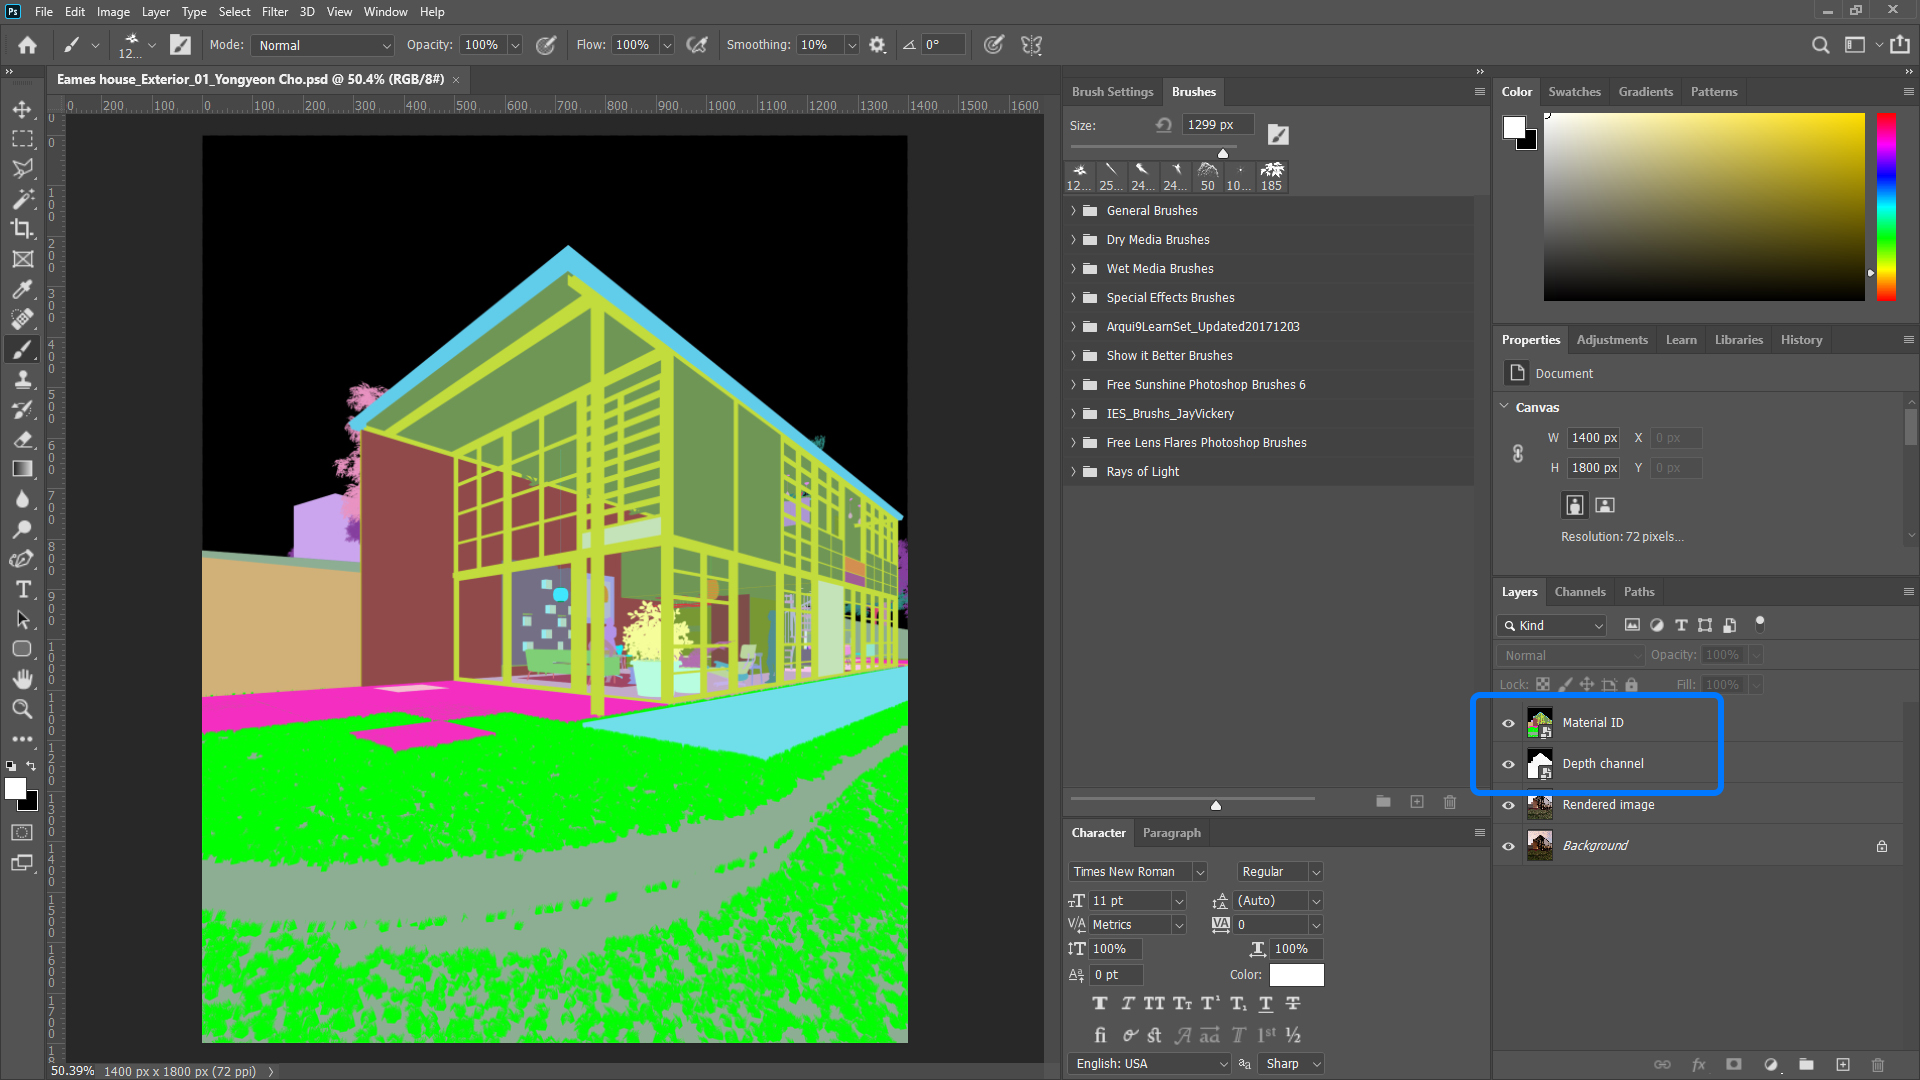
- [STEP 06] Add the [Depth Channal] and the [Material ID] by dragging and dropping on the file.
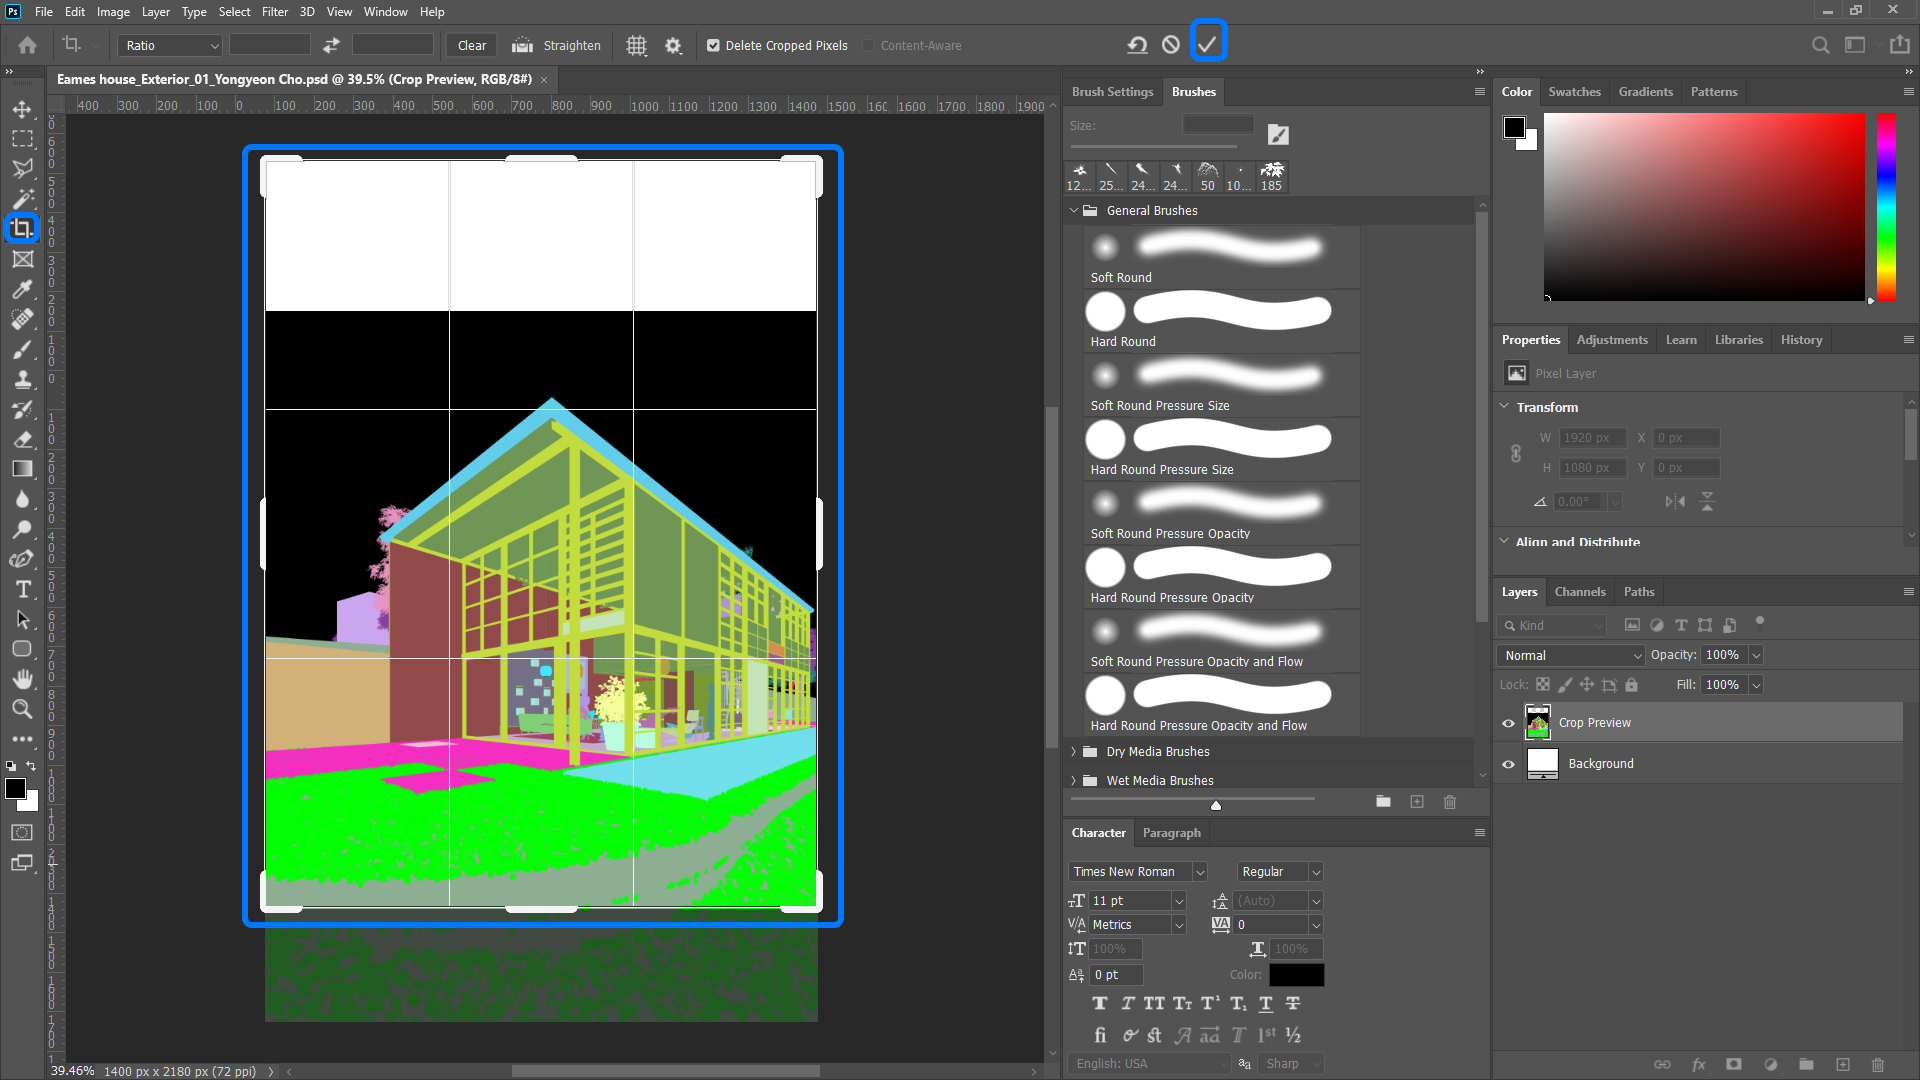
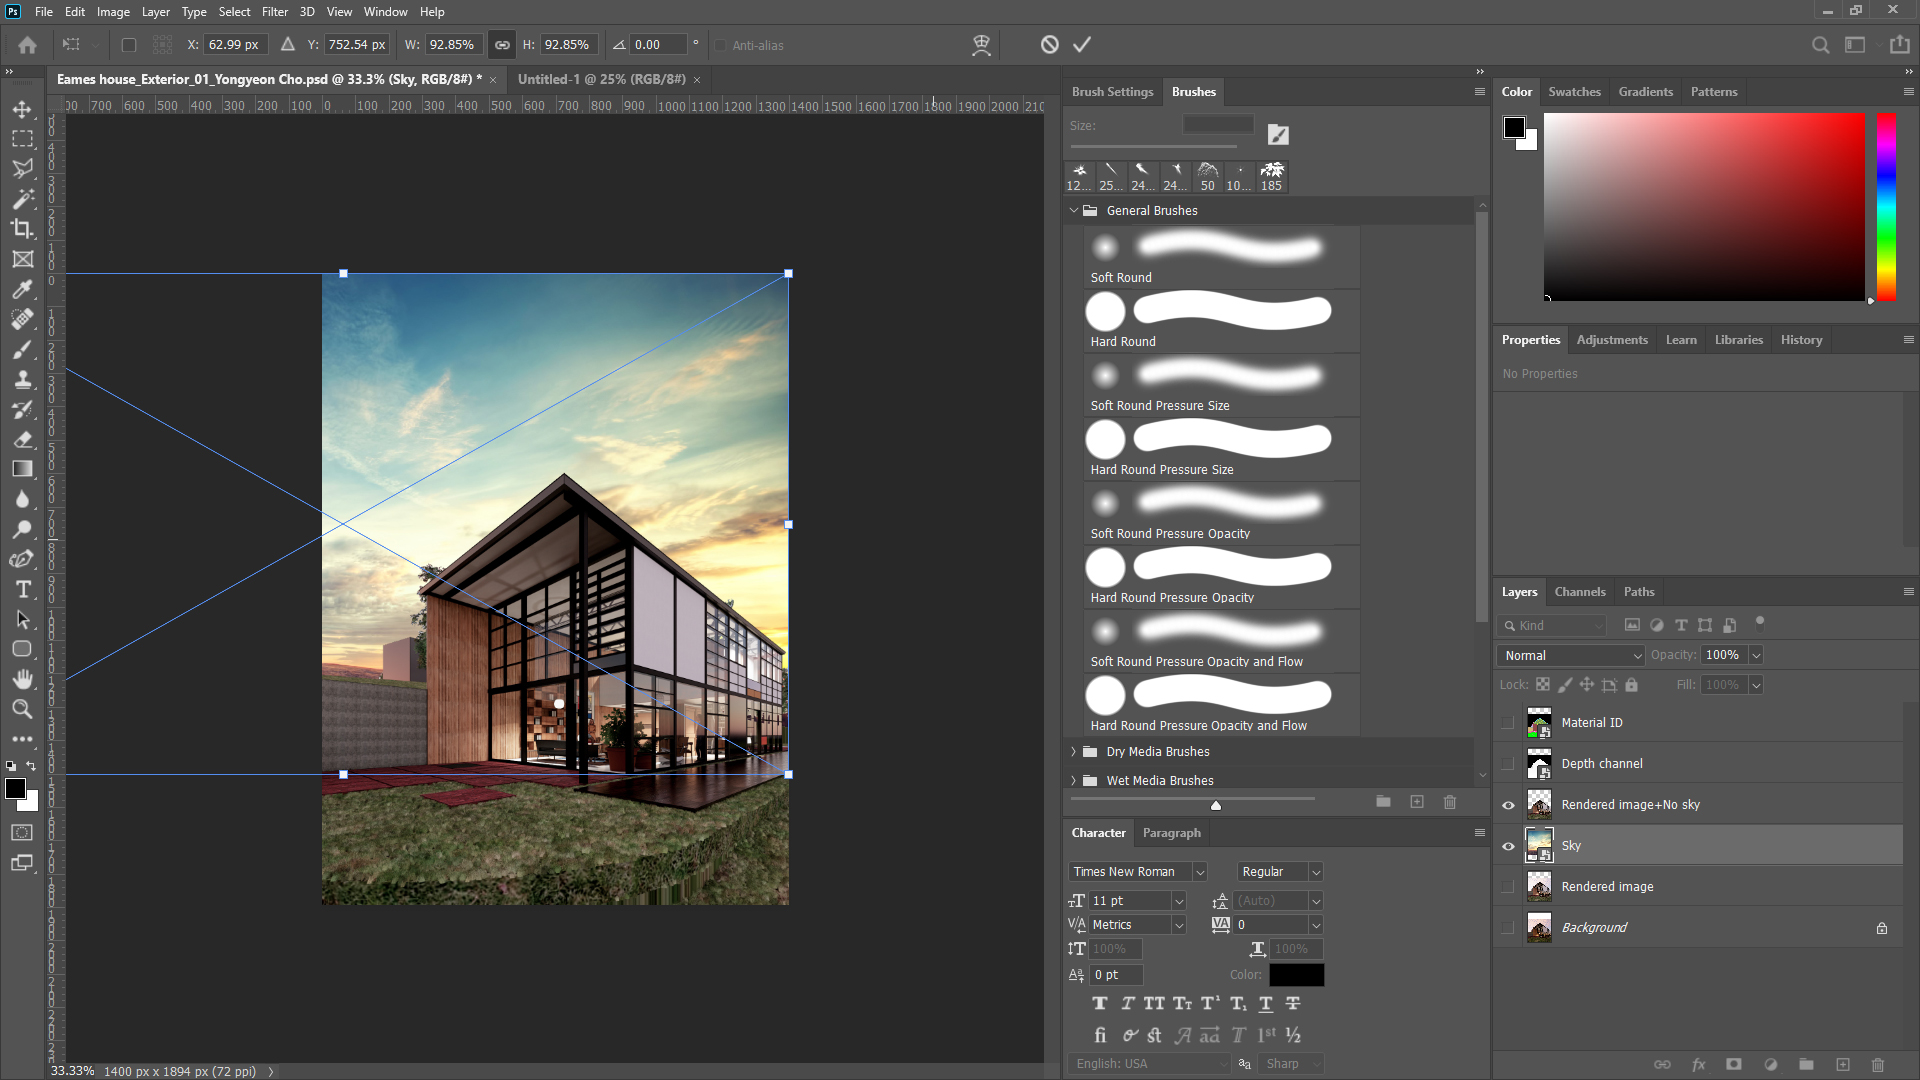
- [STEP 07] Use [Crop] tool, pressing [C] and change the region to show more the sky
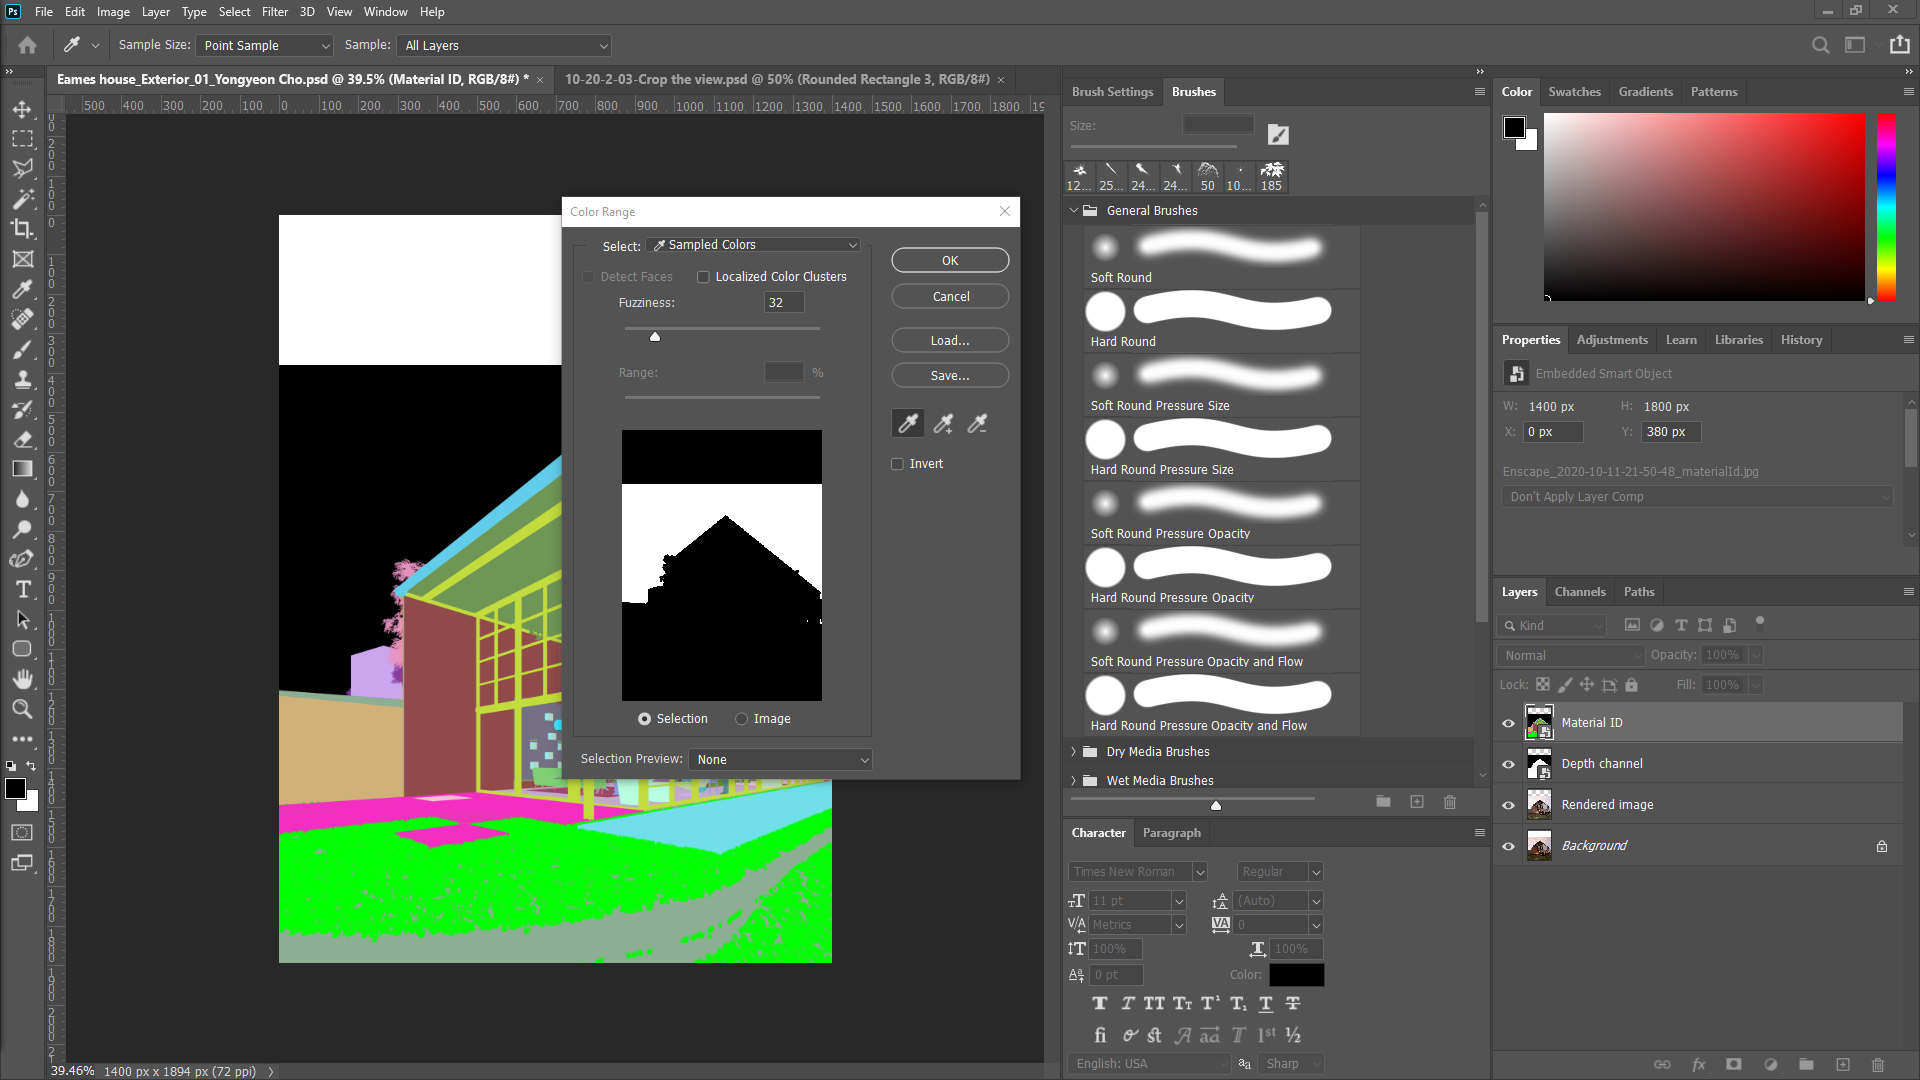
- [STEP 08] Click [Color range] from [Select] menu > select the black > click [OK].
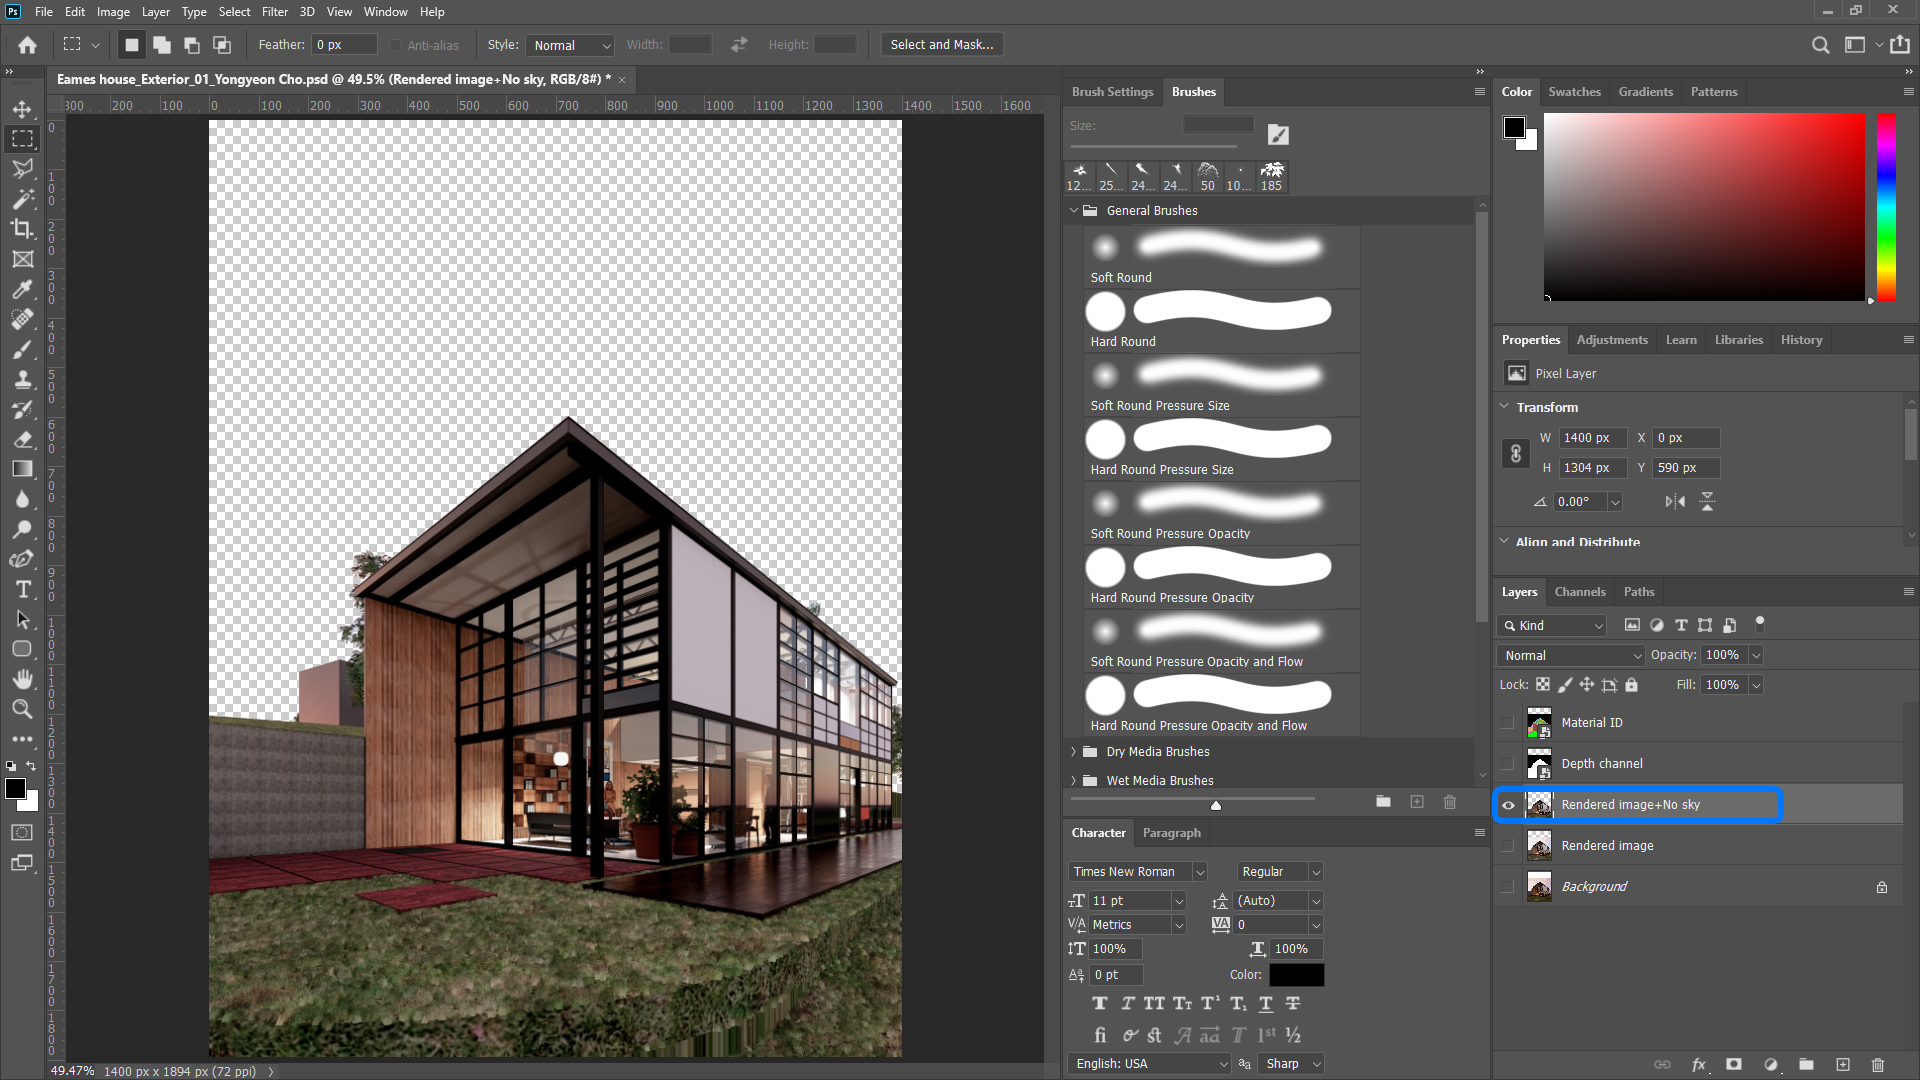
- [STEP 09] Hide [Materal ID] and [Depth Channel] > Select [Randered image] layer > Invert select by pressing [Ctrl+Shift+I] > Duplicate the selected area to a new layer by pressing [Ctrl+J] > Layer name change [Rendered image+No sky] > Hide [Render image] layer.
- [STEP 10] Image search website [Sky HD background] and click advance search with [Large] size image and [copyright] if needed.
- [STEP 11] Add the downloaded Sky image to the file > the layer must be below the rendered image > change the size and locations of the sky image.
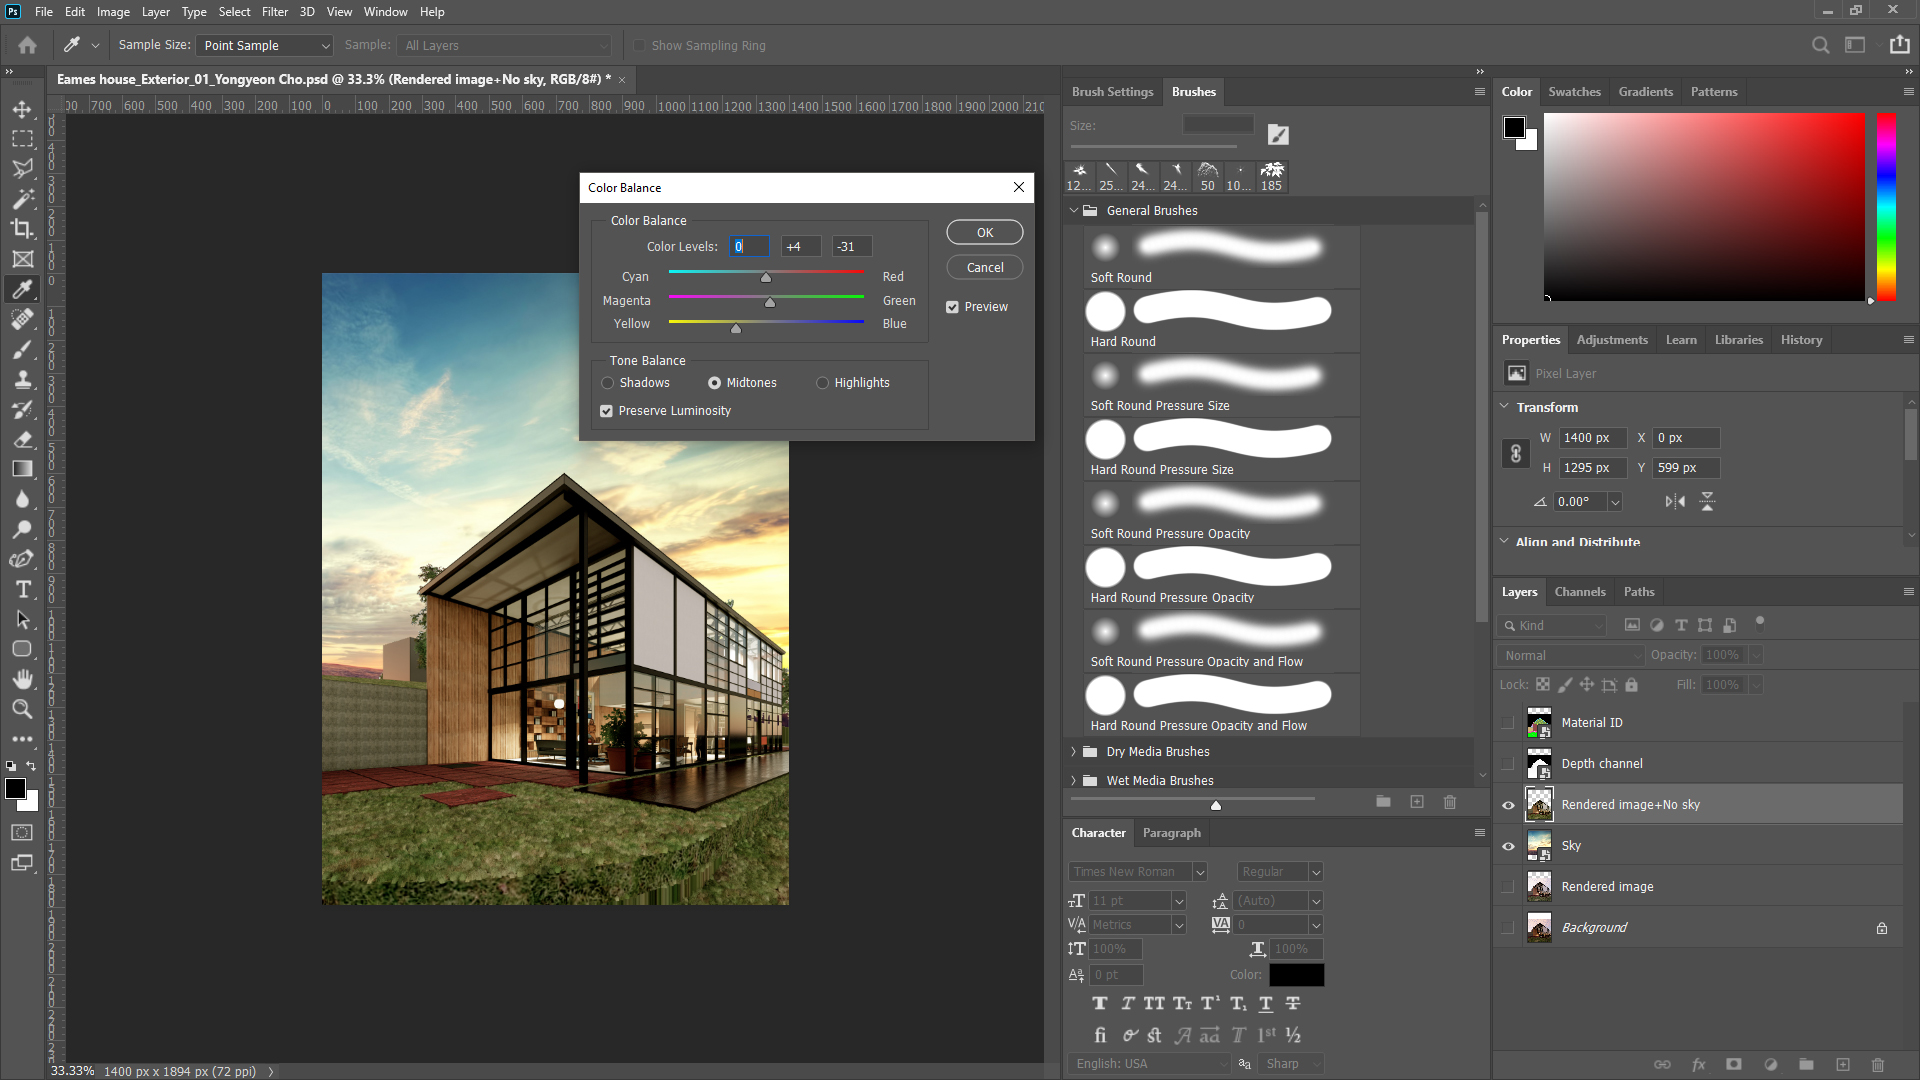
- [STEP 12] Adjust the color of the rendering or the sky to harmonize for both images by using [Color Balance] from [Image] > [Adjustment] menu.
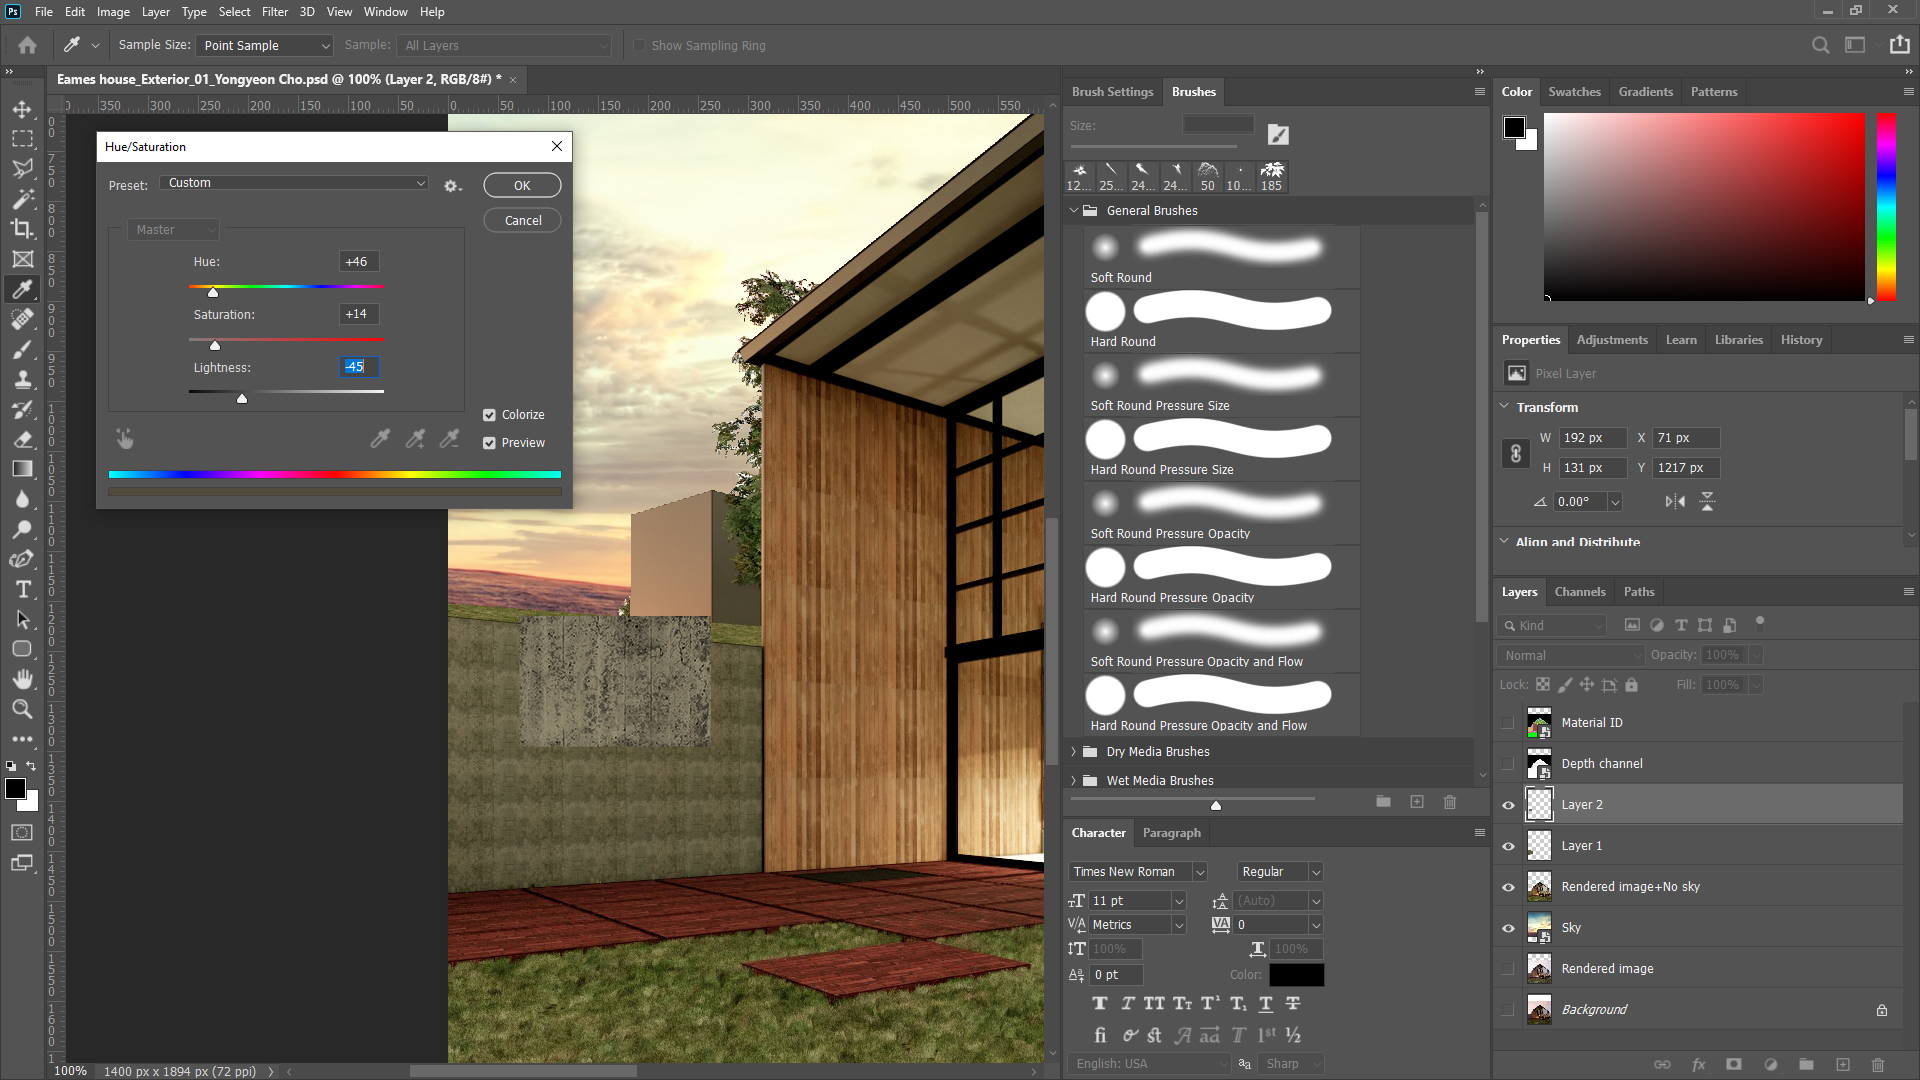
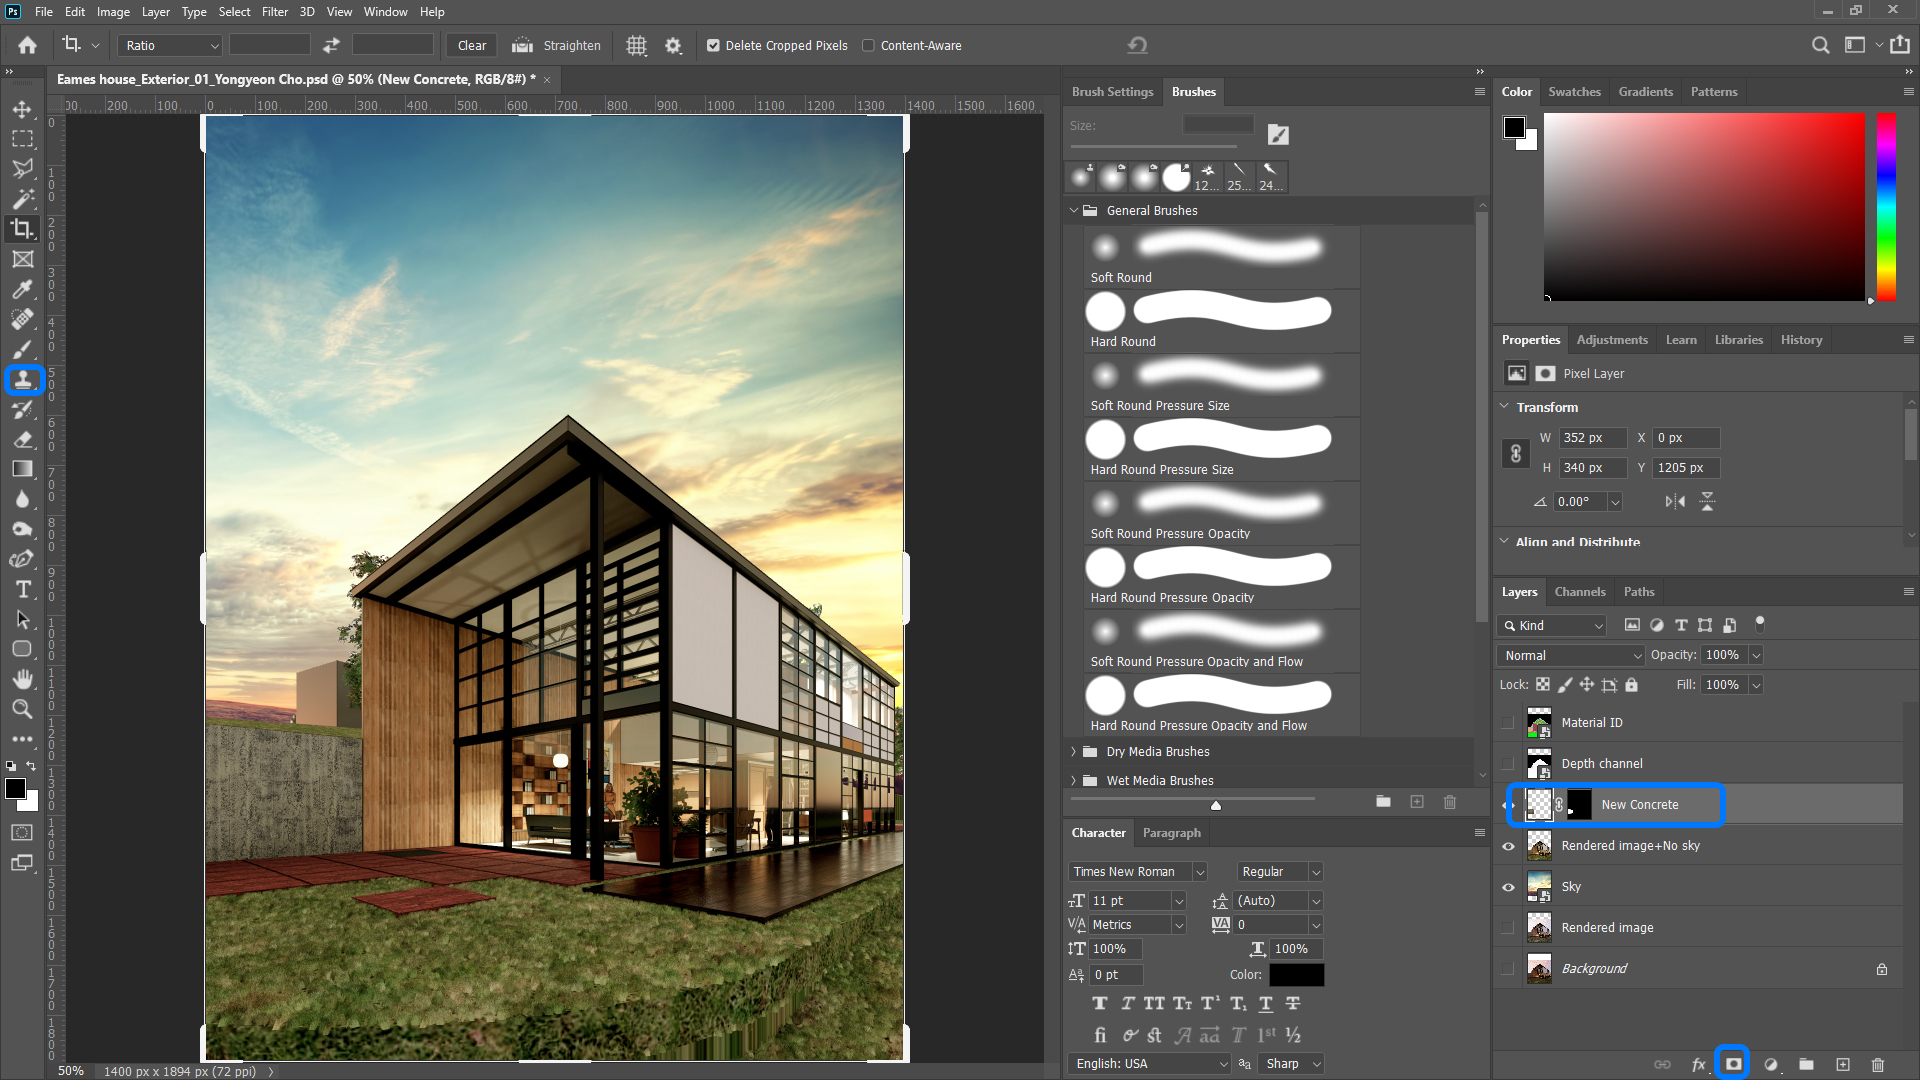
- [STEP 13] If needed, change the color or pattern of the materials by using the [Material ID] layer to select the materials > Add high-quality seamless texture > convert to a layer > change the color to match the original color of the texture.
- [STEP 14] Copy/size change the image to make a pattern > If needed, use [clone stamp] tool to remove the pattern effects > If needed, use [Burn] tool or [Dodge] tool to add shadows and highlights > use [Mask] to hide the not needed area.
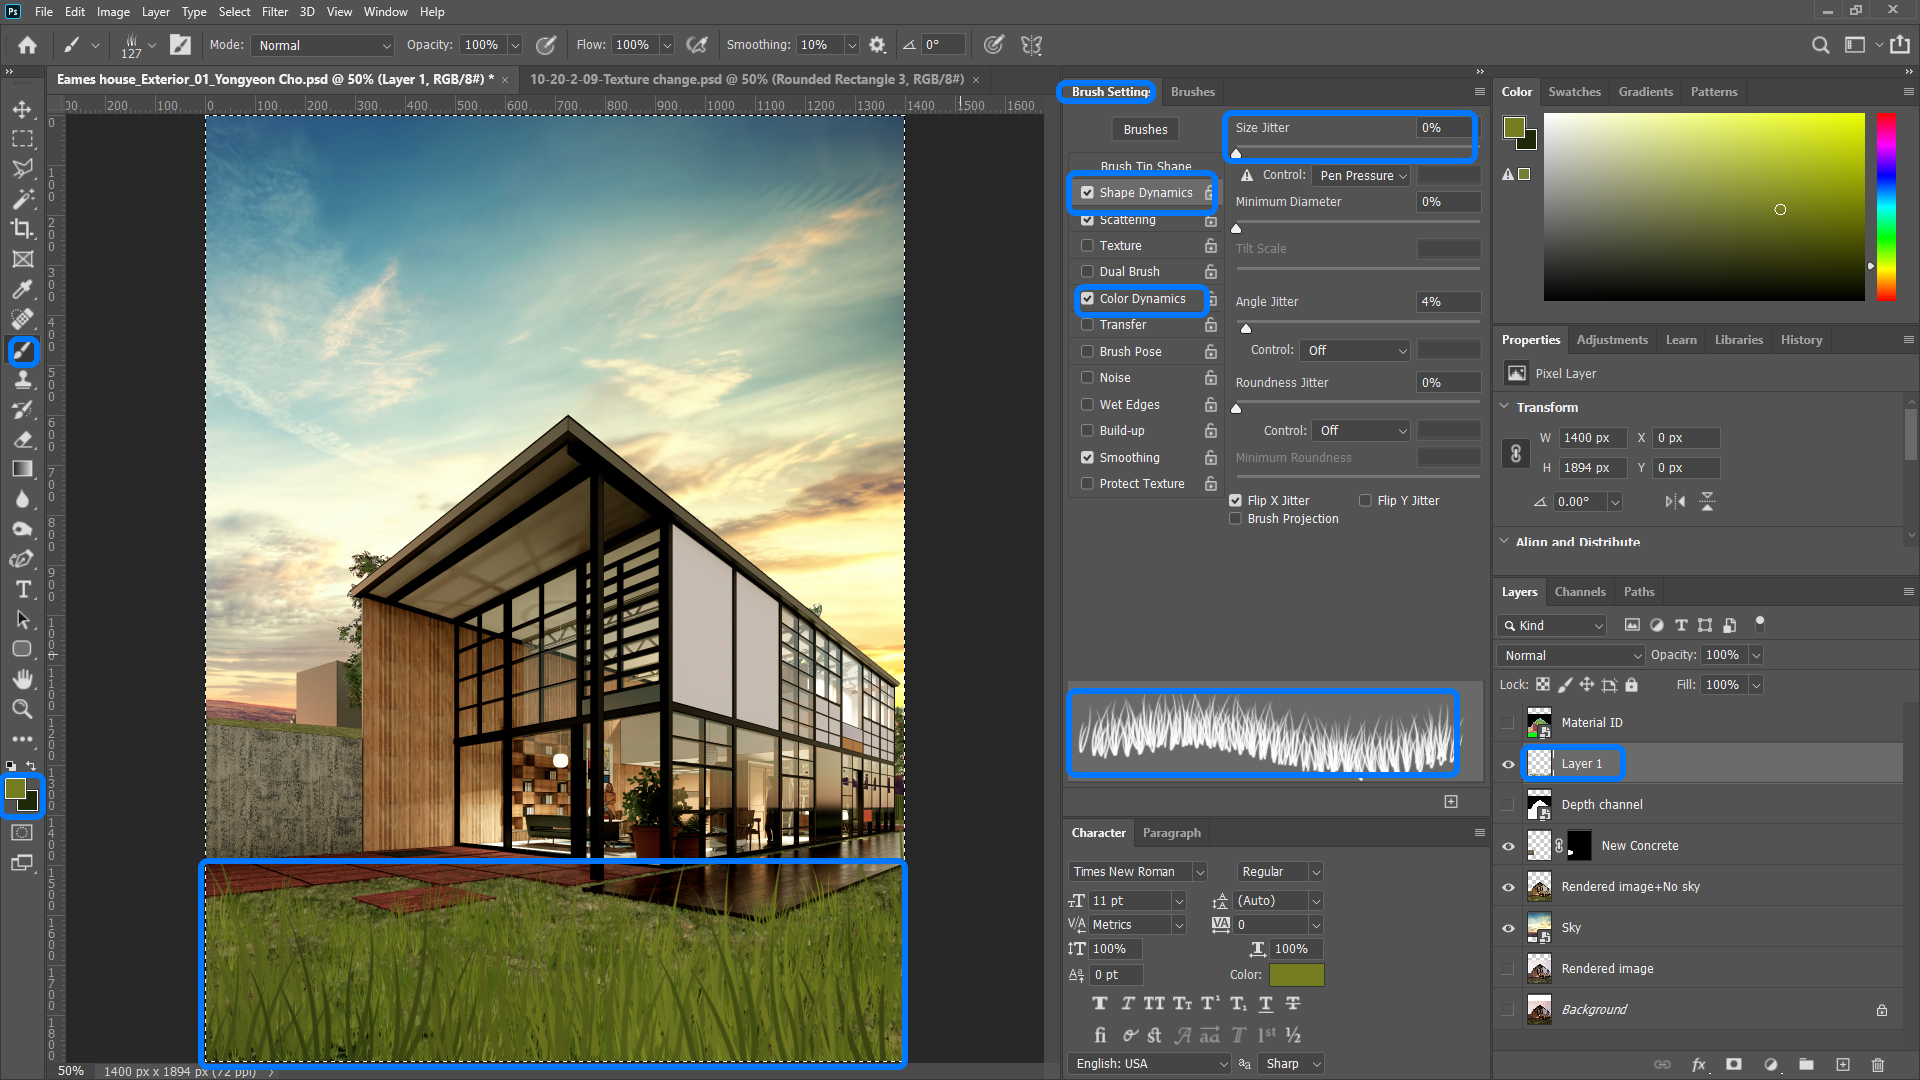
- [STEP 15] The rendering already has grass on the ground. However, I will add plans on the grass and the concrete wall using the [Brush] tool.
- Click [Brush] tool > Select [Herbe3] from [Argui9LearnSet] > Click [Brush Settings] panel > adjust [Shape Dynamics] – Size Jitter, adjust [Color Dynamics] – Foreground/Background Jitter and Hue Jitter.
- Change the foreground/background color.
- Create a new layer.
- Click or hold the mouse or use the Wacom tablet.
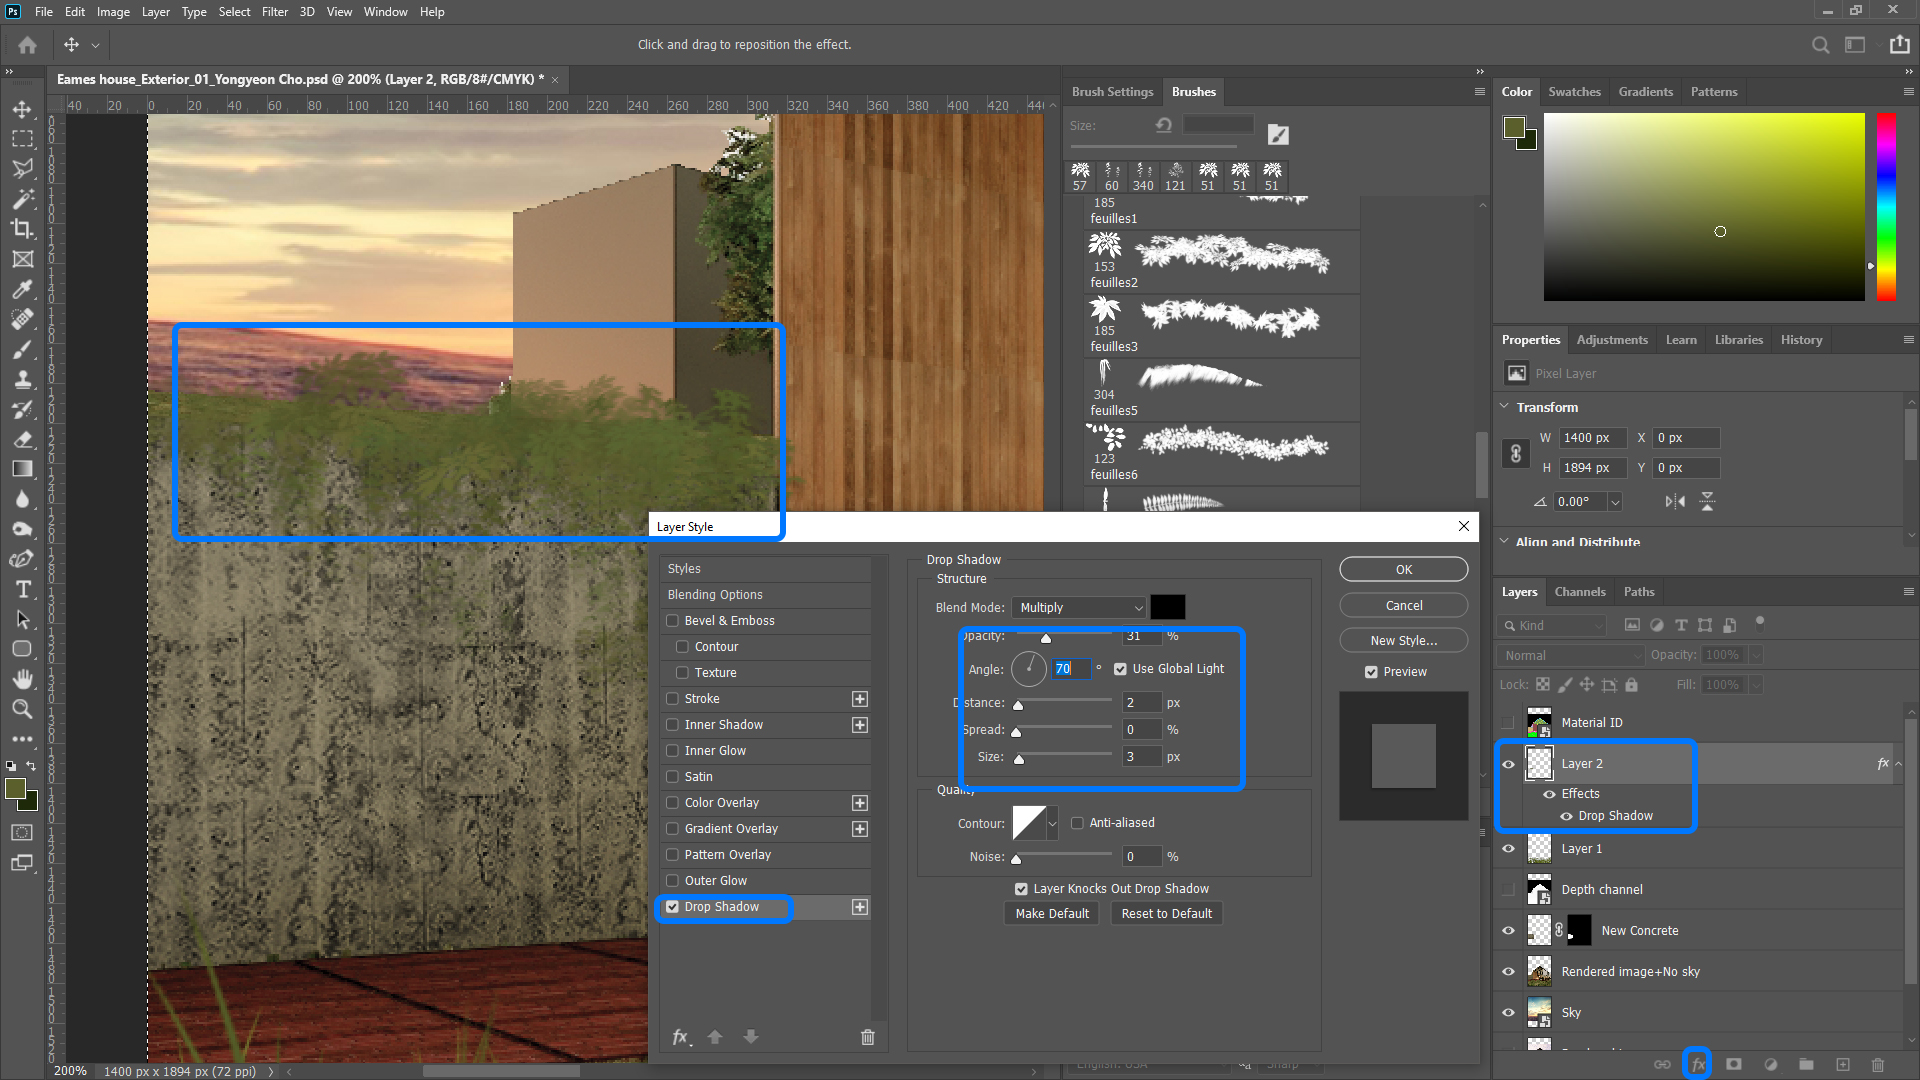
- Use a different brush for the plans on the concrete wall and apply [Drop Dhadow] on the layer effect.
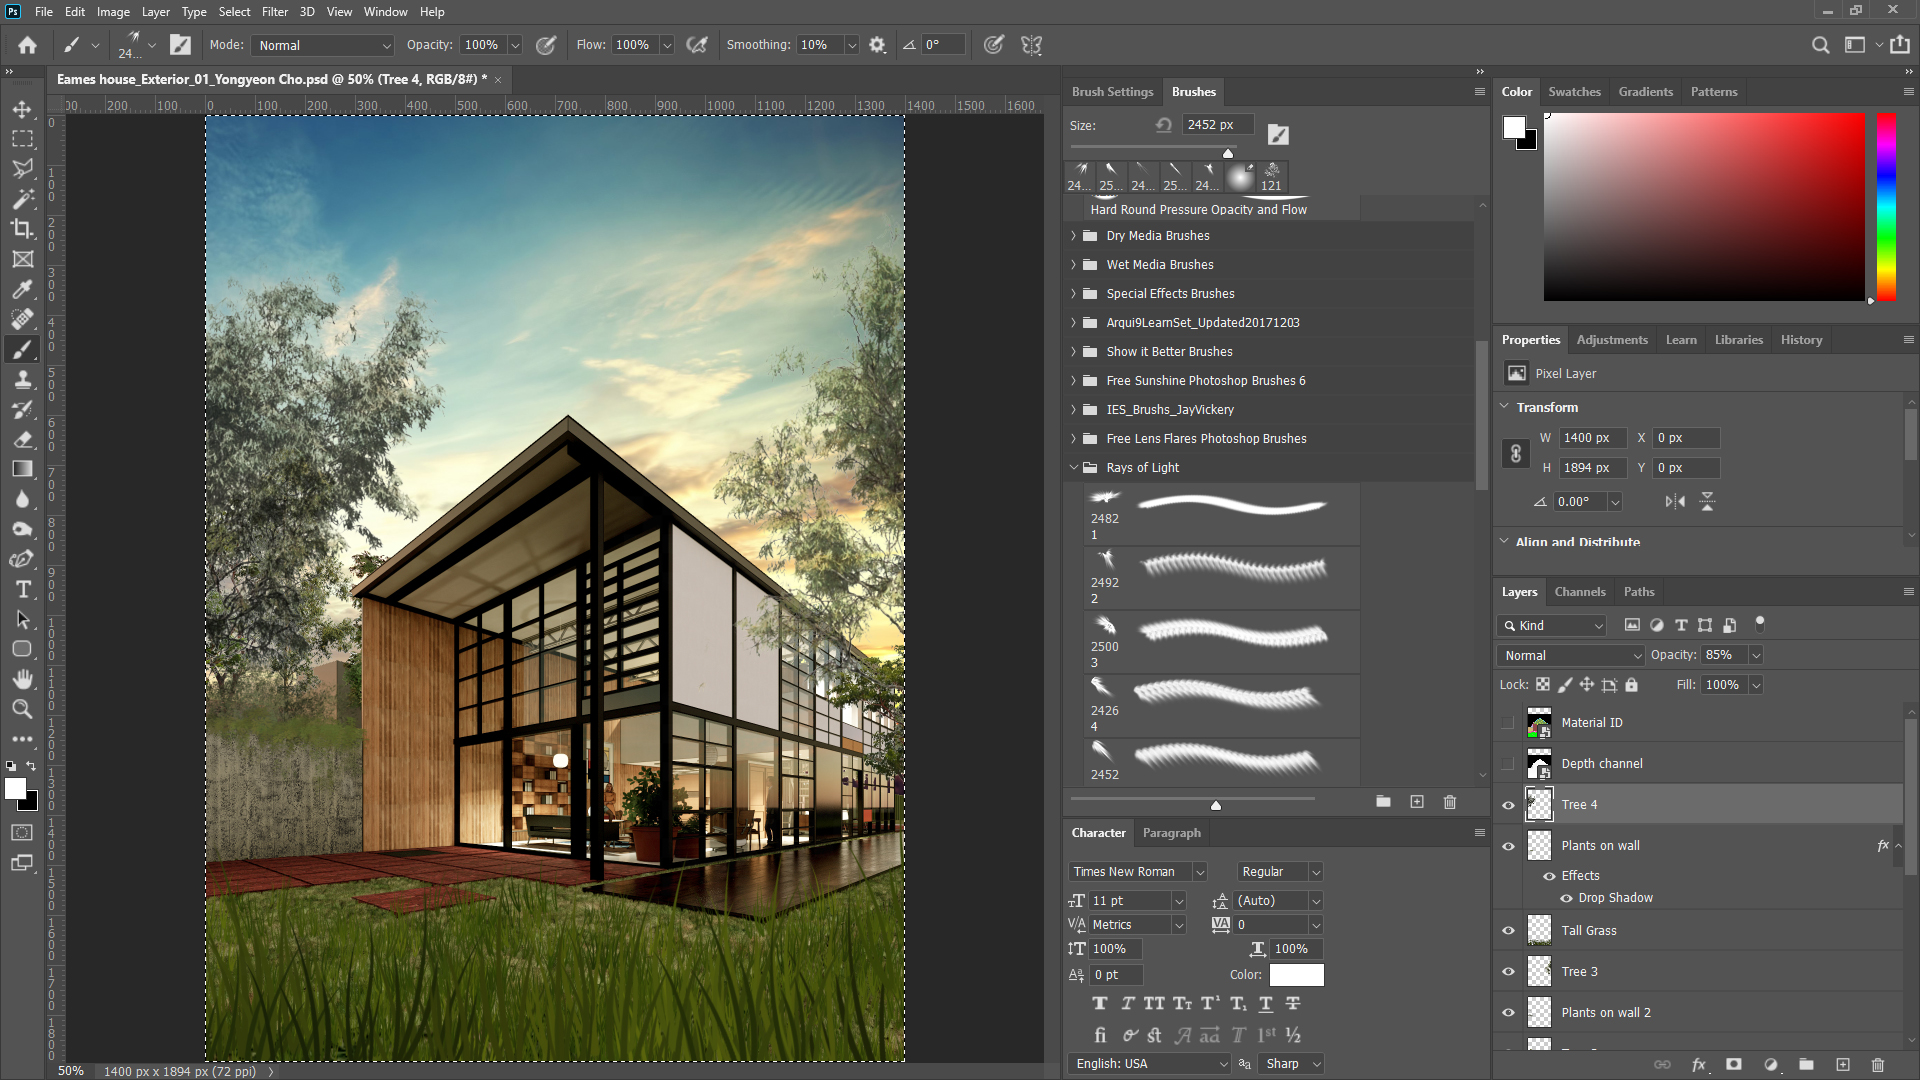
- [STEP 16] Download trees from image searching sites and add the images on the scene. You may need to only the tree image without a background. You can use the [Color Range] tool to select the background and invert the selection, then copy the tree image only. It would help if you also had color changes and layer opacity changes for a better look.
- [STEP 17] For a dramatic effect, you can add [Ray of Light].

- [STEP 18] On the top of the layer, [add adjustment of layer]. I like to use 2 Color Lookup with different opacity, Photo Filter, and Brightness/Contrast.
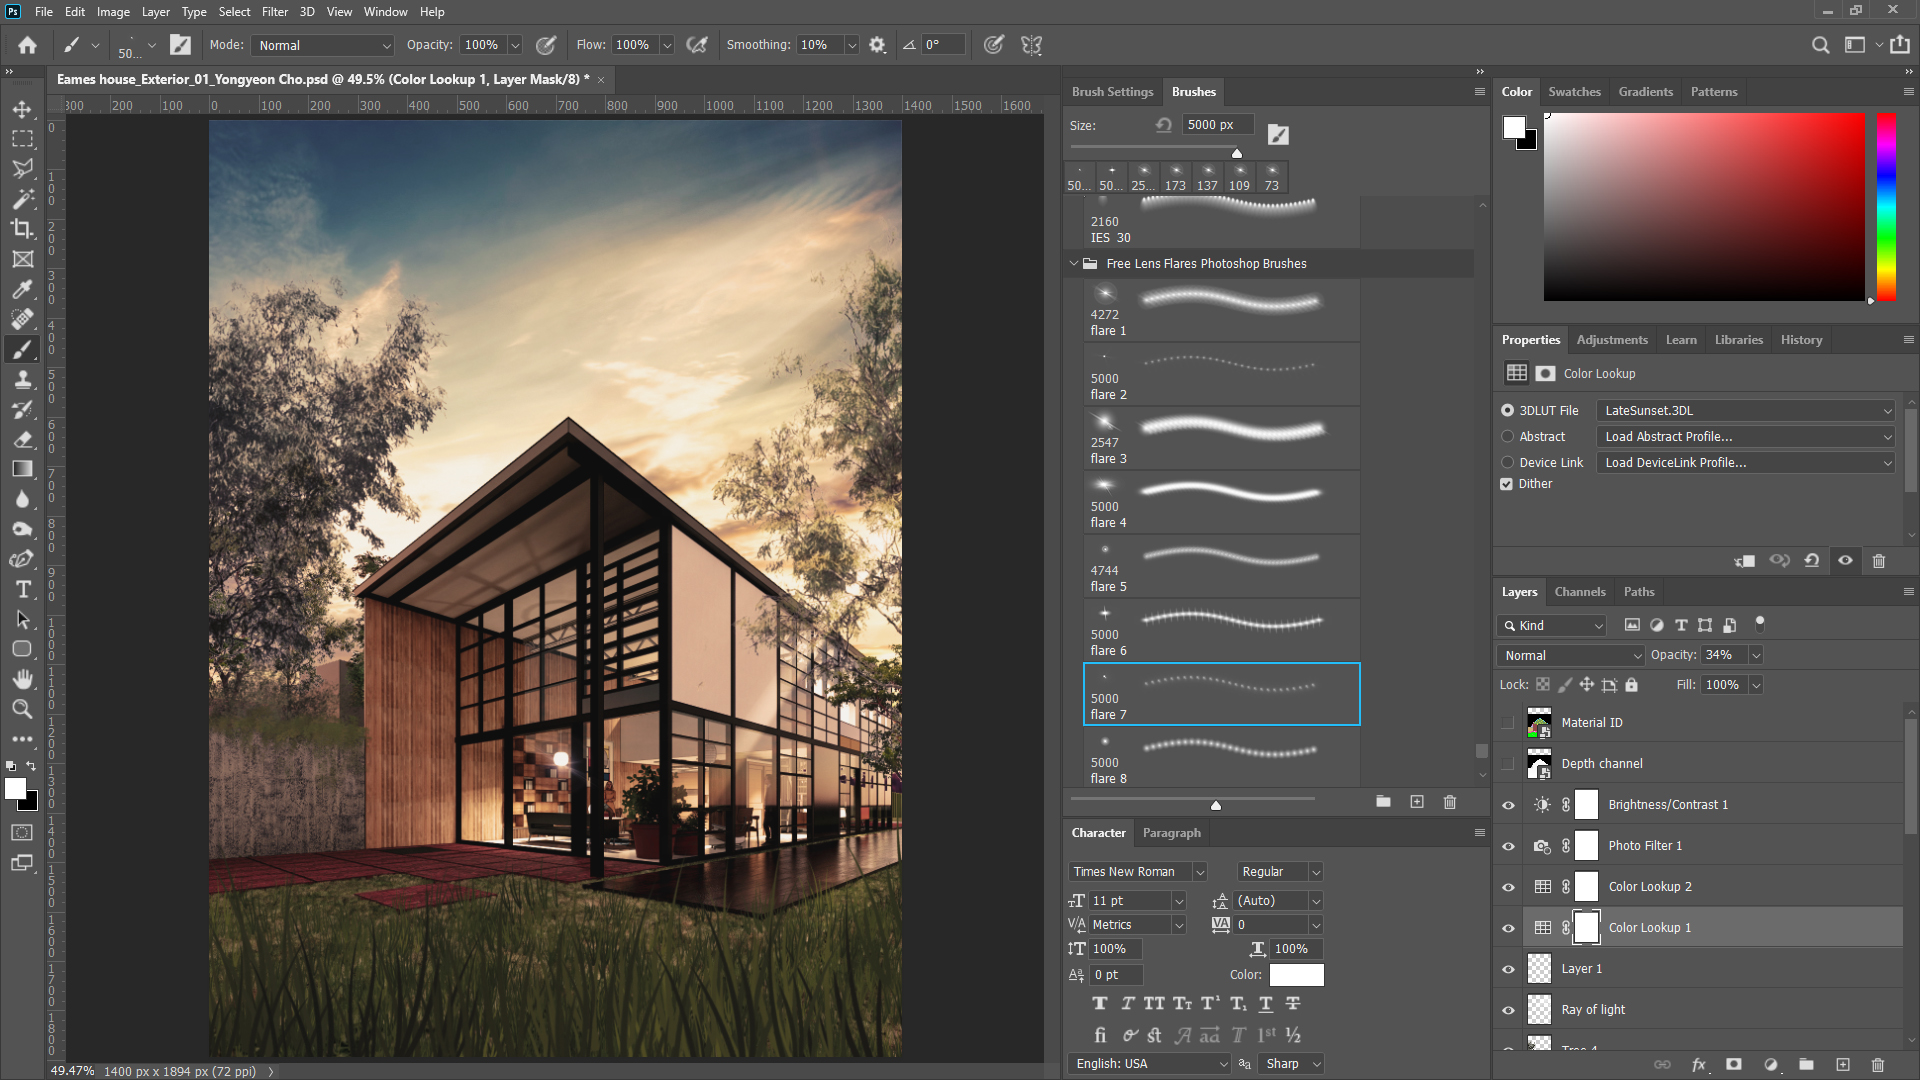
Save the file before closing.
 References
Arqui9 Learn. (n.d.). Arqui9 learn brush set. Architectural Visualisation Learning. Retrieved December 24, 2021, from https://www.arqui9learn.com/productbrushes
Epstein, A. (2021, May 10). How to install & use photoshop brushes. Creative market blog. Retrieved December 24, 2021, from https://creativemarket.com/blog/how-to-install-use-photoshop-brushes
Show it Better. (n.d.). Show it better brushes for Photoshop. Retrieved December 24, 2021, from https://showitbetter.gumroad.com/l/QQhBJ
