Part Five. 3D Video Animation
Chapter 22. Lumion – walk-through video
Upon completing this session, students will be able to:
- (CO 1) Create a walk-through video in Lumion
 Session Highlights
At the end of the session, students will be able to create the graphics below.
 Lecture Contents
(CO1) Create a walk-through video in Lumion
This lecture content is based on ‘Architecture Inspirations’ Lumion Animation Tips and Tricks.’
Animation basic
- [STEP 01] From the [Build] mode, click movie] mode on your right-bottom menu.
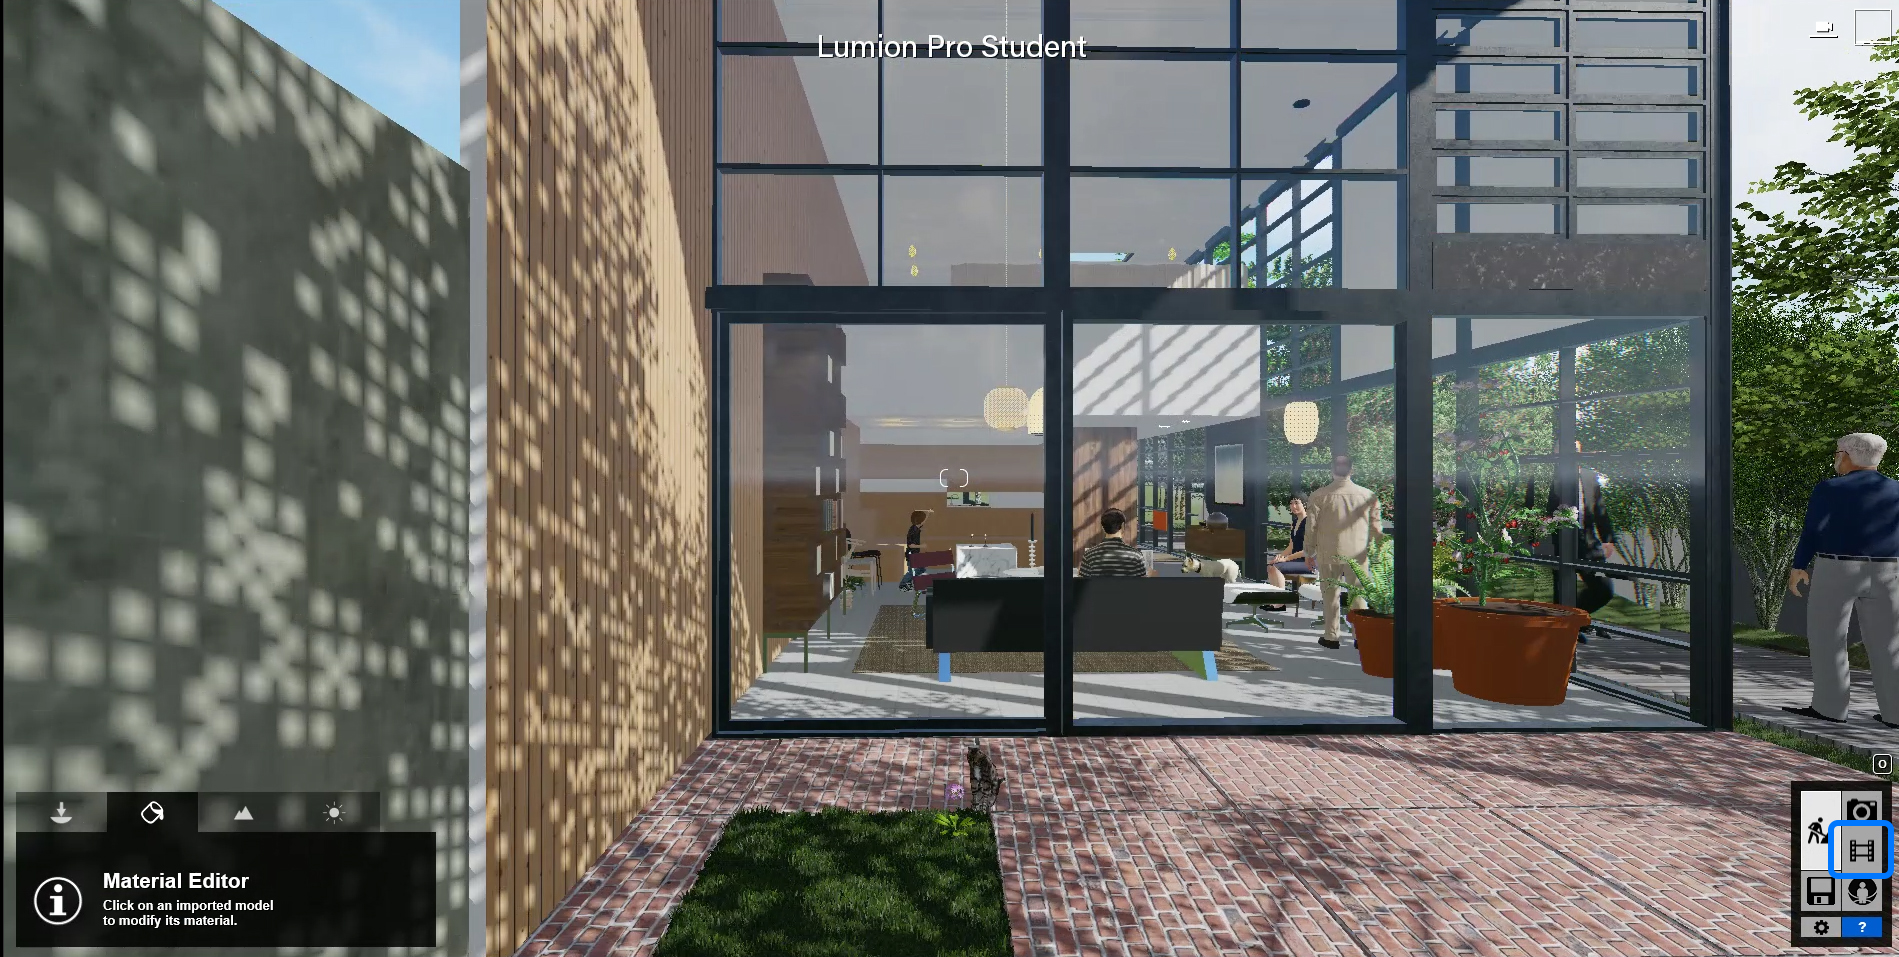
- [STEP 02] In this [Movie] mode, you can create video clips, add rendered images, and add videos that you already made.
- Click a frame to add a clip. In this first clip, use the first frame.
- Click [Recode] to start making a video.

- [STEP 03] Create scenes.
- Position your camera to create your scene by using the [Focal Length], [Horizontal Eye Level], and [Set Eye Level].
- Focal Length – recommended setting is 28mm ~ 32mm.
- Horizontal Eye Level – Checked.
- Set Eye Level – Checked.
- You can capture the first scene by clicking the camera] icon.
- Move the scene by using [QWEASD] keys to move the camera.
- Click the [Camera] icon again to add another scene. It will make a camera path.
- Click the [Play] icon to confirm your clip looks good.
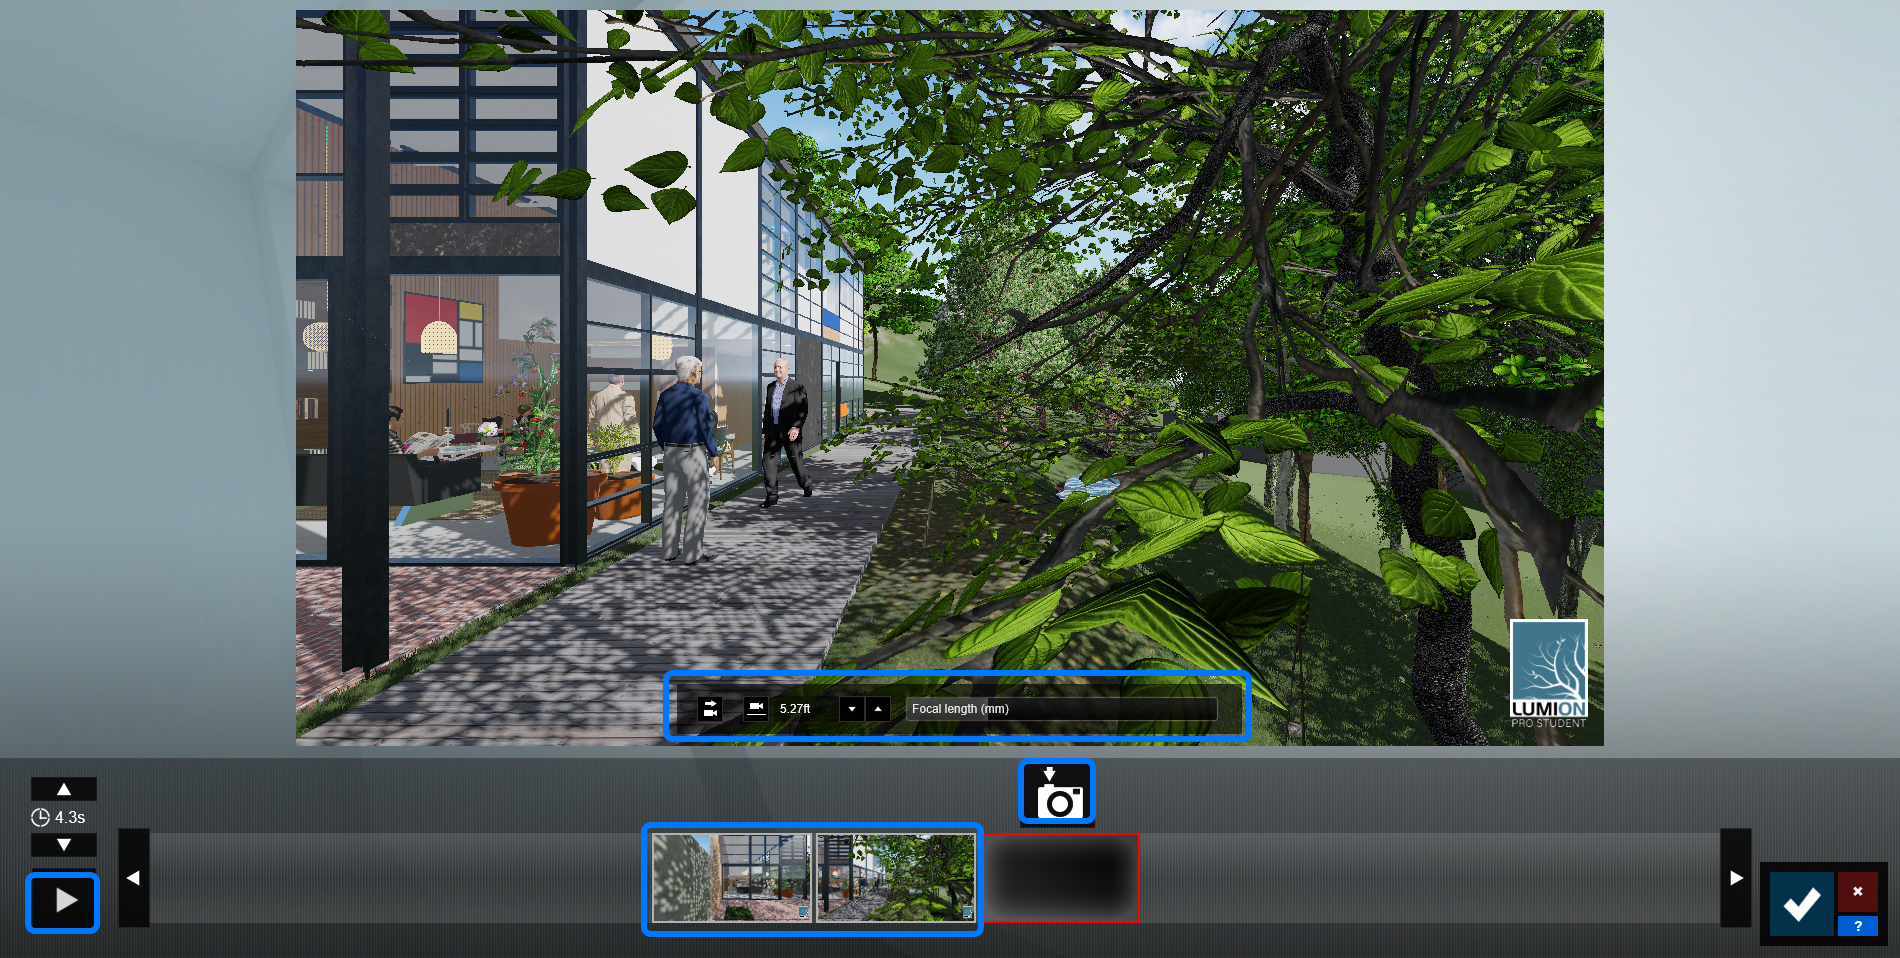
- You can repeat this process complete a clip. I recommend having 2~4 scenes in a clip that makes the best result. Simple is the best! Less is More!!
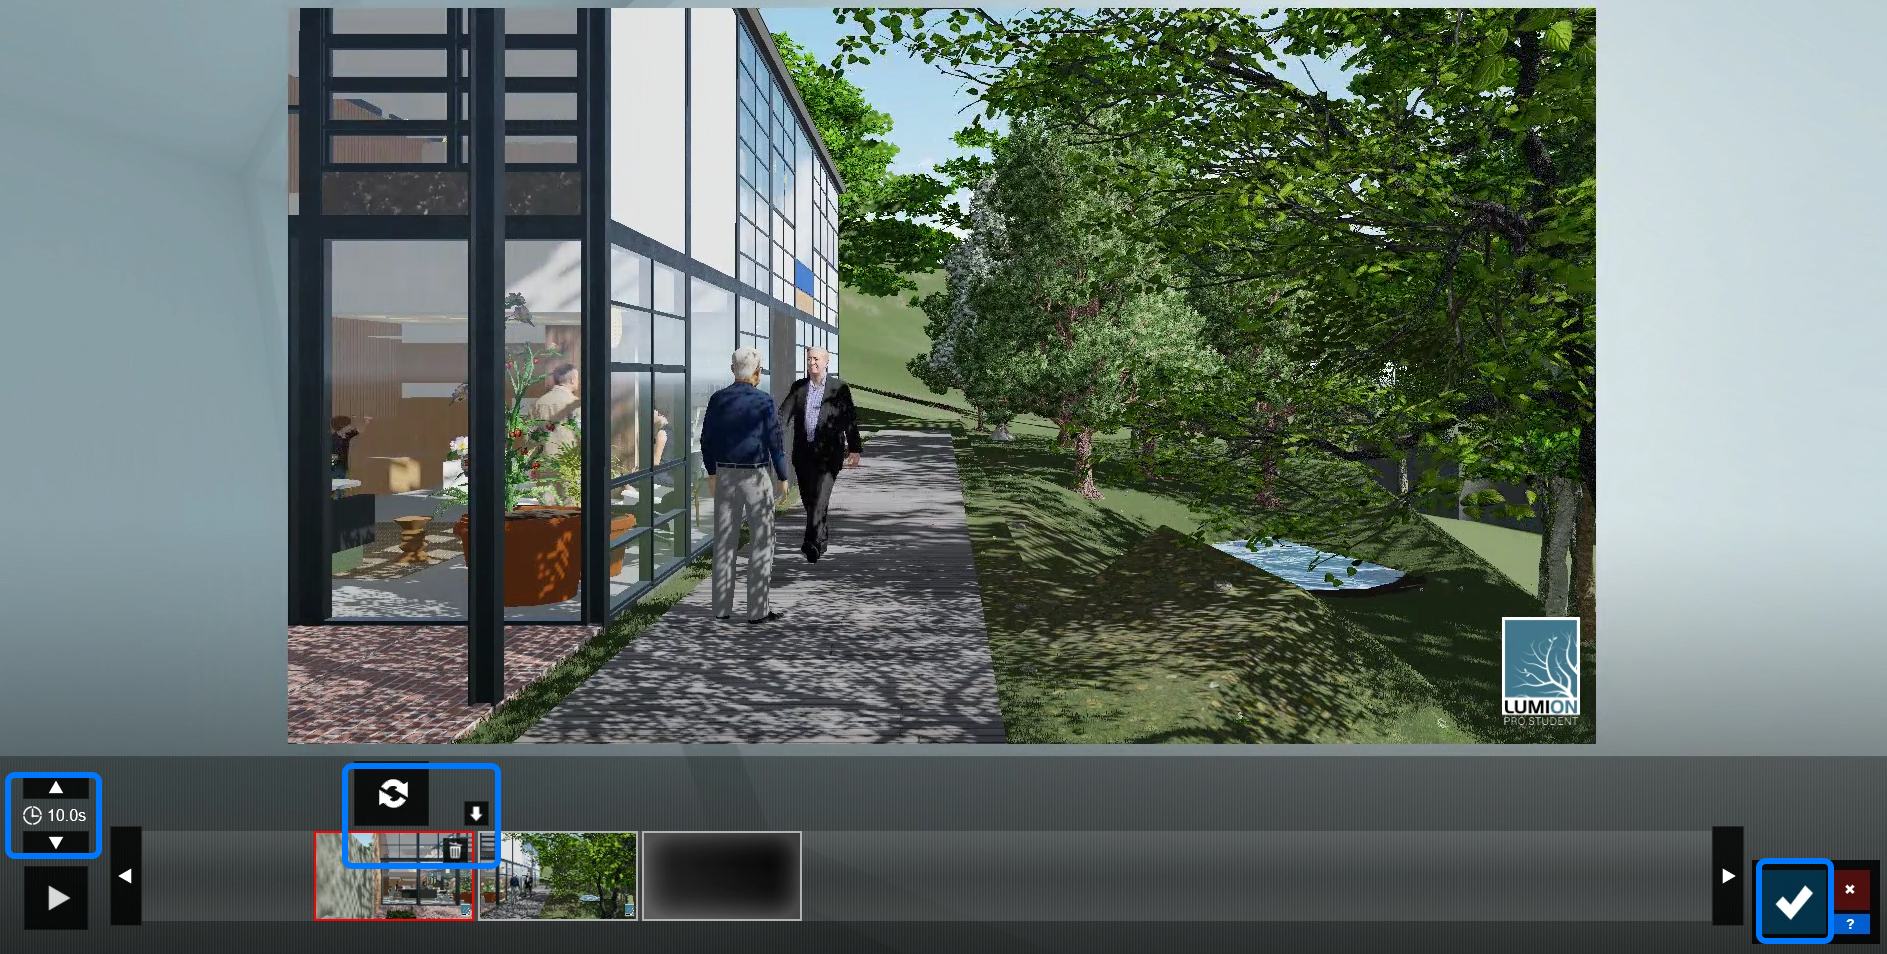
- [STEP 04] Adjust scenes.
- If the clip moves too fast, change the duration of the time.
- If you want to change a scene, move the camera, or change the setting of the camera. Then click the [refresh] icon to replace the old scene with the new scene.
- You can also add scenes between two scenes.
- You can also delete scenes by clicking the [Trash Can] icon.
- To complete the clip, click [Checkmark].
- [STEP 05] Change the style and add effects.
You can use the presets or add effects to the best outcomes of your movie. Just like your rendering.
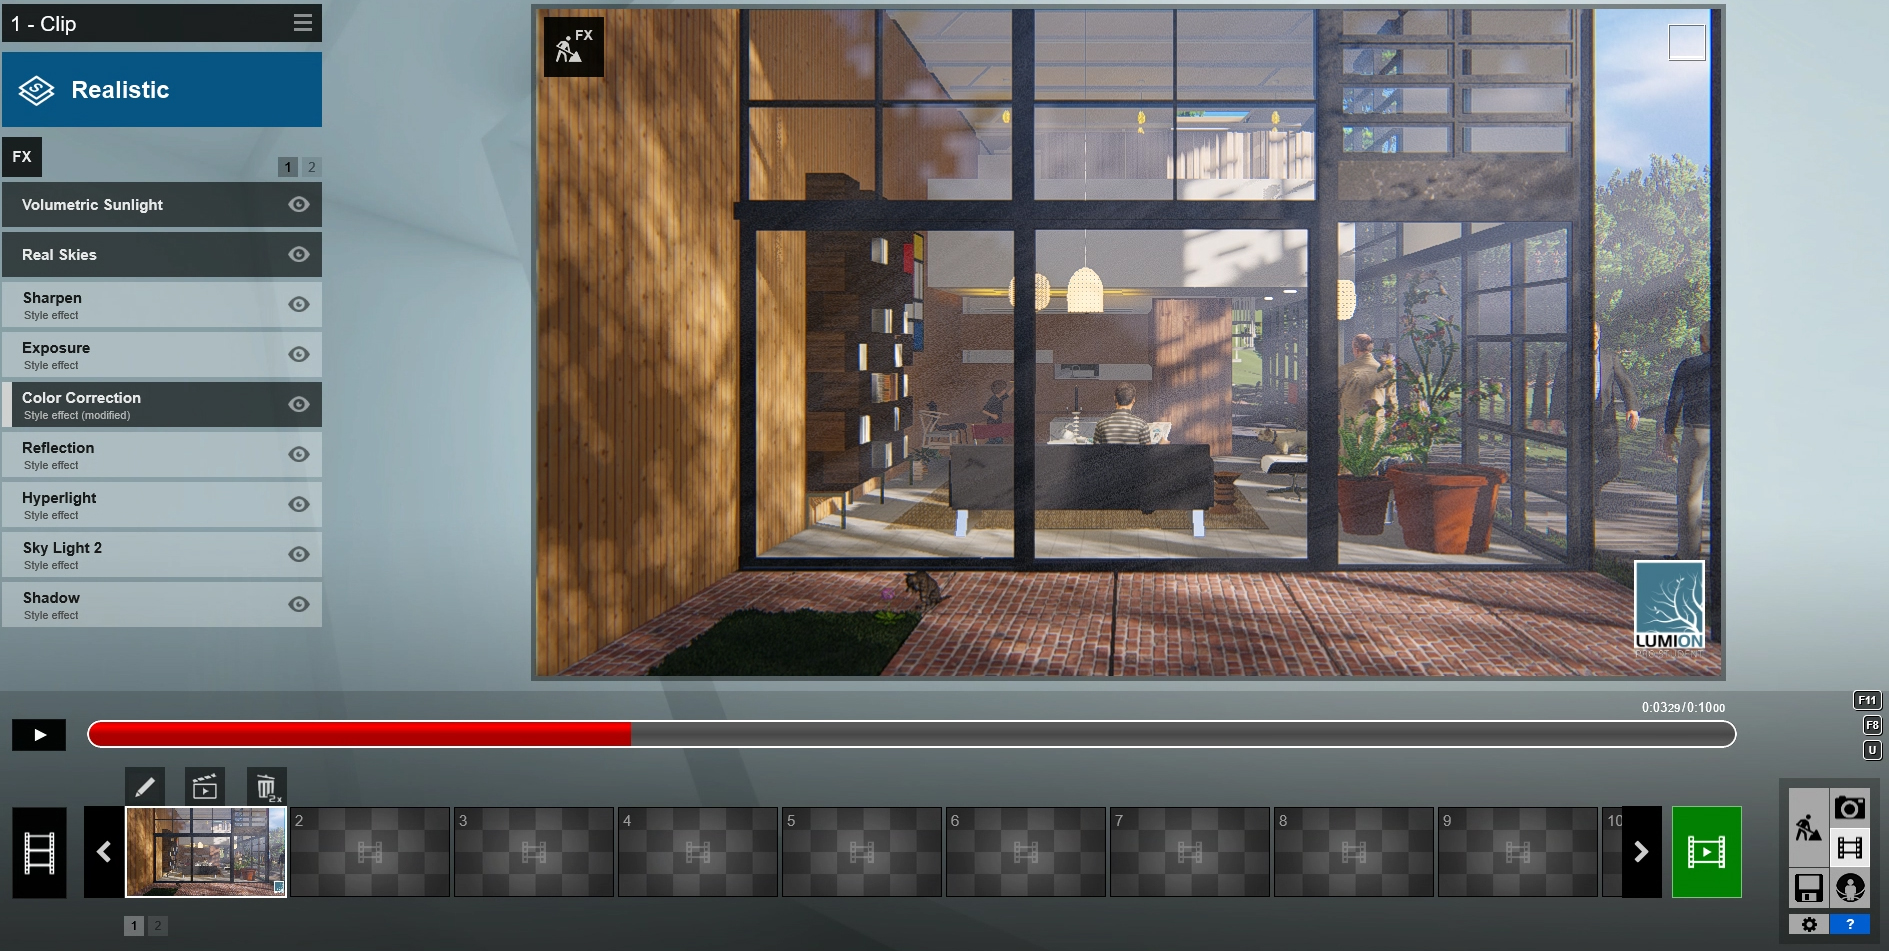
- Recommended effects.
- Sun
- Volumetric Sunlight
- Motion Blur
- Depth of Field
- Exposure
- Color correction
- Lens Flare
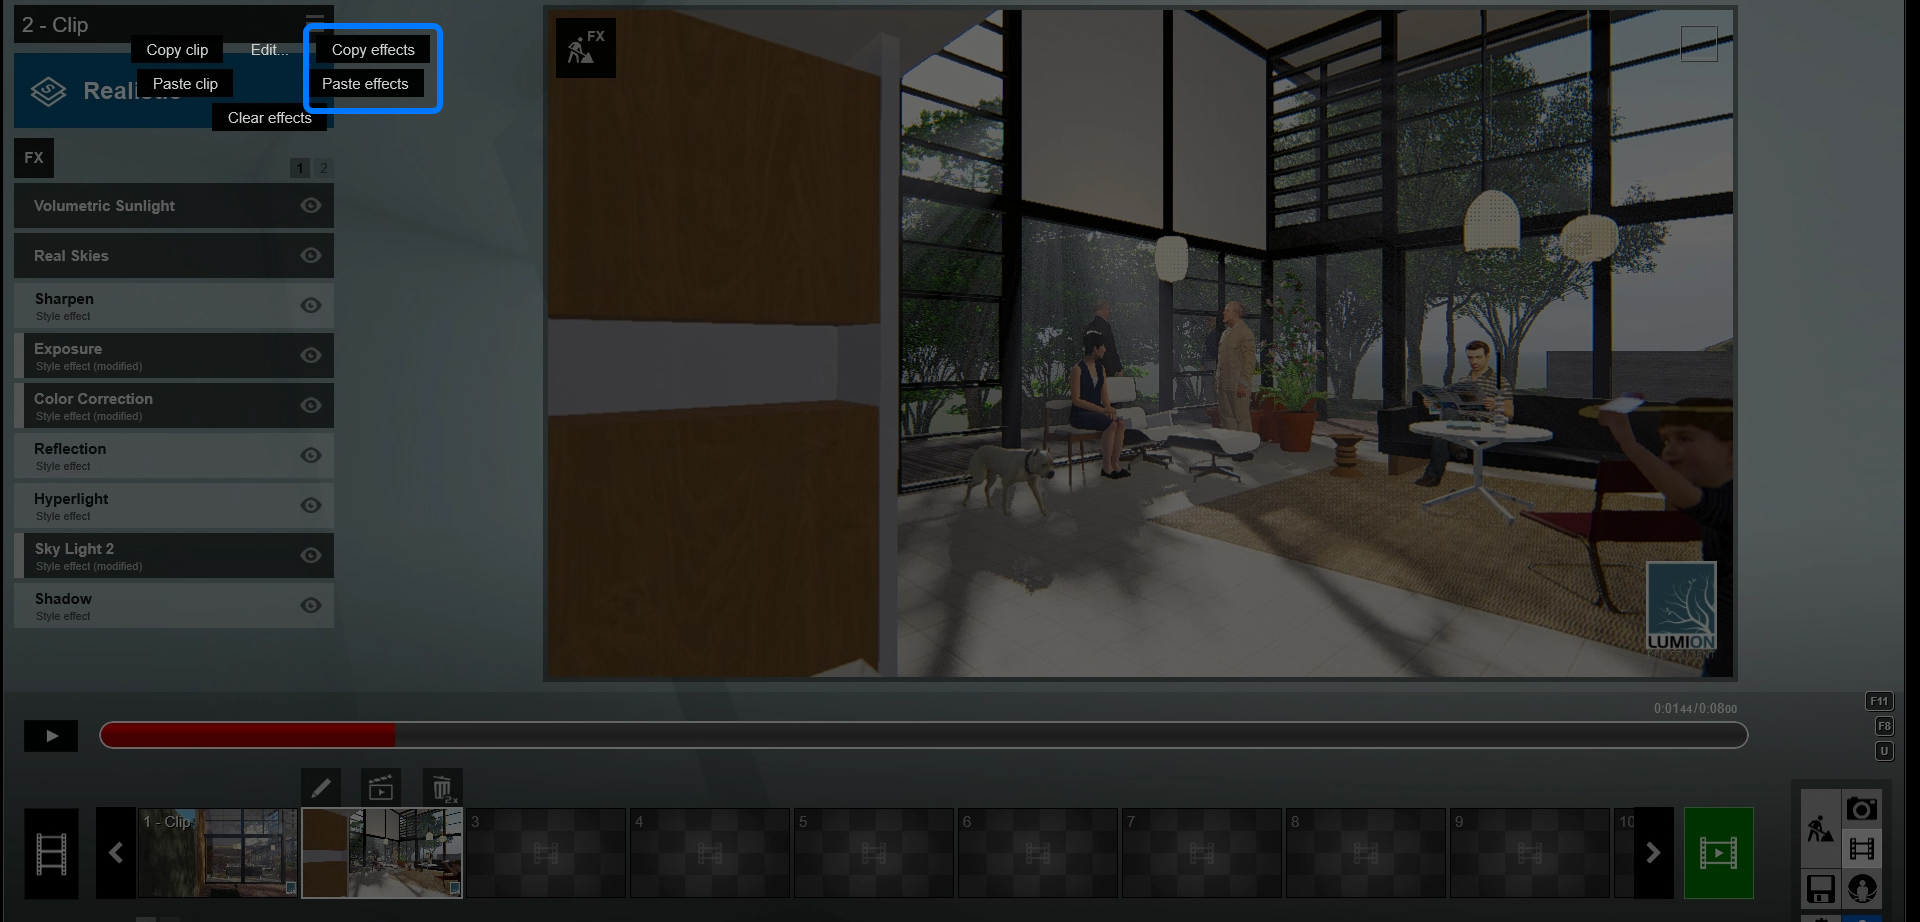
- You can copy the effect to another clip by copying and pasting the effects.
- [STEP 06] Render the clip.
- If you want to render the clip, click the [Render Clip] icon on the clip.
- If you want to render the entire movie, click [Render Movie] (Green icon).

- Check the output quality is [Production Quality].
- Check the Frames per second is [30].
- And click one of the Render sizes [HD or Full HD] to start the video render.
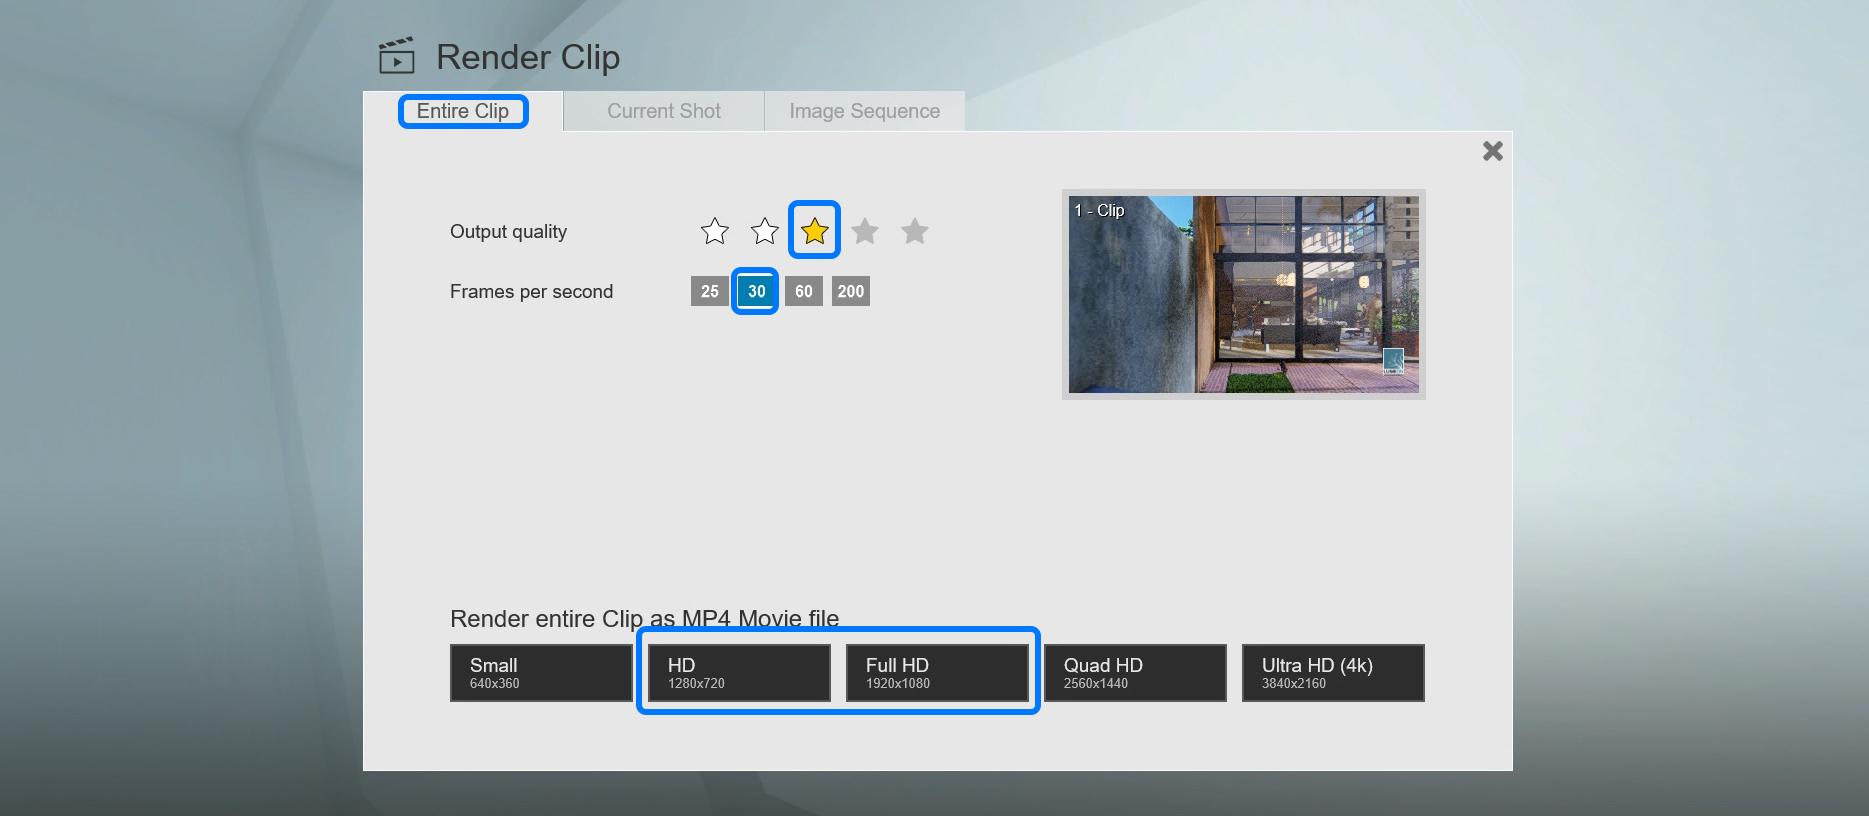
- Define the file location and the file name to save.
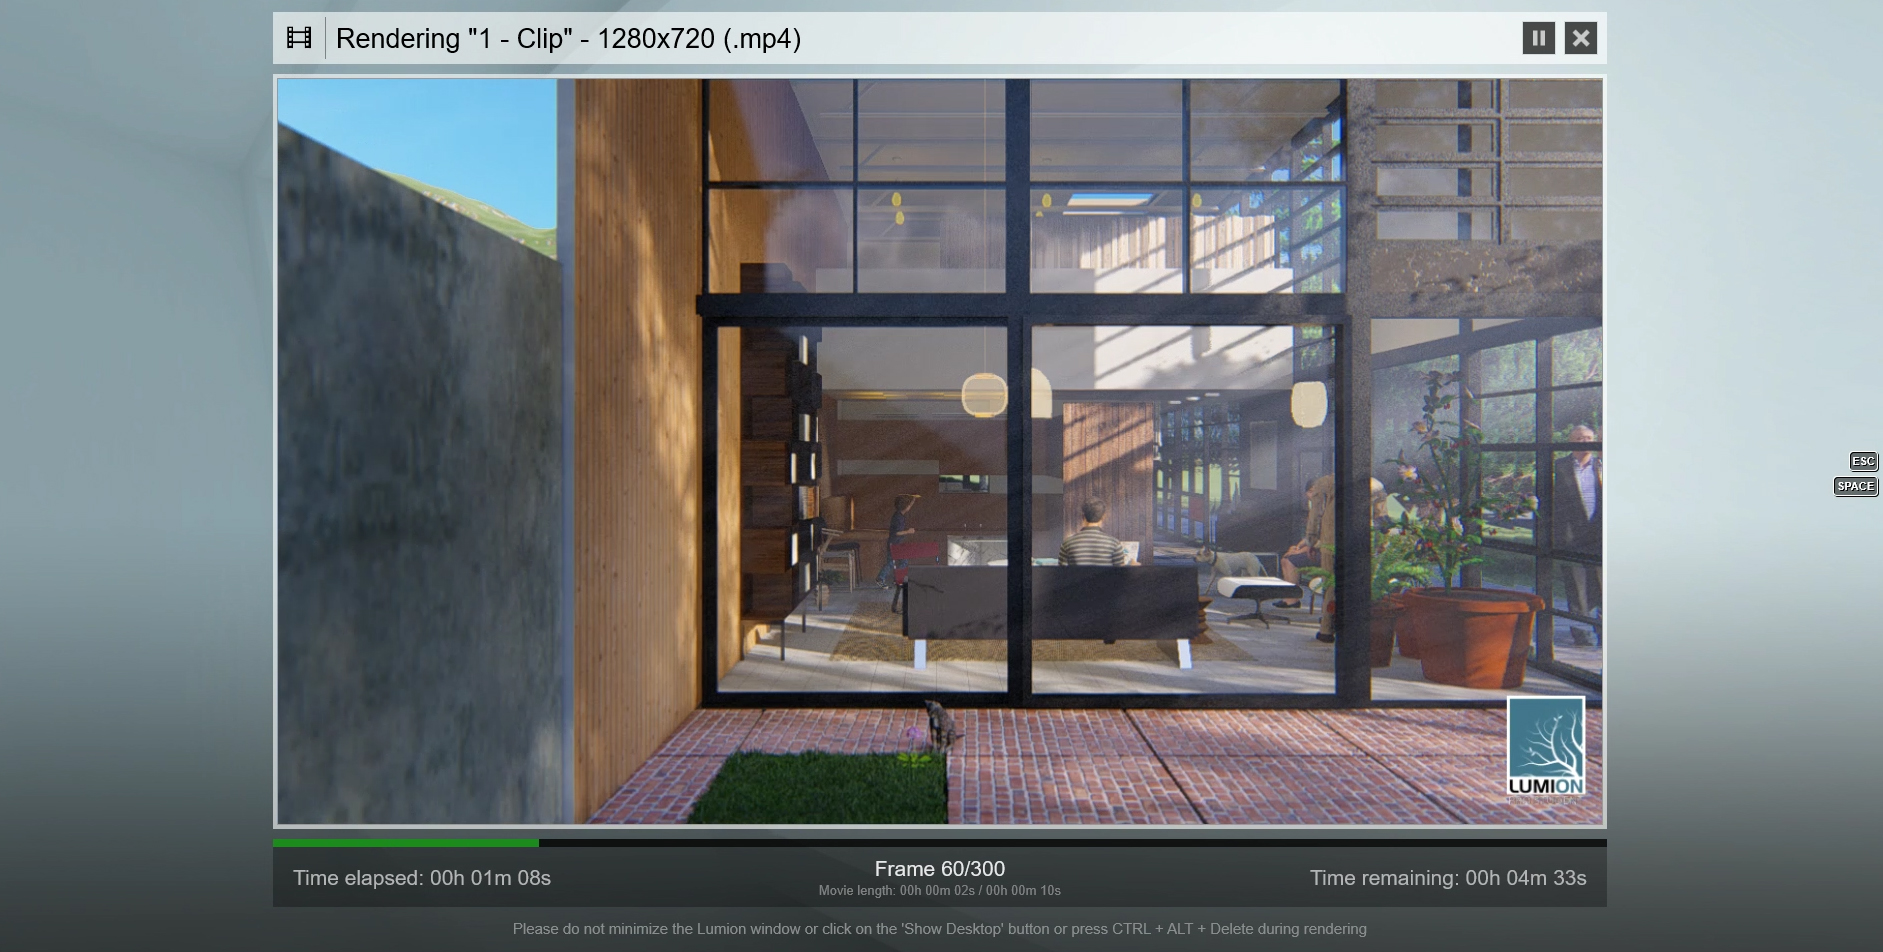
- Once it starts to render, you can see the process of the rendering. To make this 10-seconds clip, Lumion renders 100 frames. It took more than 5 minutes to complete the video render.
Add keyframes with effects (Cloud, Sun, Precipitation, and more)
The time-lapse effect is a technique whereby the frequency at which film frames are captured is much more spread out than the frequency used by viewing the sequence. When played at normal speed, time appears to be moving faster and thus lapsing.
- [STEP 01] If you do not have the [Sun] effect, add [Sun] and open the [Sun] effect setting by clicking the effect on the clip.
- [STEP 02] Play the clip to find a frame you want to add a keyframe to set the [Sun height].
- [STEP 03] Click [New Keyframe]. You can find the icon on the right side of the bar.
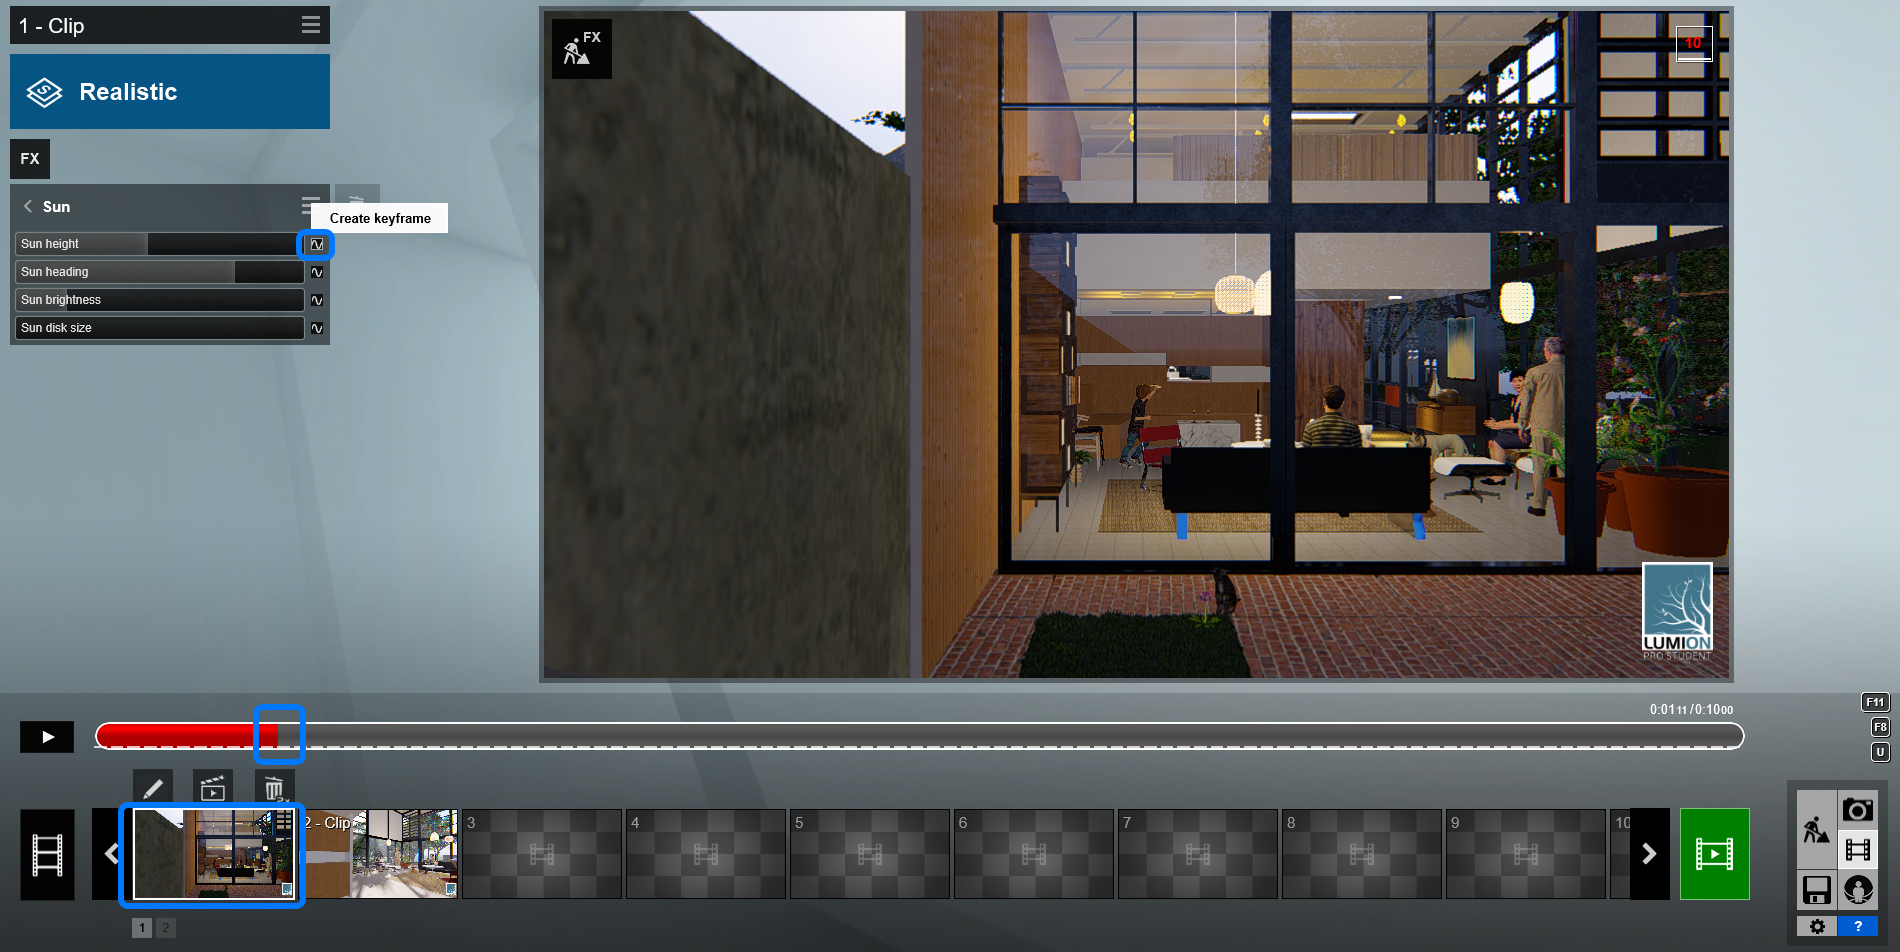
- [STEP 04] Move to a different position of the clip by selecting the play bar.
- [STEP 05] Add another Keyframe and change the slider bar to change the Sun height.
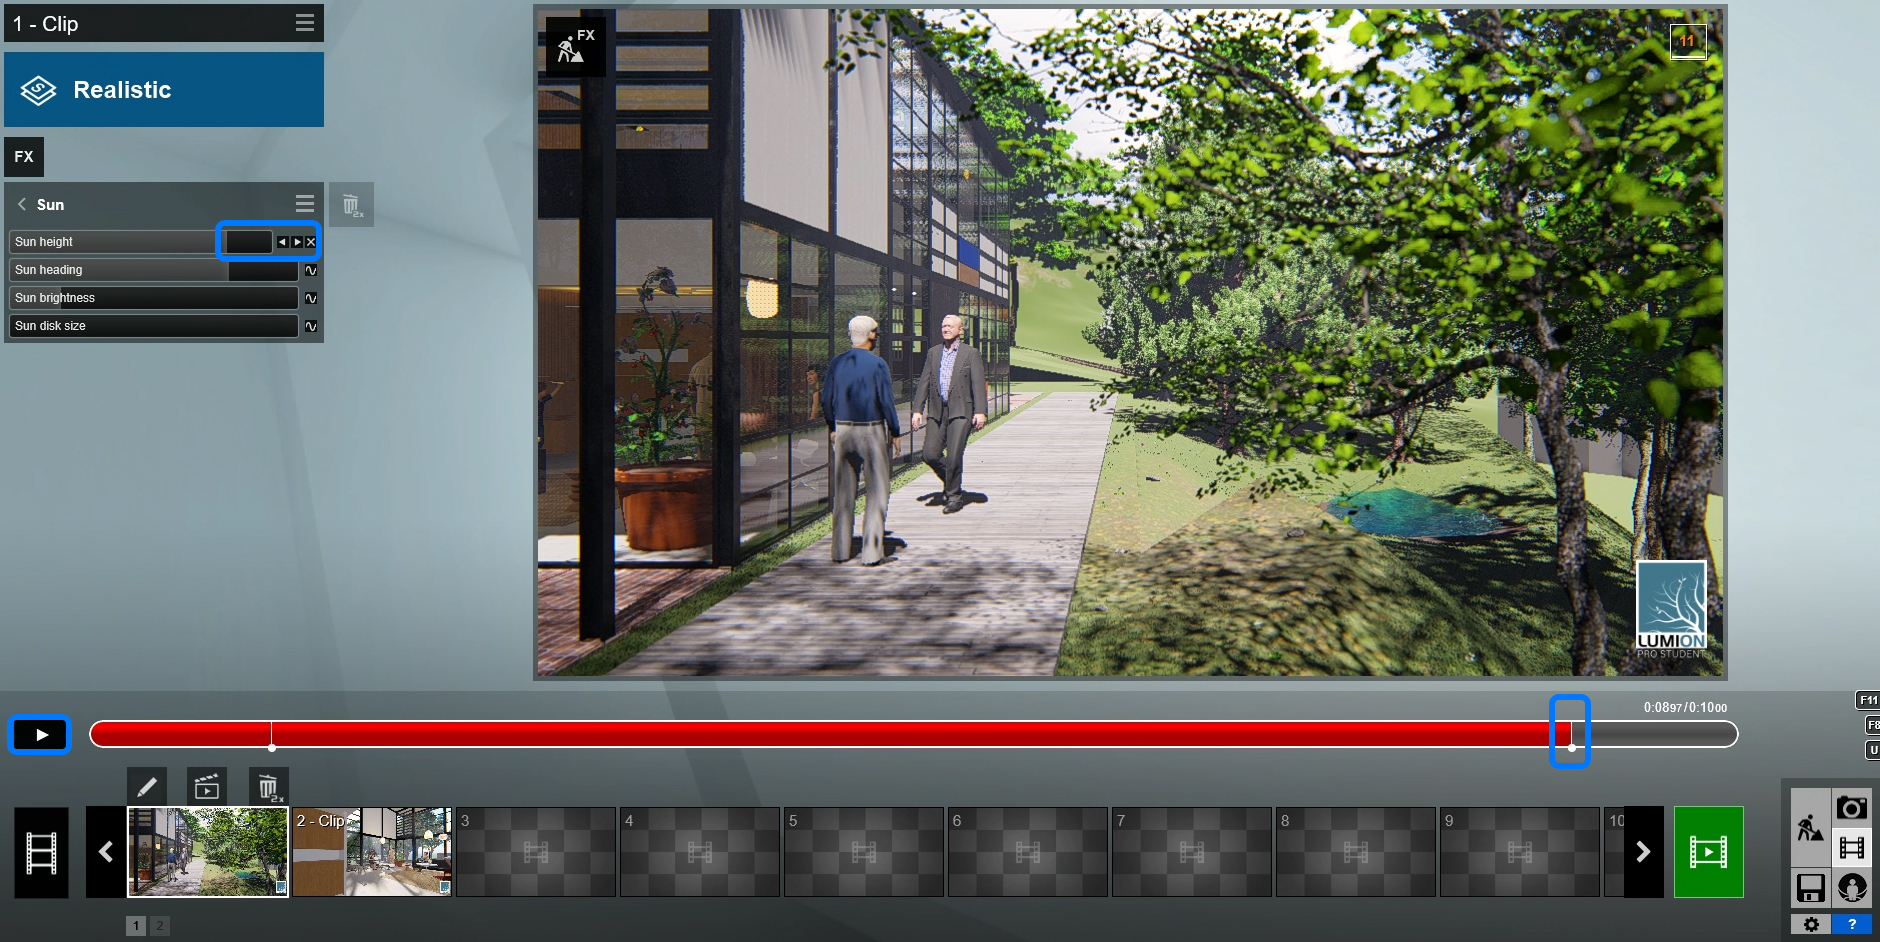
- [STEP 06] Click the play icon to see the preview.
Repeat this process for [Cloud] and [Precipitation].
Animated objects and effect
Lumion allows you to move/rotate an object in your video.
- [STEP 01] Click a clip to add the animated object effect.
- [STEP 02] Click [FX] > Click [Scene and animation] tab > Select [Advanced Move].

- [STEP 03] Click [Edit] icon (look like a pen).
- [STEP 04] Select the start point on the timeline. The camera can be moved to see the object better.
- [STEP 05] Select an object (human) and move to the start point.
- [STEP 06] Select the endpoint on the timeline.
- [STEP 07] Select the object (human) and move to the endpoint.
- [STEP 09] Click [Checkmark] to go back to the mode.
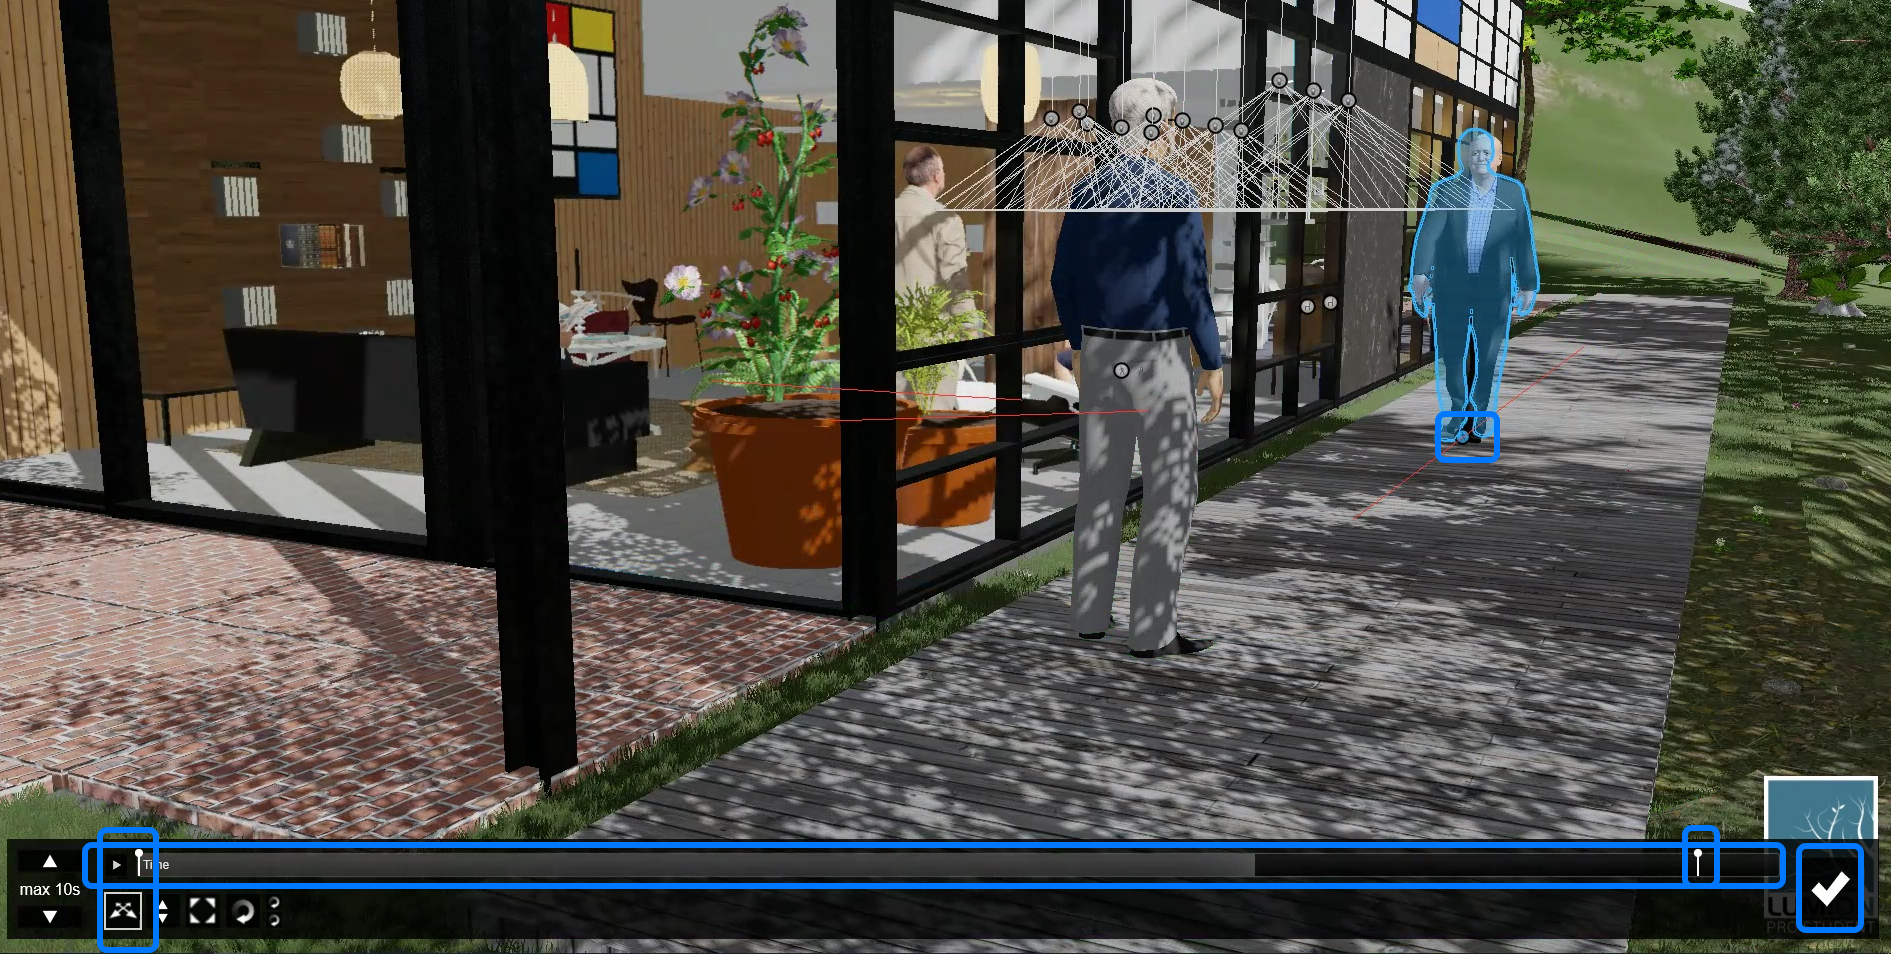
Repeat [STEP 04] to [STEP 08] for other objects.
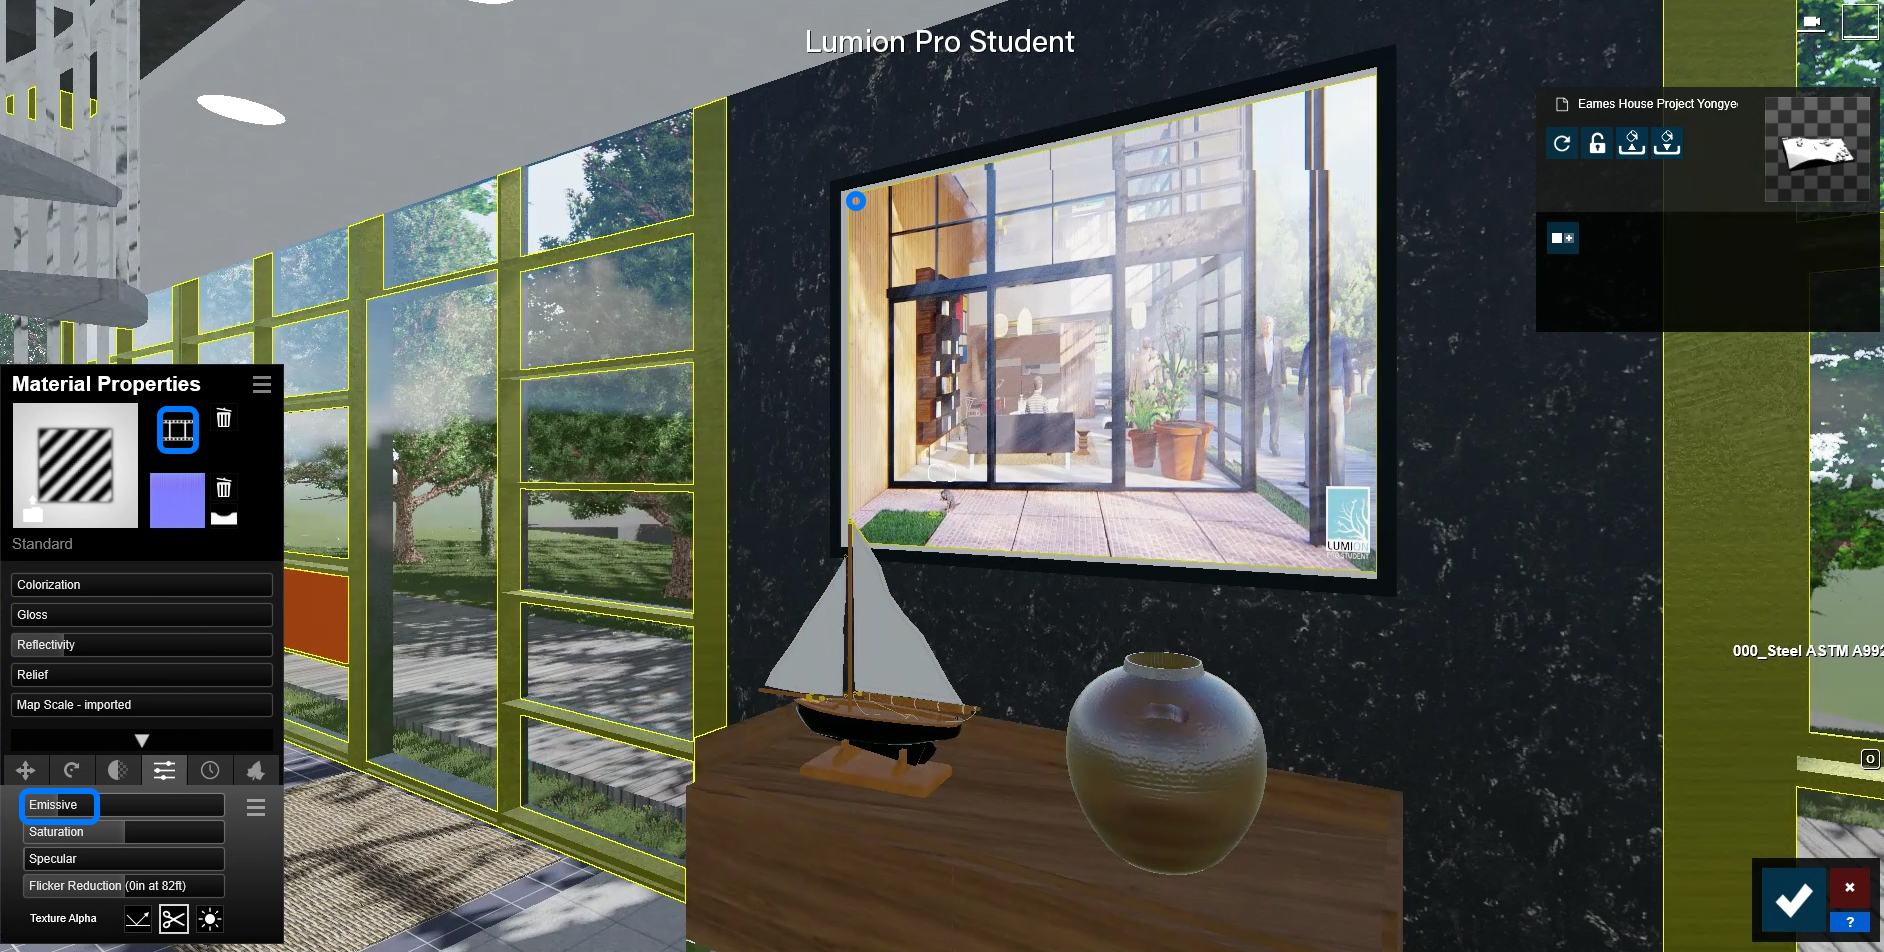
TV screen effect
- [STEP 01] Select the [Material Editor] tab on the [Build] mode.
- [STEP 02] Select a TV screen surface on the model.
- [STEP 03] If the surface does not have a Lumion Material, select [Standard] material.
- [STEP 04] Click [Choose Color Map] > then a window browser will be open.
- [STEP 05] Select a video file > Click [Open].
- [STEP 06] Change the [Reflectivity] value and [Emissive] value.
- [STEP 07] Click [Checkmark] to finish.