
Part Three. Advanced Modeling
Chapter 14. Sketchup advanced modeling
Upon completing this session, students will be able to:
- (CO 1) Understand the process of a Revit model to a Sketchup model for rendering
- (CO 2) Understand the Sketchup modeling process and strategies
- (CO 3) Understand Sketchup advanced modeling with plug-ins
 Session Highlights
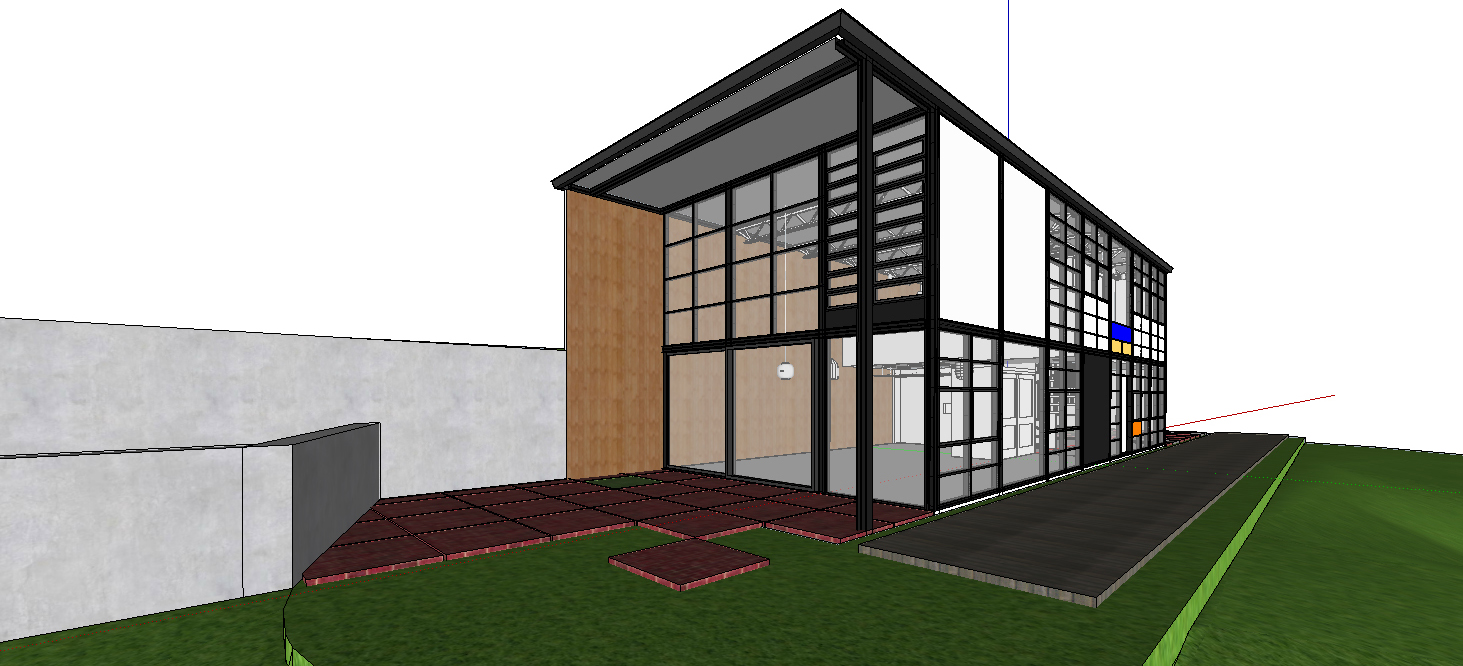
At the end of the session, students will be able to create the graphics below.
 Lecture Contents
(CO1) Understand the process of a Revit model to a Sketchup model for rendering
Many firms use Revit and Sketchup together for various purposes. As you know, Revit is an excellent application for Construction Document sets, but the application is complicated at the beginning of the design process, especially Schematic Design(SD). Thus designers use SketchUp or Rhino for SD and Design Developments. Also, designers often use Sketchup for renderings.
You have learned how to import a Sketchup model into a Revit model from the previous lecture. In this tutorial, you will learn how to use a Revit model in a Sketchup. Furthermore, understand how we can apply materials in Sketchup.
Students can use your project, including this course project and your previous studio project. If you want to use the Eames House model (Revit version 2021), which the instructor will demonstrate, feel free to download the model from the Canvas Module under EX3.
Prepare Revit model for Sketchup model
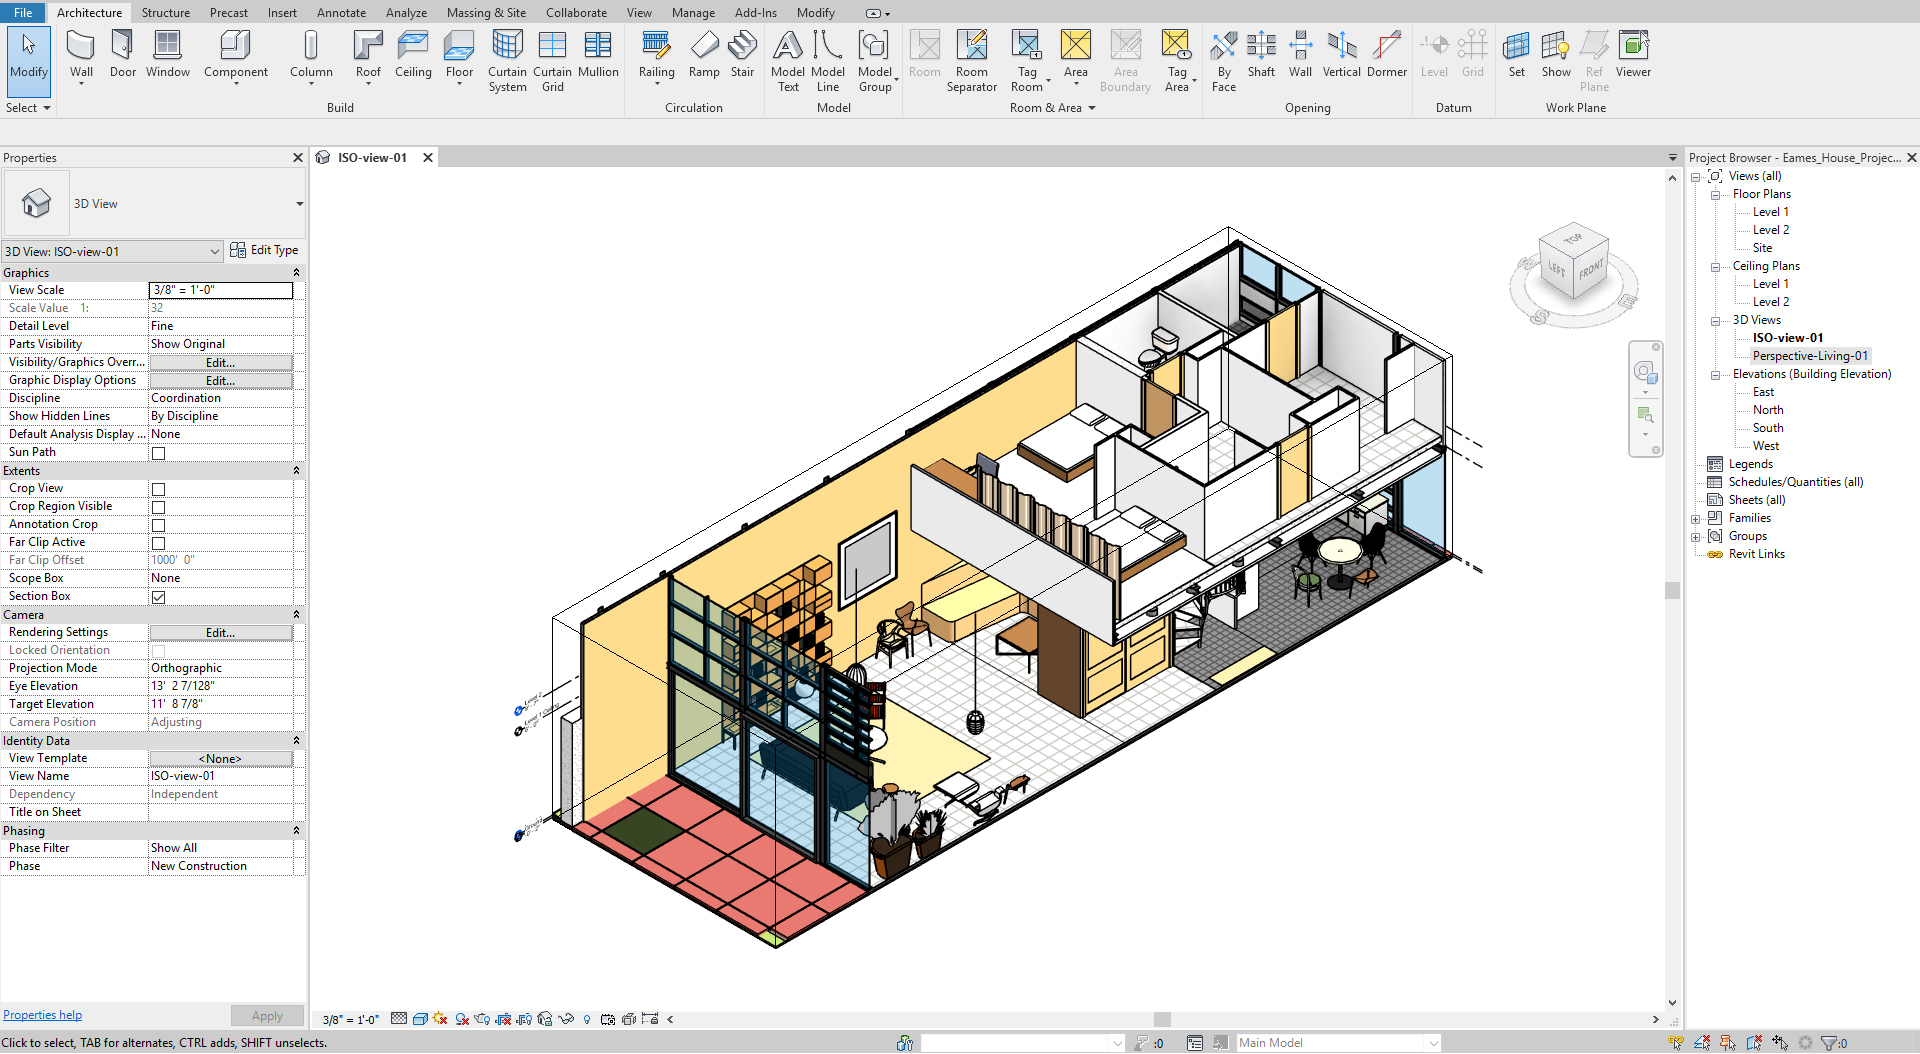
- [STEP 1] Open a 3D view. I recommend opening an ISO view, using the [Section box] tool to crop unnecessary items.
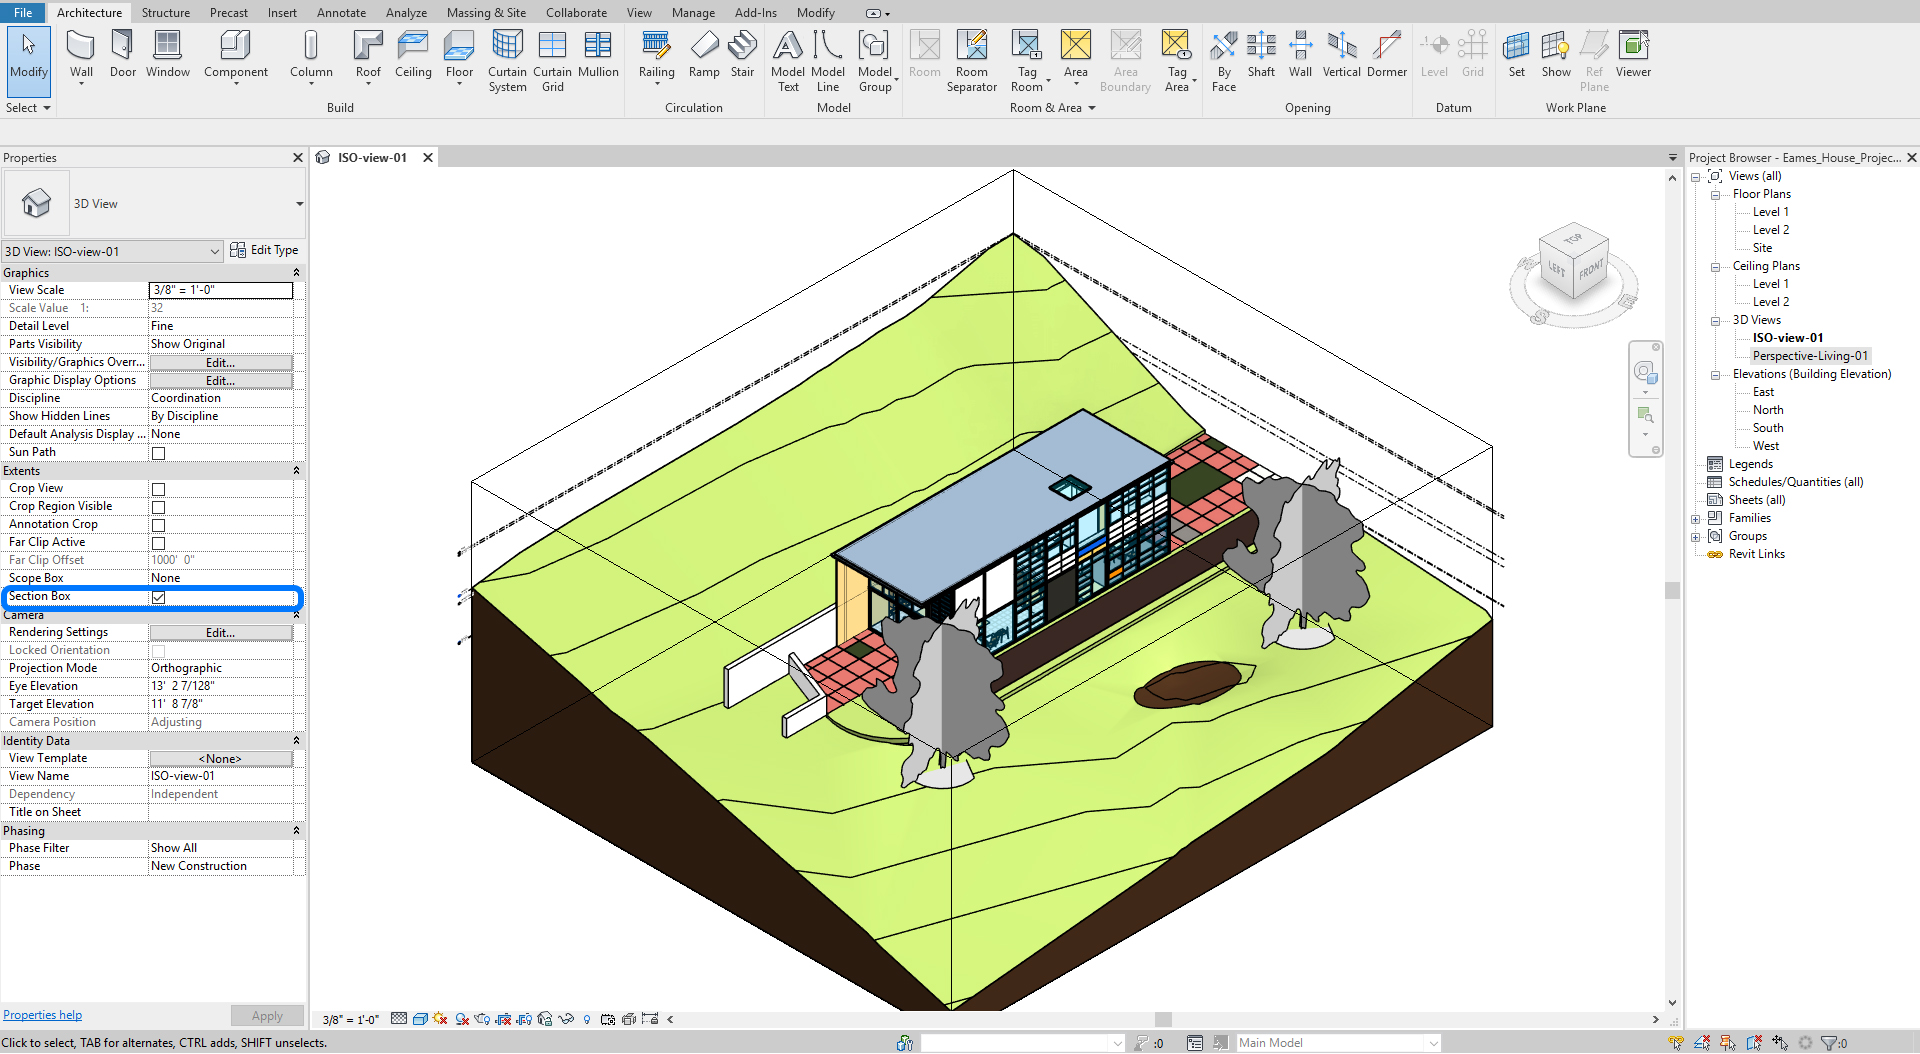
- [STEP 2] Hide elements (levels, section box, trees, and Enscape models) that are not needed for the Sketchup model.
For the best results, I also recommend hiding furniture, special equipment, plumbing fixture, and millworks.
If you need to show only a category, ex) furniture category, use [Isolate category].
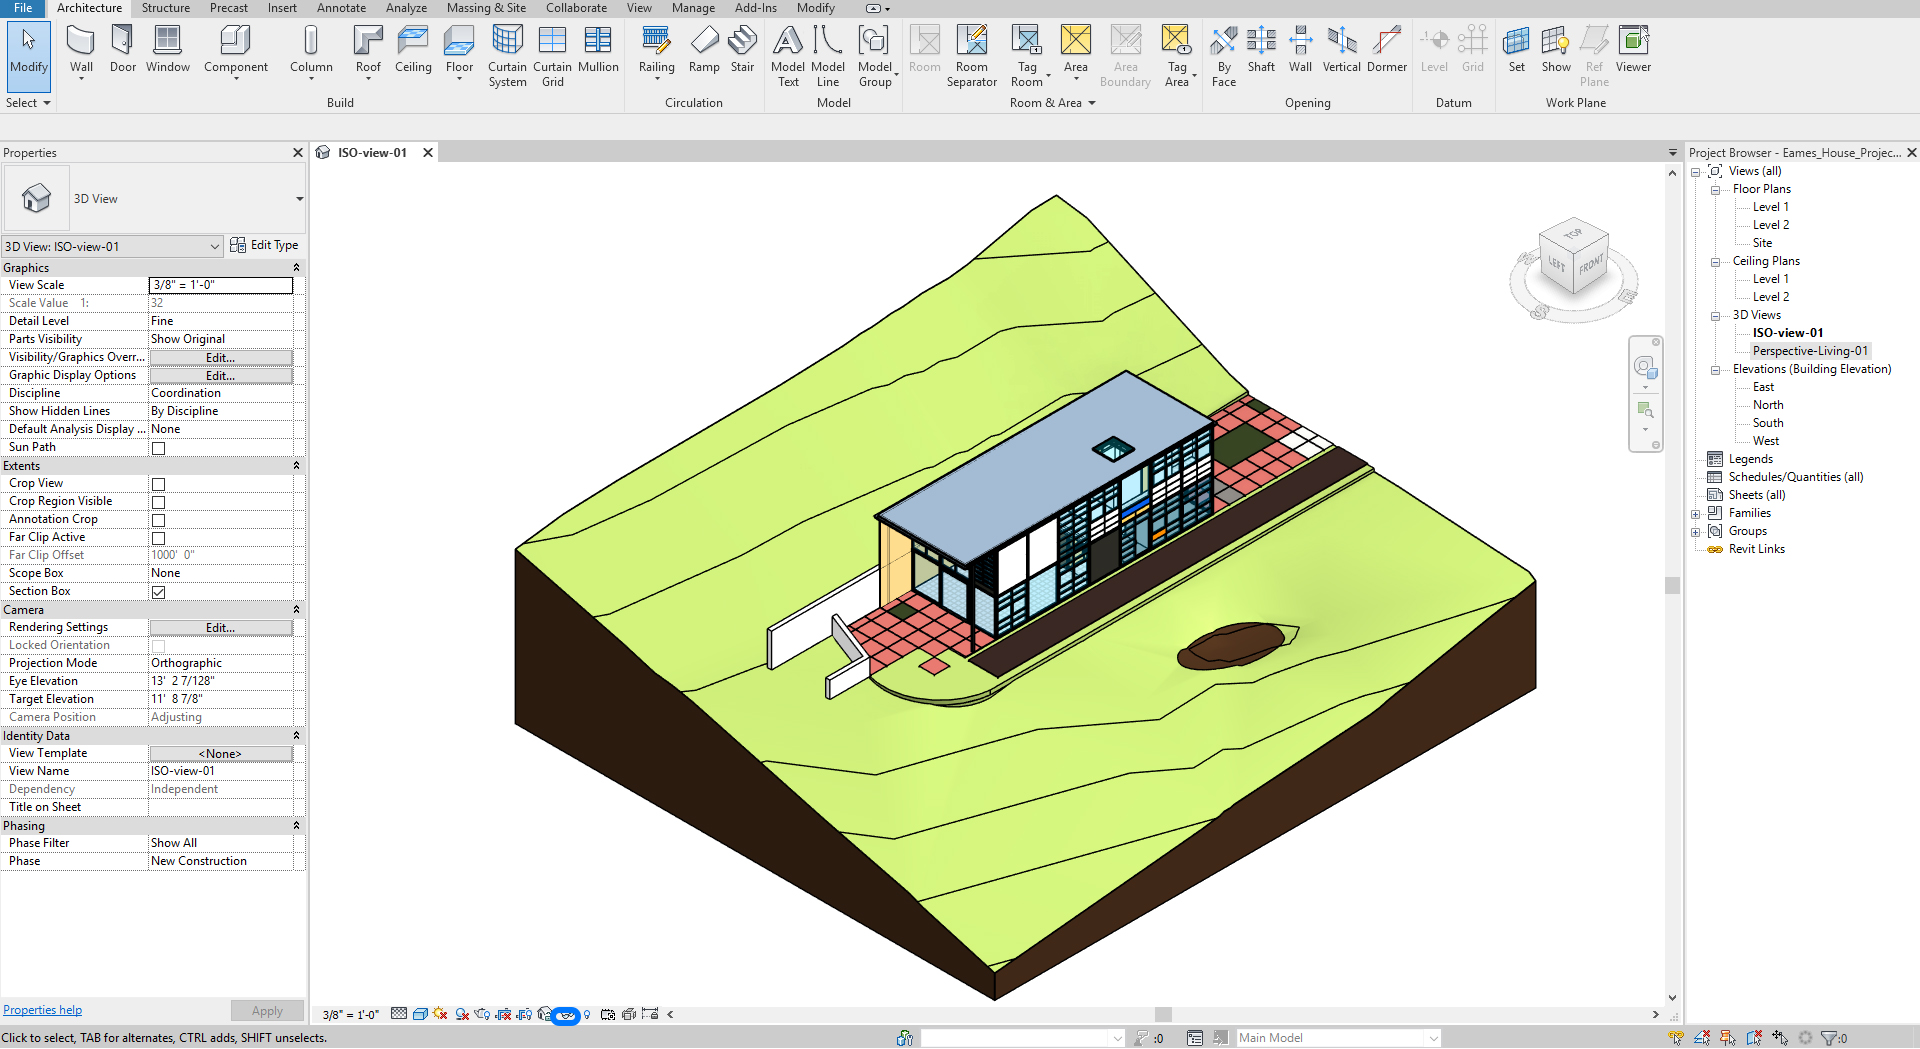
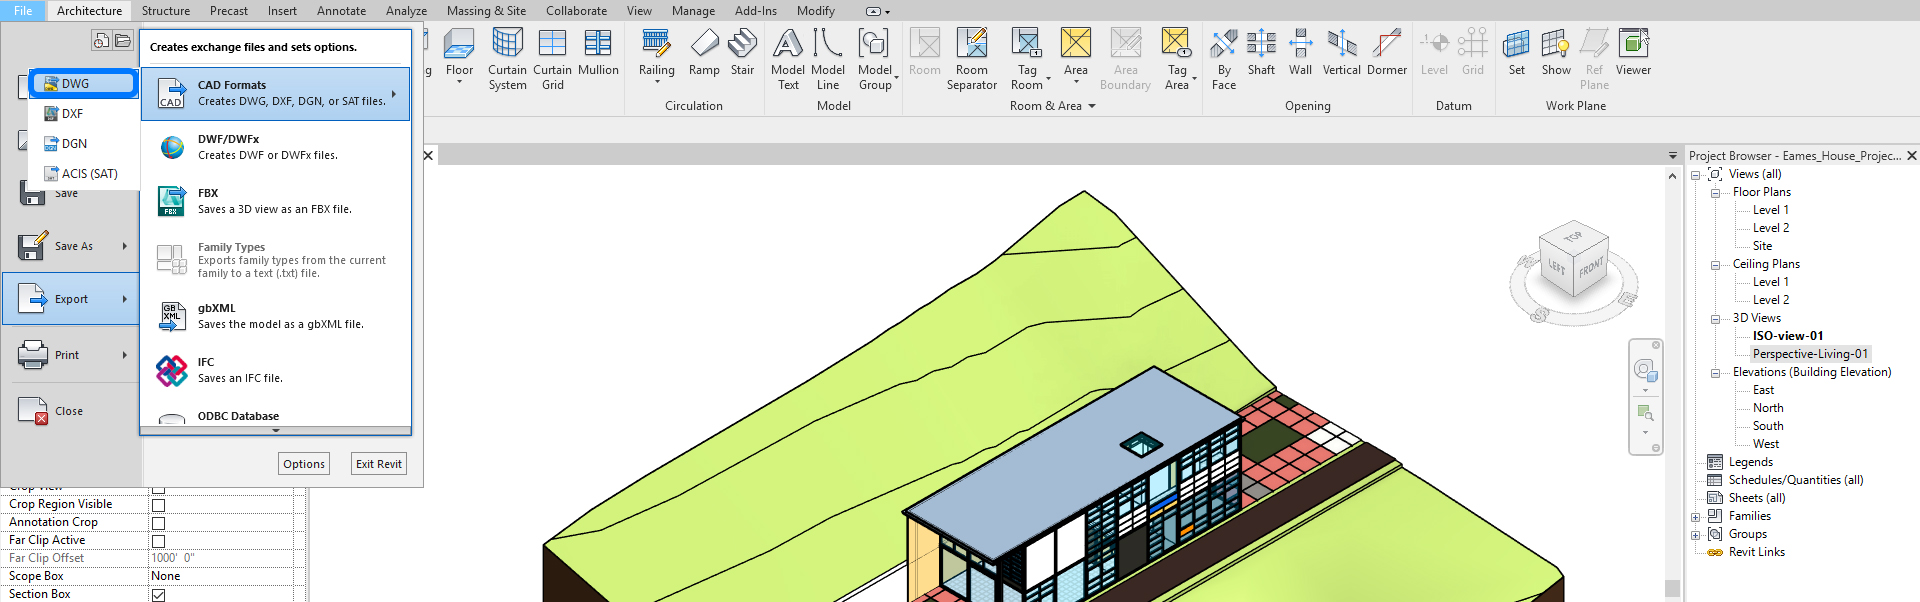
- [STEP 3] Confirm you open only the view that you want to export.
Click [File] > Click [Export] > Click [CAD formats] > Click [DWG].
- [STEP 4] Click [Setup] icon to open Modify DWG/DXF Export Setup > Select [Solids] tab > Click [ACIS solids] > Click [OK] > Click [Next].
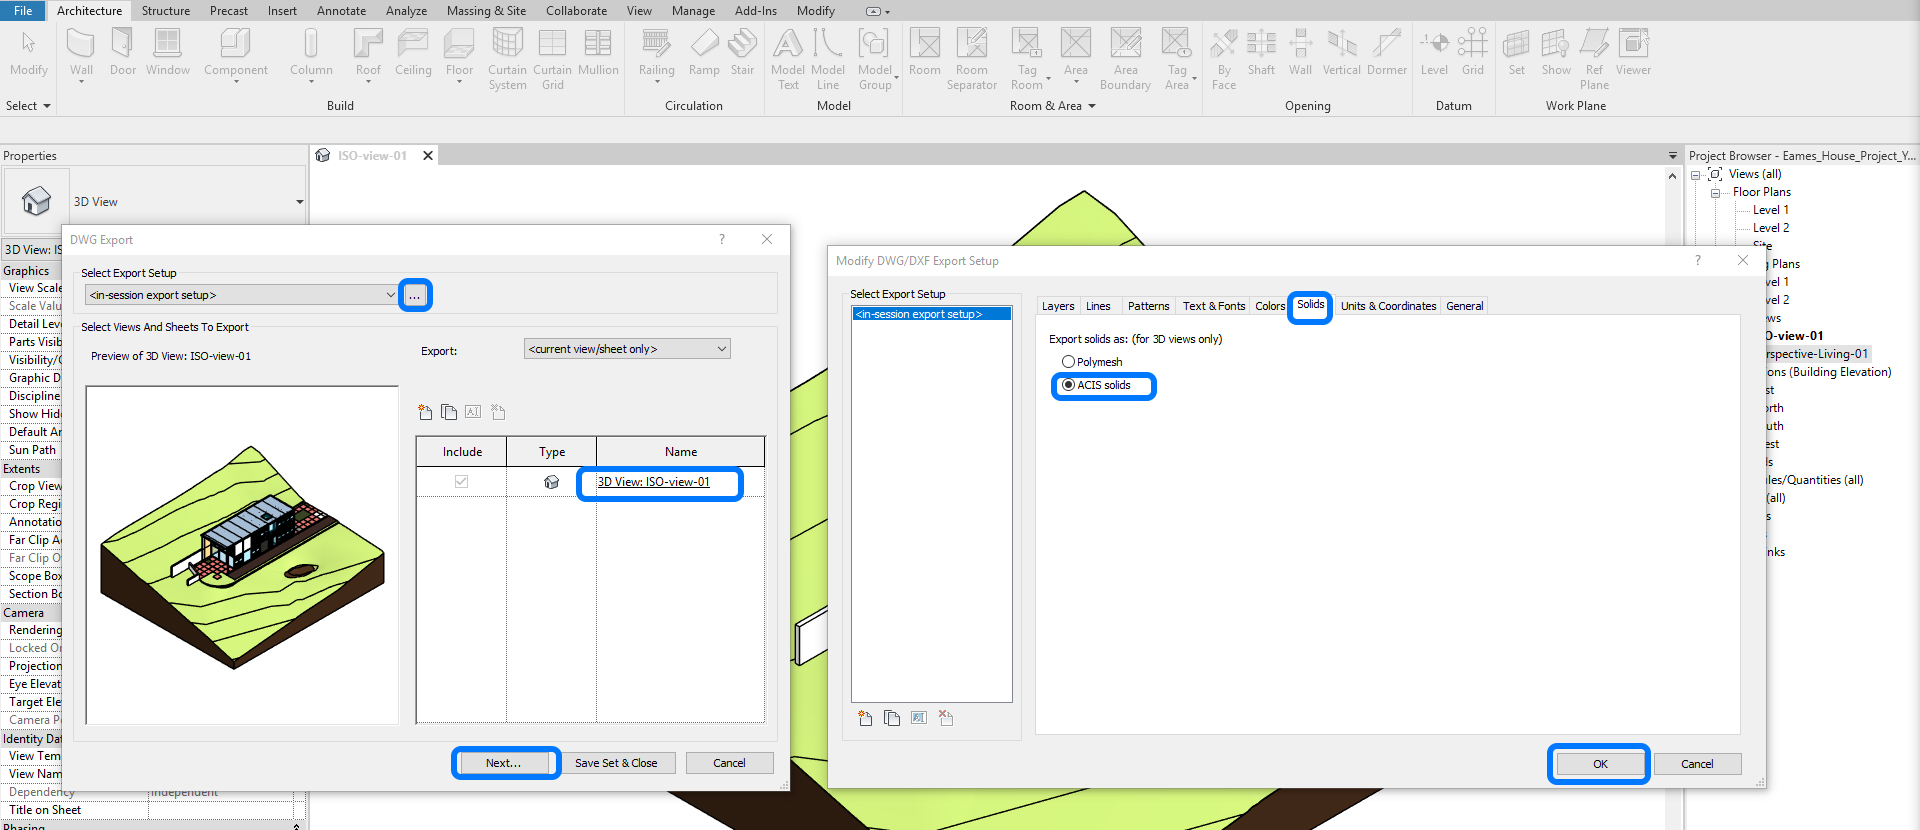
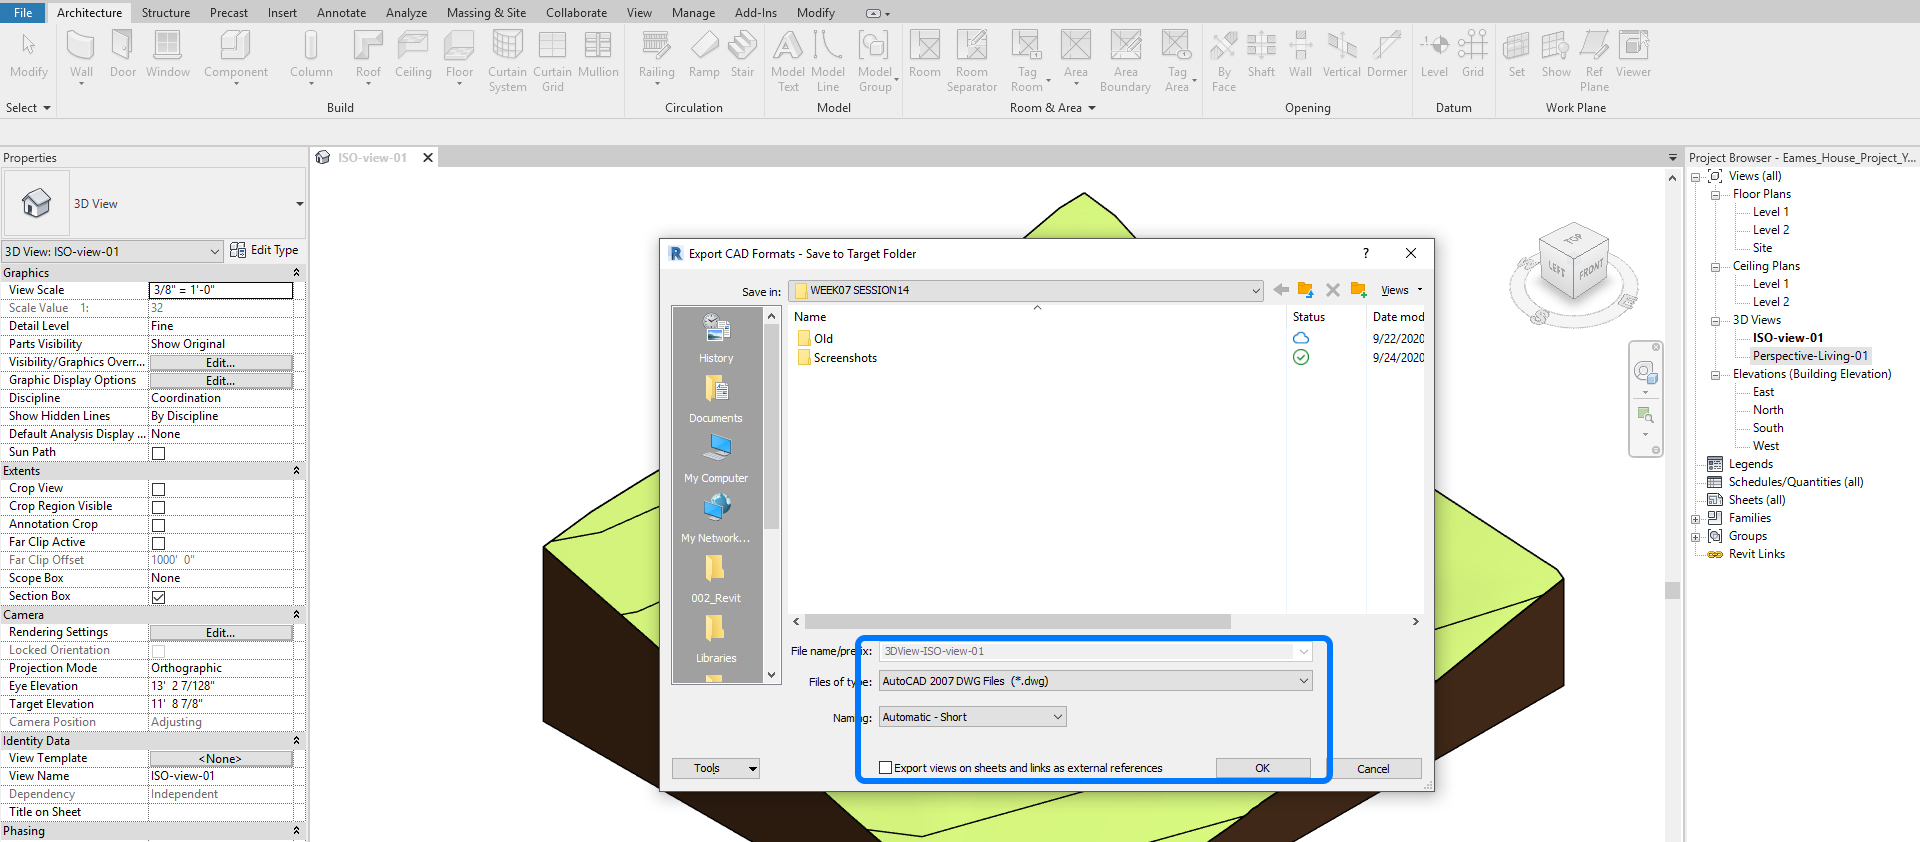
- [STEP 5] Select [AutoCAD 2007 DWG files] for the files of type, and uncheck [Export views on sheets and links as external references > Click [OK].
Import a DWG file in the Sketchup model
- [STEP 1] Open the [Sketchup] application.
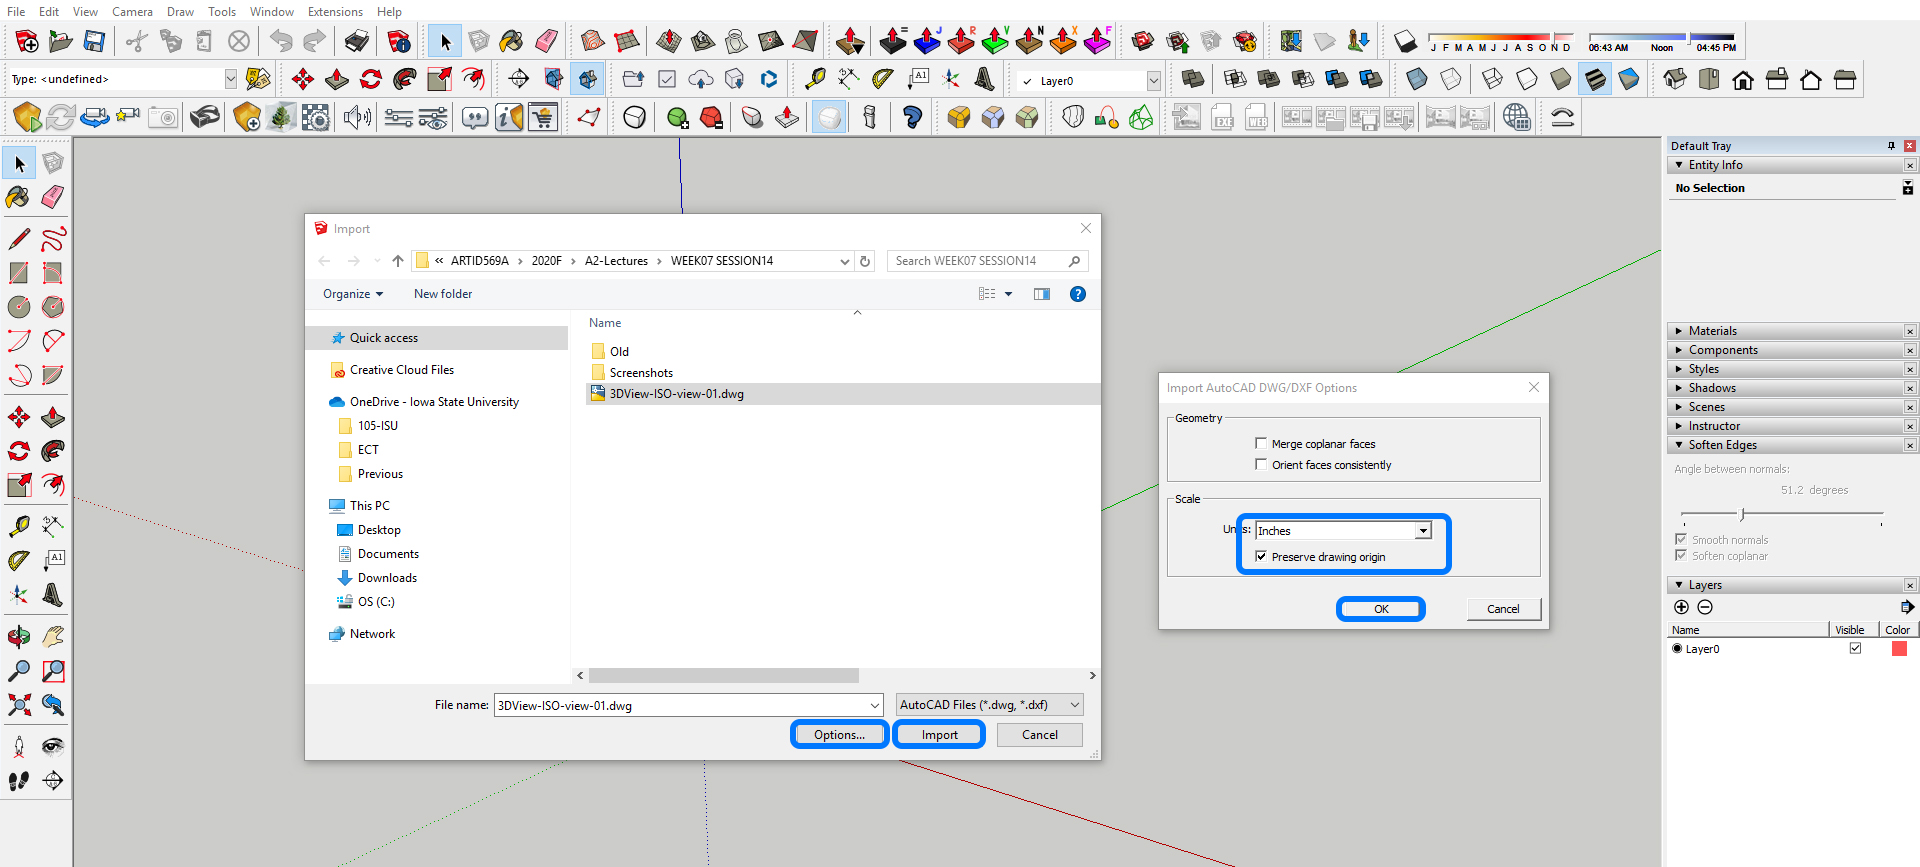
- [STEP 2] Click [File] > Click [Import].
- [STEP 3] Once the [Import] window is open, find the folder that you saved the DWG file, and select the file > Click [Options…] > Confirm the unit and [Preserve drawing origin] is checked > Click [OK] > Click [Import].
It will take some time to import the DWG model. The time depends on the complexity of the model. If you import a model, including furniture, it will take more time. For best practice, you need to export the furniture separately or add furniture from the 3D warehouse.
- [STEP 4] After the processing is done, the import results window will open > Click [Close] to complete the [Import] command.
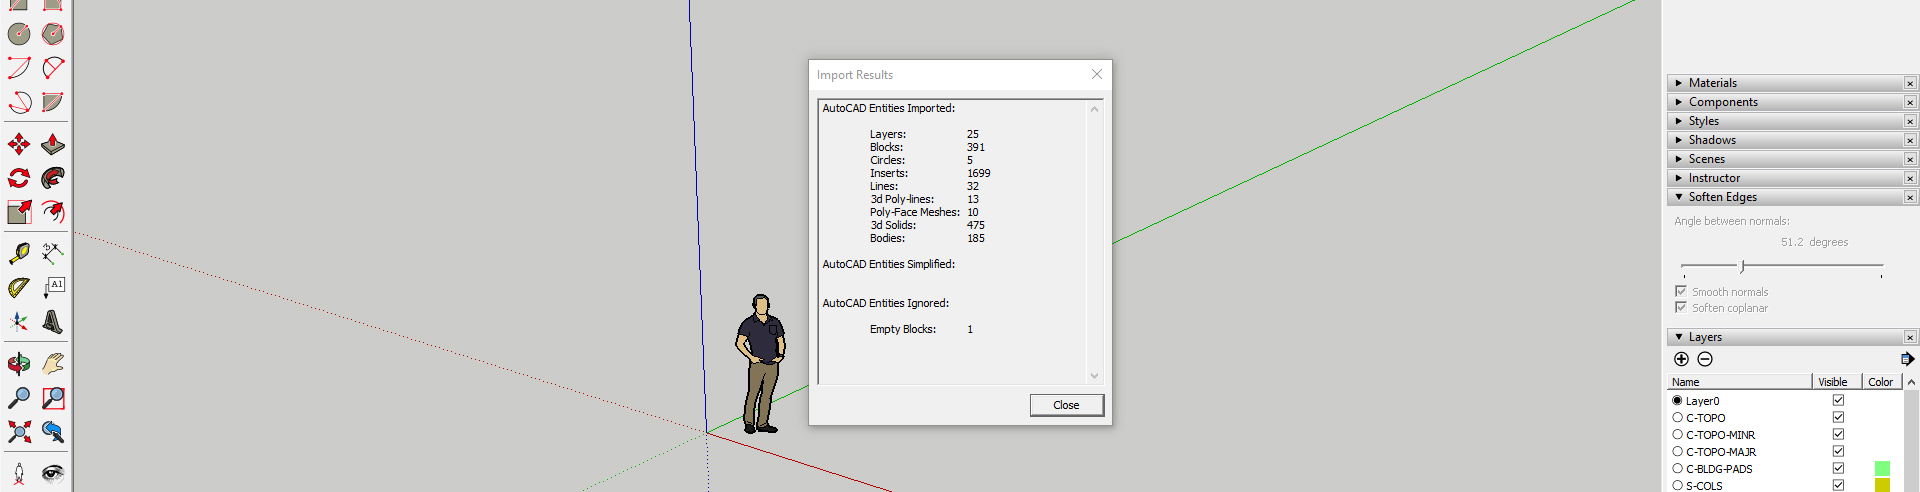
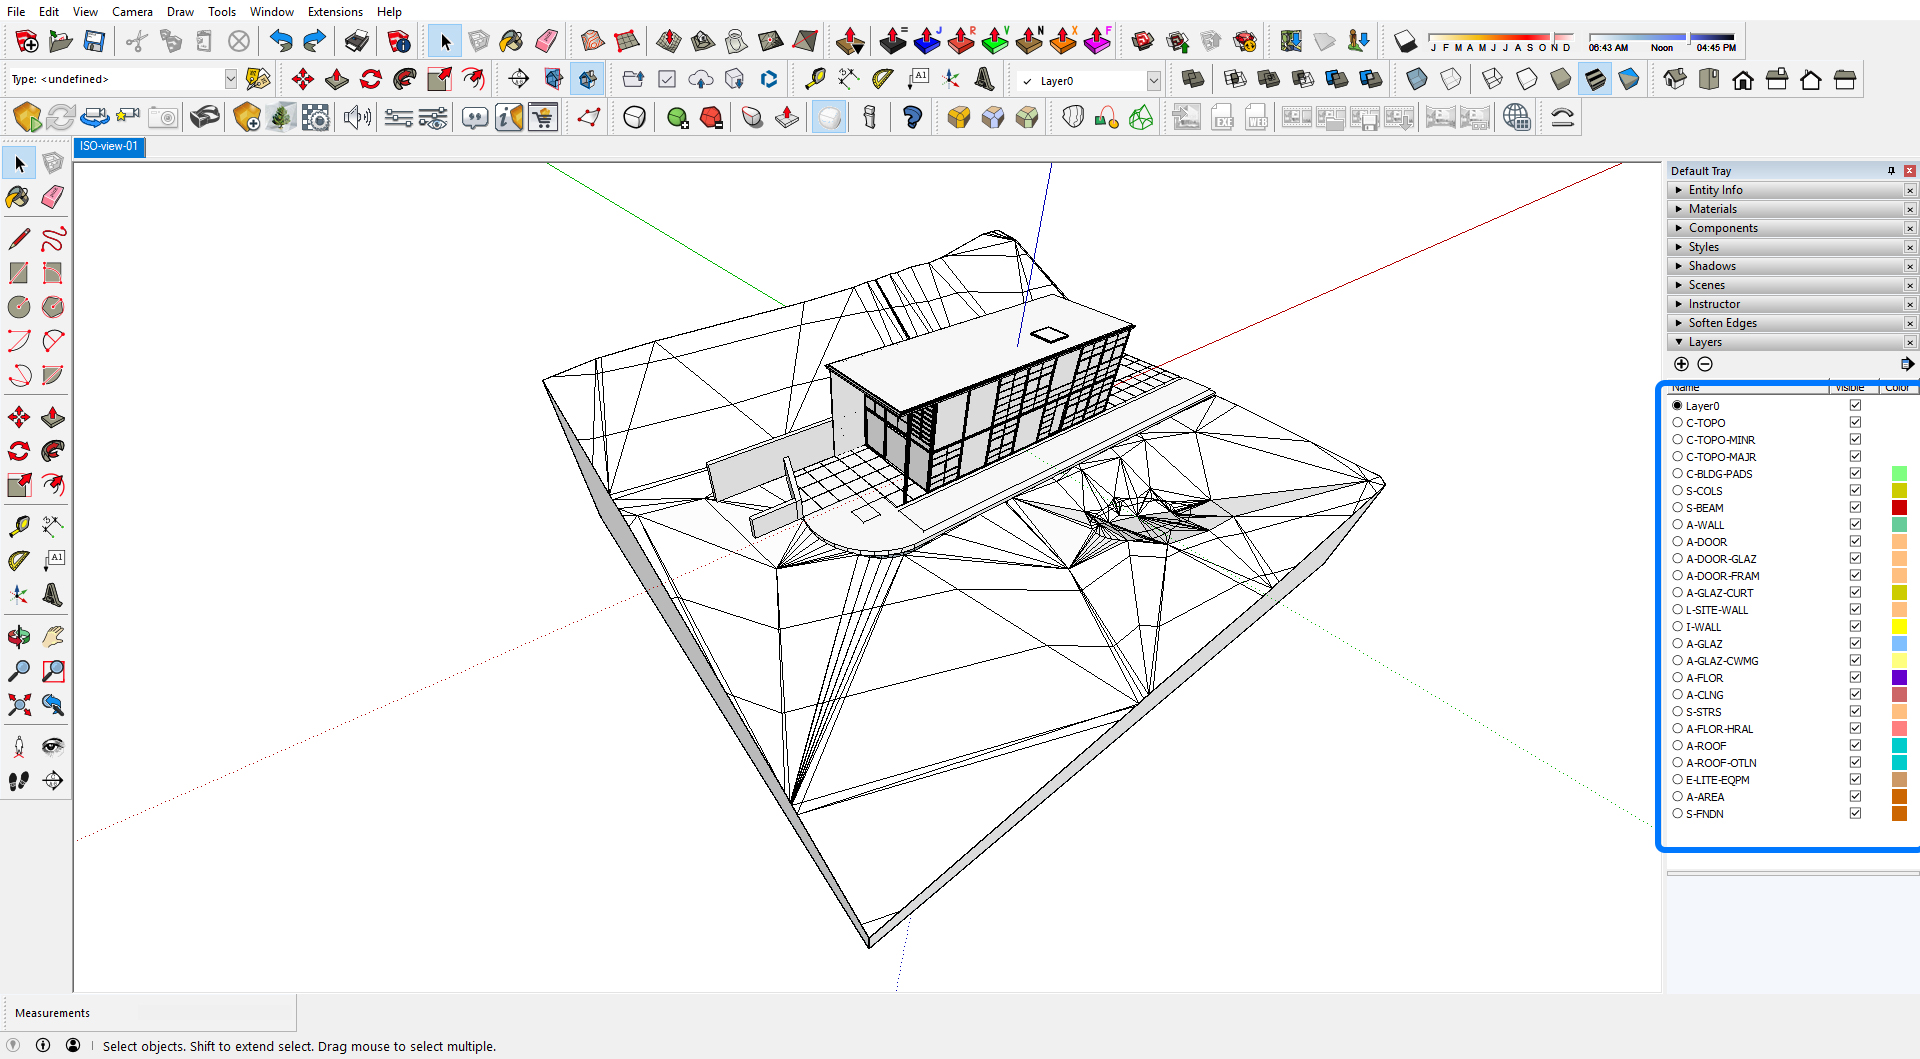
- [STEP 5] Open [Layers] or [Tags] tray to see the structure of the model.
You can clean up the model by checking the visible on Layers > Purge layer after cleaning up.
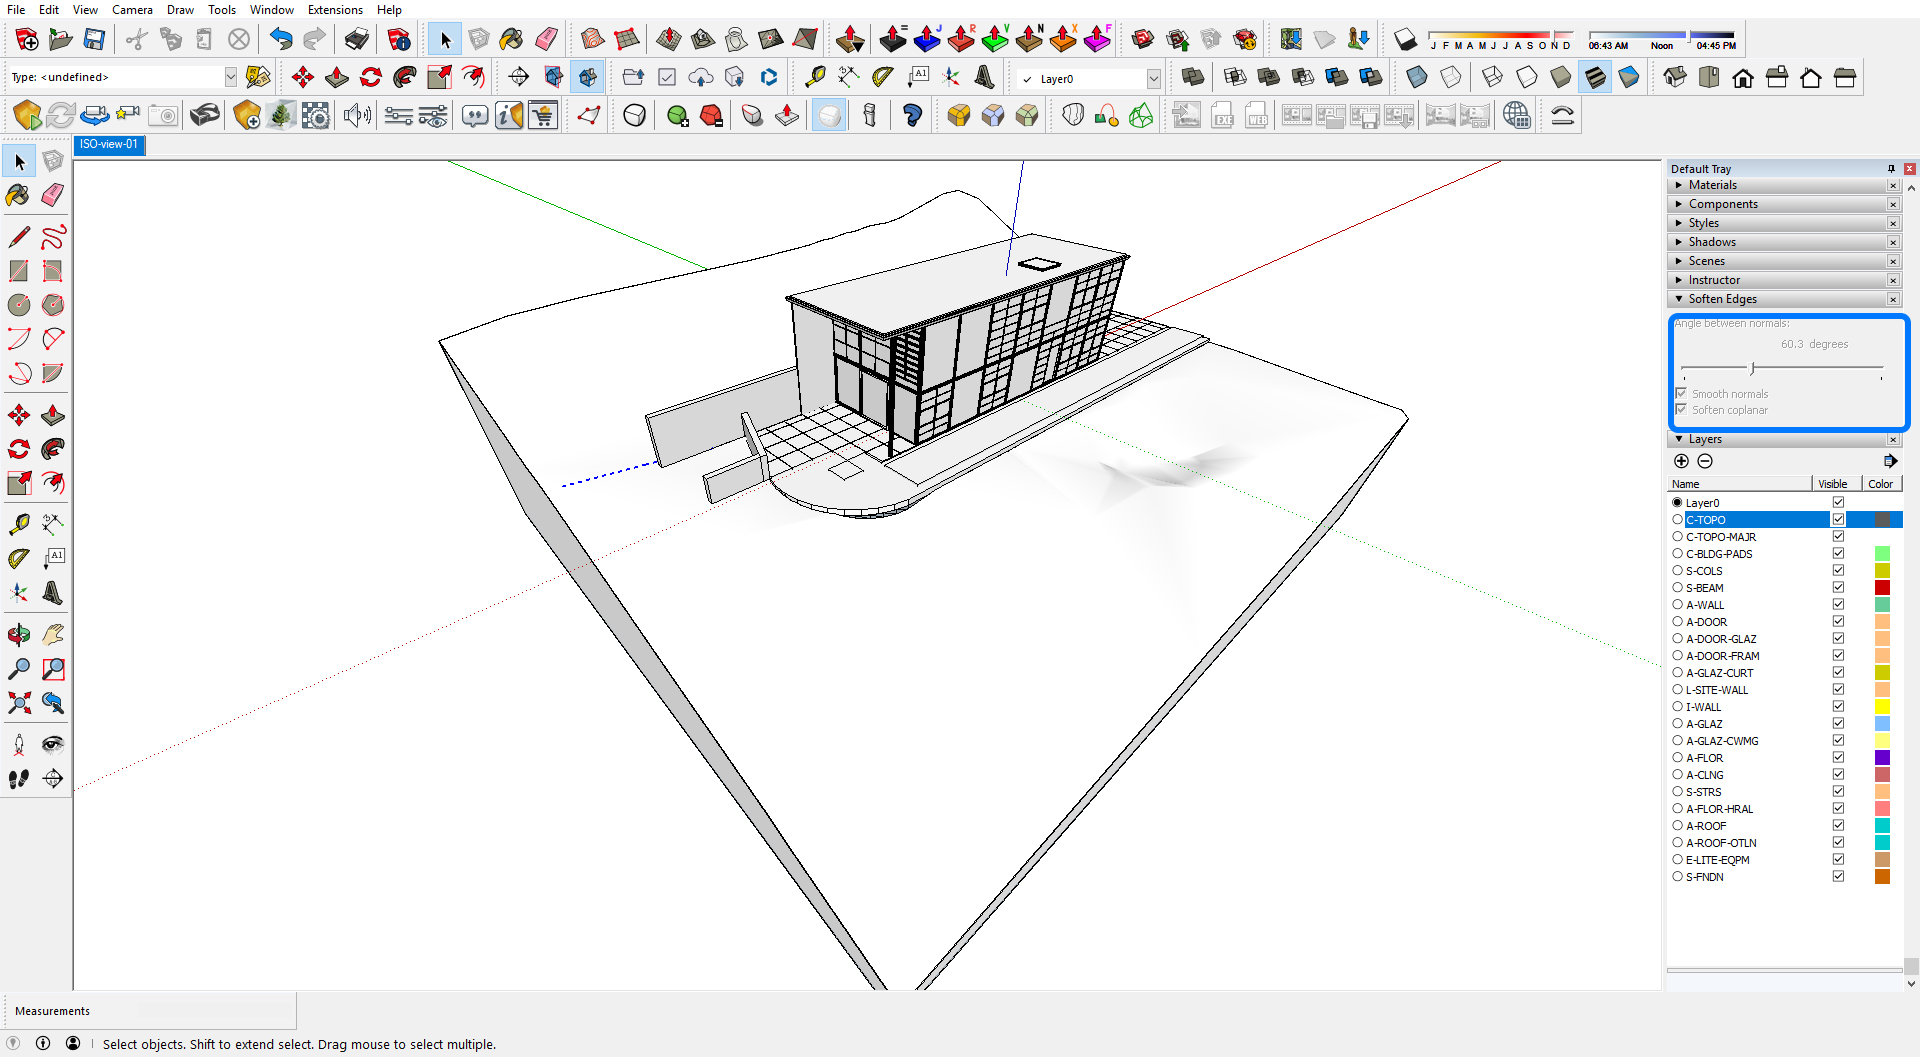
- [STEP 6] Adjust [Soften Edges] value to hide the triangle edges.
Apply materials
You can apply materials by selecting objects. To select objects, you can turn on and off layers.
- [STEP 1] Remove all existing materials from Materials.
- [STEP 2] And select a material from the library.
- [STEP 3] Apply the material to the elements.
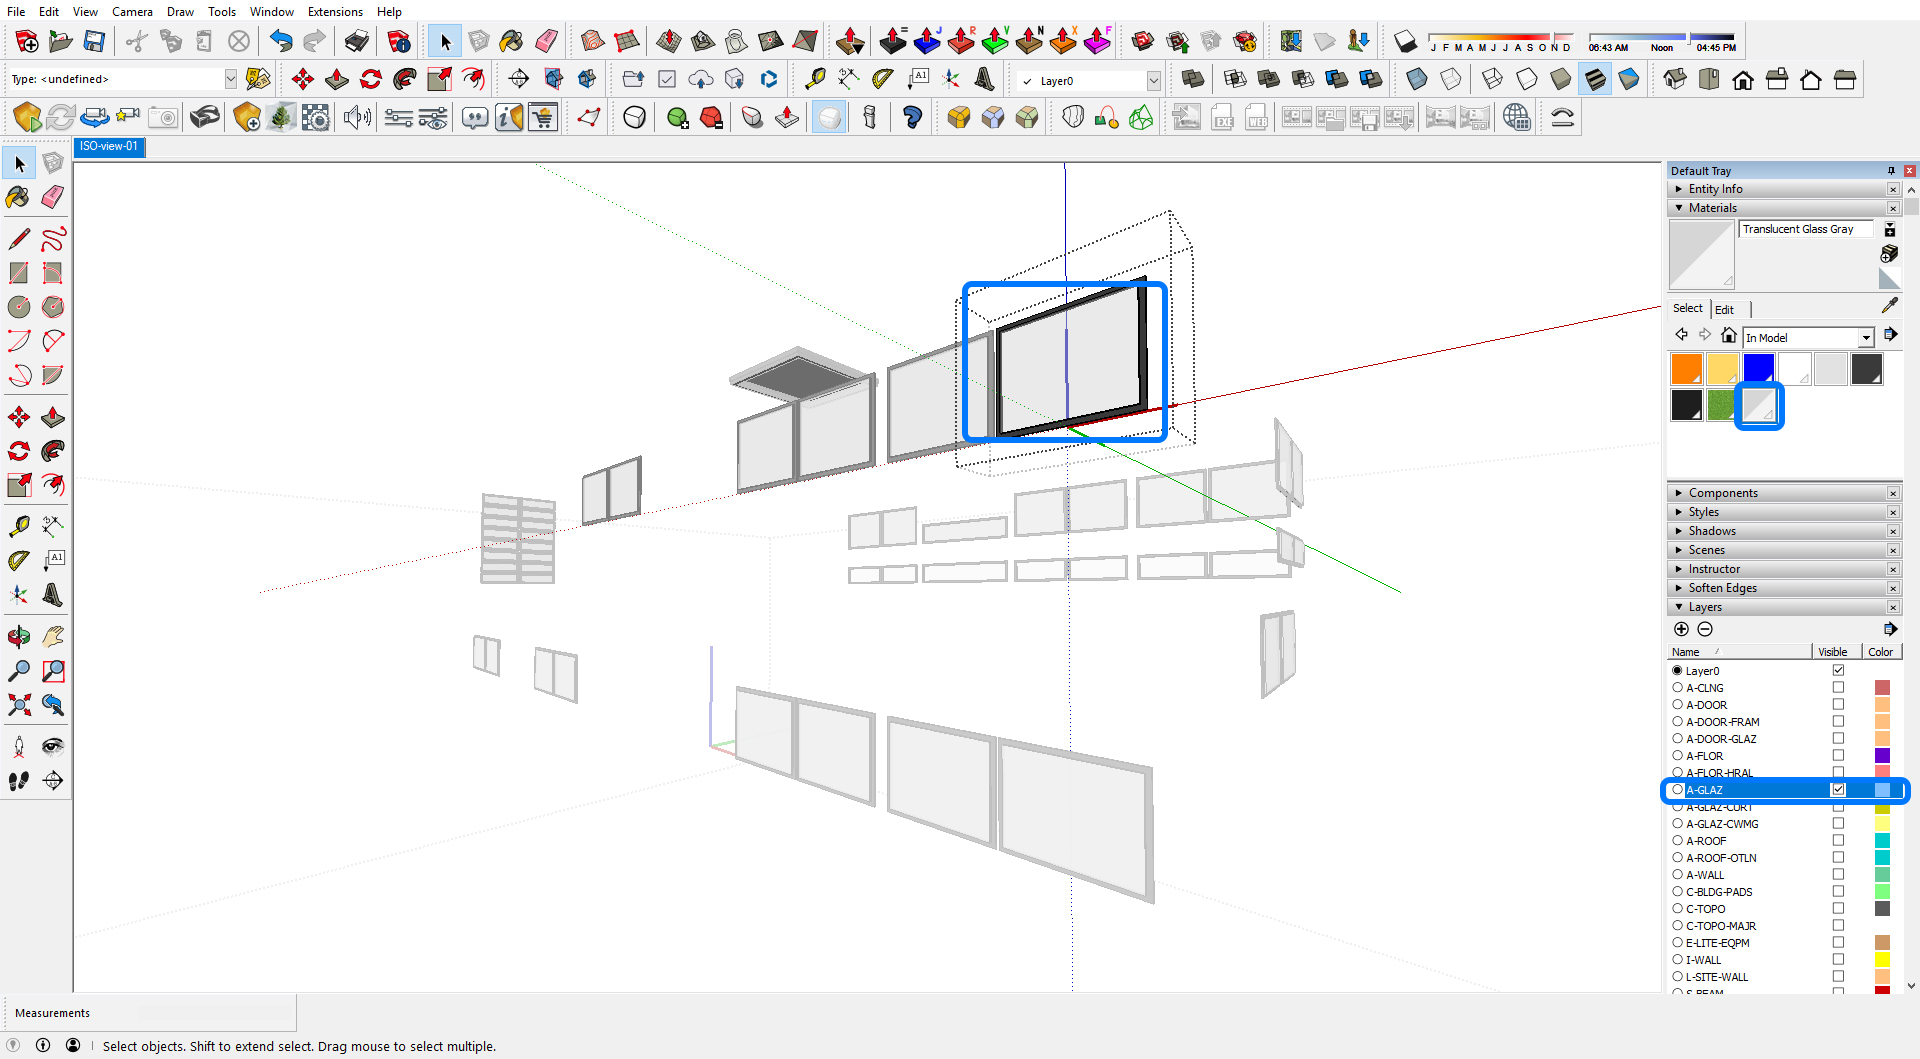
- [STEP 4] Repeat this process for all materials.

(CO2) Understand the Sketchup modeling process and strategies
Many senior students know how to create Sketchup models. However, here are some tips to help speed up your modeling.
[TIP 1] Please use Keyboard Shortcuts.
- Spacebar – Select tool.
- R – Rectangle tool.
- L – Line tool.
- M – Move tool.
- P – Push/pull tool.
- S – Scale tool.
- Q – Rotate tool
- E – Eraser tool.
- G – Group tool.
- B – Paint tool.
- K – Back Edge.
[TIP 2] Define – Custom Keyboard Shortcuts.
If you need a shortcut, you can define keyboard shortcuts.
- Click [Window] > Click [Preferences] > Click [Shortcuts].
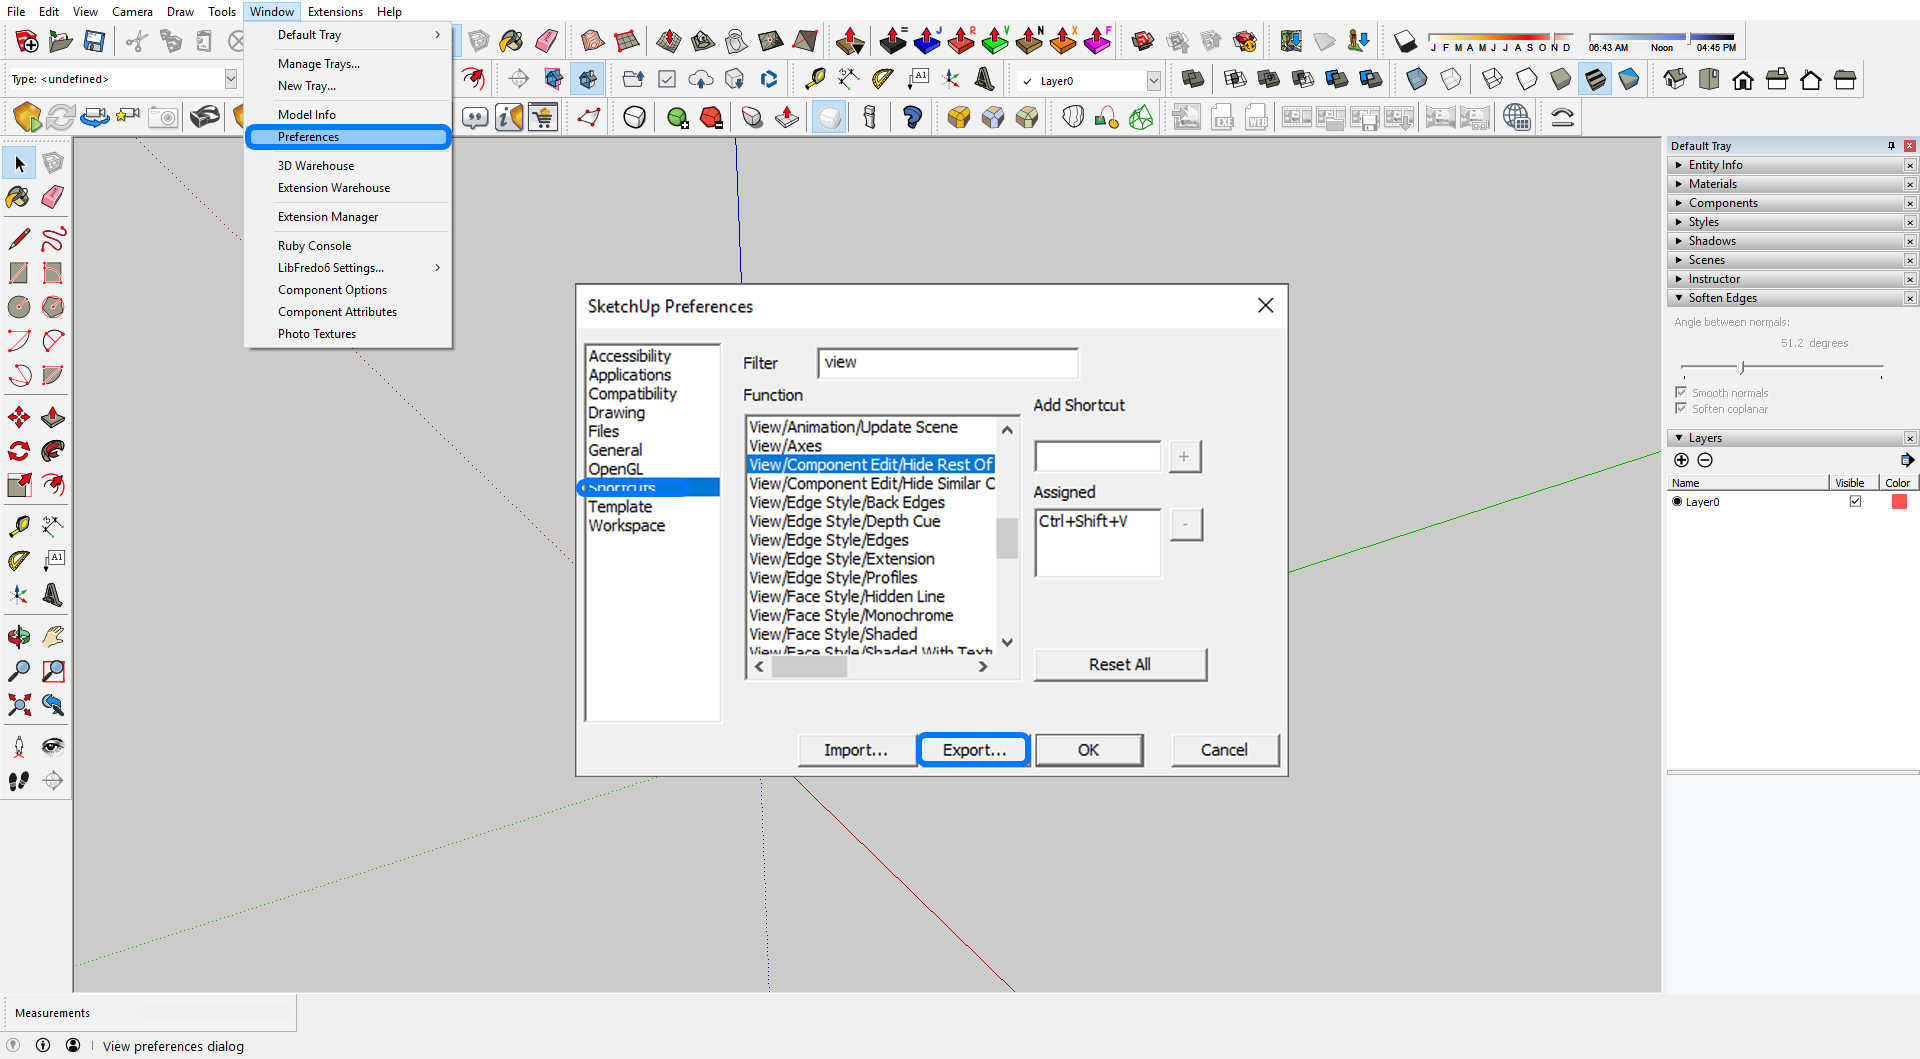
- If you want to save the shortcuts for your future use, click [Export]. And [Import] the shortcuts to load the shortcuts.
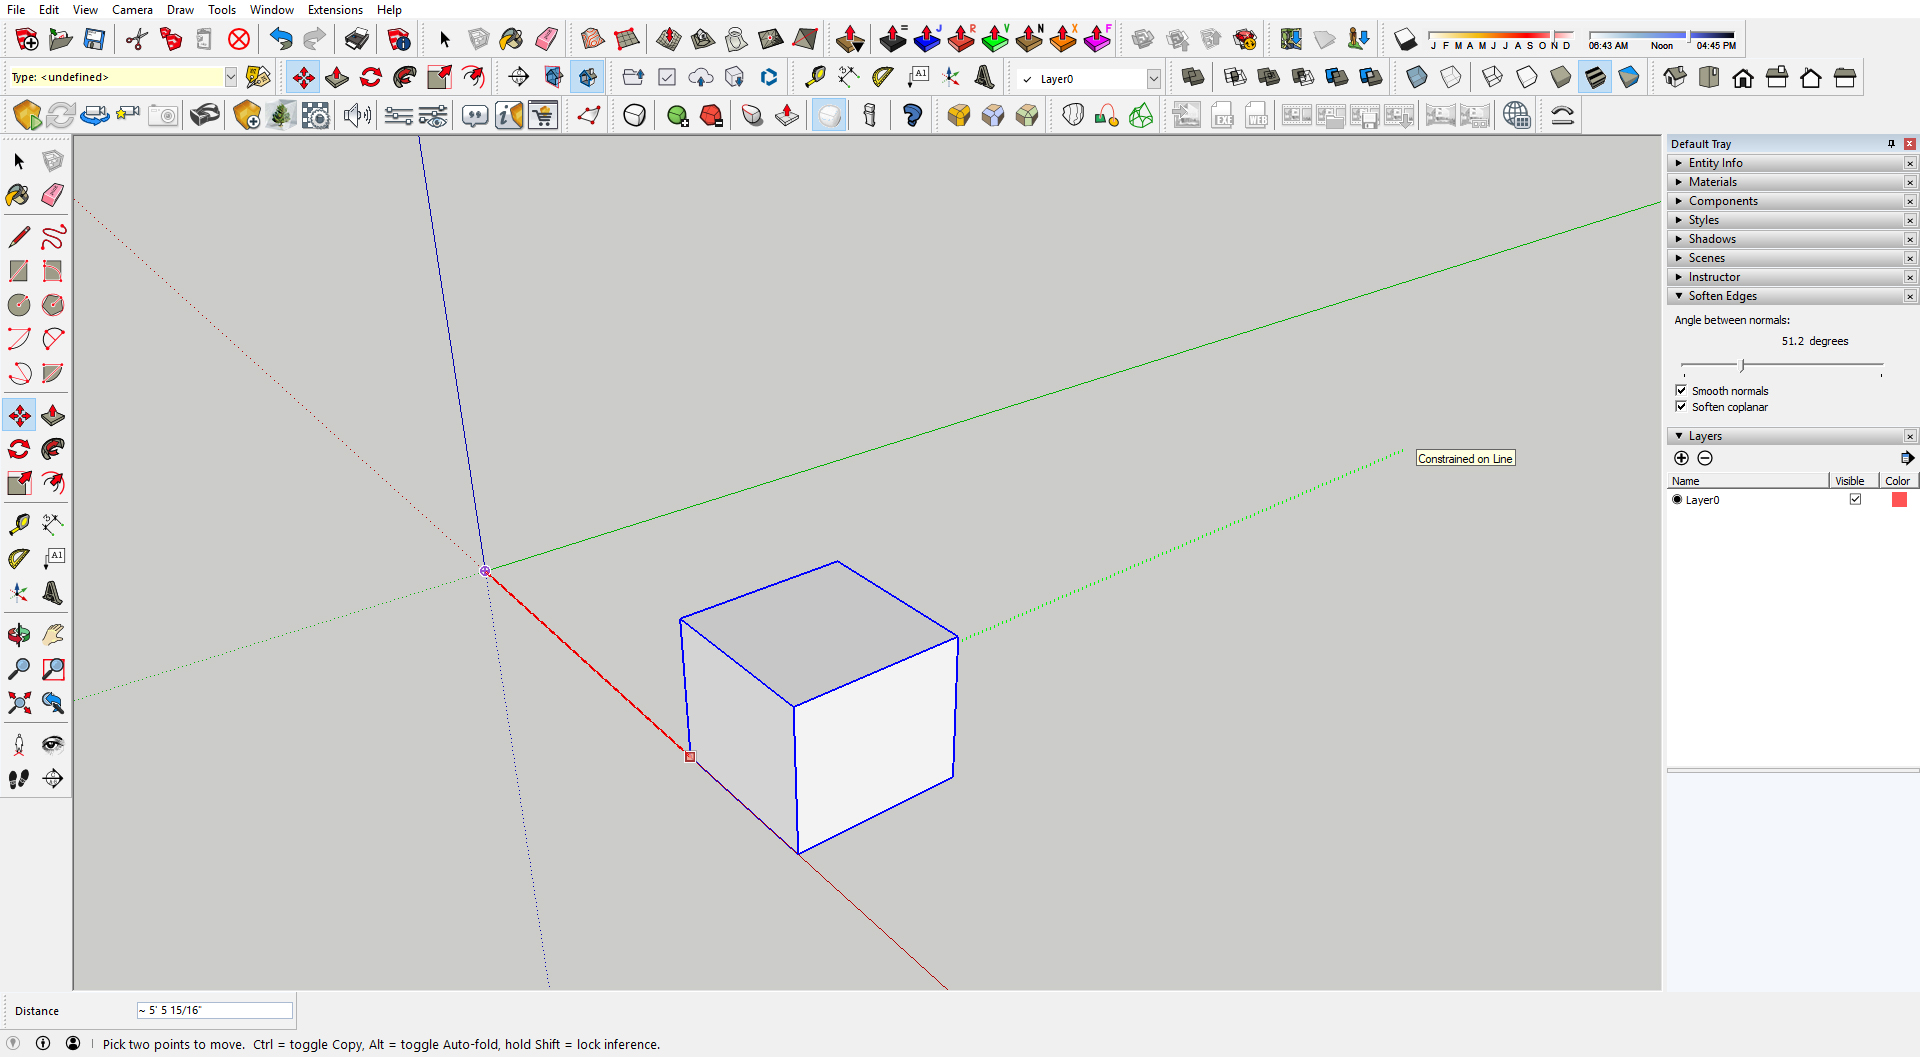
- Use [Shift] Key to hold axes.
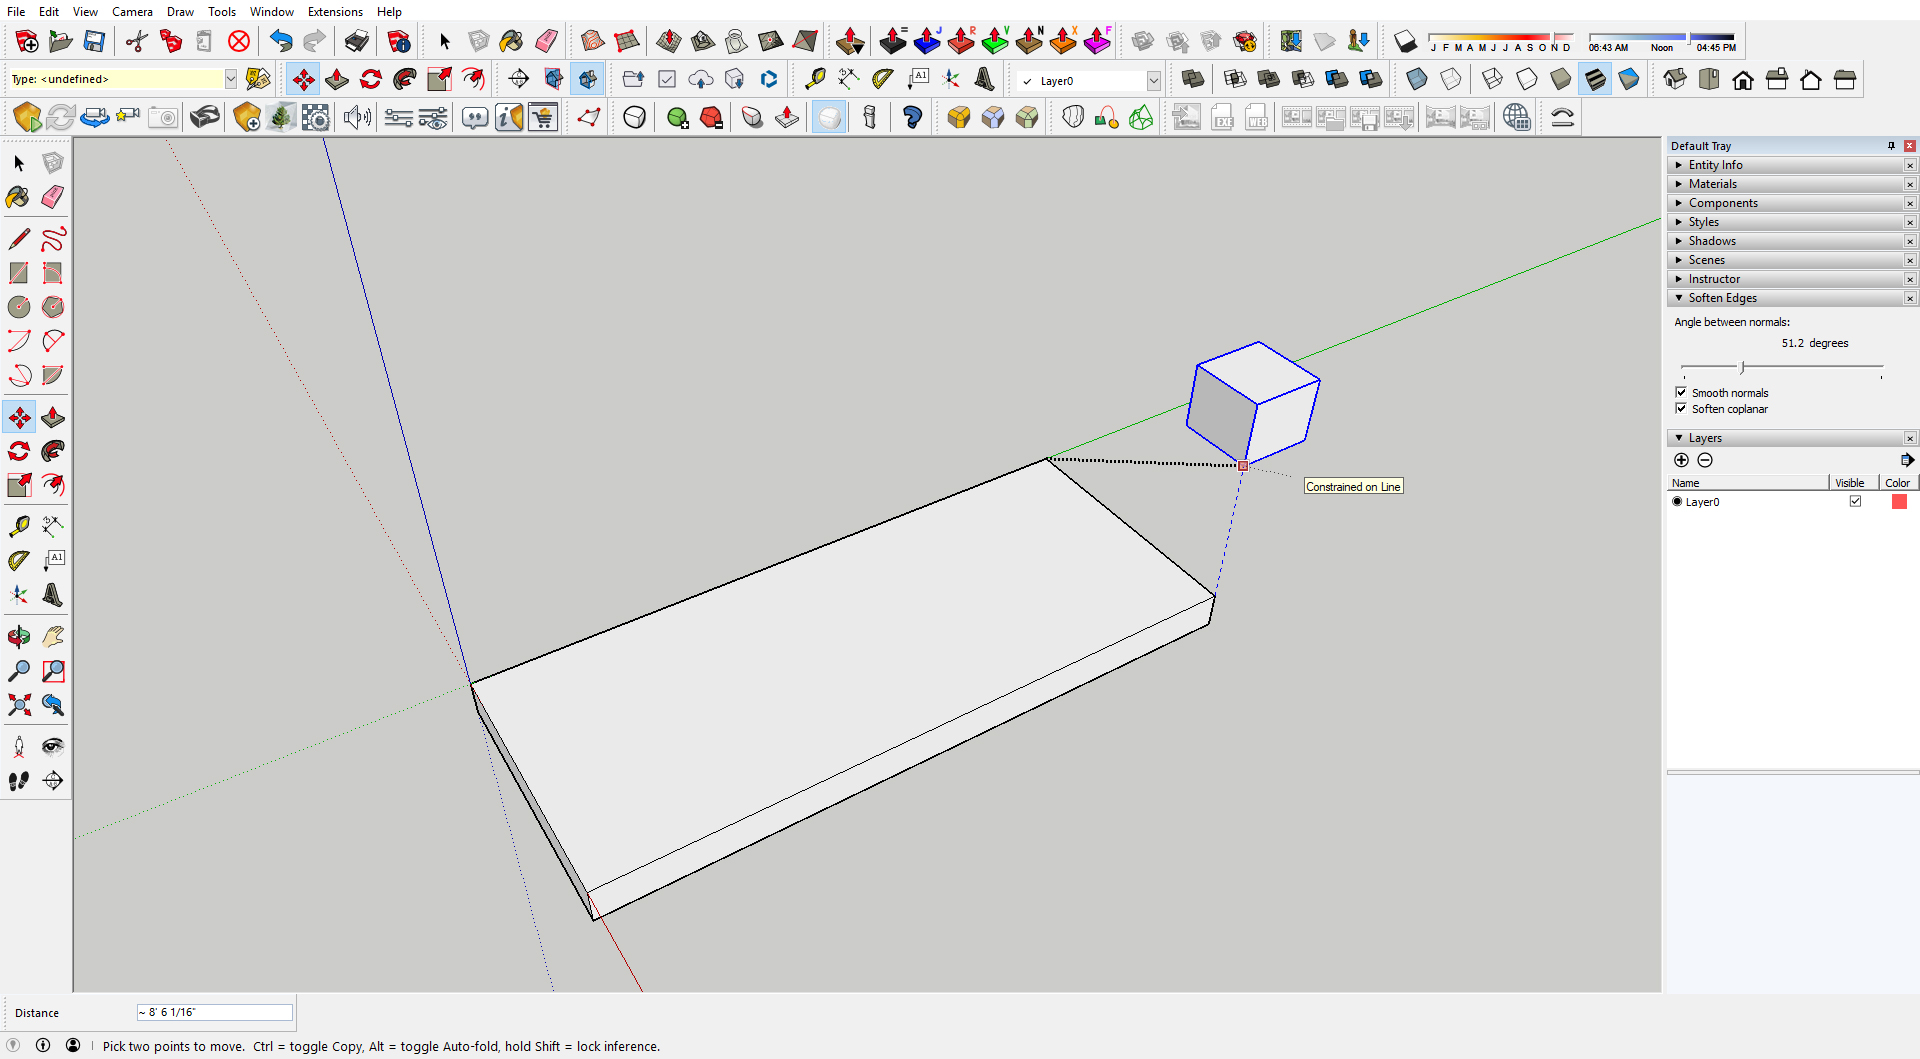
[TIP 3] Move objects along Axes.
Moving an object is not easy for a beginner. Try to move objects along Axes.
- Use the direction keys (Up-Blue axes, Right–Red axes, Left-Green axes) to lock Axes while you move objects.
- You can also define Axes by clicking [Tools] > click [Axes].
[TIP 4] Use inferencing to place objects.
- Use other objects to move and rotate objects.
[TIP 5] Model using groups and components (any objects that will be used multiple times in the model).
- If you do not make a group/ a component of an object, faces will merge and be difficult to control.
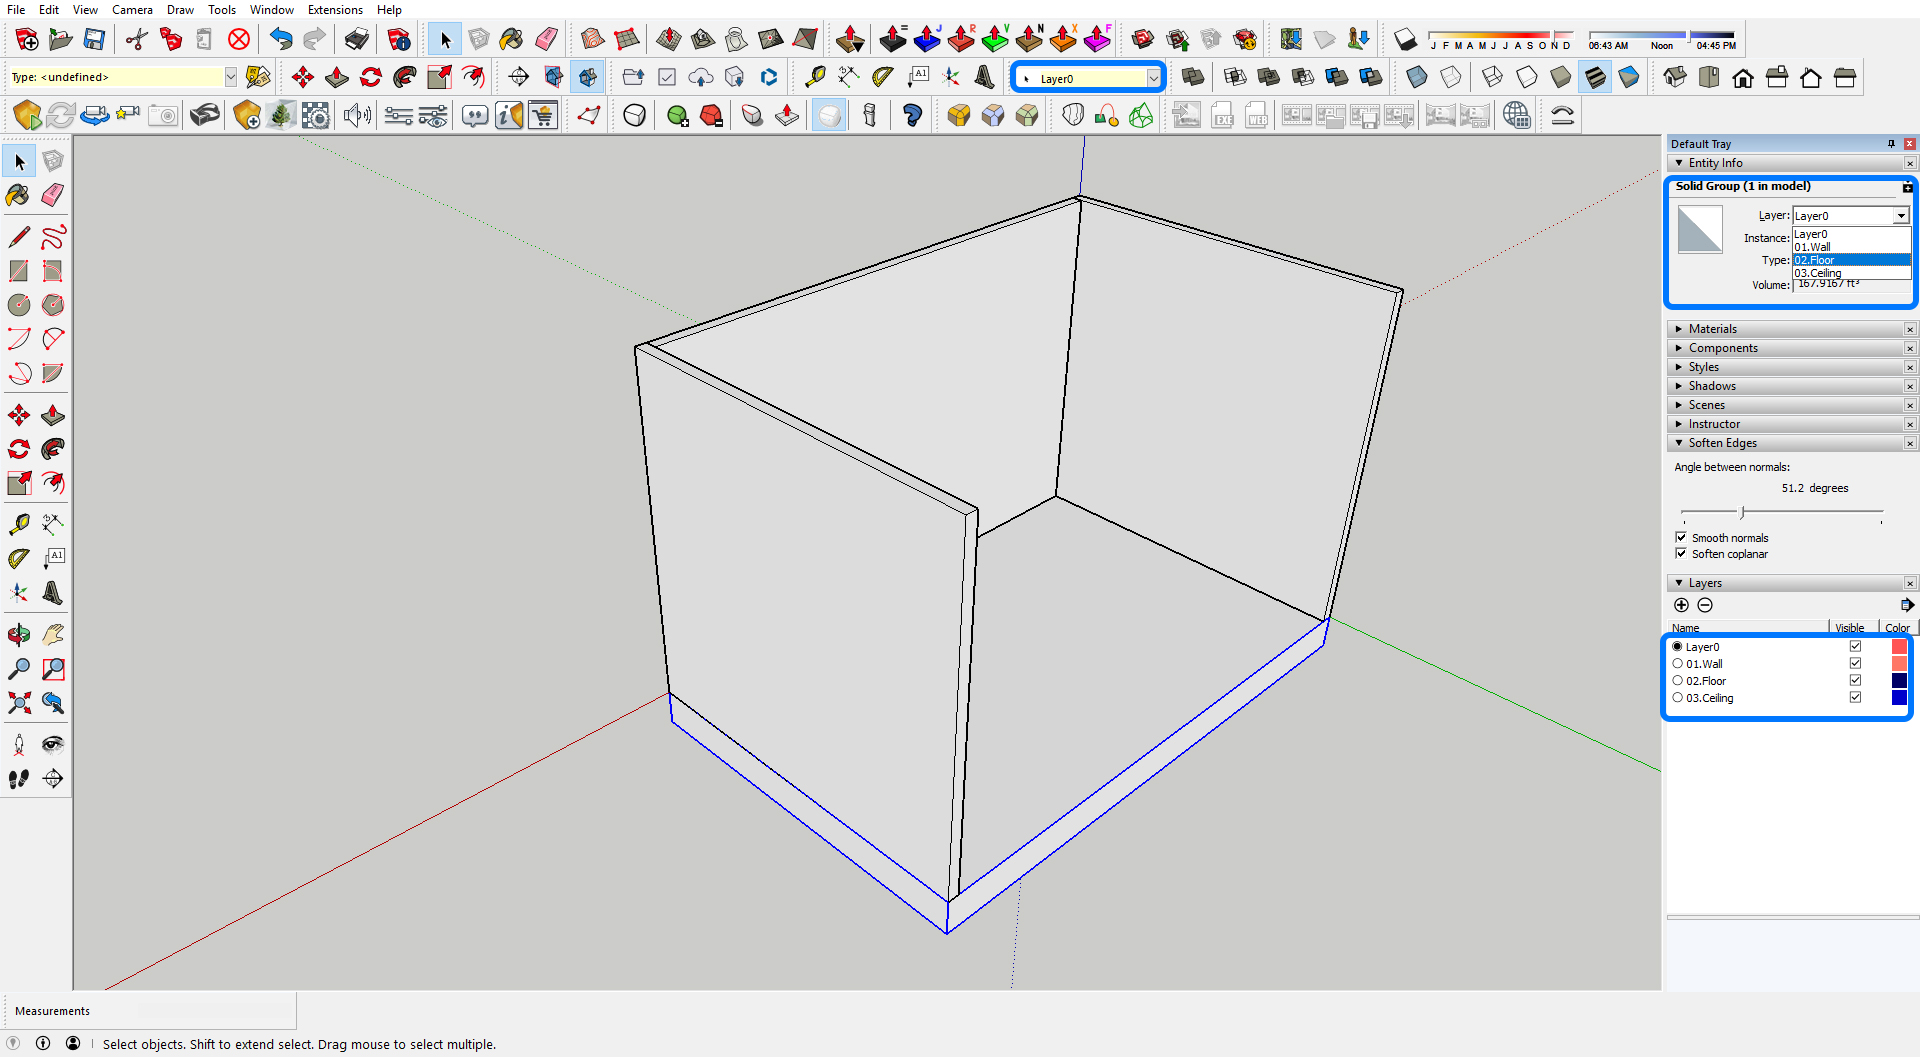
[TIP 6] Use layers/tags.
- Layers/tags are applied in an object/ a group/ a component.
- [Layer0] is a default and a base layer for an object.
- Once you create a group or a component, assign a layer/ a tag.
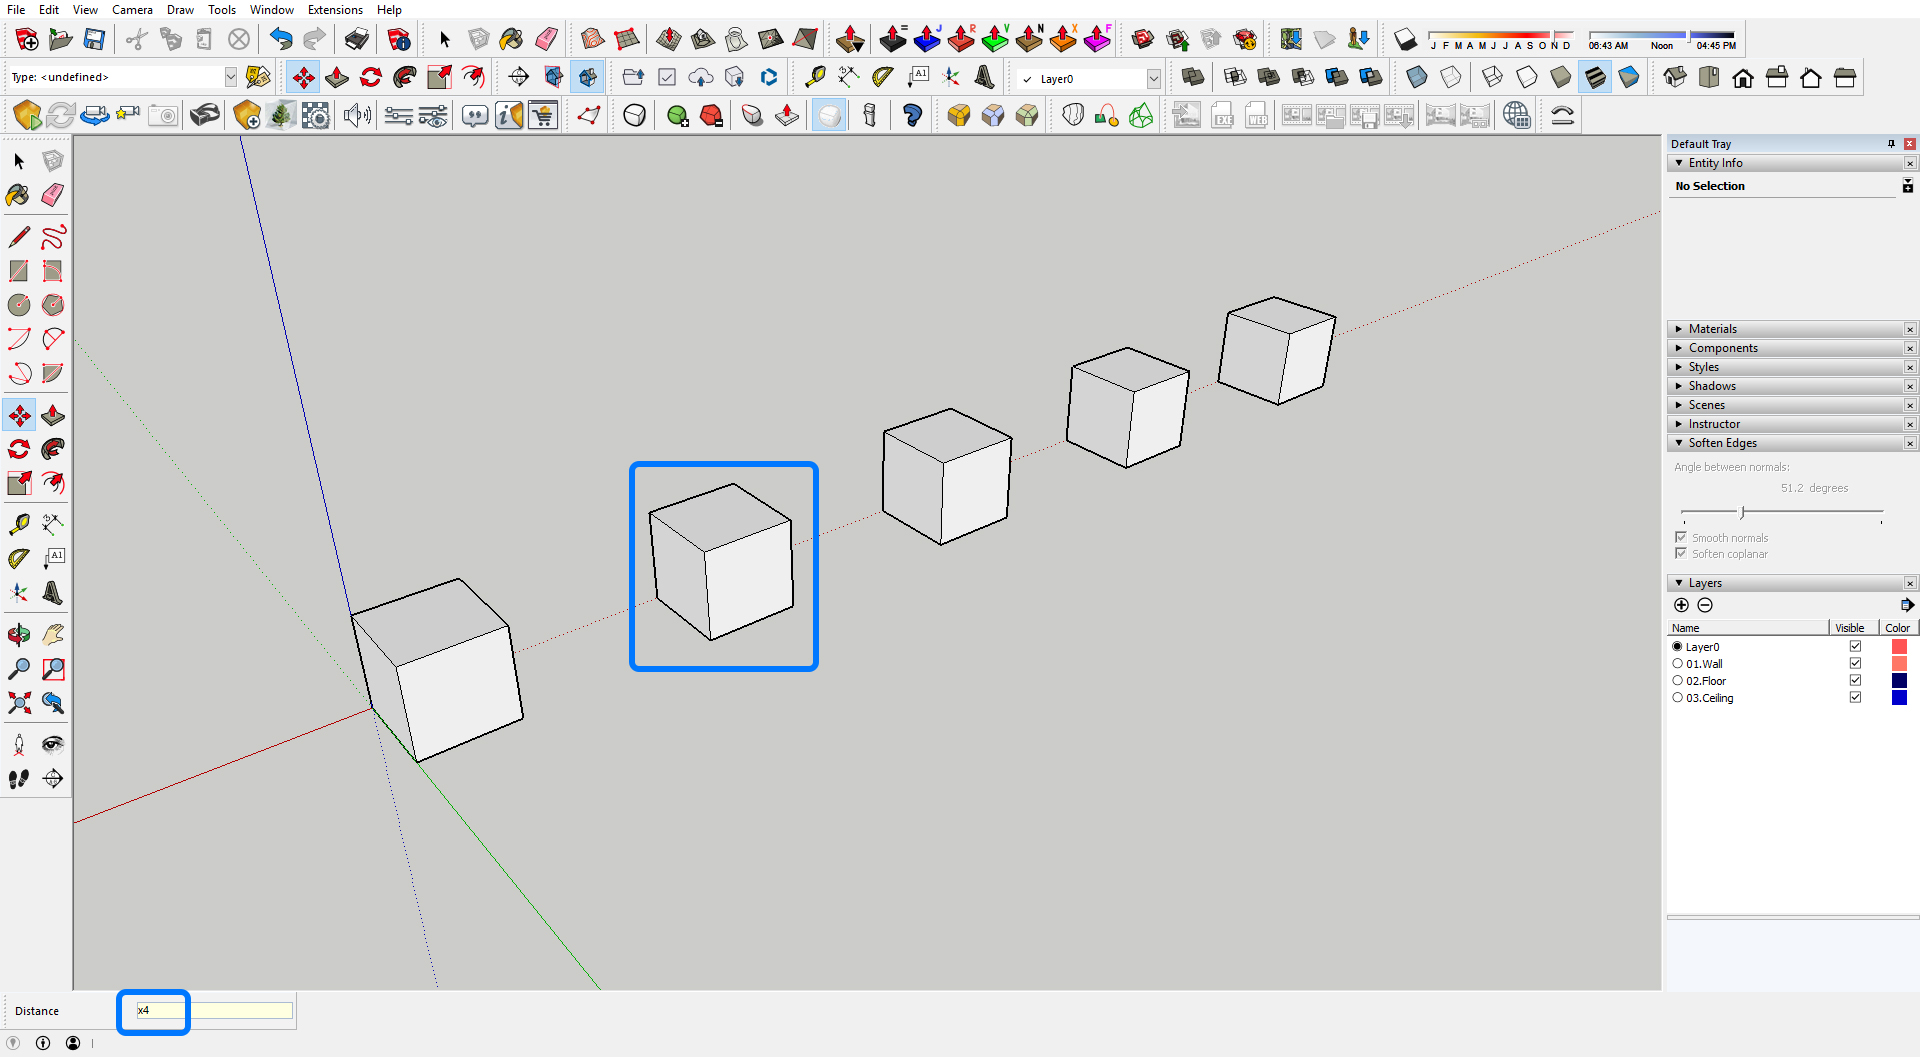
[TIP 7] Create multiple copies with the Move tool or the Rotate tool.
- Use [x] to multiple.
[TIP 8] Create Equally spaced copies.
- Use [/] to divide.

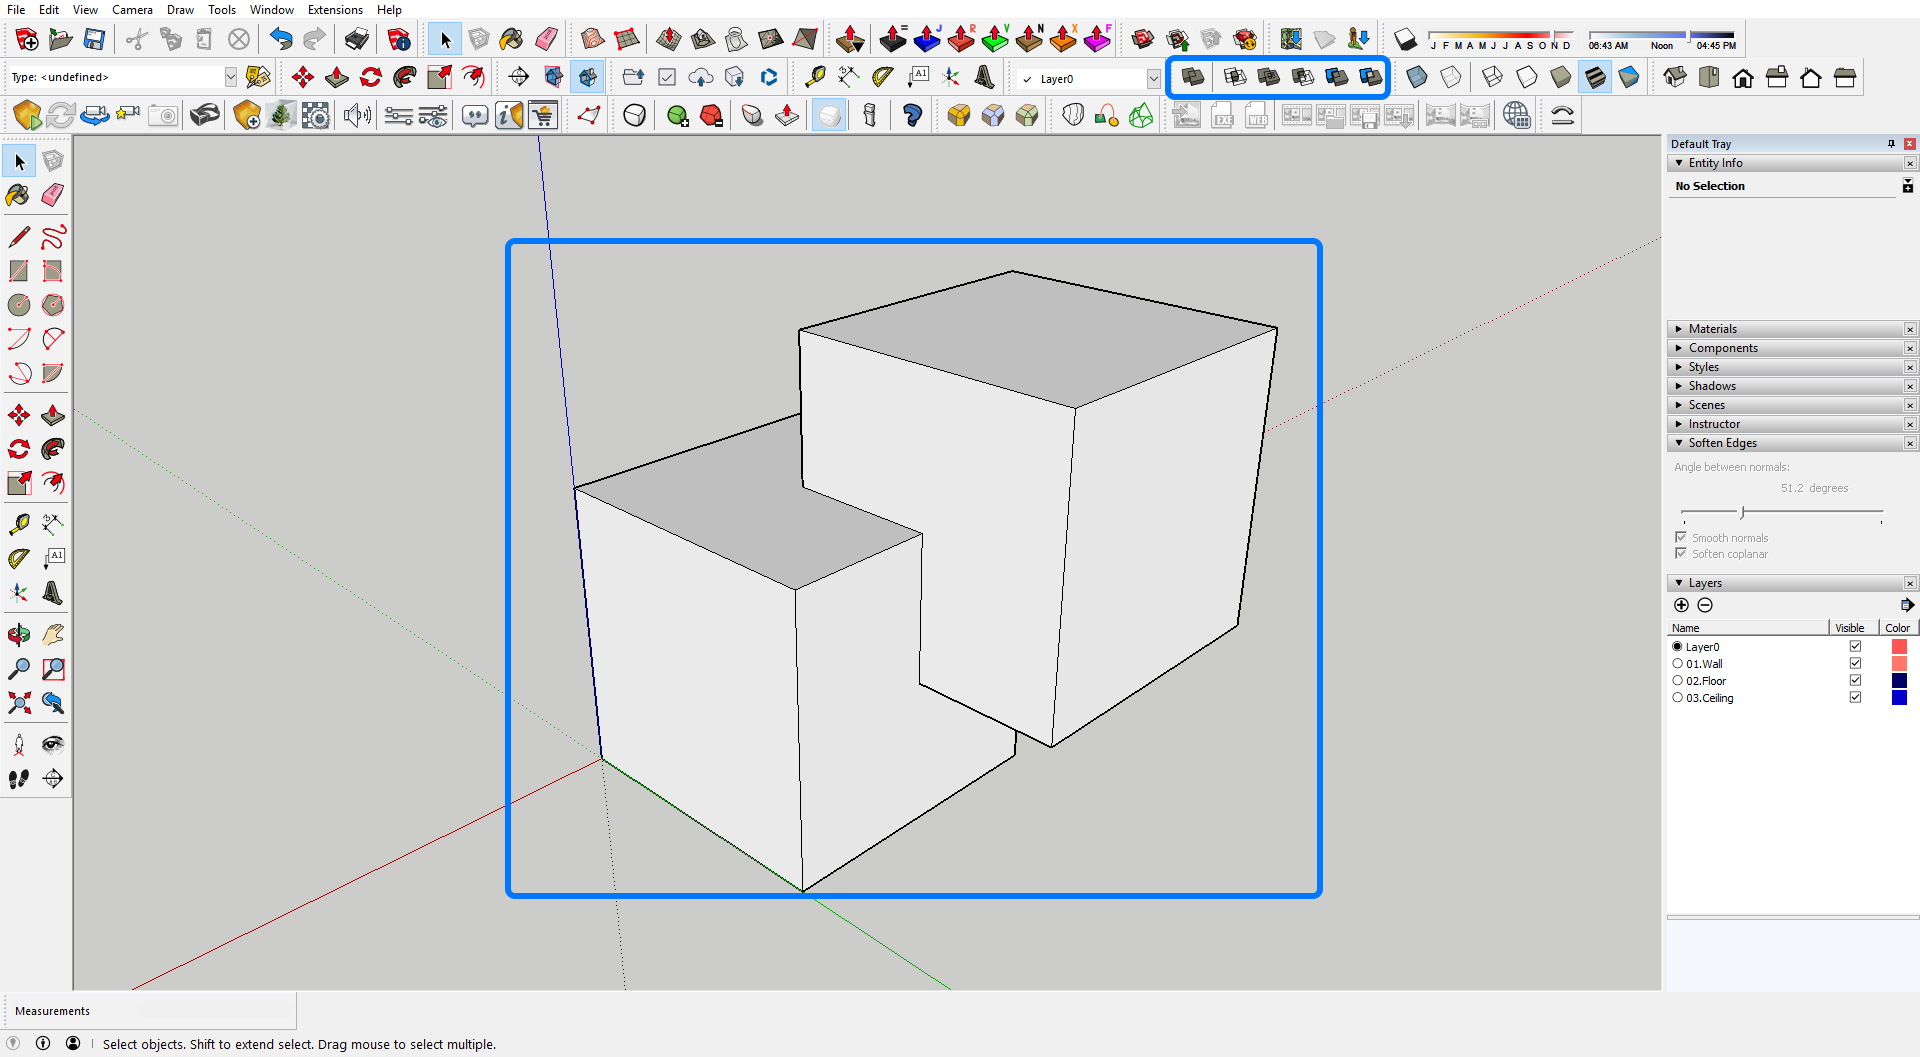
[TIP 9] Use [Solid Tool] to create a unique shape of an object.
- Use union, intersect, subtract, trim, split.
[TIP 10] Set Field of view – 72 deg ~ 50 deg by press [z].
(CO3) Understand Sketchup advanced modeling with plug-ins
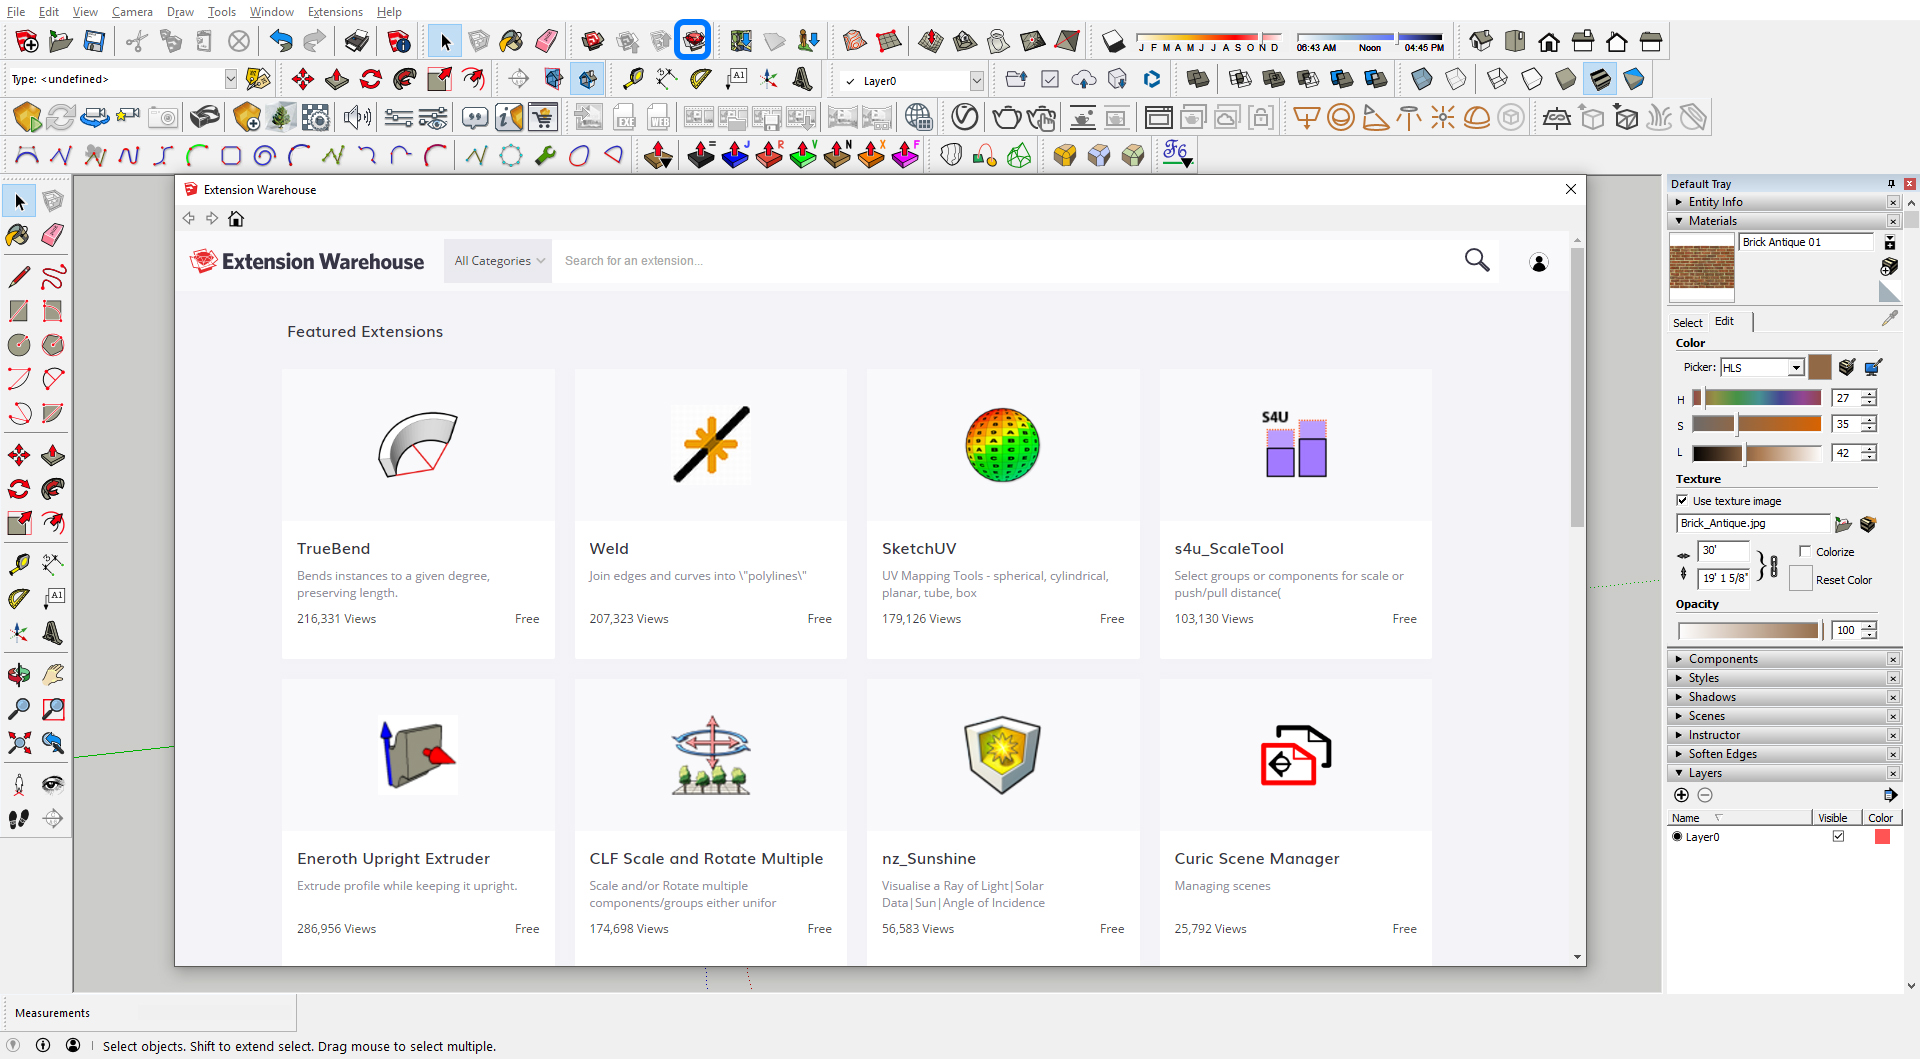
Extension warehouse
The Extension Warehouse is an online resource full of plug-ins developed especially for SketchUp. These extensions enable you to add special tools and features to SketchUp.
Refer to this linked page.
SketchUcation
SketchUcation is a growing community and resource center for SketchUp Users. There are more than 800 SketchUp Extensions in this linked community.
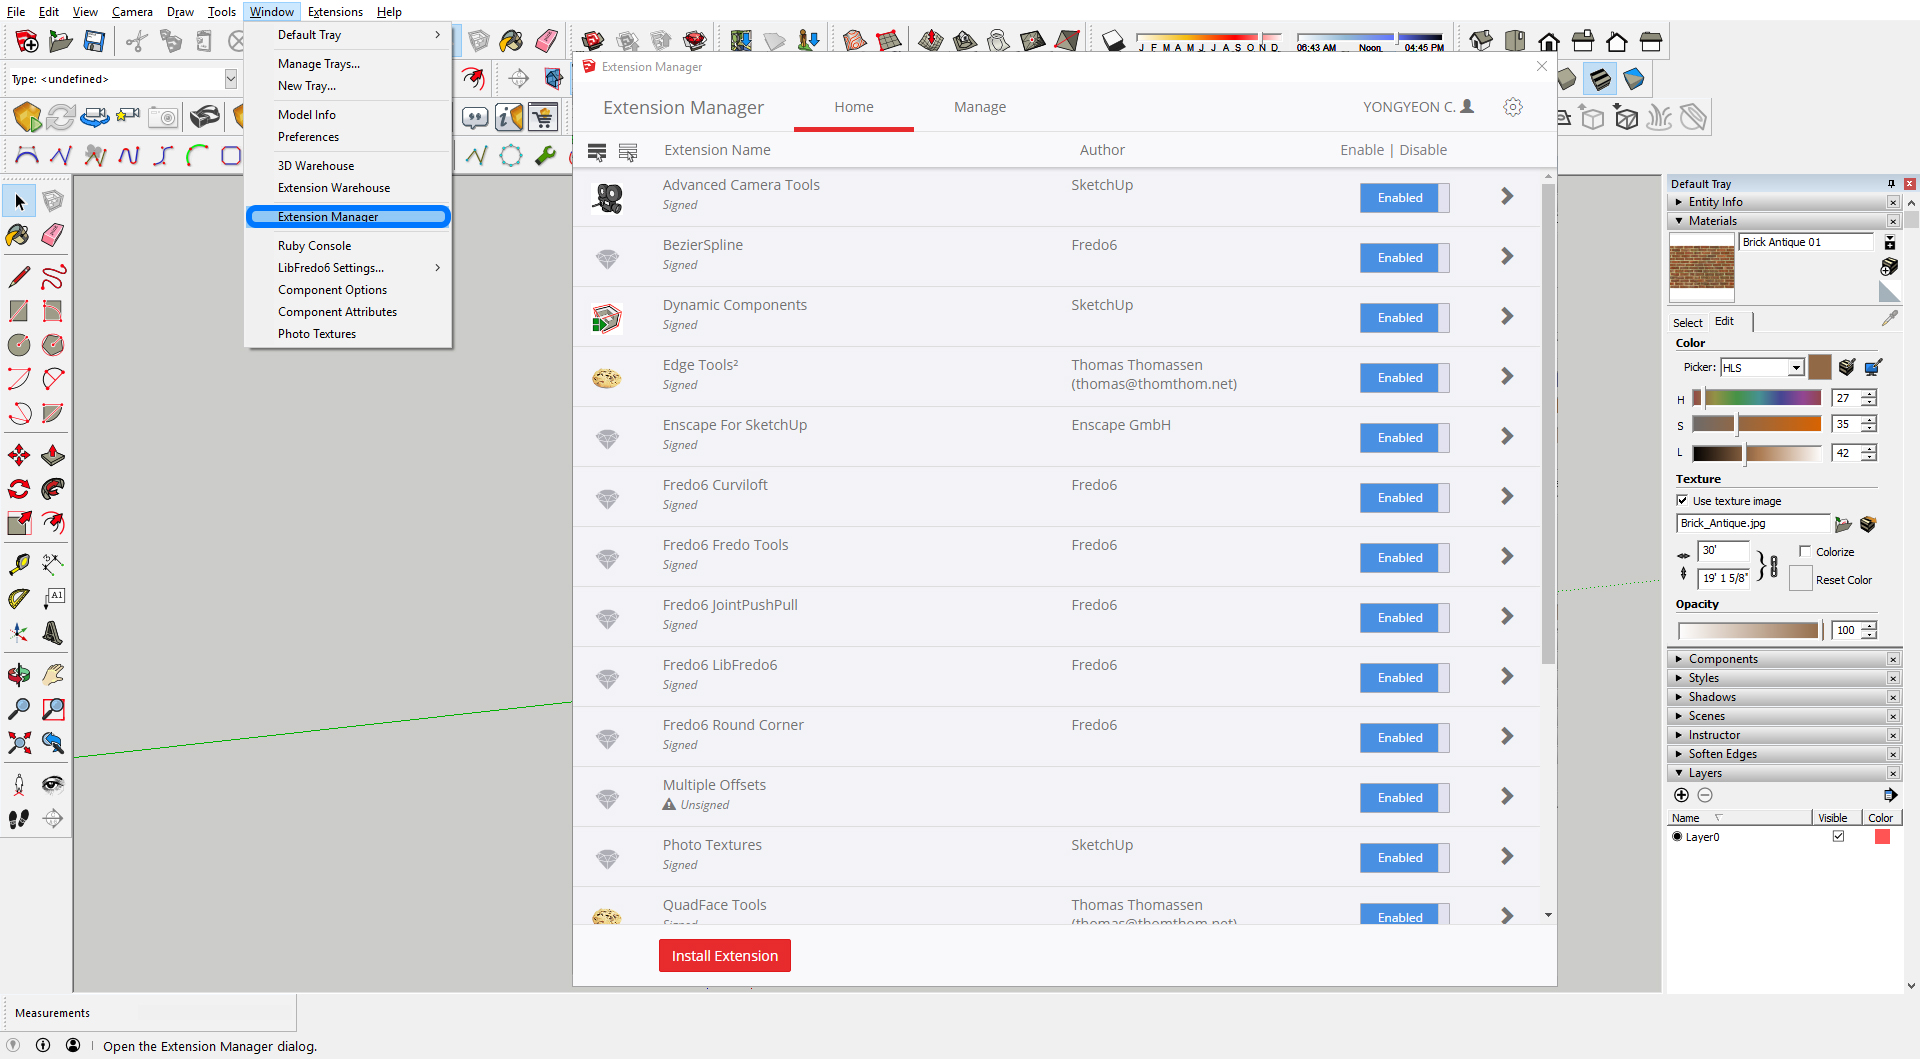
Extension manager
You can install new extensions and manage installed extensions.
Free extensions – Recommended installing
- BZ_Tool – Draws a variety of Polylines, Bezier and Spline curves, all in 3D.
- JointPushandpull – Perform various extrusions of faces.
- Curviloft – Dedicated to Loft and Skinning, that is, generation of surfaces from contours.
- RoundCorner – Performs the rounding of the edges and corners of 3D shapes along a 2D profile, in 3 modes: Round corners, Sharp corners and Bevel.
- Sketchy FFD –
Adds a control cage to an object that allows the mesh to be manipulated via control points. - ThruPaint – FredoTools groups a number of my standalone plugins. By delivering them as a single package.
- SectionCutFace – Adds faces to a Section-Plane.
Paid extensions for subdivided and smooth model
- SubD – SUbD is a parametric subdivision extension for SketchUp optimised for quad-based workflows.
- QuadFace Tools – Suite of tools for working with non-planar quads in SketchUp. Enables logical quad-based topology to be created – which in turn permits the use of ring and loop selections seen in other 3D modelling software.
- Vertex Tools – Take control over each vertex with this vertex editor for SketchUp. Soft selections are a must for organic modelling and the manipulator gizmo gives you great control when modelling.
- Artisan – Artisan is a SketchUp extension filled with powerful organic modeling tools.
Additional paid extensions for Architects
- For more information regarding paid extensions, please watch this linked video.
 References
SketchUcation. (n.d.). Sketchup plugins. Retrieved December 24, 2021, from https://sketchucation.com/pluginstore?listtype=3&author=0&category=0
SketchUp School. (August 22, 2020). 10 SketchUp Extensions Every Architect Should Know. YouTube. Retrieved December 24, 2021, from https://www.youtube.com/watch?v=mtpEmbteWW8
Trimble. (n.d.). Extension warehouse. Extension Warehouse | SketchUp Help. Retrieved December 24, 2021, from https://help.sketchup.com/en/extension-warehouse/extension-warehouse
