
Part Four. Advanced Rendering
Chapter 17. Lumion – surroundings, objects, and materials
Upon completing this session, students will be able to:
- (CO 1) Add surroundings
- (CO 2) Add/edit materials
- (CO 3) Add objects
 Session Highlights
At the end of the session, students will be able to create the graphics below.
 Lecture Contents
(CO1) Add surroundings
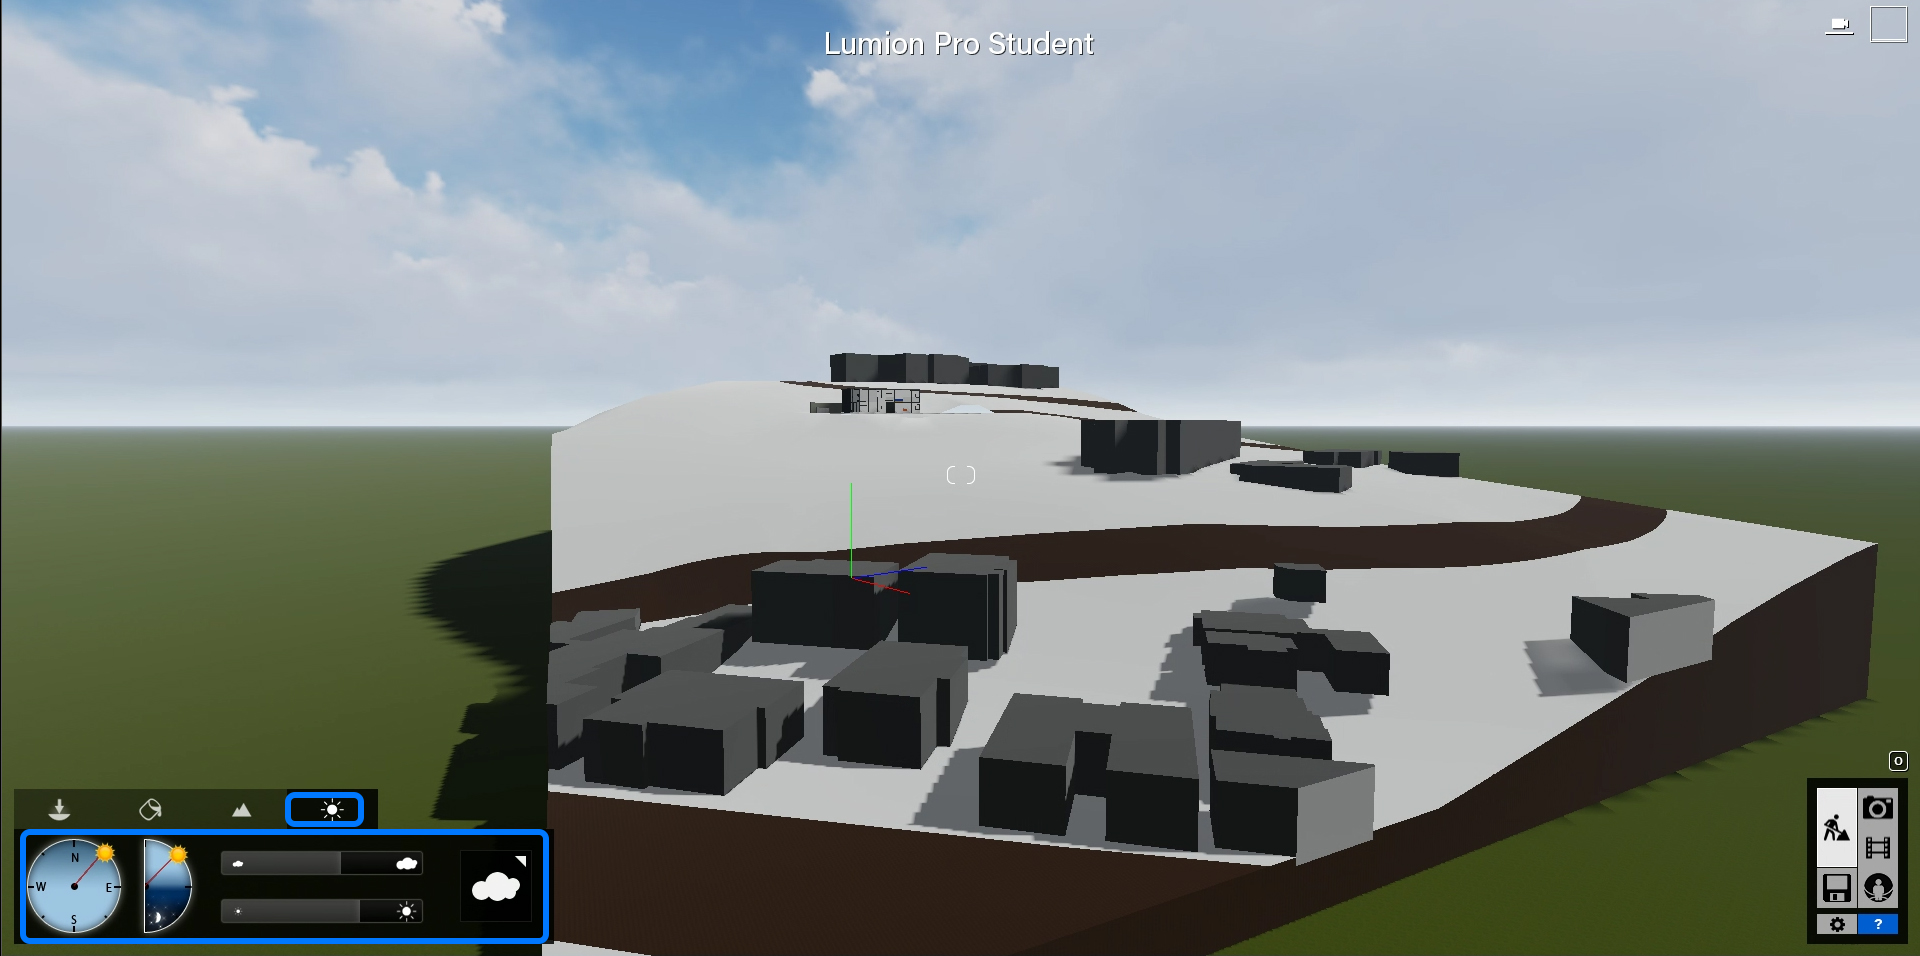
Change Weather
Lumion has several presets for Sky and can change the direction of the sun and time of date quickly. Lumion is a rendering software, so it does not need precise data for the renderings.
- [STEP 01] Click [Weather] tab.
- [STEP 02] Adjust [Sun direction].
- [STEP 03] Adjust [Sun height].
- [STEP 04] Adjust [Amount of cloud].
- [STEP 05] Adjust [Amount of sunlight].
- [STEP 06] Change [Cloud type] by clicking the [Cloud] icon and selecting one of nine clouds.
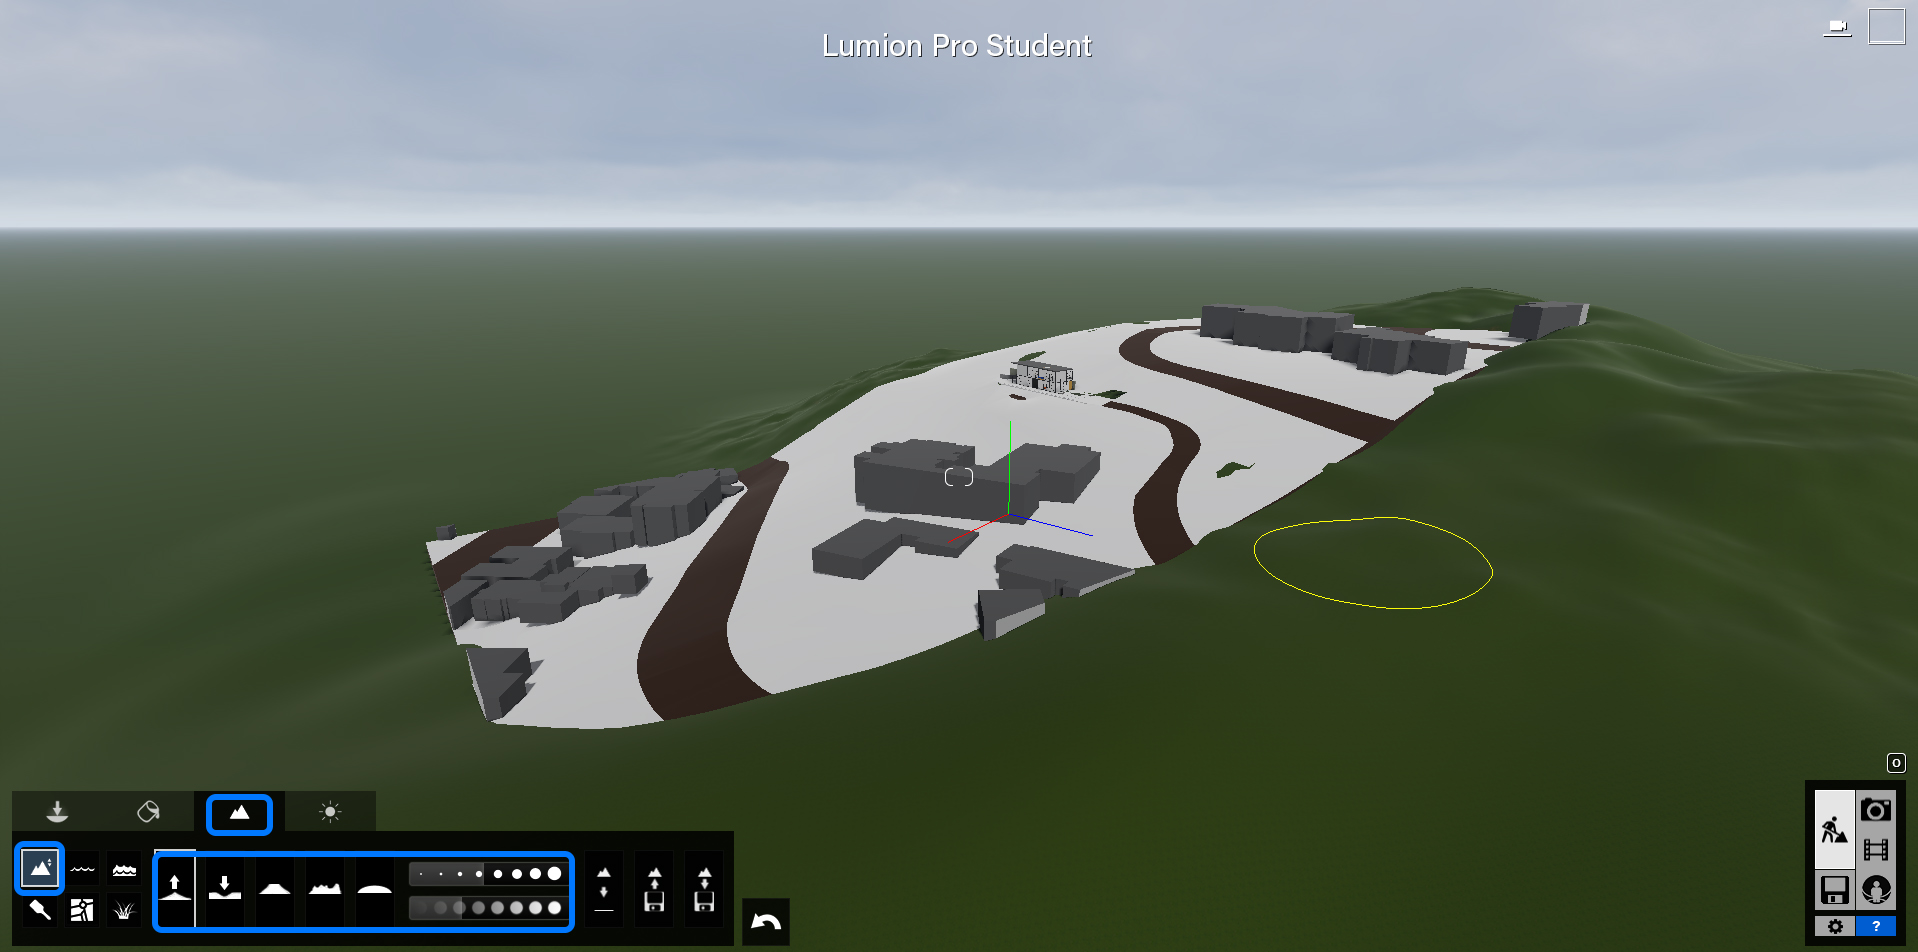
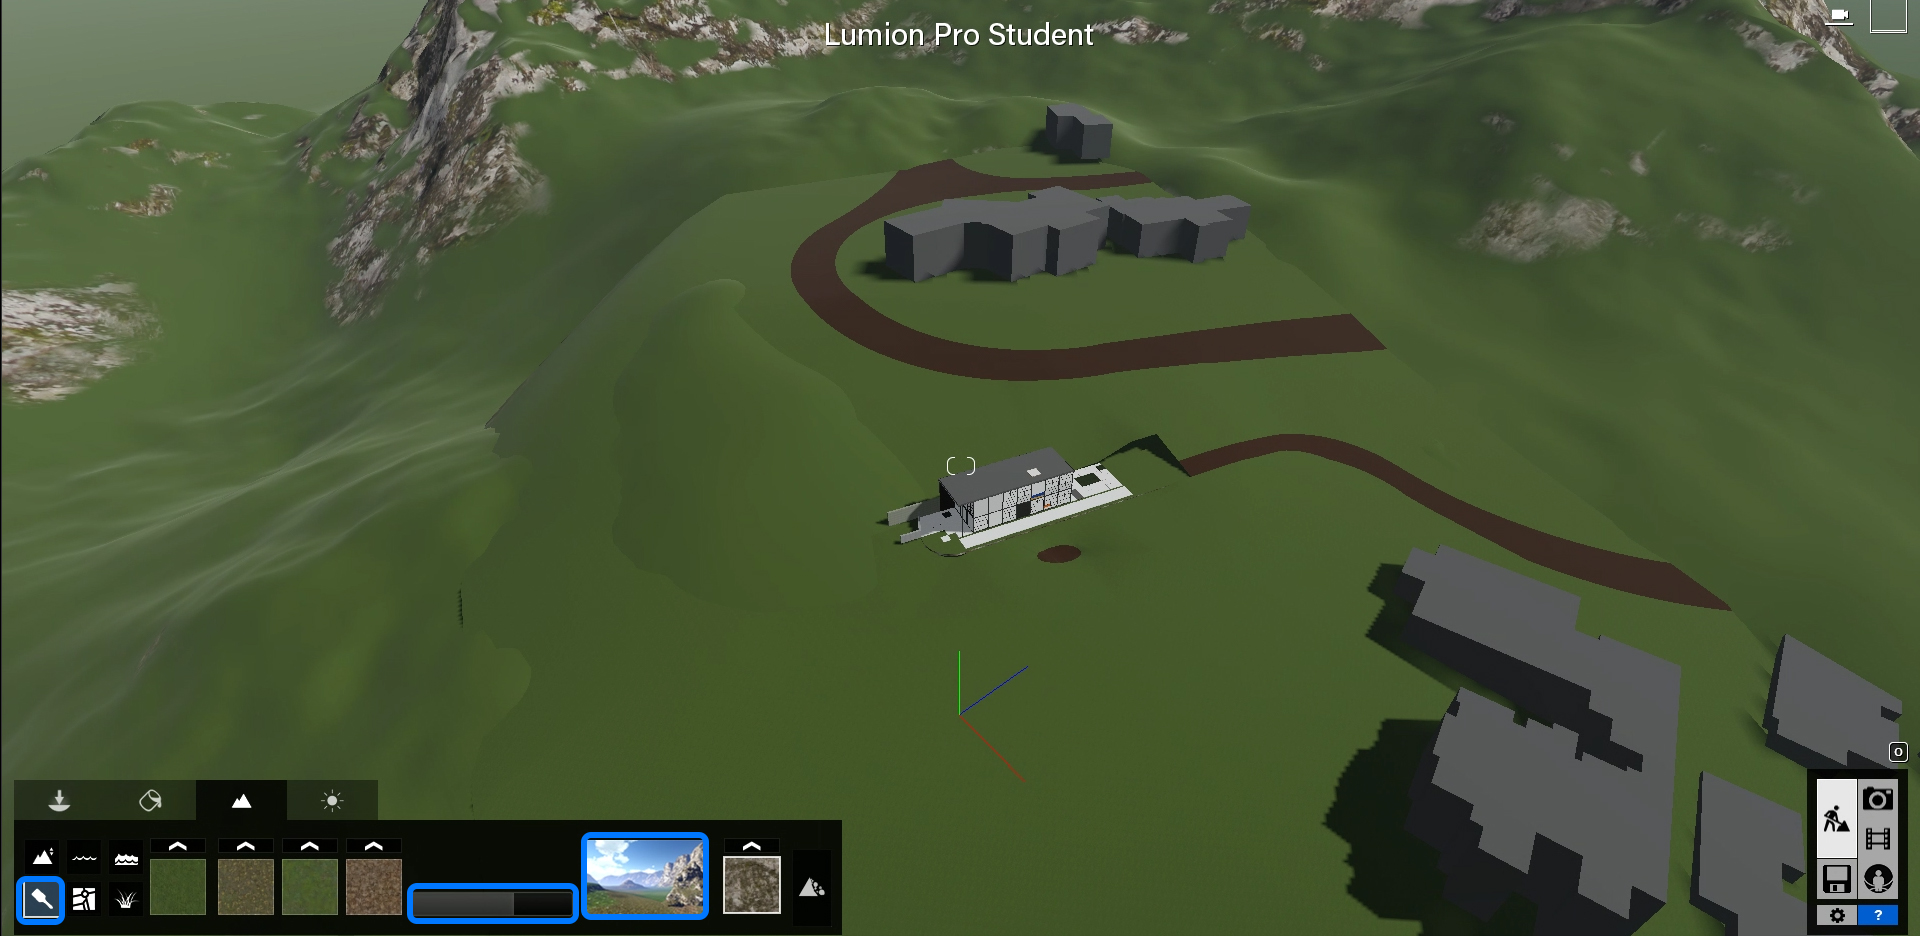
Edit Landscape
Lumion landscape allows you to create terrain height change, add water, add ocean, change landscape types.
- [STEP 01] Adjusting terrain height.
- Click the [Landscape] tab.
- Click [Height] icon.
- Select the size of the circle and the speed of the creation.
- Select [Raise], [Lower], [Flatten], [Jitter], and [Smooth] to modify the shape of terrain.
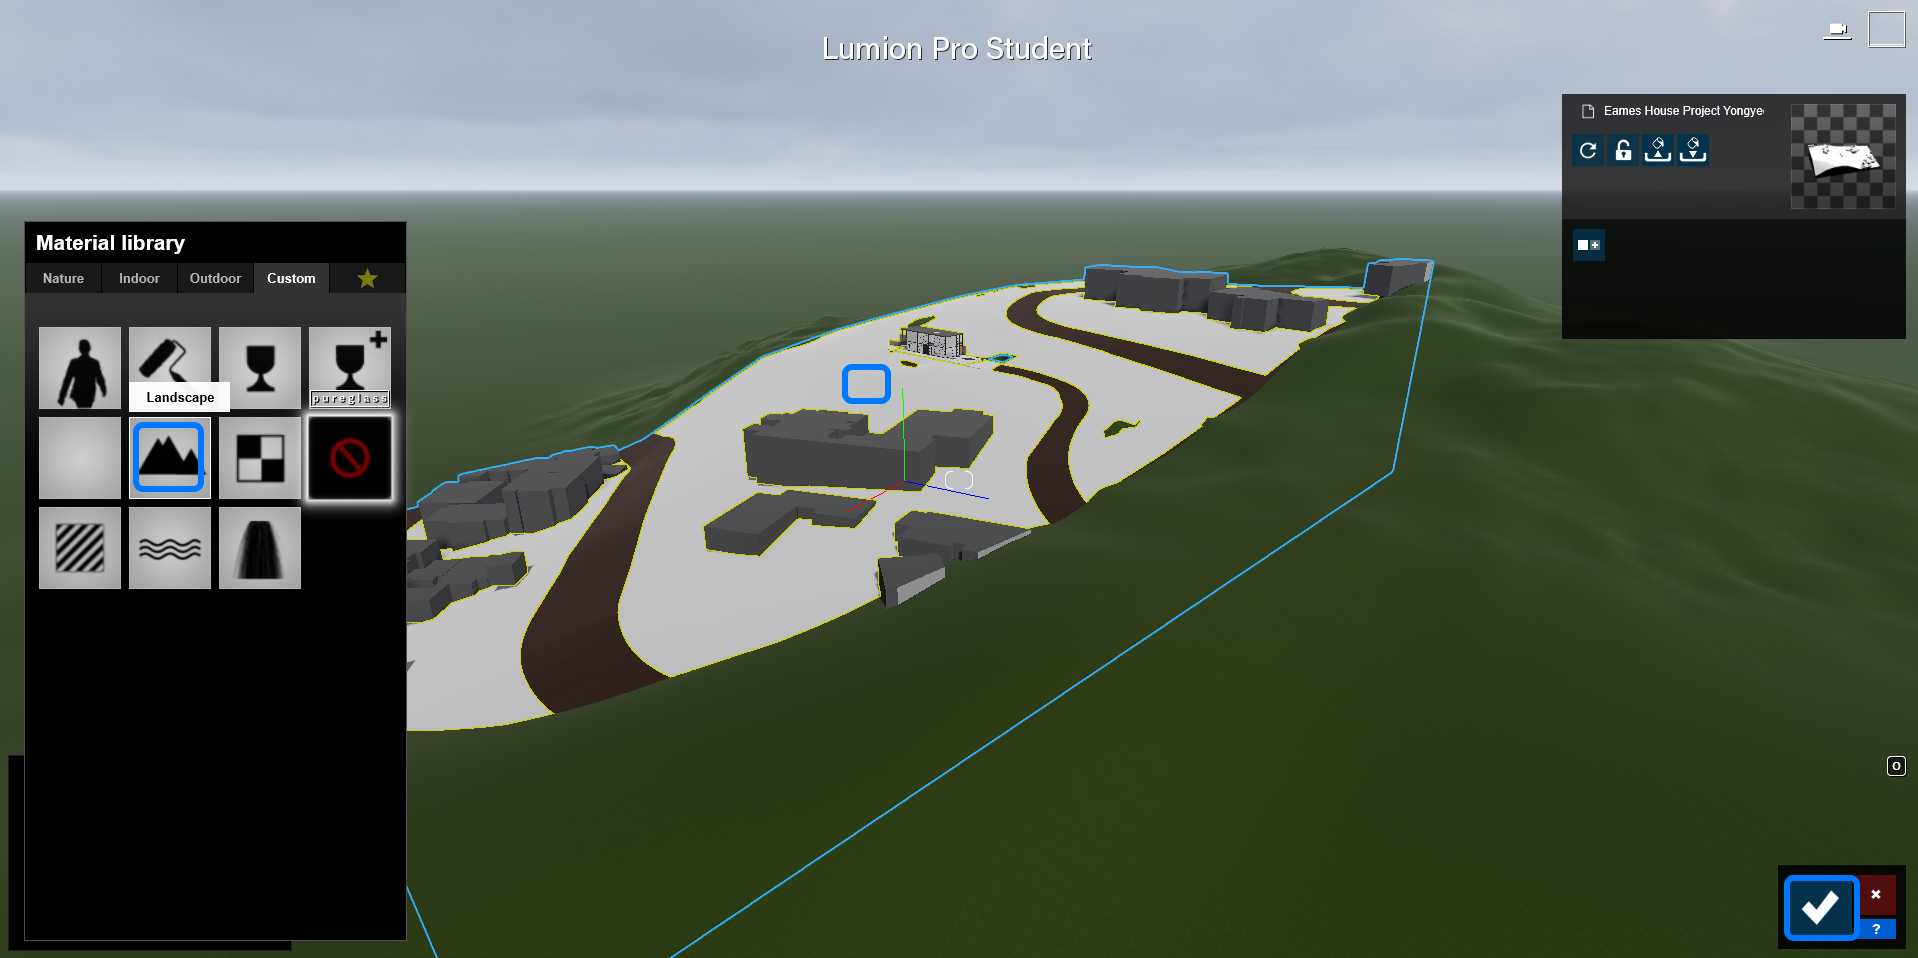
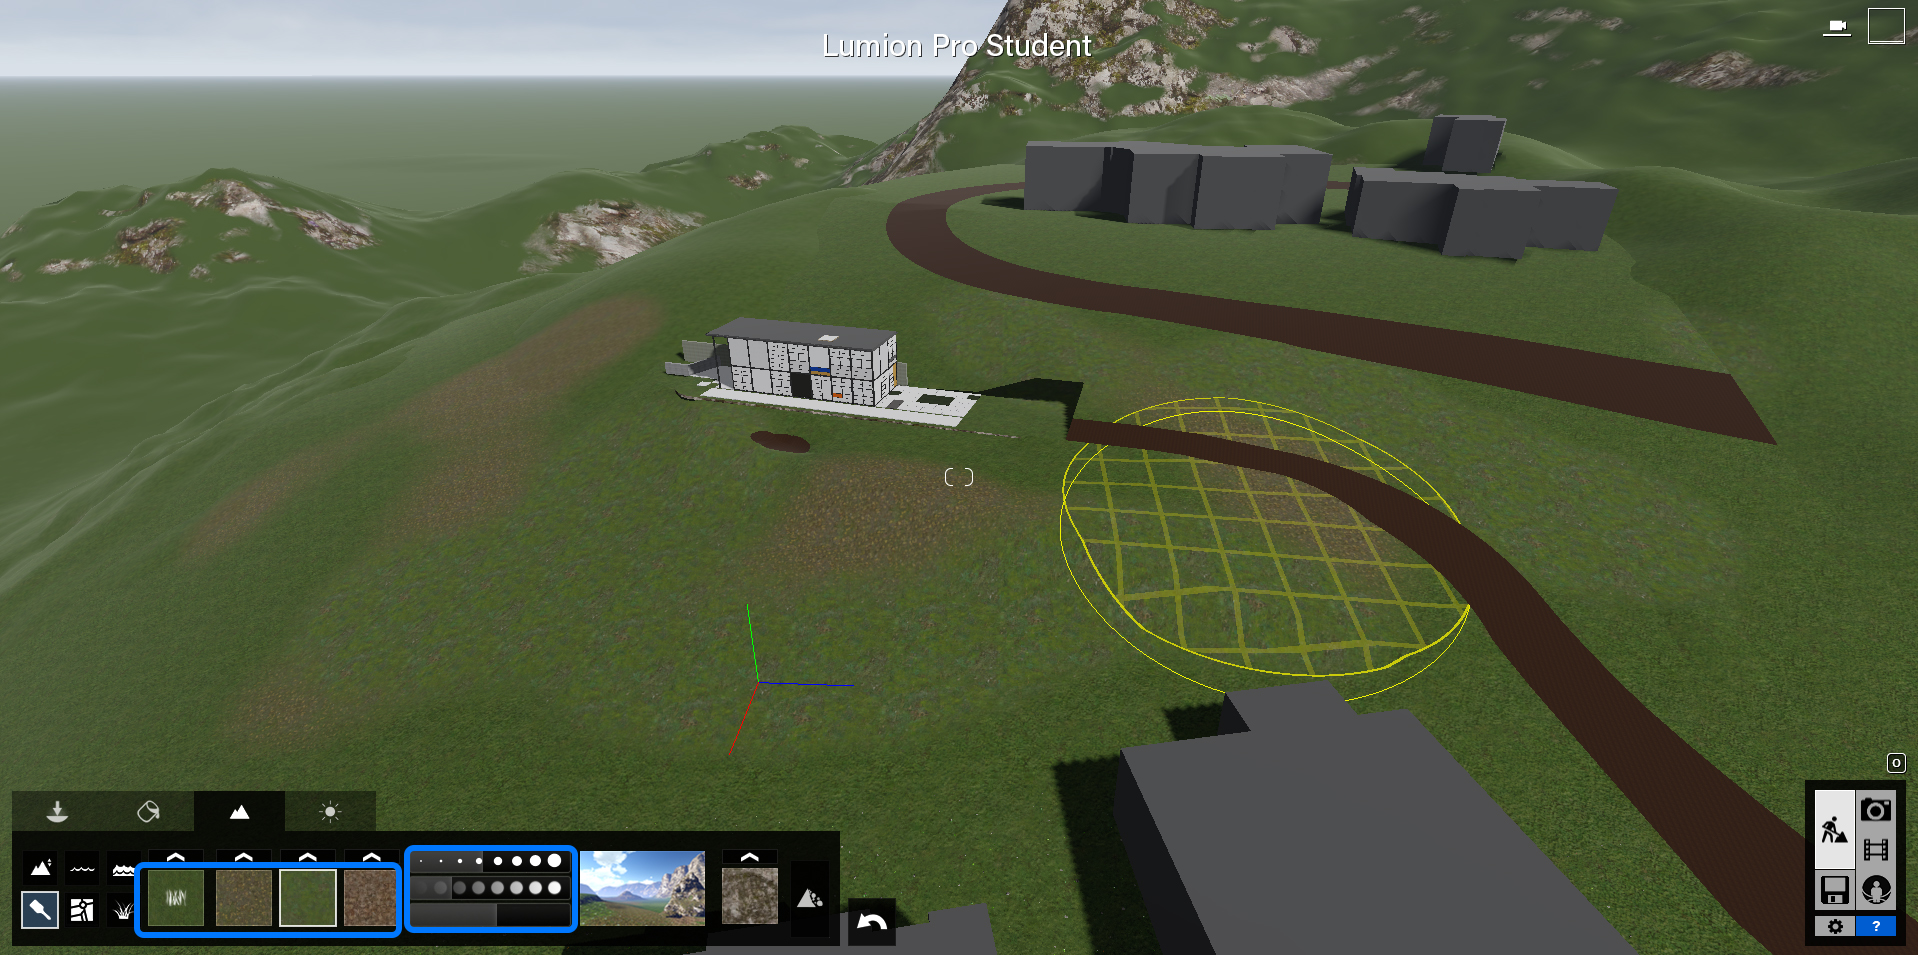
- [STEP 02] To match the landscape texture with your Revit model.
- Click [Paint] tab.
- Hoover over the mouse to select the landscape surface that you want to change.
- Select the [Landscape] icon from [Material library].
- Click the [Check mark] to complete the command.
- [STEP 03] If you want to add water or ocean, click the icons and place them on your surface.
- [STEP 04] To change the landscape texture type.
- Click the [Paint] icon.
- Select the landscape image to change the landscape type. You have 20 options for your landscape type.
- Adjust the bar to change the texture size.
- Select one of the textures and paint on the landscape surface.
- [STEP 05] You can turn on/off landscape (3D) grass option. This function should be activated when you render to save your speed of work.
- Save the file frequently.
(CO2) Add/edit materials
When you import a Revit file, you need to convert the materials to Lumion material. This is a typical process for most standalone rendering software. When you exported, the textures(images) would be created in a separate folder. You can use the texture, you can use textures in your project folder, or you can rely on Lumion preset texture.
In this tutorial, you will learn how to add Lumion texture from the material library and convert the existing material to Lumion material.
Add materials
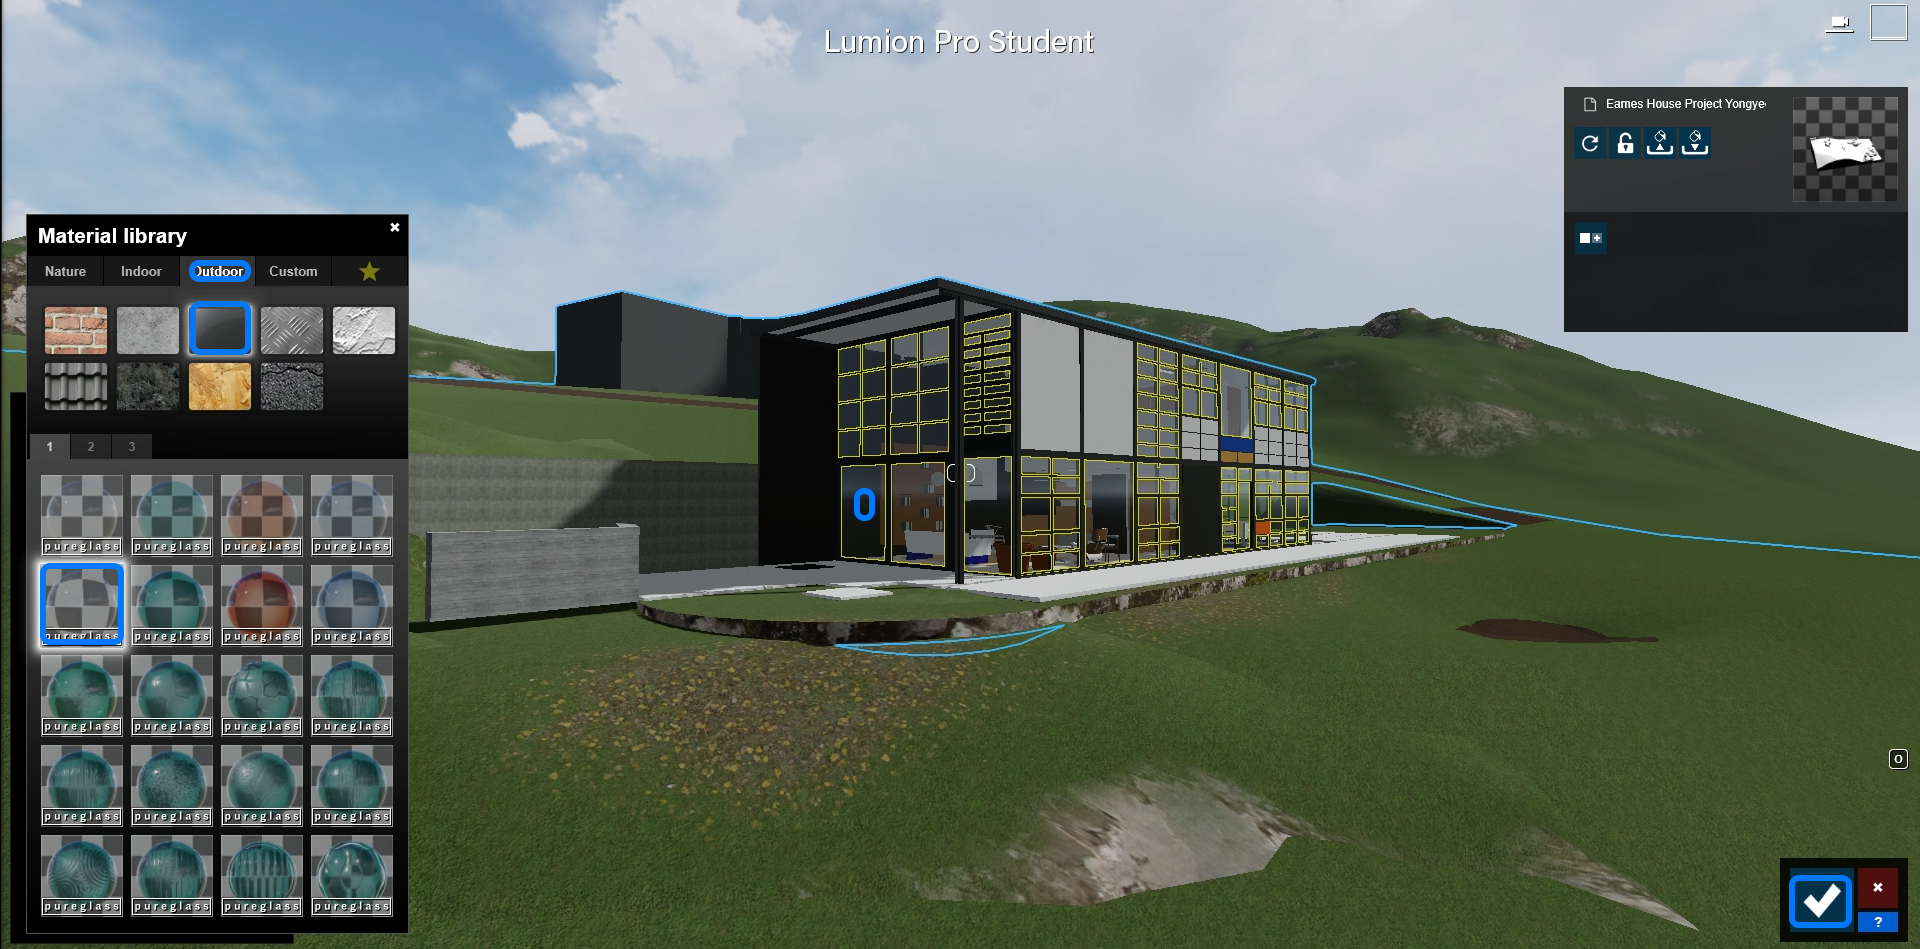
- [STEP 01] Click [Material Editor] tab.
- [STEP 02] Select a model (surface) you want to change (In this tutorial, I choose the curtain wall glass).
- [STEP 03] Select [Outdoor] tab from the [Material library] > Click [Glass] category > Click a type glass from the list. You can find more by navigating the tabs.
- [STEP 04] Once you finished the change, click the [checkmark] on the right bottom corner to complete the command.
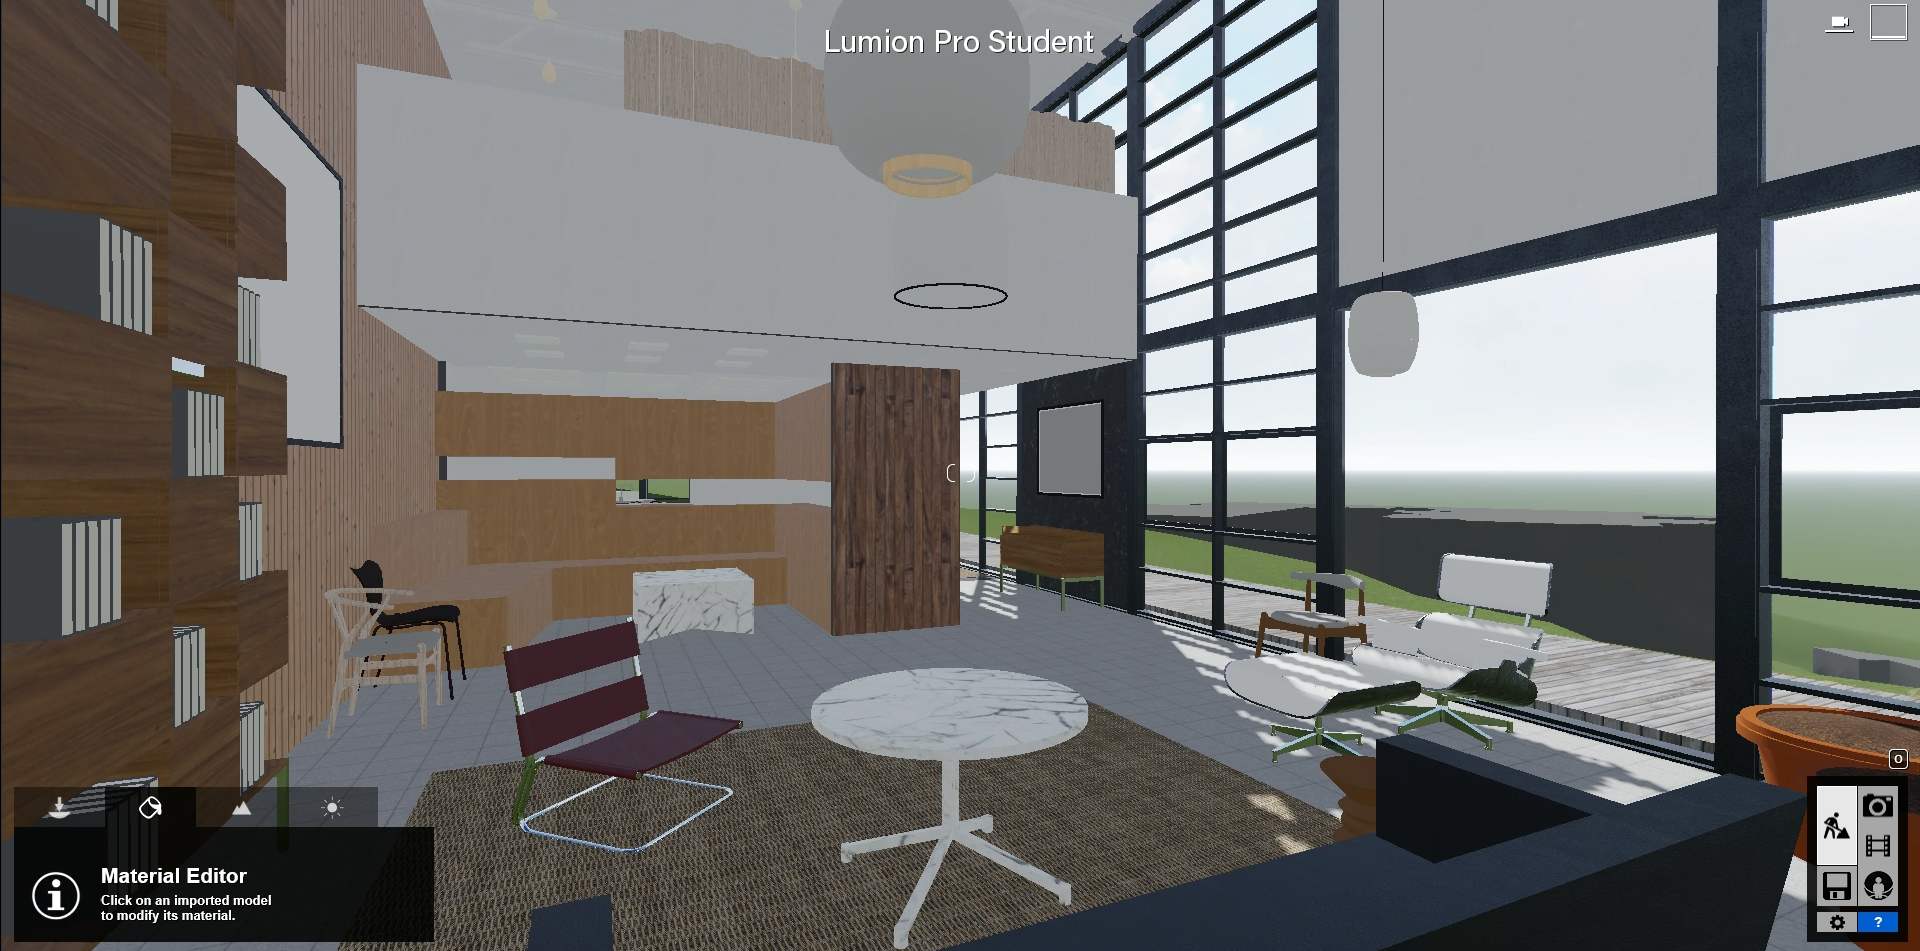
Edit materials
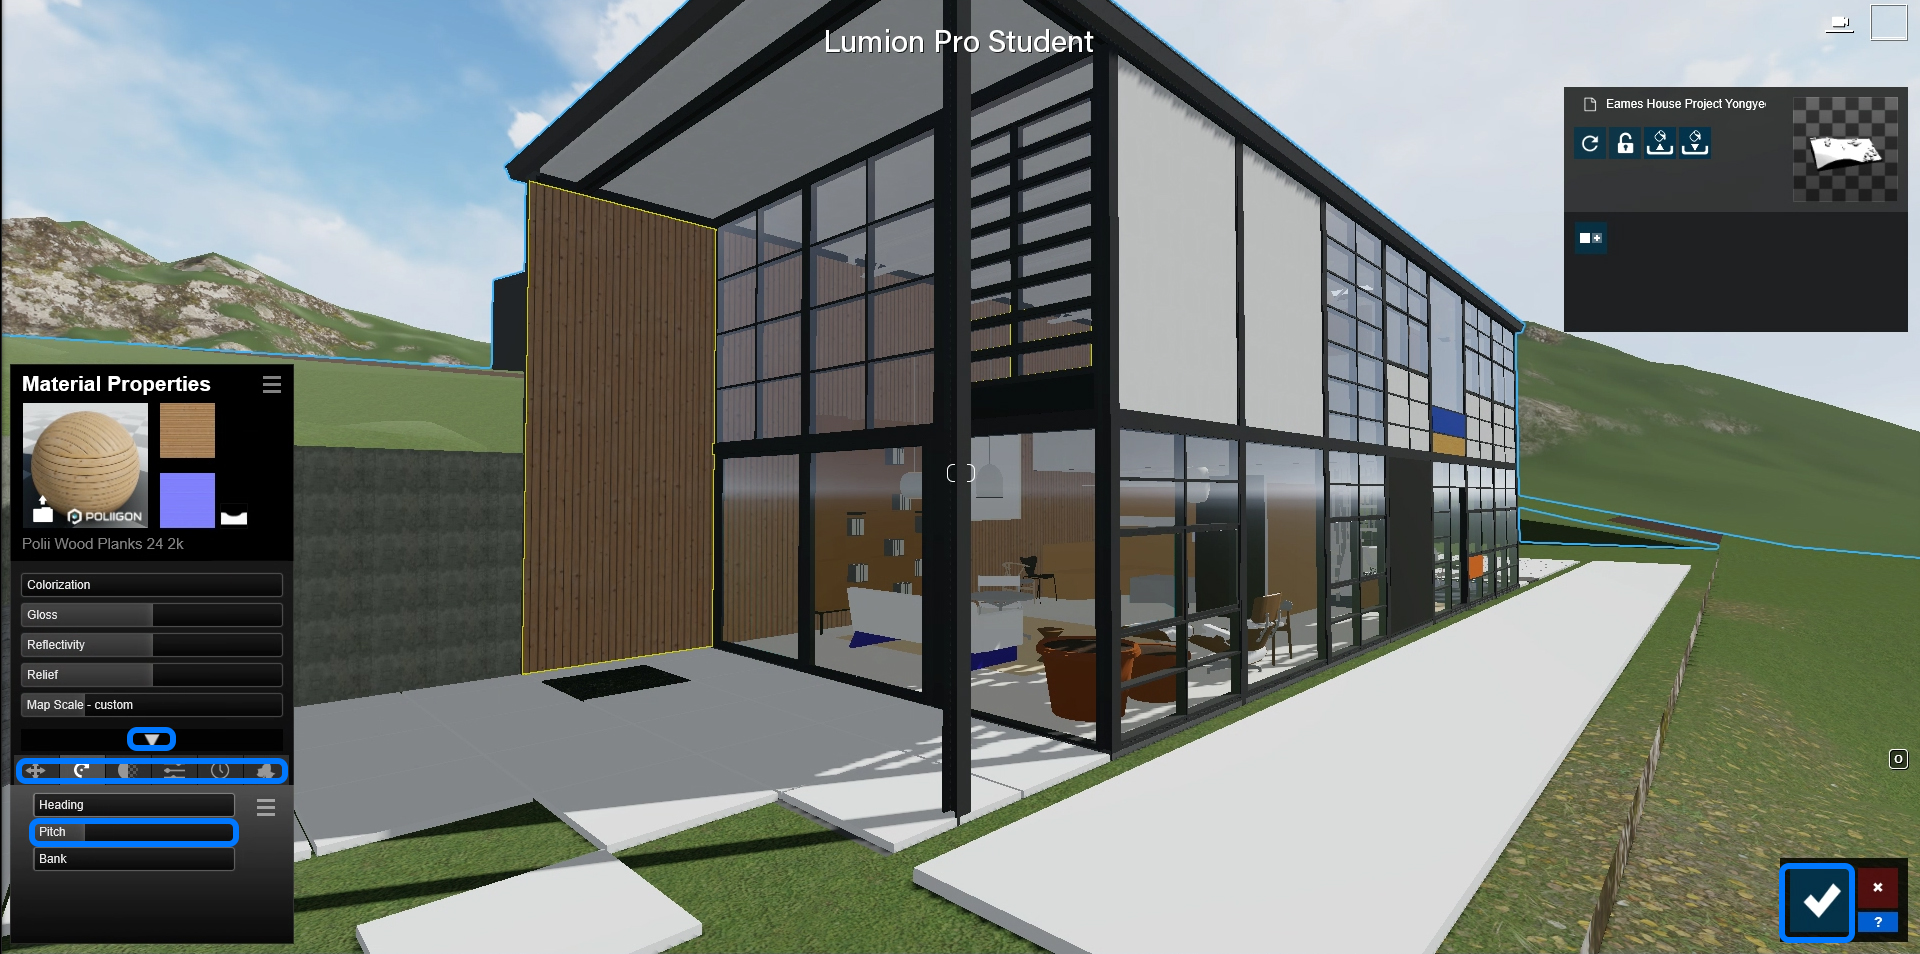
- [STEP 01] Click [Material Editor] tab.
- [STEP 02] Select a model (surface) you want to change (In this tutorial, I choose the wood panel wall).
- [STEP 03] Select [Indoor] tab from the [Material library] > Click [Wood] category > Click a type wood from the list. You can find more by navigating the tabs.
- [STEP 04] Once the material is applied, see the direction of the texture, size of the map, and any changes needed. If you need to edit the material that you apply, double-click to enter [Material Properties].
- [STEP 05] On the [Material Properties] panel, you can change the properties. By clicking the arrow to the bottom, you can edit in advanced mode.
- [STEP 06] Once you finished the change, click the [checkmark] on the right bottom corner to complete the command.
Convert a Revit material to a Lumion material
- [STEP 01] Click [Material Editor] tab.
- [STEP 02] Select a model (surface) you want to change (In this tutorial, I choose the Concert retaining wall).
- [STEP 03] Select [Standard] from [Custom] tab on the [Material library].
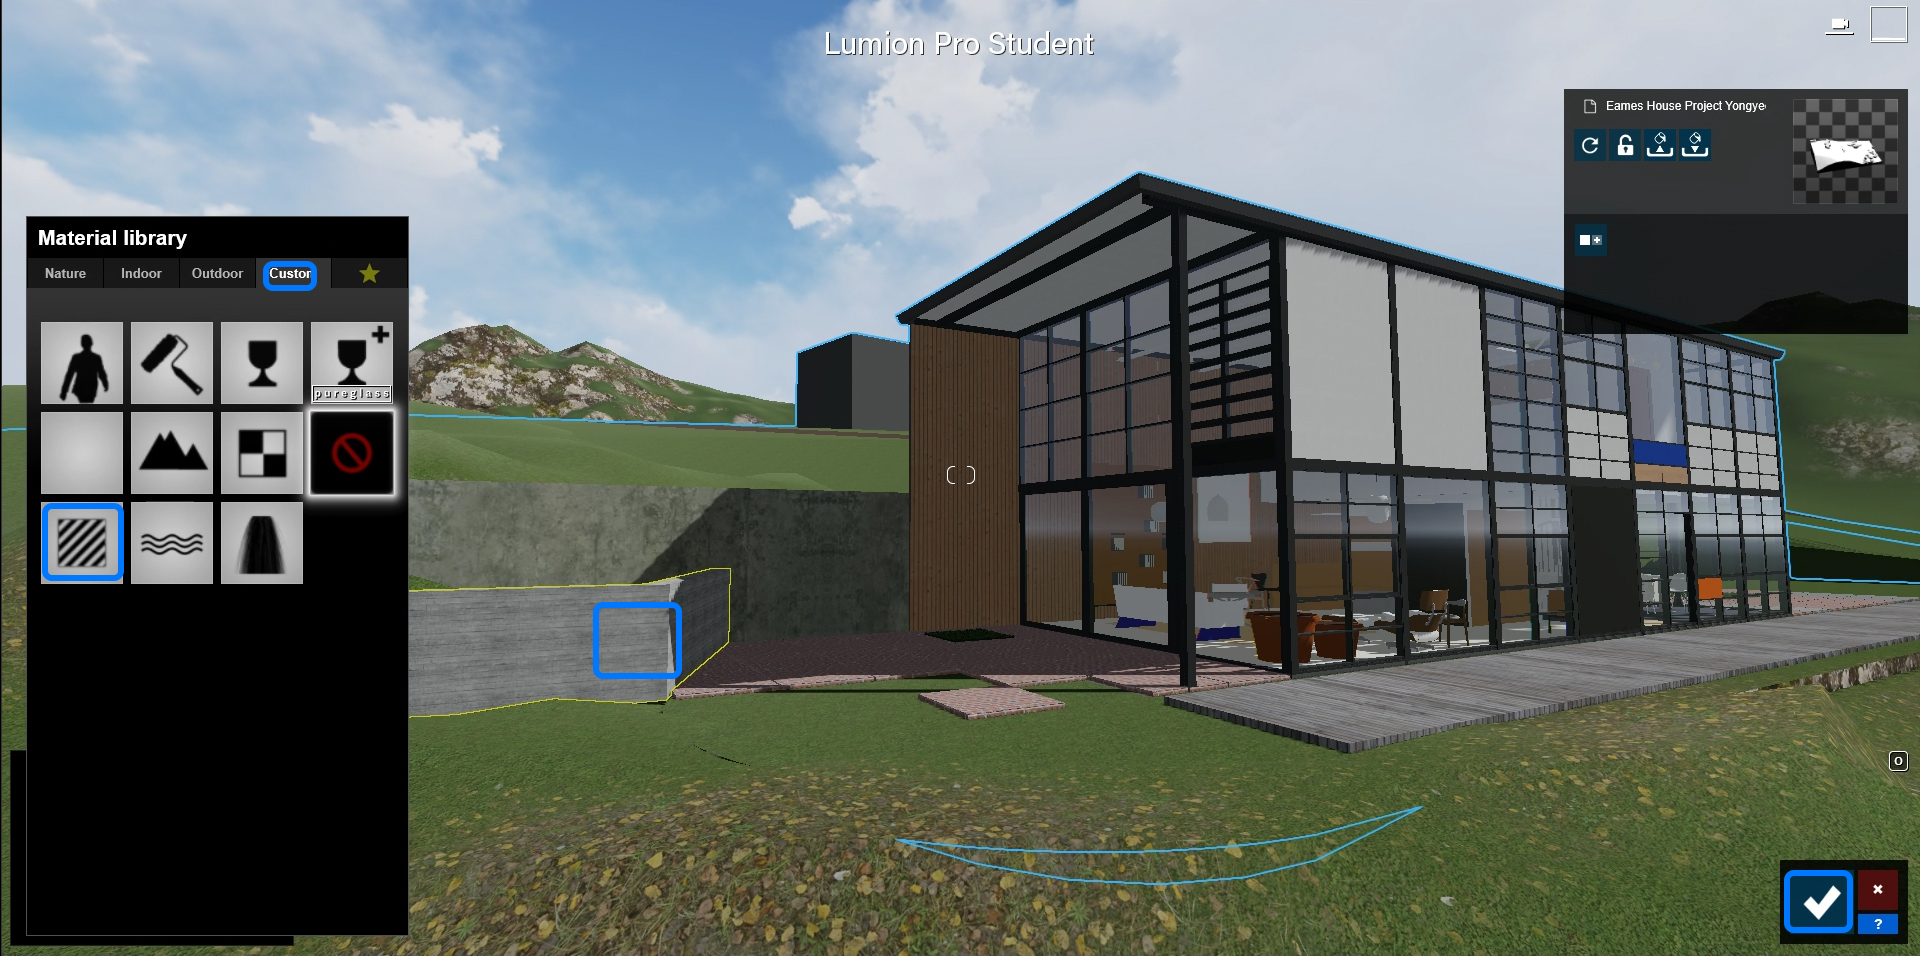
- [STEP 04] On the [Material Properties] panel, you can change the properties. By clicking the arrow to the bottom, you can edit in advanced mode.
- [STEP 06] Once you finished the change, click the [checkmark] on the right bottom corner to complete the command.
Please use these three material mapping strategies to apply all material on the exterior and interior.
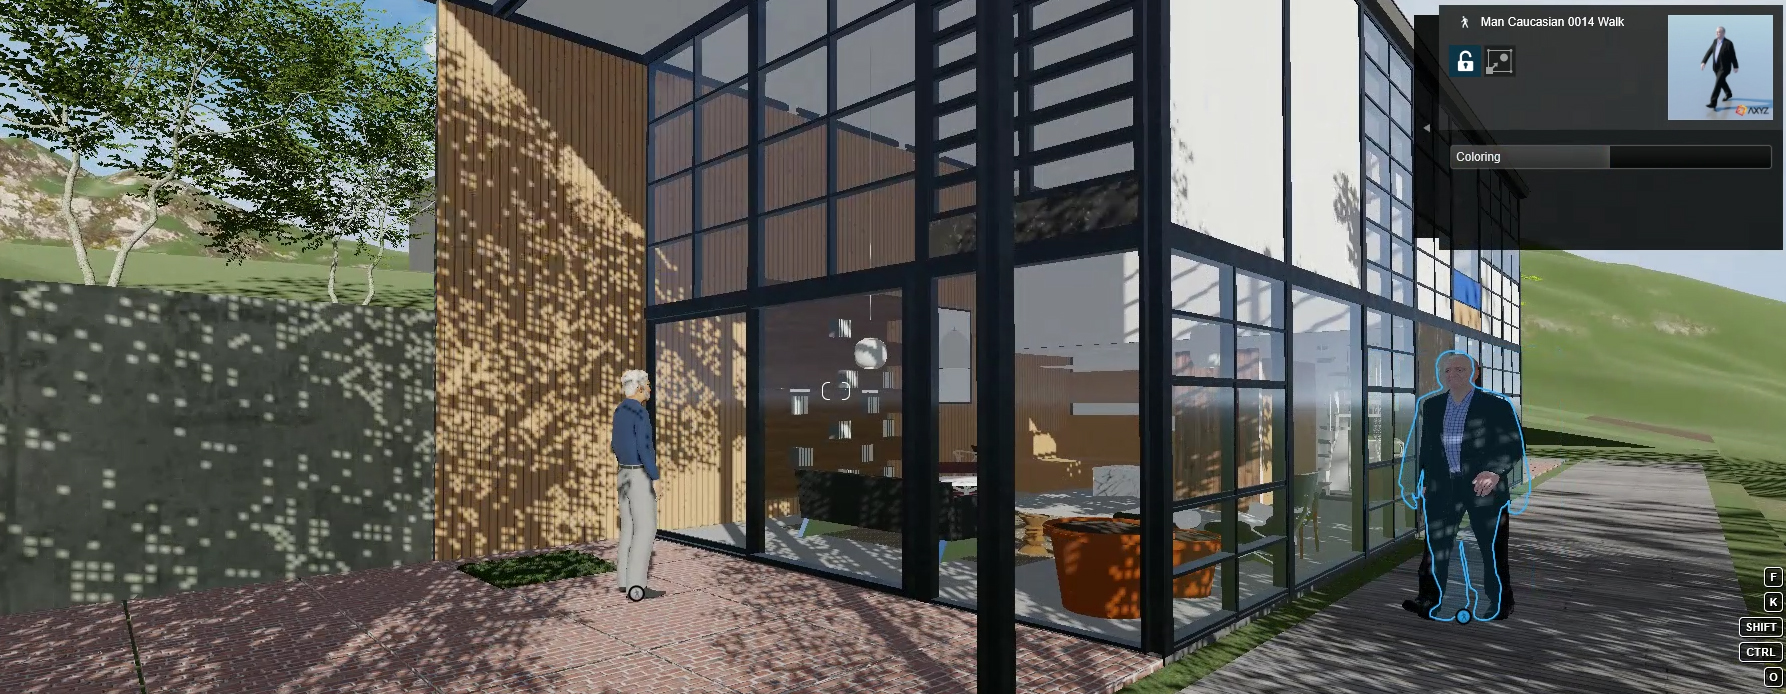
(CO3) Add objects
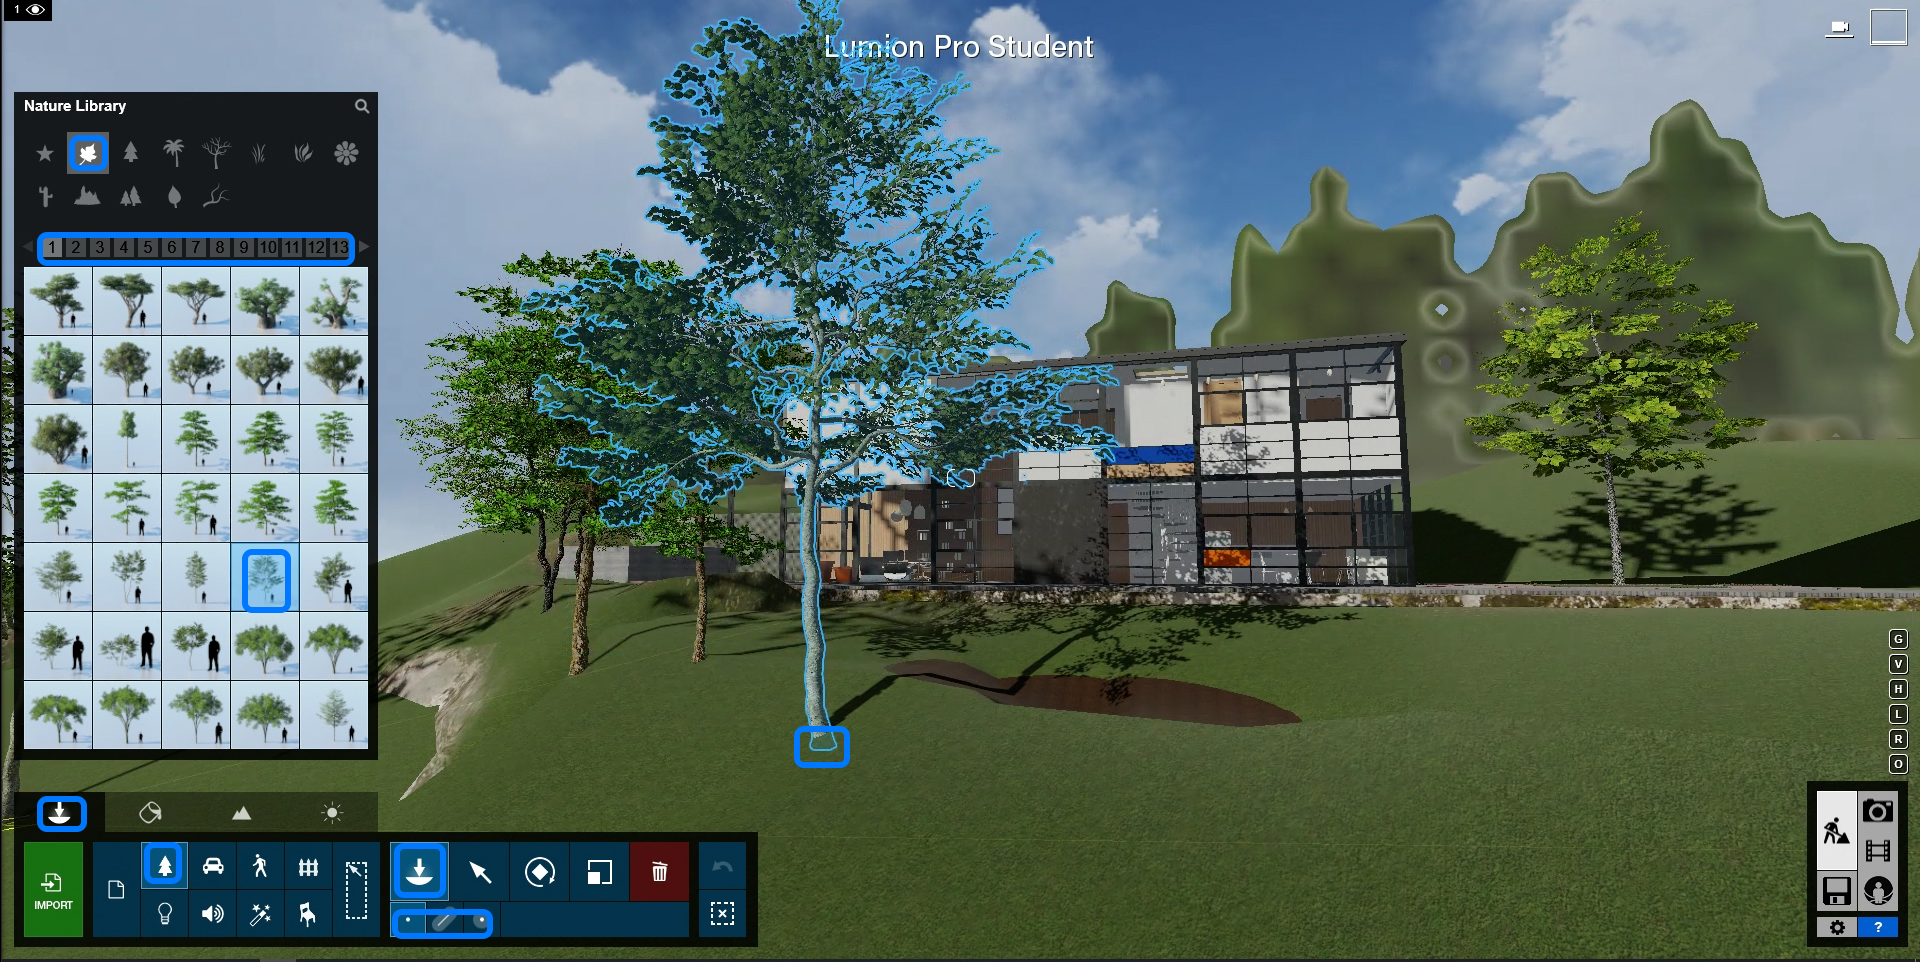
Add objects
Lumion provides lots of objects for your rendering. Nature, Transports, People and animals, Outdoor objects, Indoor objects. Please navigate the object library and use it for your rendering.
- [STEP 01] Click [Objects] tab.
- [STEP 02] Select a category then the library will open > Select a sub-category > Select a page > Select an object to place.
- [STEP 03] Place on the top of the model.
There are three methods of placement [Single placement] [Mass placement], and [Cluster placement]. Please practice these placement methods in this exercise.
- [STEP 04] If you want to move or rotate the object that you placed, select the object by holding the [Ctrl] key and select the object key > Click one of the options (Rotate, Move, or Delete) on the menu > Adjust the value or drag the position.
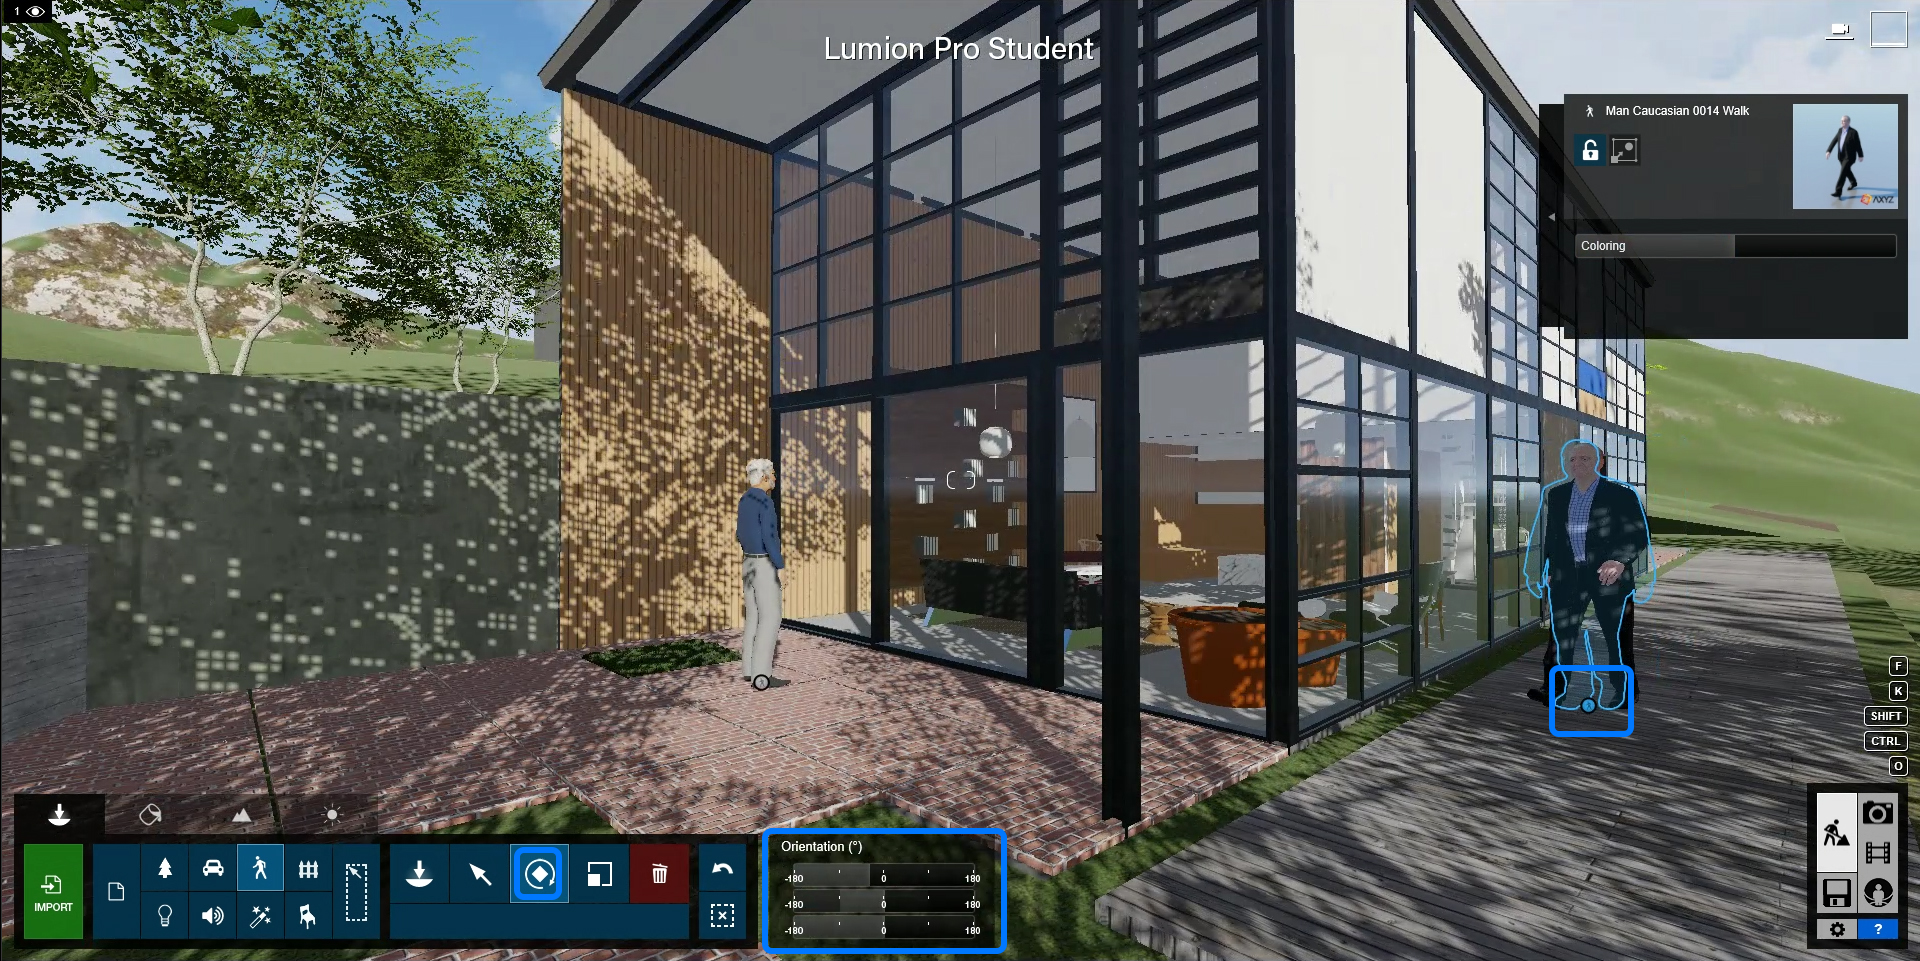
- [STEP 05] Once you select the object, you can adjust the properties, such as coloring, transparency, and more if the object allows.
Once your object placements are done, please save the file.
