
Part Three. Advanced Modeling
Chapter 13. Revit – Sketchup models
Upon completing this session, students will be able to:
- (CO 1) Create an advanced Revit Site model (Surroundings)
- (CO 2) Import Sketchup models into a Revit project with material changes
- (CO 3) Import Sketchup models into a Revit project without the complex lines using 3Ds Max
 Session Highlights
At the end of the session, students will be able to create the graphics below.
 Lecture Contents
(CO1) Create an advanced Revit Site model (Surroundings)
Examples of how I create architectural surroundings/backgrounds
[METHOD 1] For a rendered scene.
- [STEP 1] I usually create a site model in a smaller boundary like just the next buildings and a few trees.
- [STEP 2] Then set perspective views that have similar angles with site photographs.
- [STEP 3] After the final render of the perspective views, photoshop the views with the photographs.
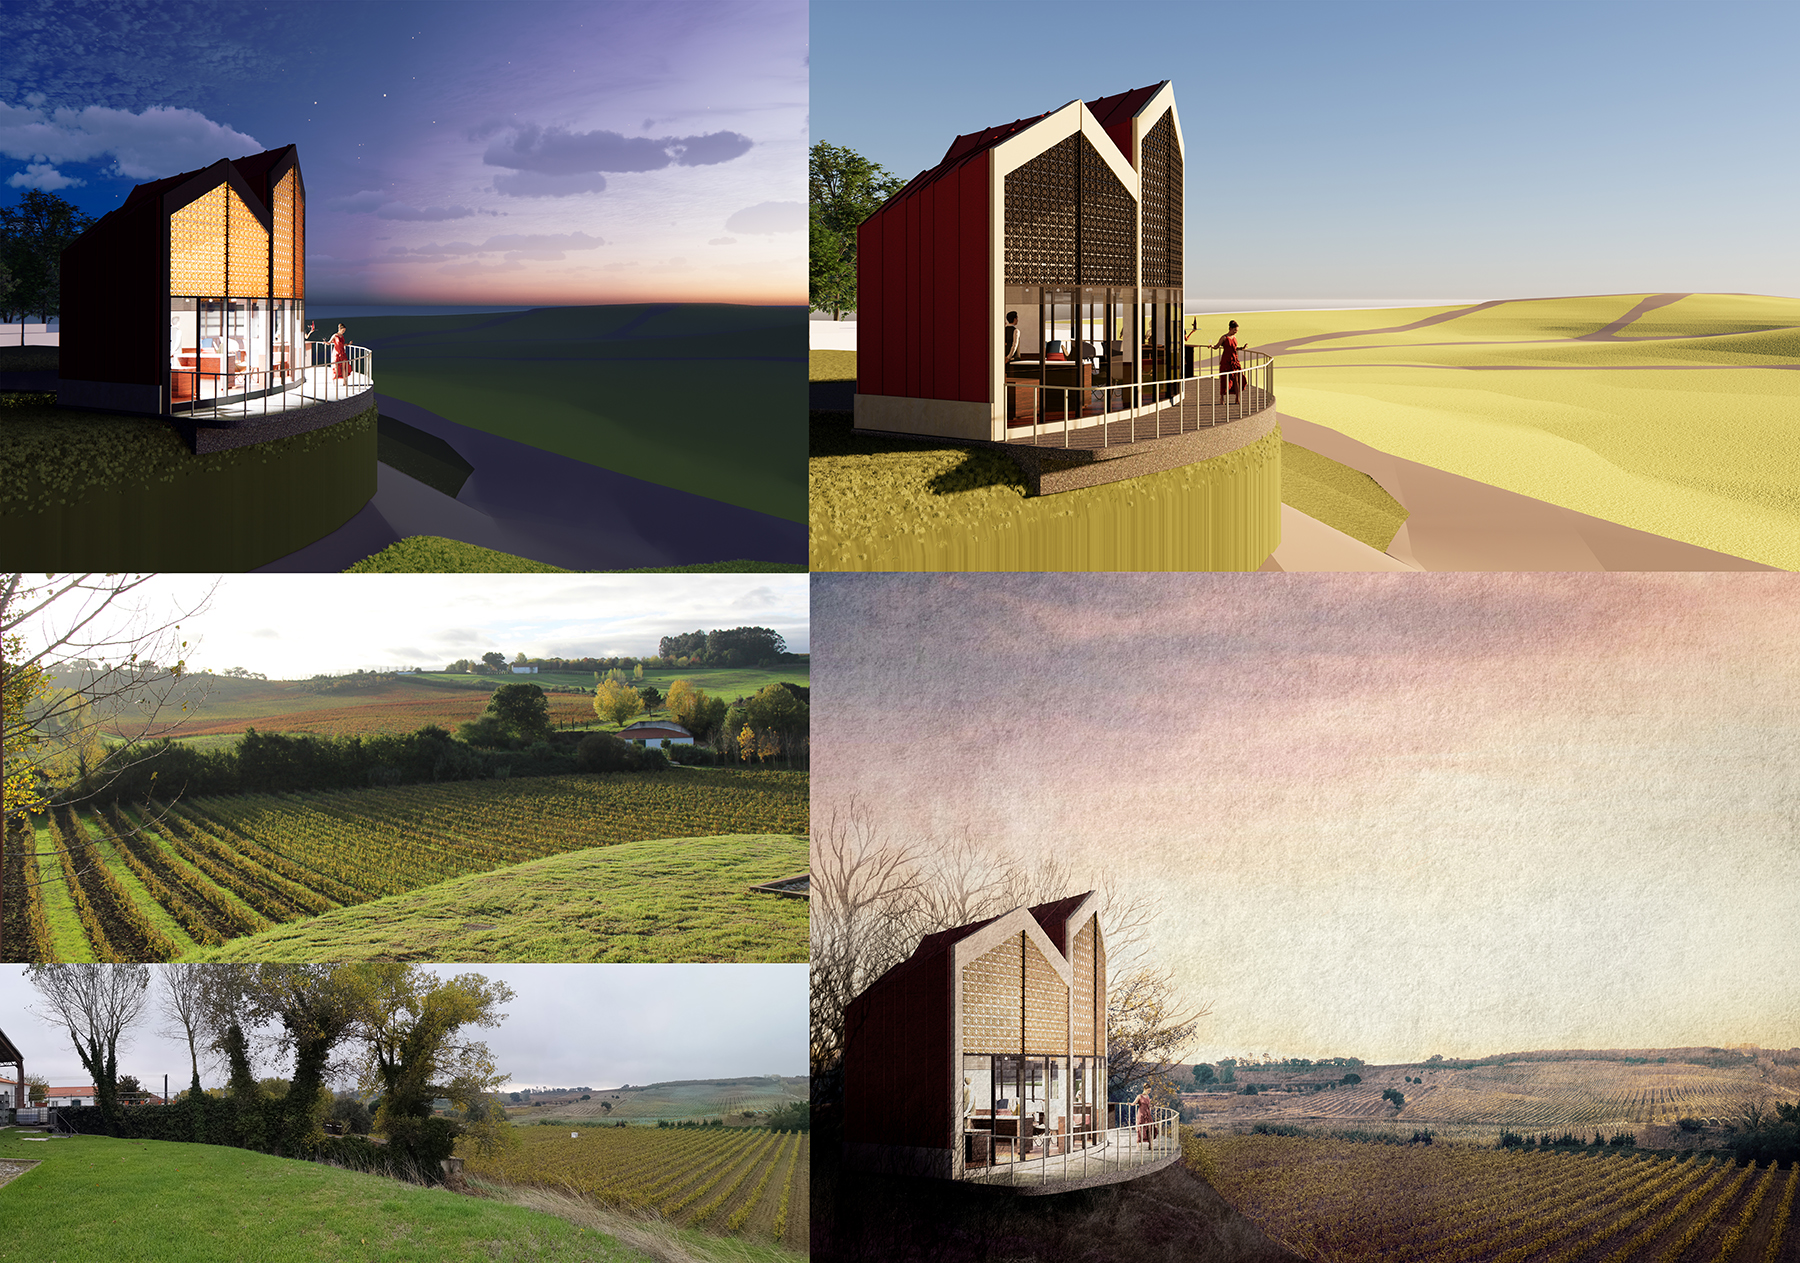
image credit: Bee Breeders (bottom-left) 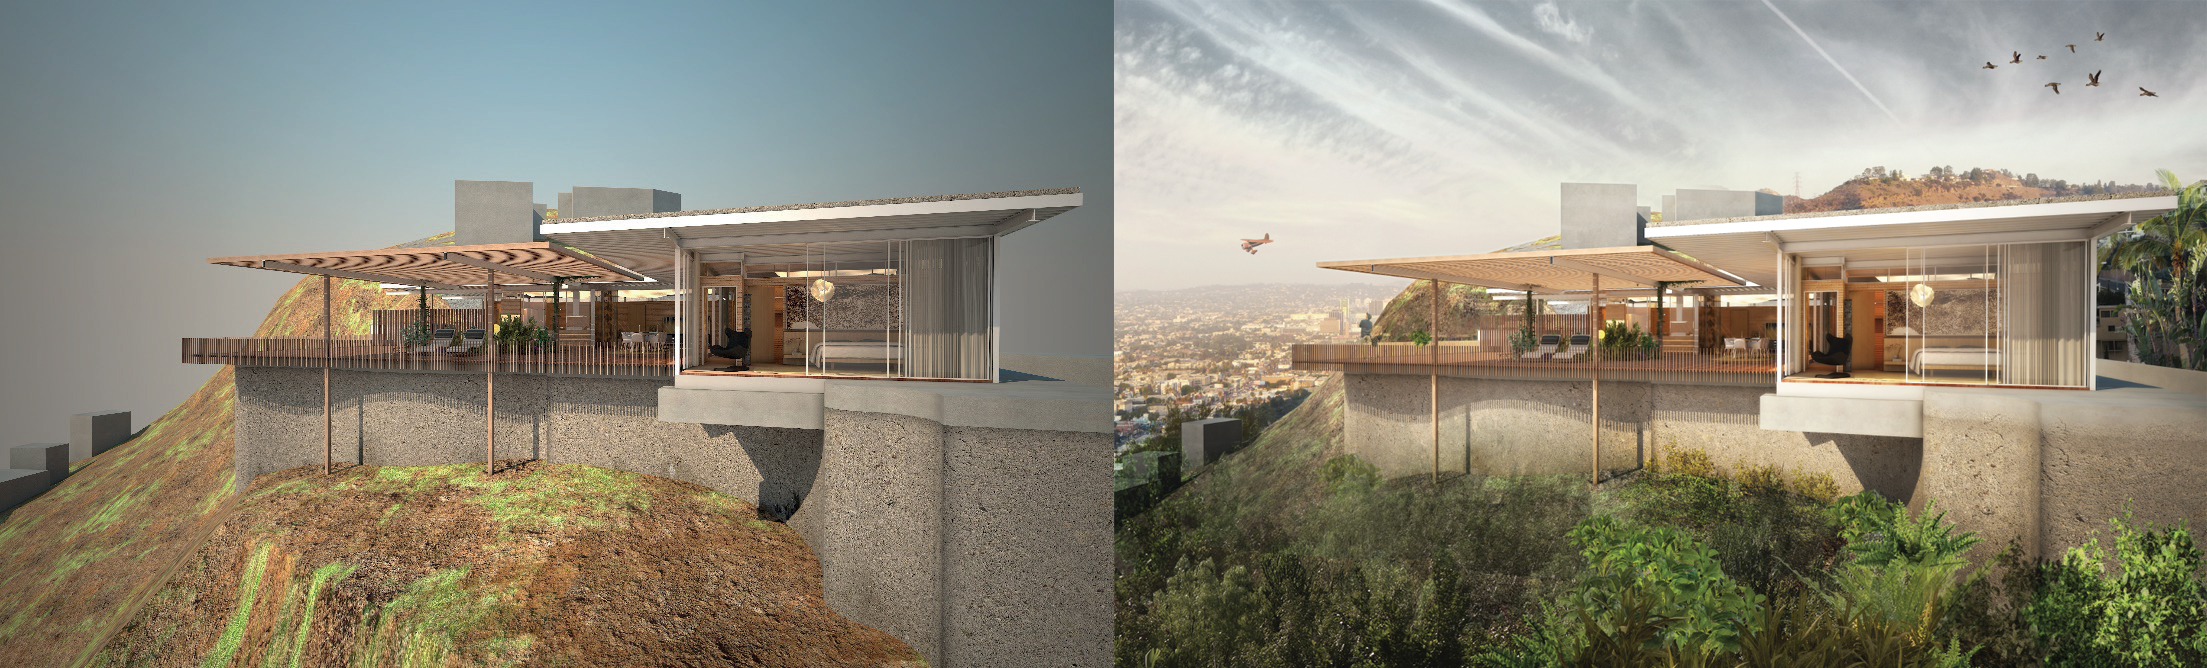
[METHOD 2] For an animation a VR, and a panorama view.
- [STEP 1] I build a detailed site model including topo, road, trees, other buildings in Revit.
- [STEP 2] After the final render of the perspective views, photoshop the views with the photographs.

Various site modeling techniques in Revit
In Revit
- [STEP 1] Create [toposurface] using CADMAPPER model (dxf). Please refer to the video link.
- [STEP 2] If you need detailed surrounding buildings, you must build the model by using massing (apply a material) or a wall and roof. If you don’t need detailed surrounding buildings, you can use the model from CADMAPPER. You can add material on [Object Styles] from the [Manage] tab. You can find the CAD layers from the [Imported Objects] tab in [Object Styles].
- [STEP 3] Draw Building Pad for your building area to make the site flat. If your site needs, you need to add/adjust the [toposurface].
- [STEP 4] Add [Property Line] if you know.
- [STEP 5] Use [Split Surface] to crop the [toposurface] and/or add different materials on the surfaces.
- [STEP 6] Use [Subregion] to divide the surface, usually, this tool is used for roads.
- [STEP 7] Use [Site Component] to add trees and other street elements. But I prefer to use [Component] from [Enscape library].
In Sketchup
(Based on the author’s practice experience, many firms are still using Sketchup for their design including site model, building models)
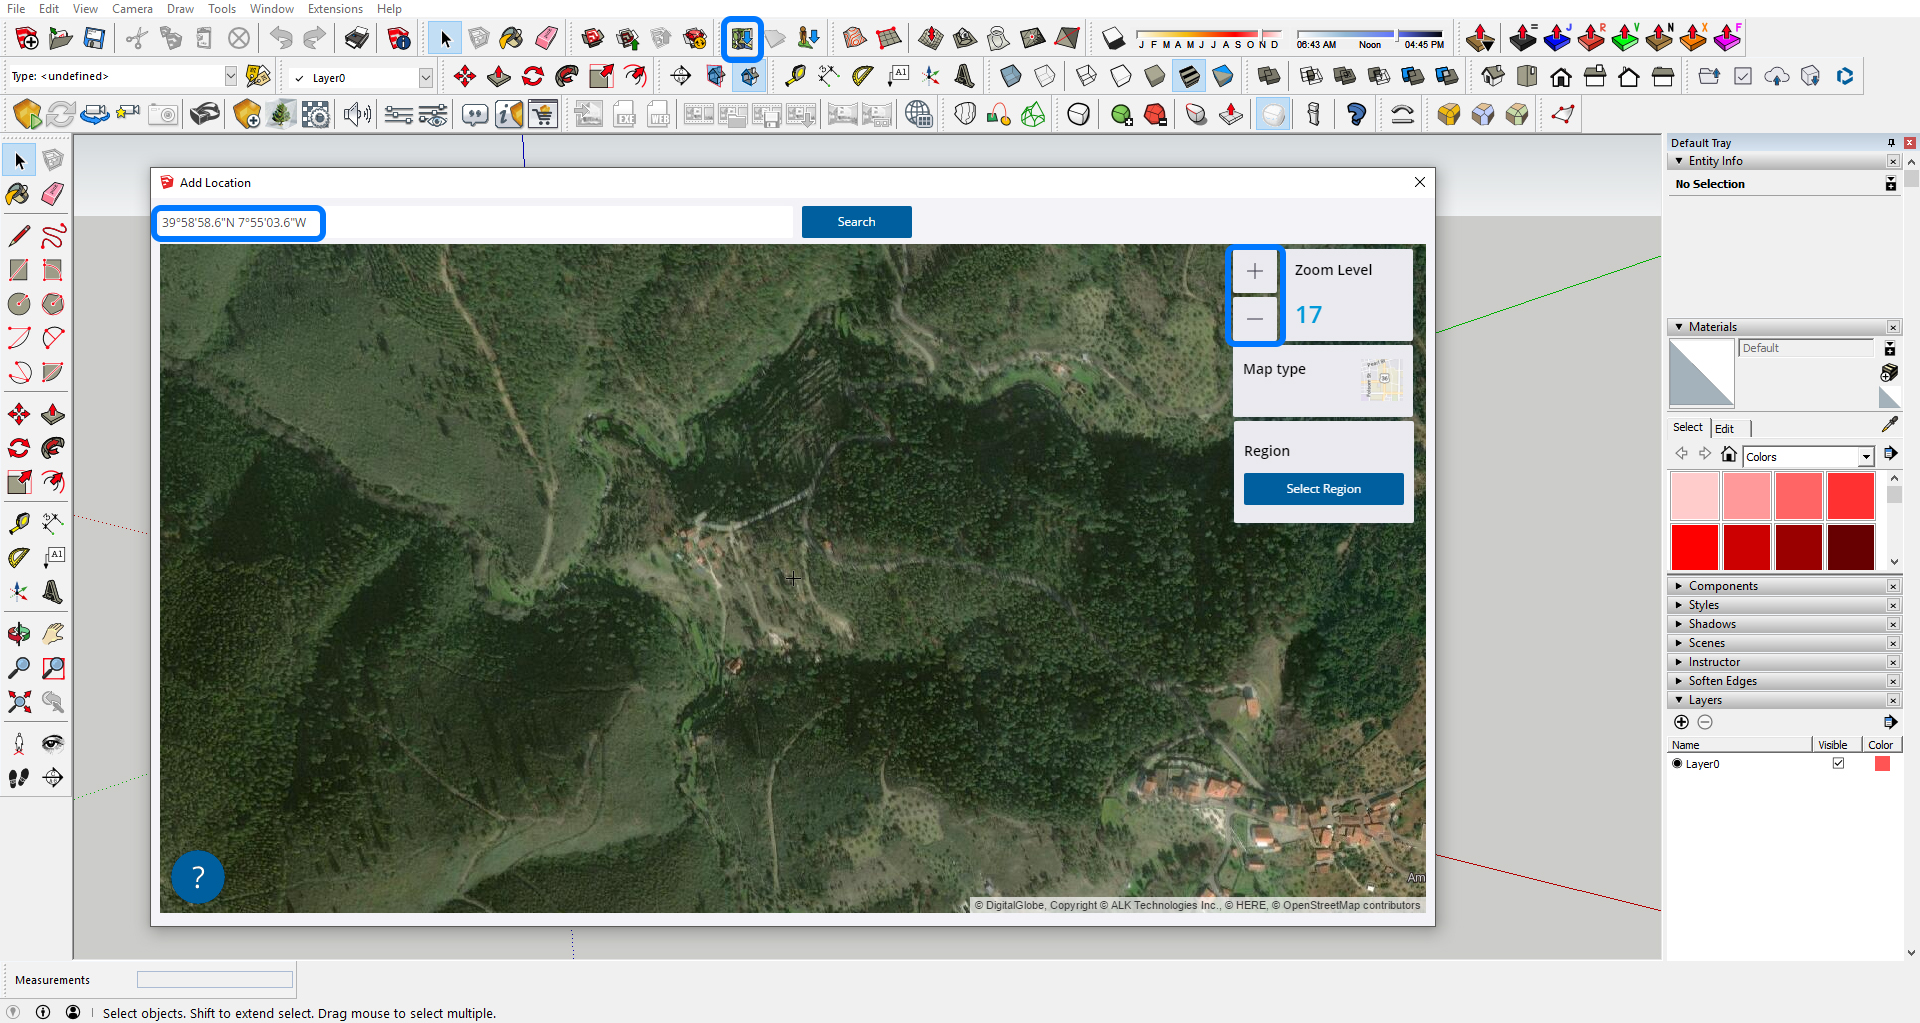
[OPT 1] Geolocation (Accurate GIS information, but not detailed model).
- [STEP 1] Open Skechup application > Click [Add Location] > Add [Address] >Zoom in or out for a desire size of map.
- [STEP 2] Click [Region] > Change the four corners of the rectangle > Click [Import].
- [STEP 3] Open [Layer] panel > hide [Location snapshot] layer and show [Location Terrain].
[OPT 2] Use the 3D model from CADMAPPER (only a certain size of the map is free).
- Visit [Cadmapper] > Sign in > Enter [Address] and find the site > Download in [Sketchup] format > Open the model (Make sure this model is in Metric system).
[OPT 3] Use the SANDBOX tool (Need GIS information for the modeling, but you can create a detailed model).
(CO2) Import Sketchup models in Revit project with material changes
Although many manufacturers provide Revit Family and Revit also provides numerous libraries, designers always seek new models and objects for their design and renderings. Sketchup 3D Warehouse provides a great library for designers and manufacturers. I added three Video tutorials to import the Sketchup model to Revit Family for your reference. You may try.
- Sketchup Model to Revit. Please, watch this tutorial video for importing SketchUp files into Revit.
- Sketchup Model to Revit – Material changes. Please, watch this tutorial video for converting SketchUp models into Revit (with Materials).
Sketchup model to Revit with updating material changes
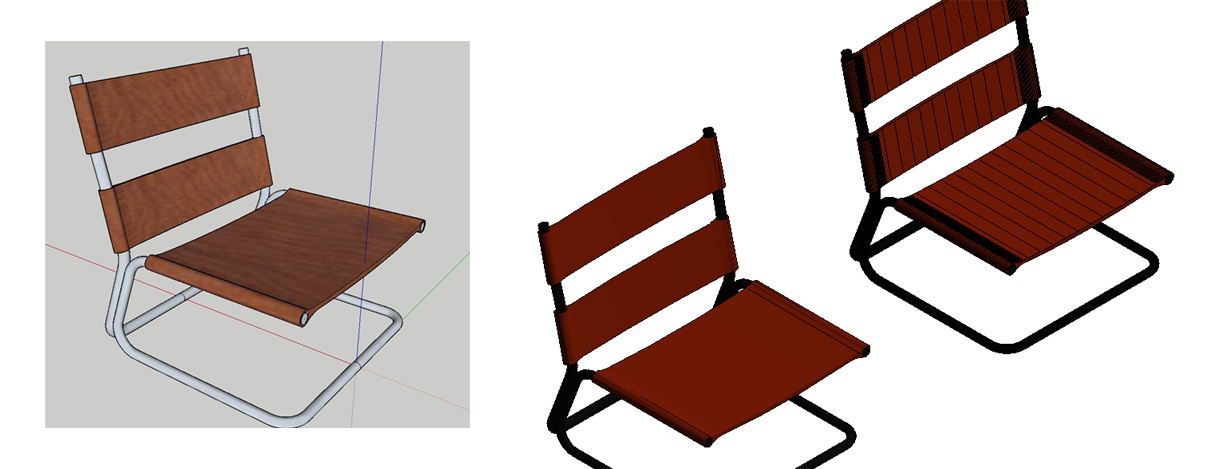
- [STEP 1] Sketchup Model to DXF file.
- Open the Sketchup model in Sketchup, or download a furniture model from a 3D warehouse. In this process, you may need Sketchup Pro.
- Create layers by material. If you have 3 materials, create 3 layers with unique names (e.g. 000_Chair_sk_seat_01, 000_Chair_sk_leg_01, 000_Chair_sk_base_01).
- Explode all models until nothing is to be exploded.
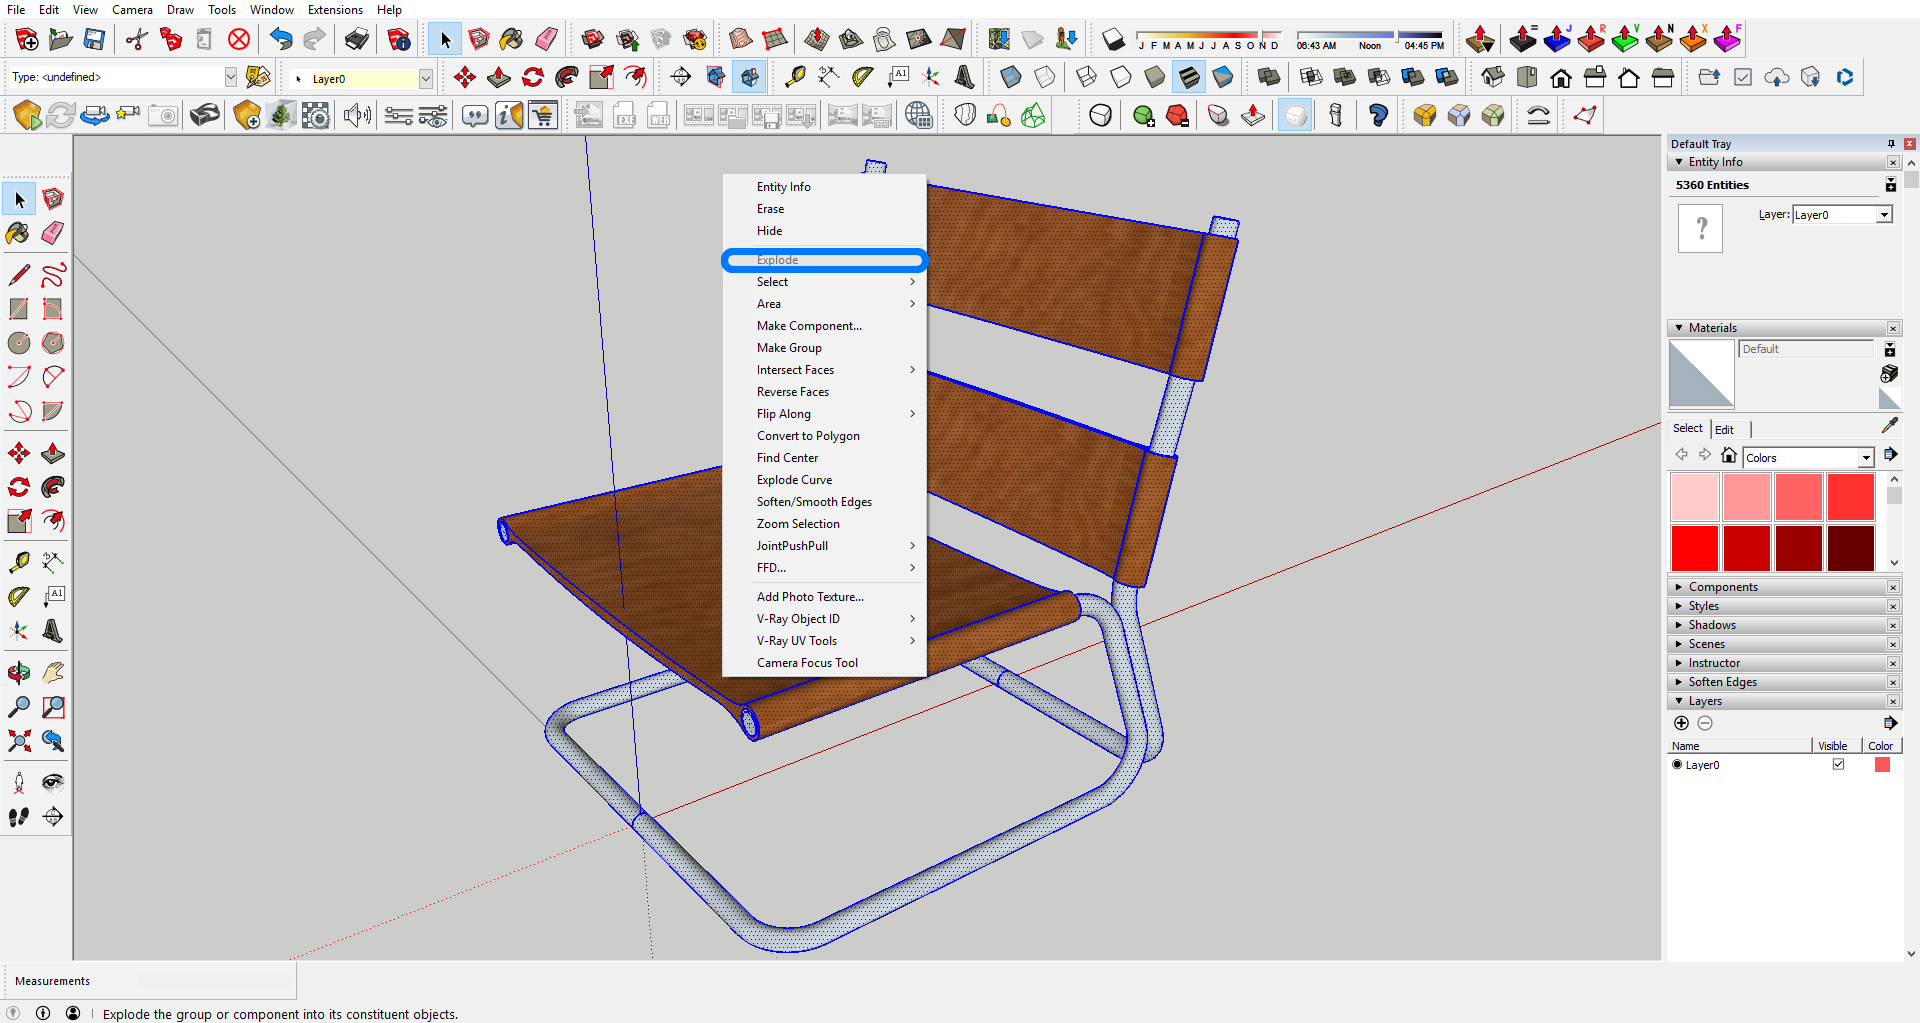
- Select one material > Mouse right click and Select > All with the same material.
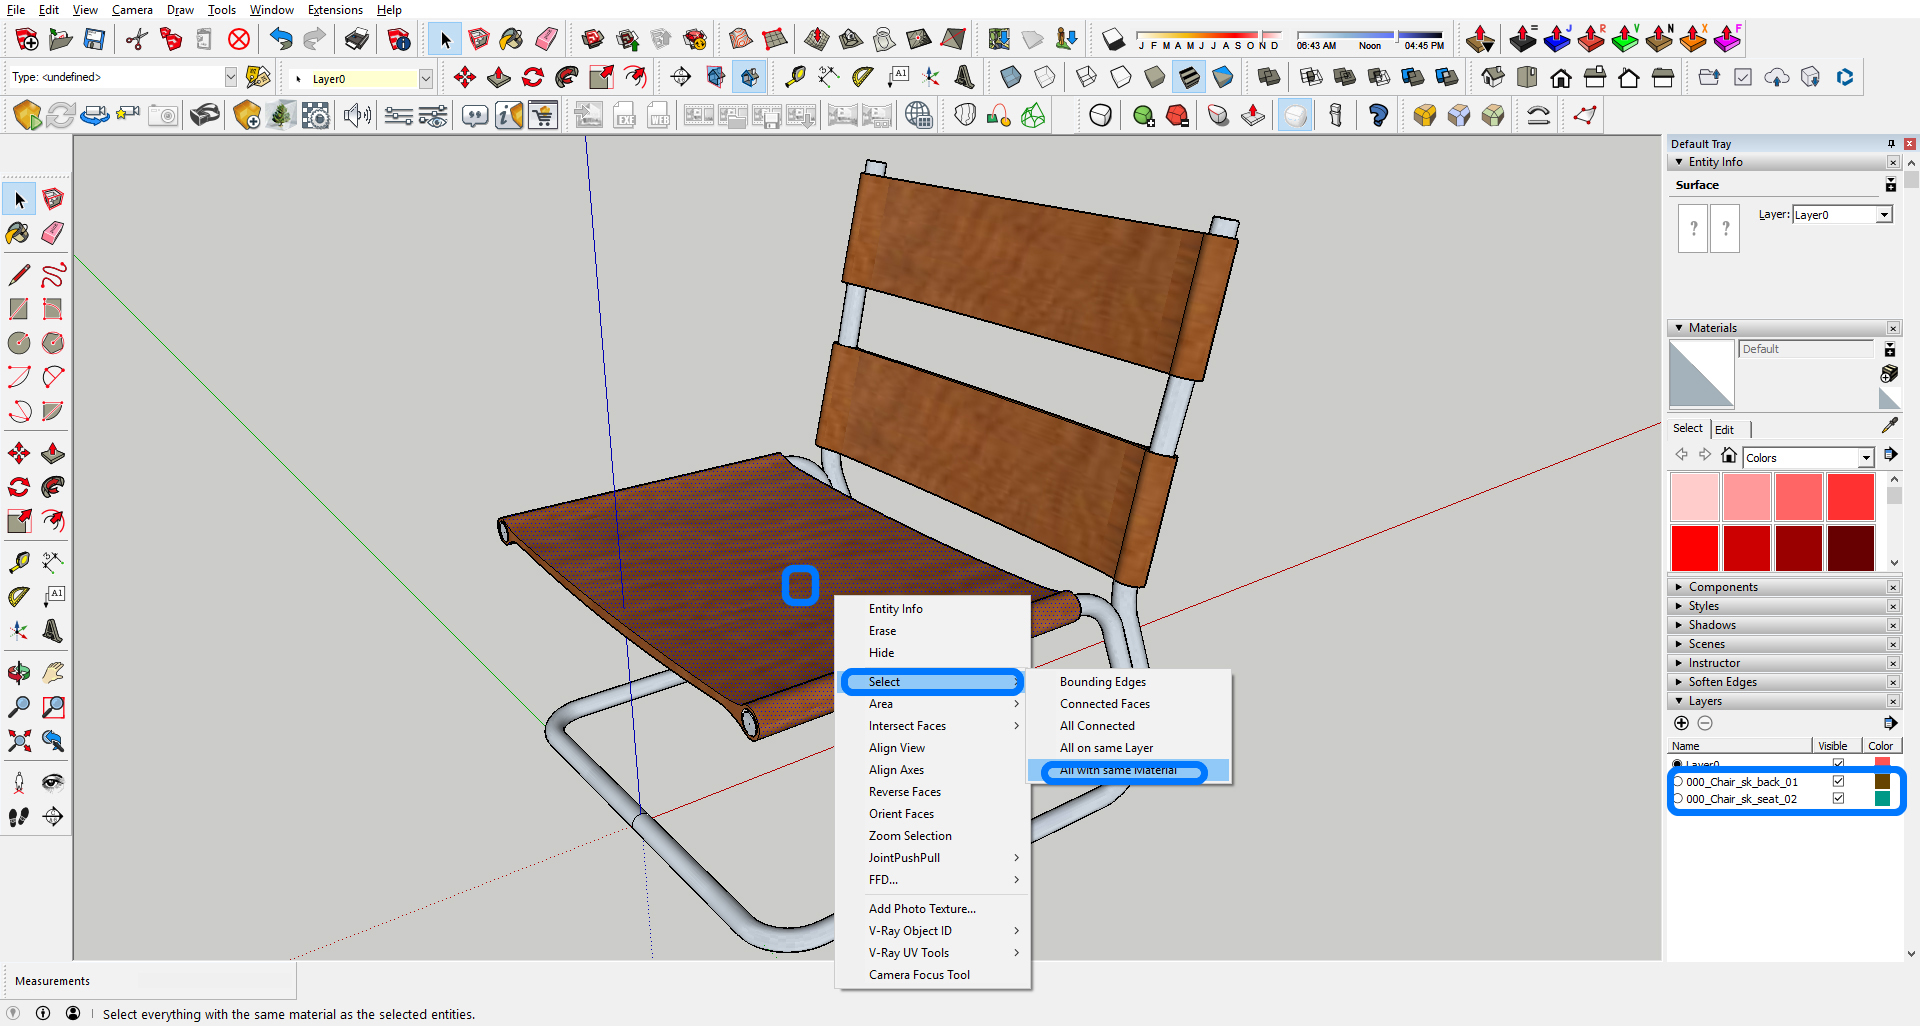
- Change layer in [Entity Info] Tray by selecting the layers that you made.
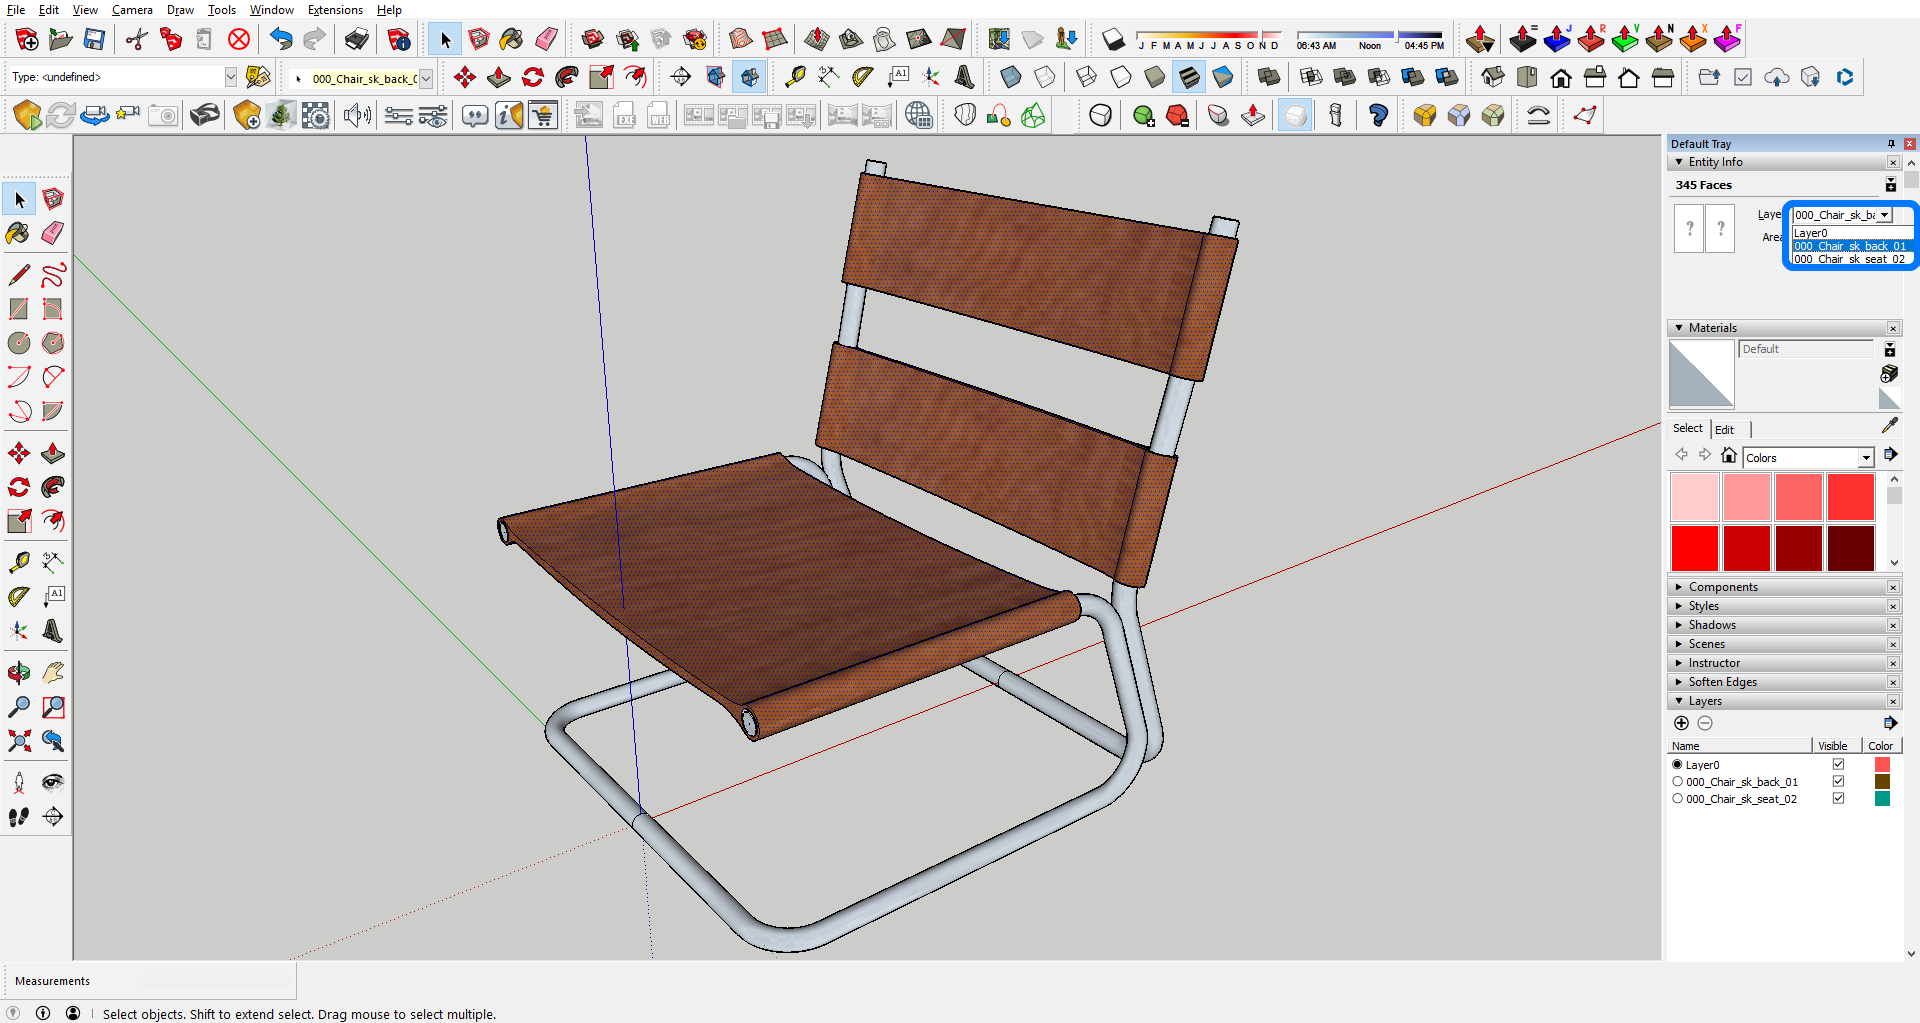
- Do the same procedure (material selection and layer change) for other materials.
- Export > 3D model > Select DXF file > Click option > Select only Faces > Version 2007> OK > Export.
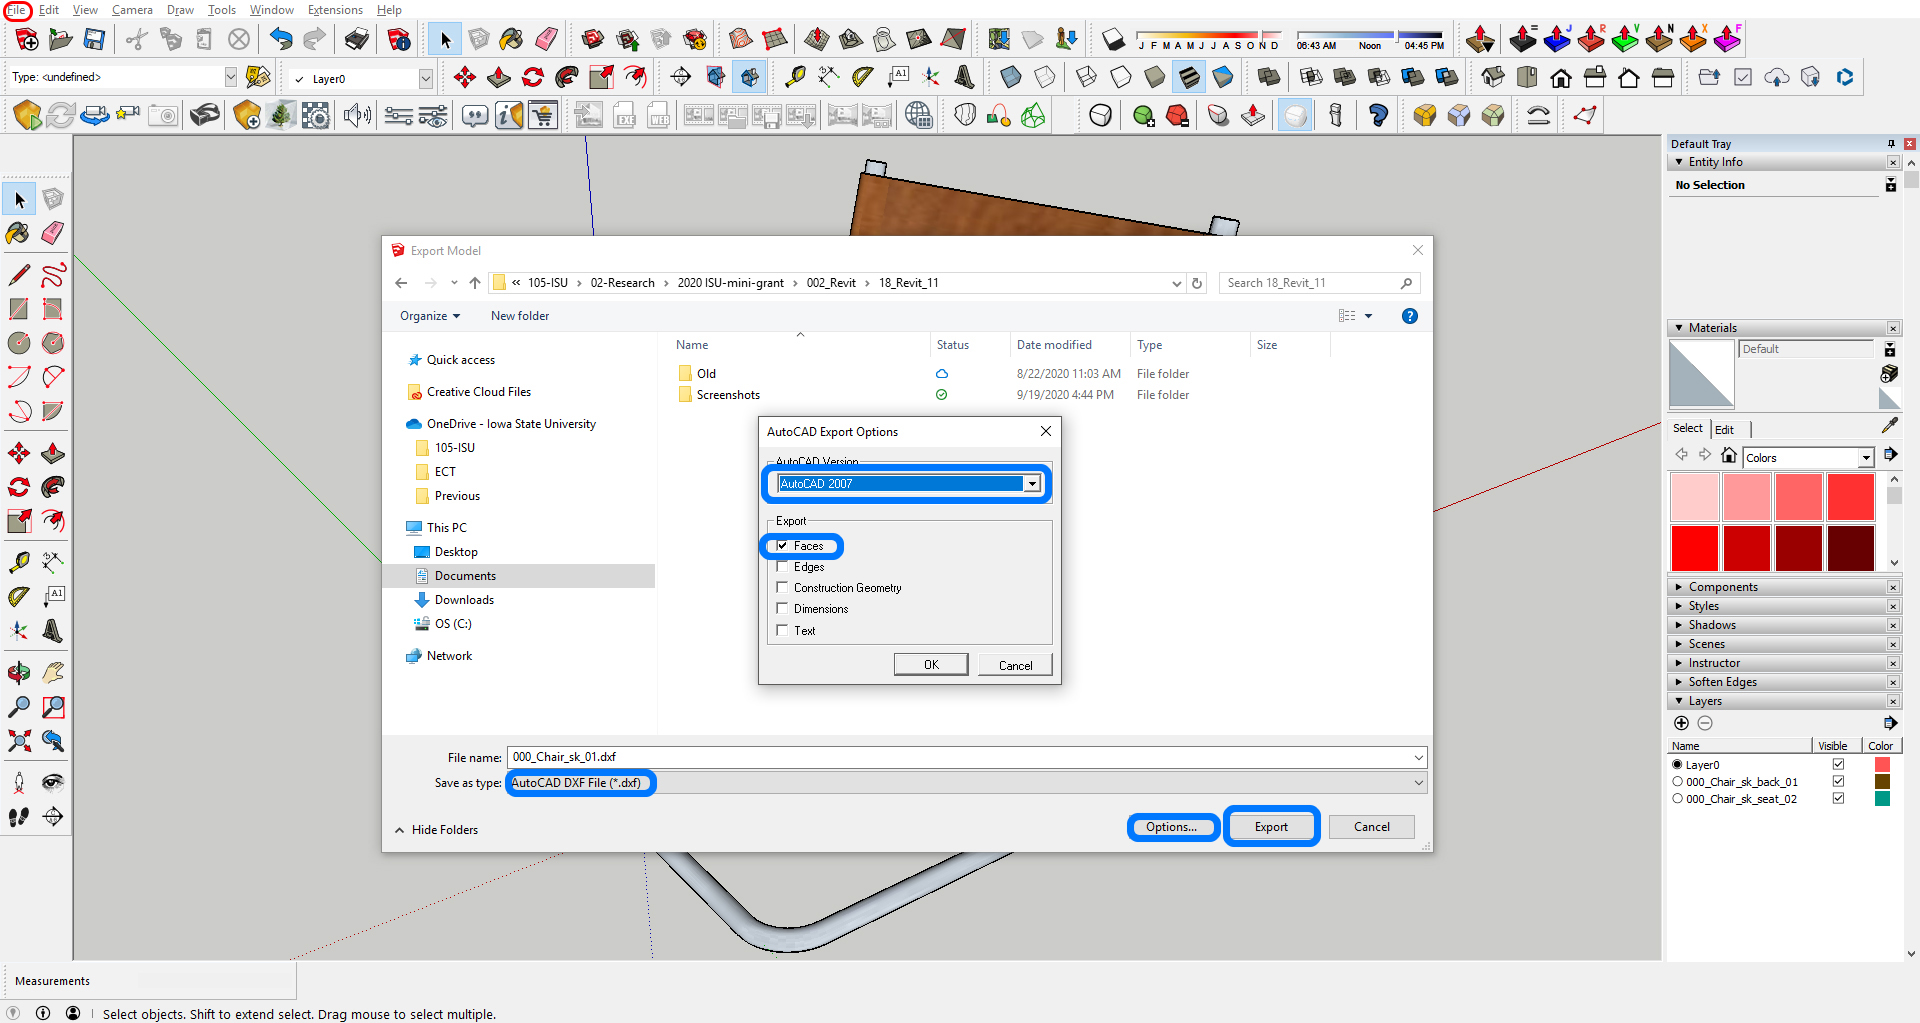
Modeling credit: Vojislav N. downloaded from 3D warehouse
- [STEP 2] DXF file Properties change.
- Open AutoCAD.
- Open the DXF file in AutoCAD. It will show in a 3D view.
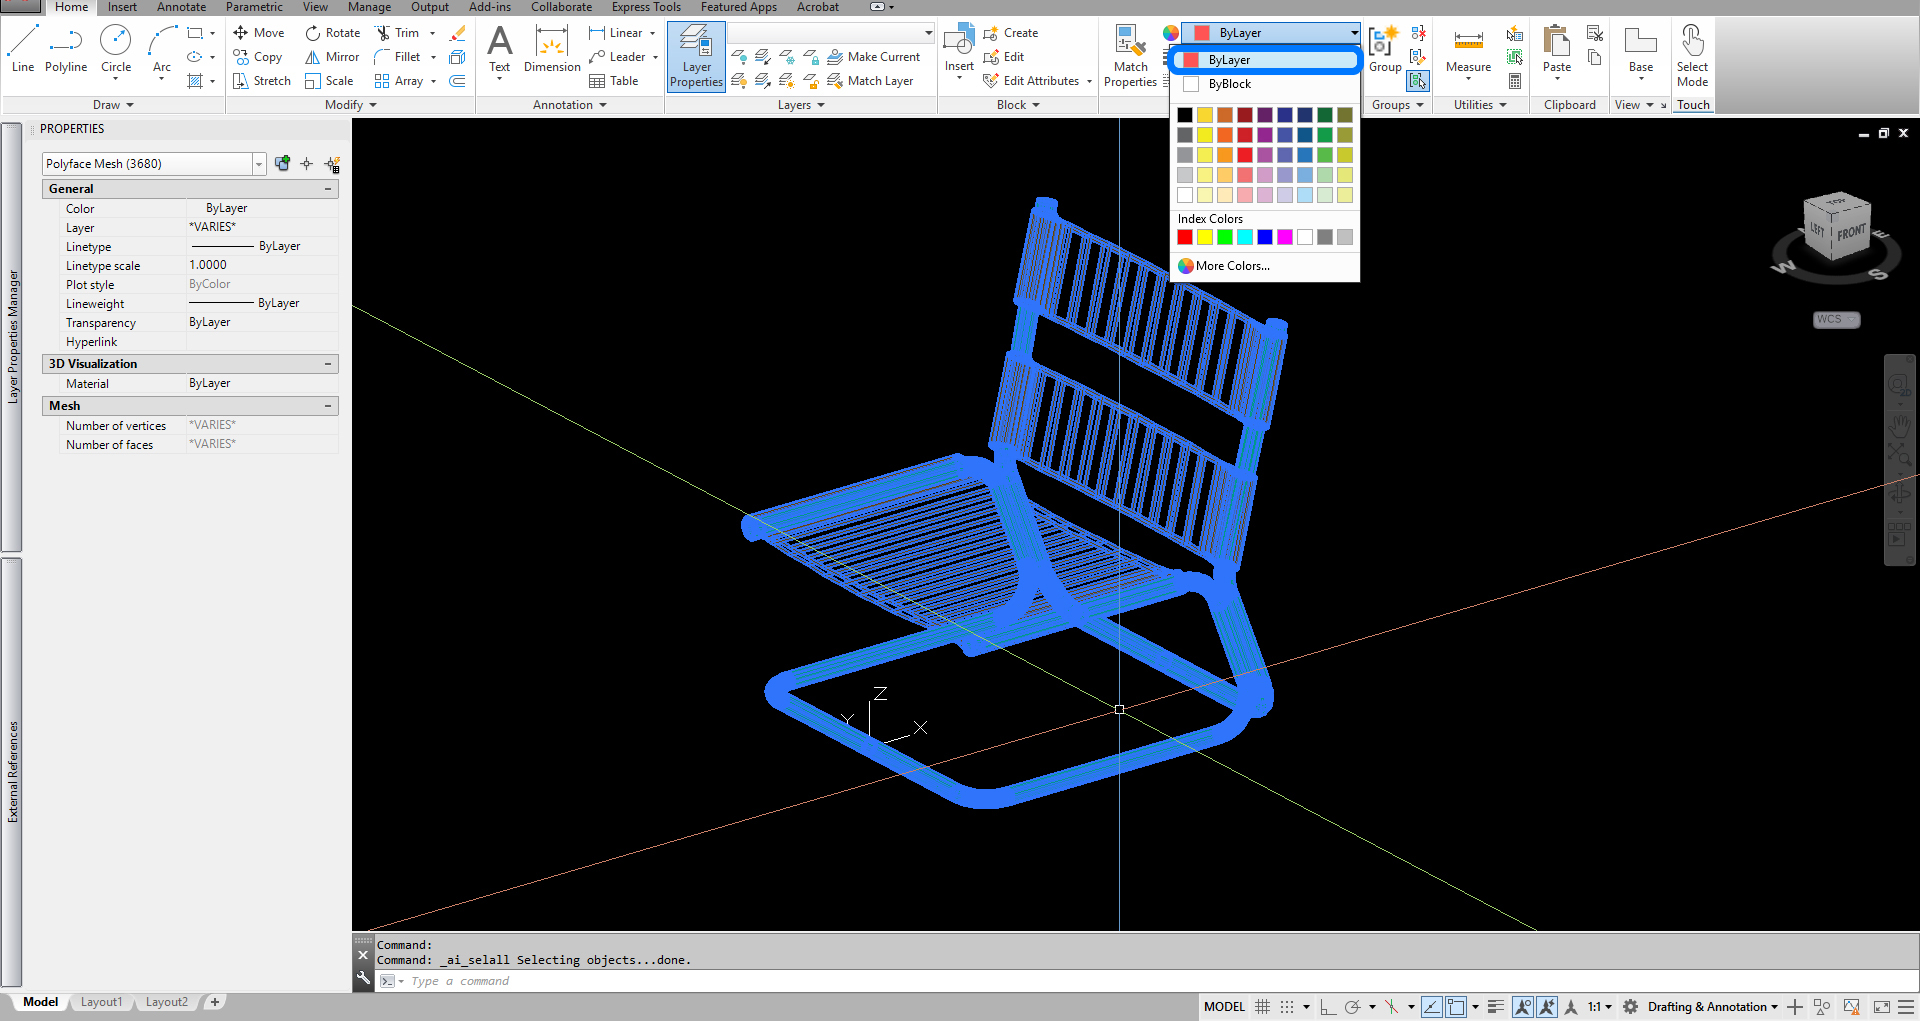
- Select all lines by pressing [Ctrl+A].
- Change Object color from [Home] tab > Color [By Layer].
- Save the DXF file with Version 2007.
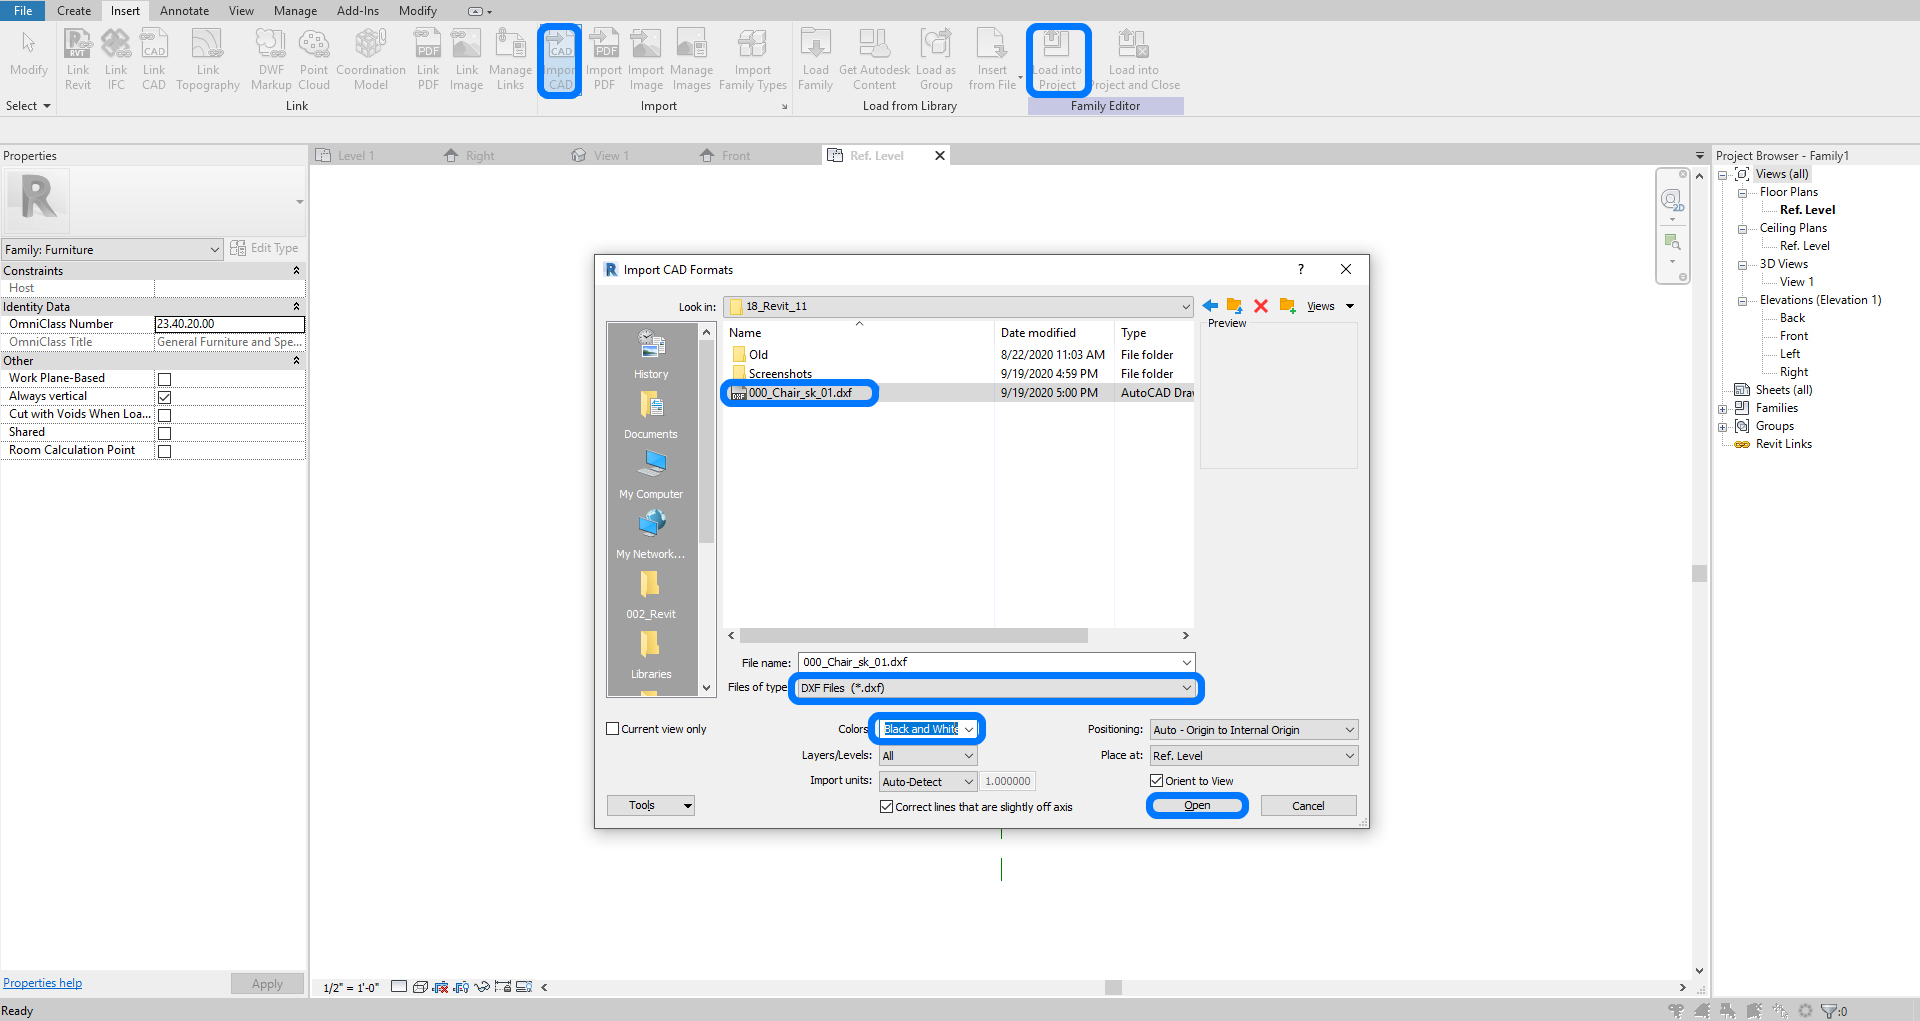
- [STEP 3] Import DWF file (Furniture) to Revit.
- File > New > Family > Select Family Template file (Furniture).
- Insert tab > Import CAD > Change files of type to DXF > Select the file > Click [Open] > Save the family file > Load into Project.
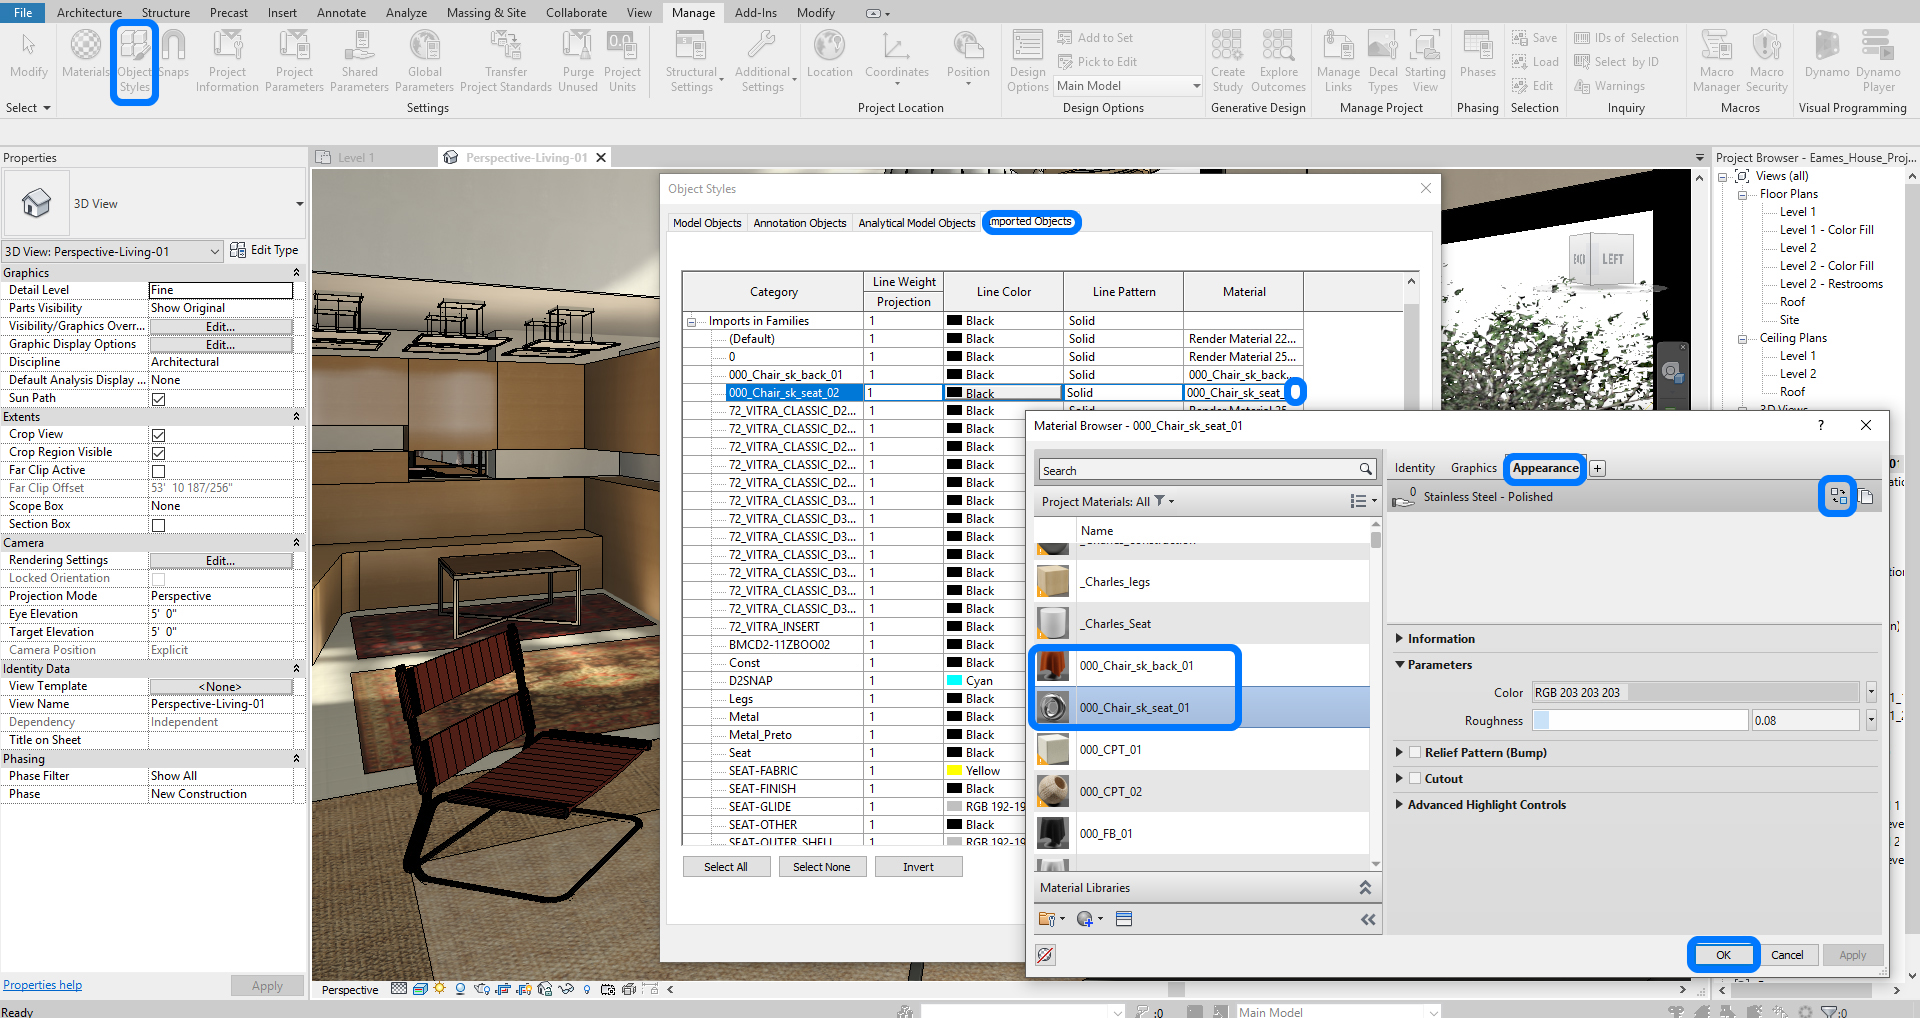
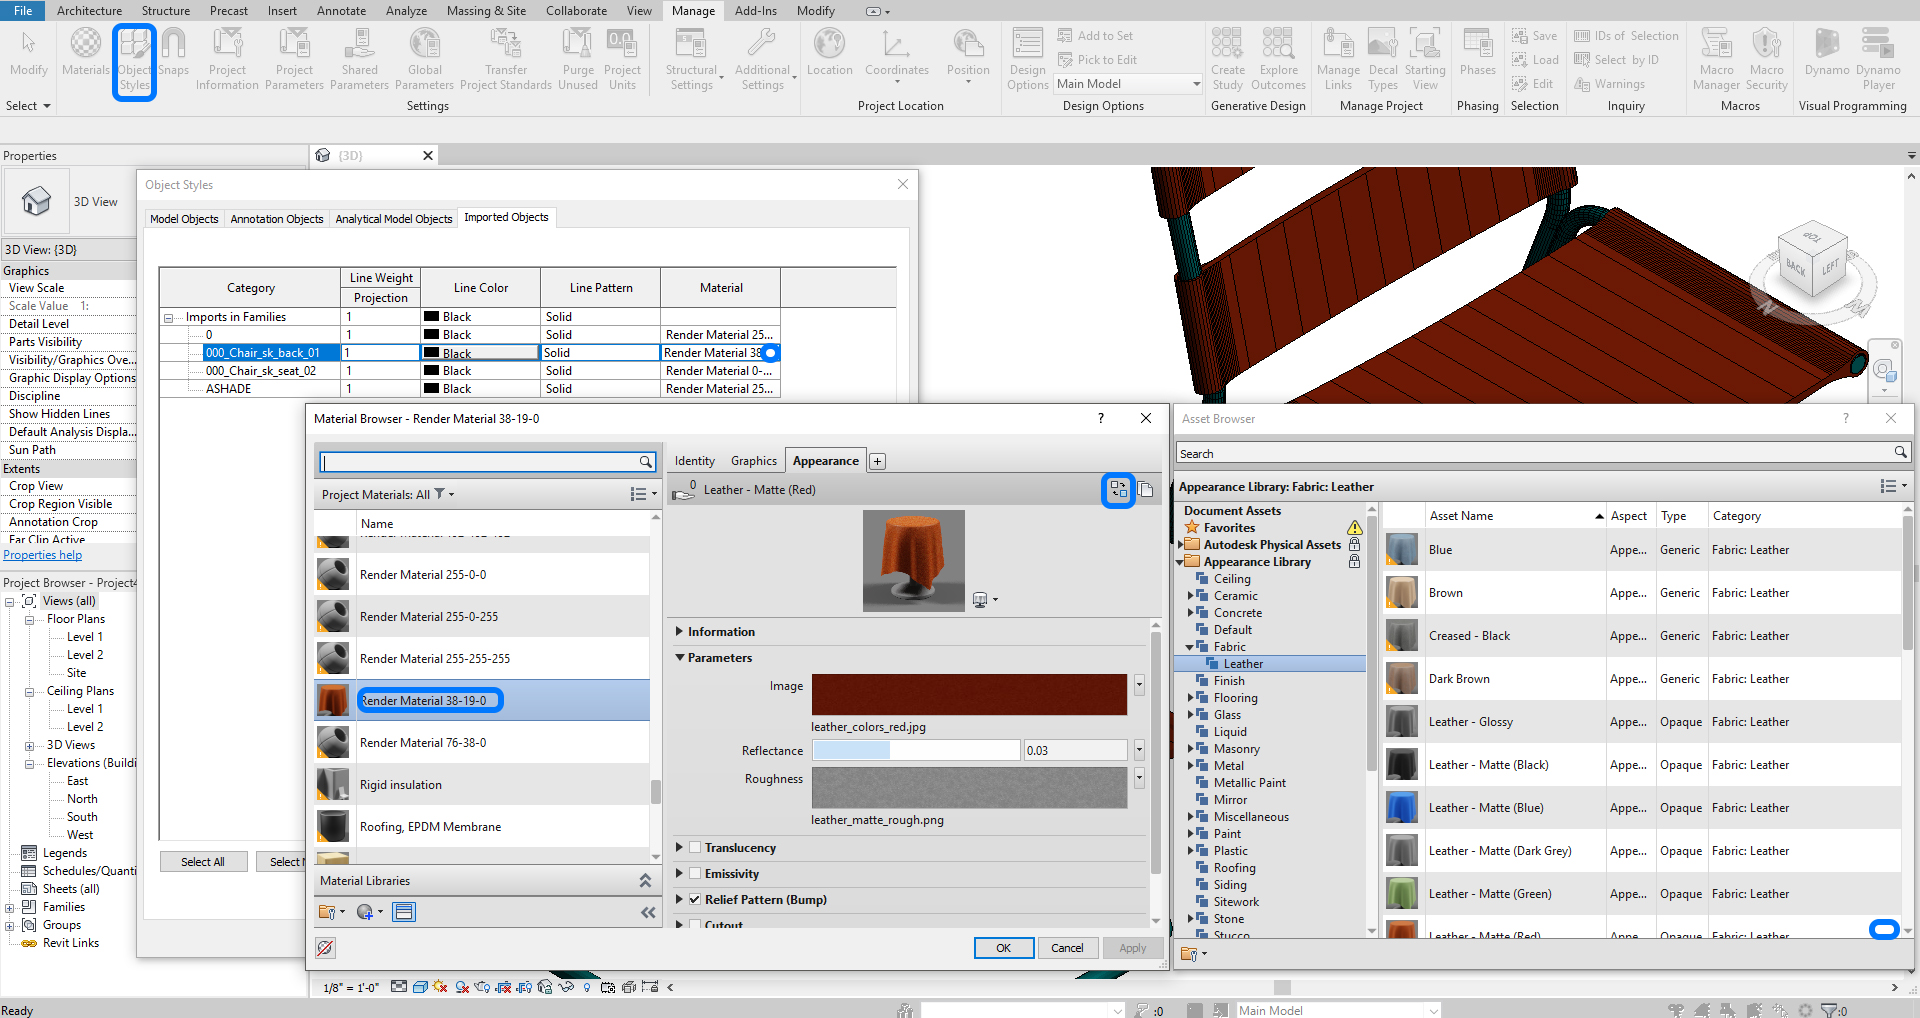
- [STEP 4] Change materials for an imported file in the Revit project file.
- Manage tab > Object Style.
- Click Imported objects.
- Change material by clicking the material slot.
(CO3) Import Sketchup models in Revit project without the complex lines using 3Ds Max
This lecture contents from this video tutorial on importing from 3DS max to Revit. Complex 3D max Model to Revit – Hide the complex model lines in Revit (Super advanced level).
Sketchup model to Revit without the complex model lines
- [STEP 1] and [STEP 2] are the same as CO2.
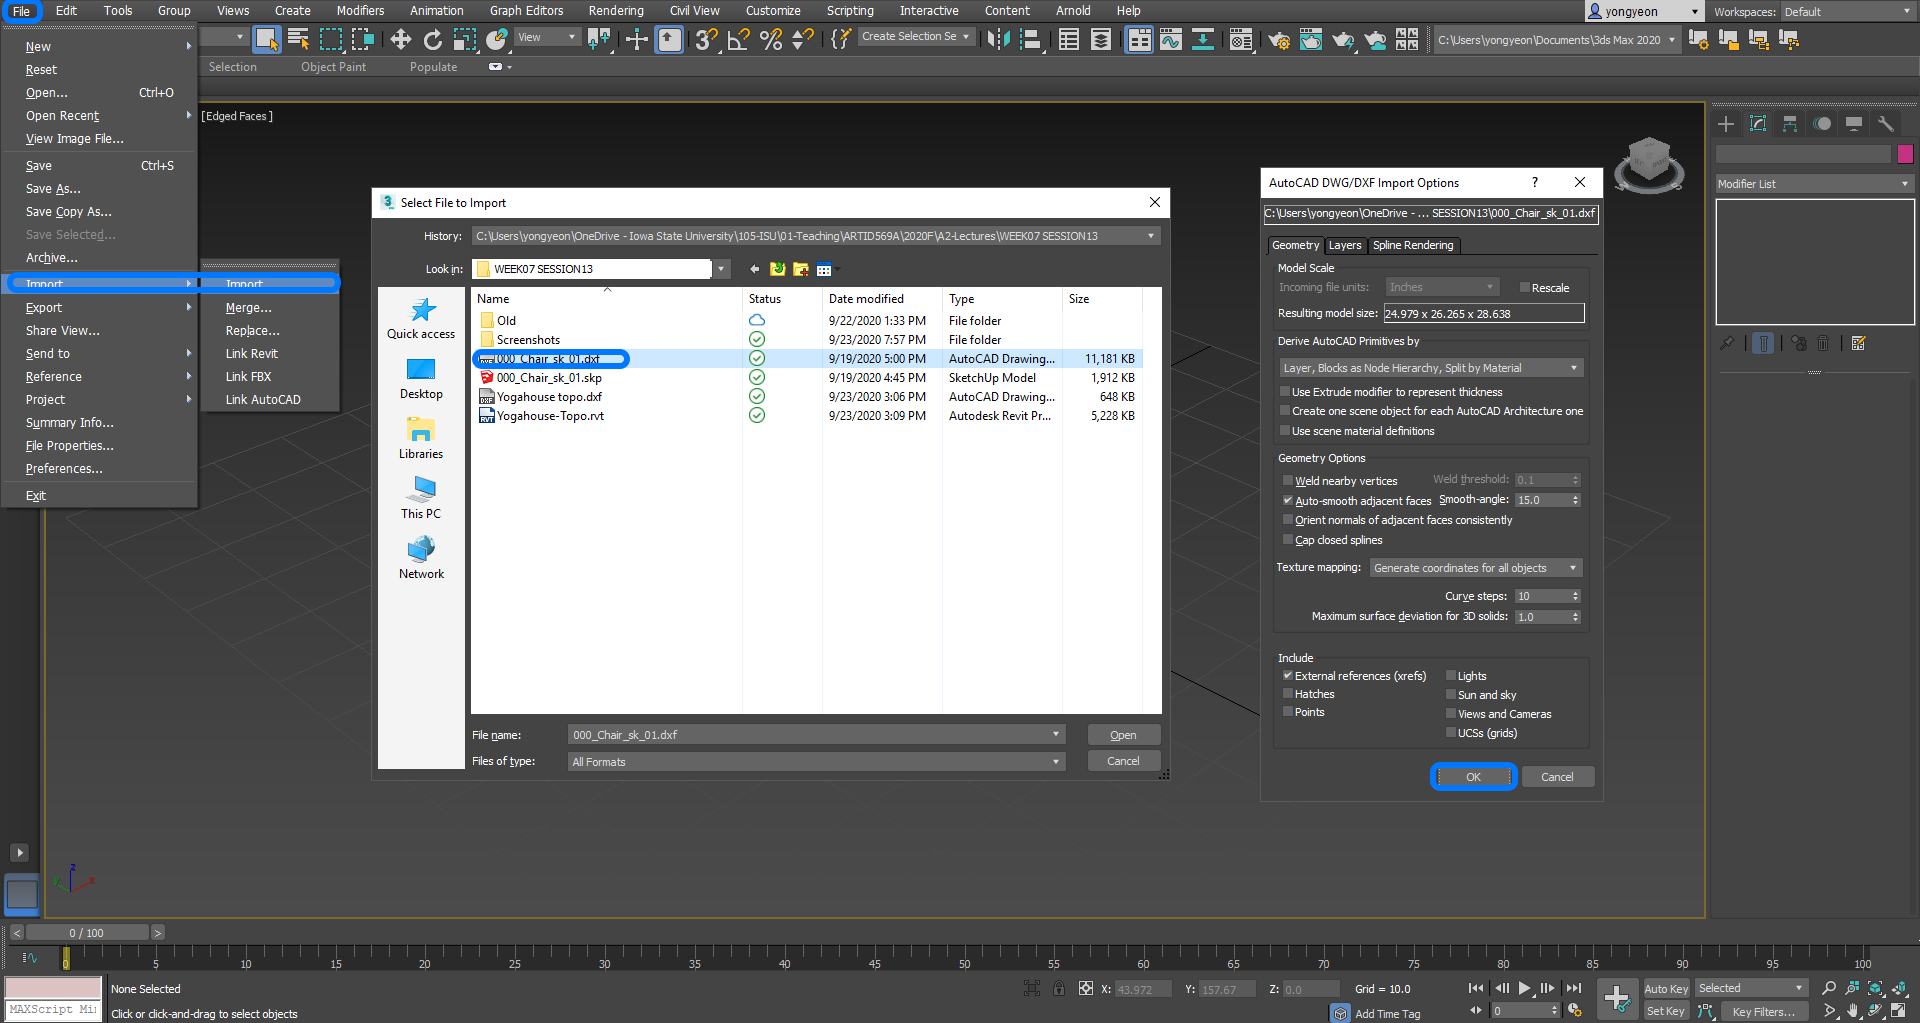
- [STEP 3] Open [3Ds MAX] application.
- [STEP 4] Click [File] > Click [Import] > Click [Import] > Select the [DXF] file > Click [Open] > Click [OK] on [AutoCAD DWG/DXF Import Options].
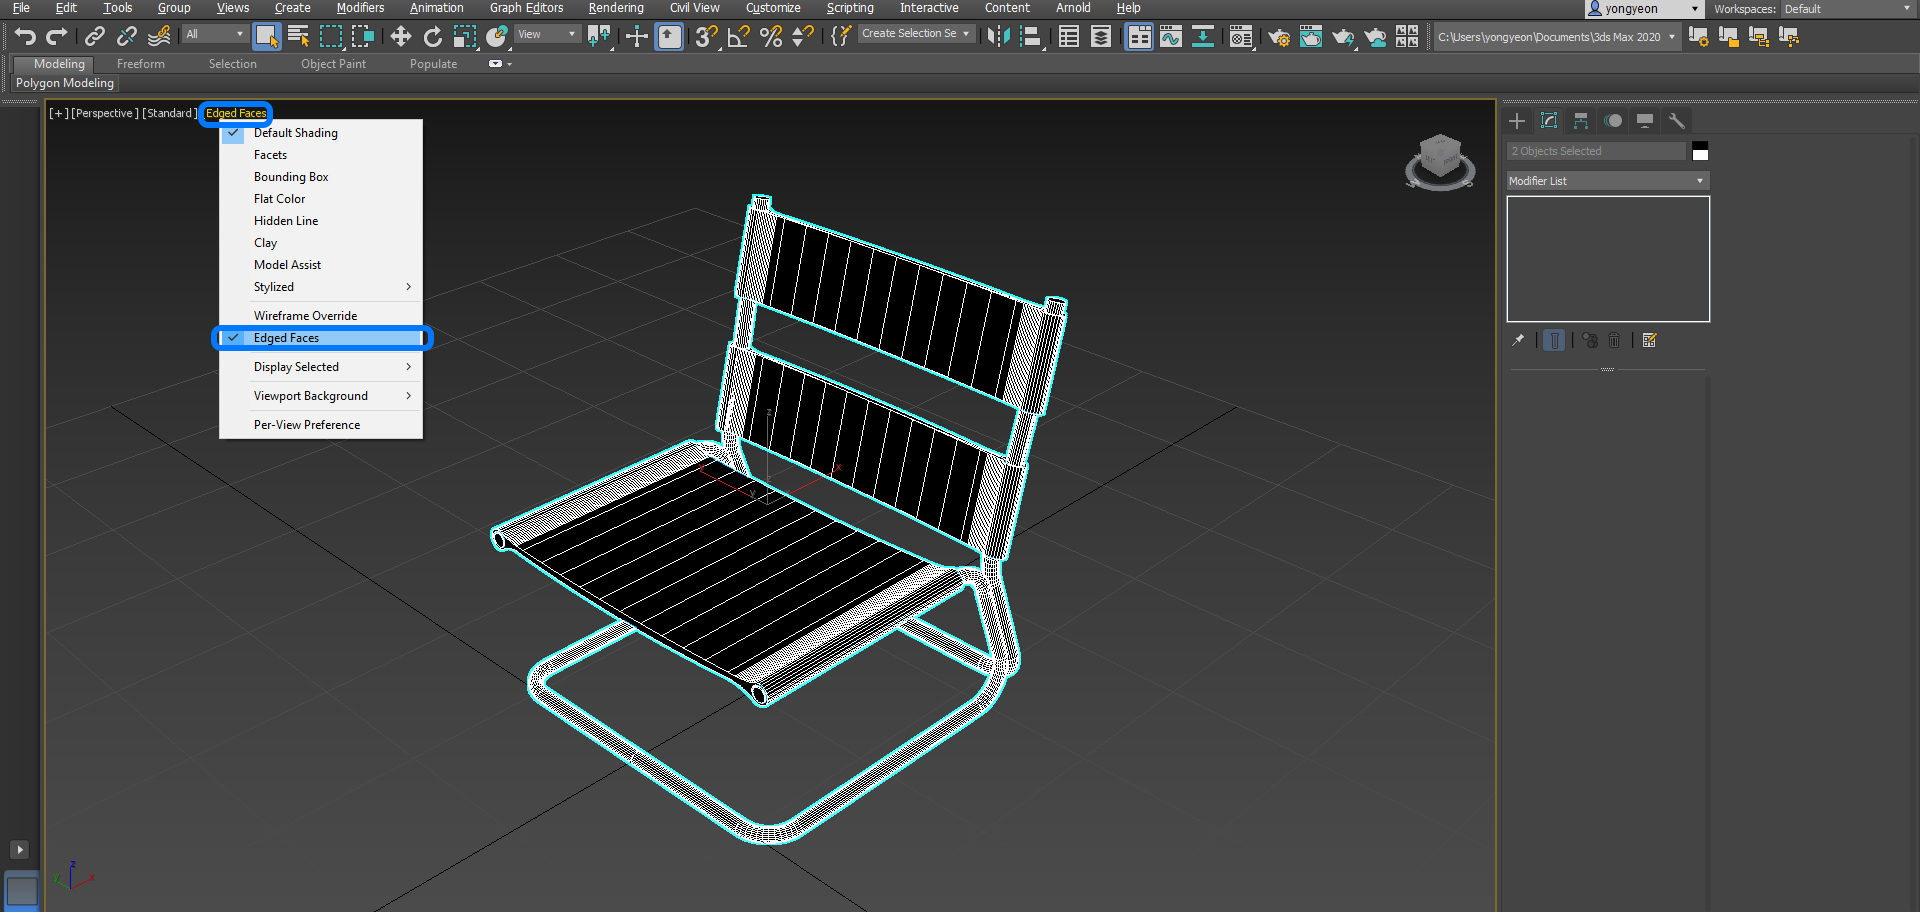
- [STEP 5] Click [Default Shading] on the view > Select [Edged Faces].
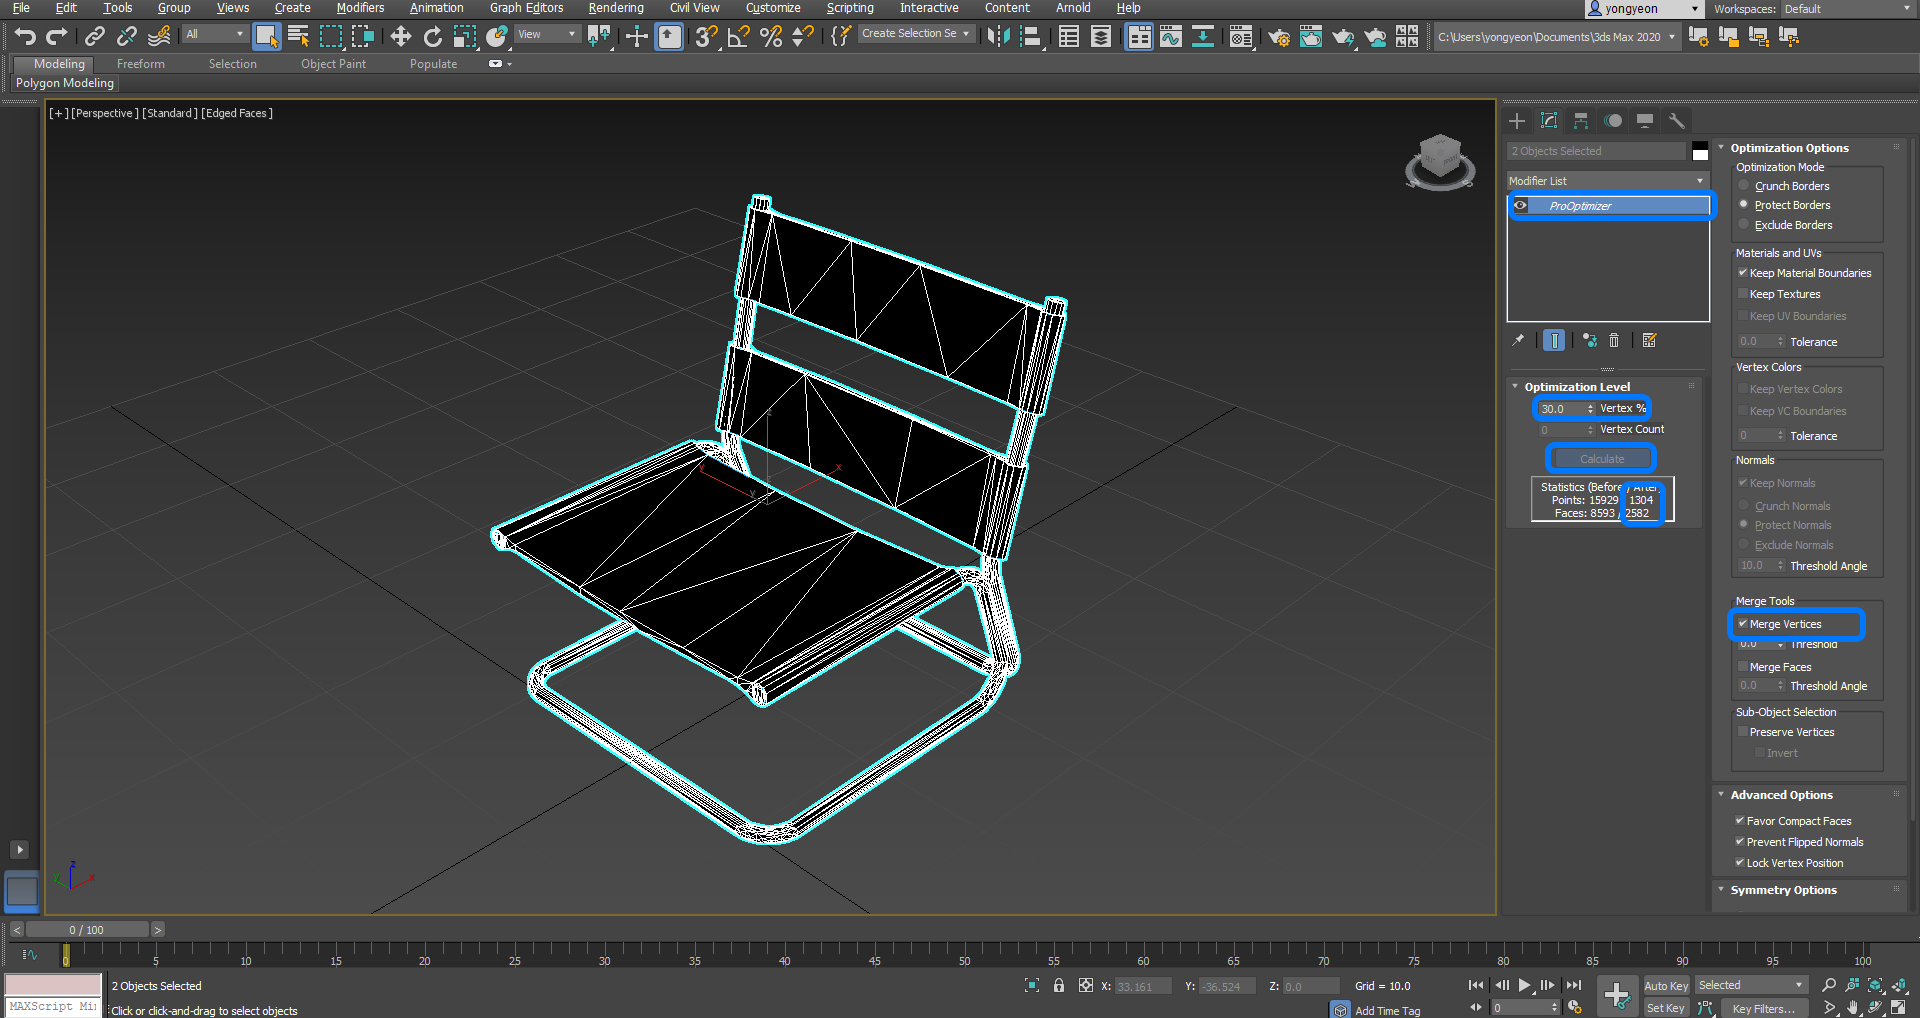
- [STEP 6] Select all by pressing [Ctrl+A] > Click [Modify] tab > Select [ProOptimization] > Check [Merge vertices] > Click [Calculate] > Adjust [Optimization Level].
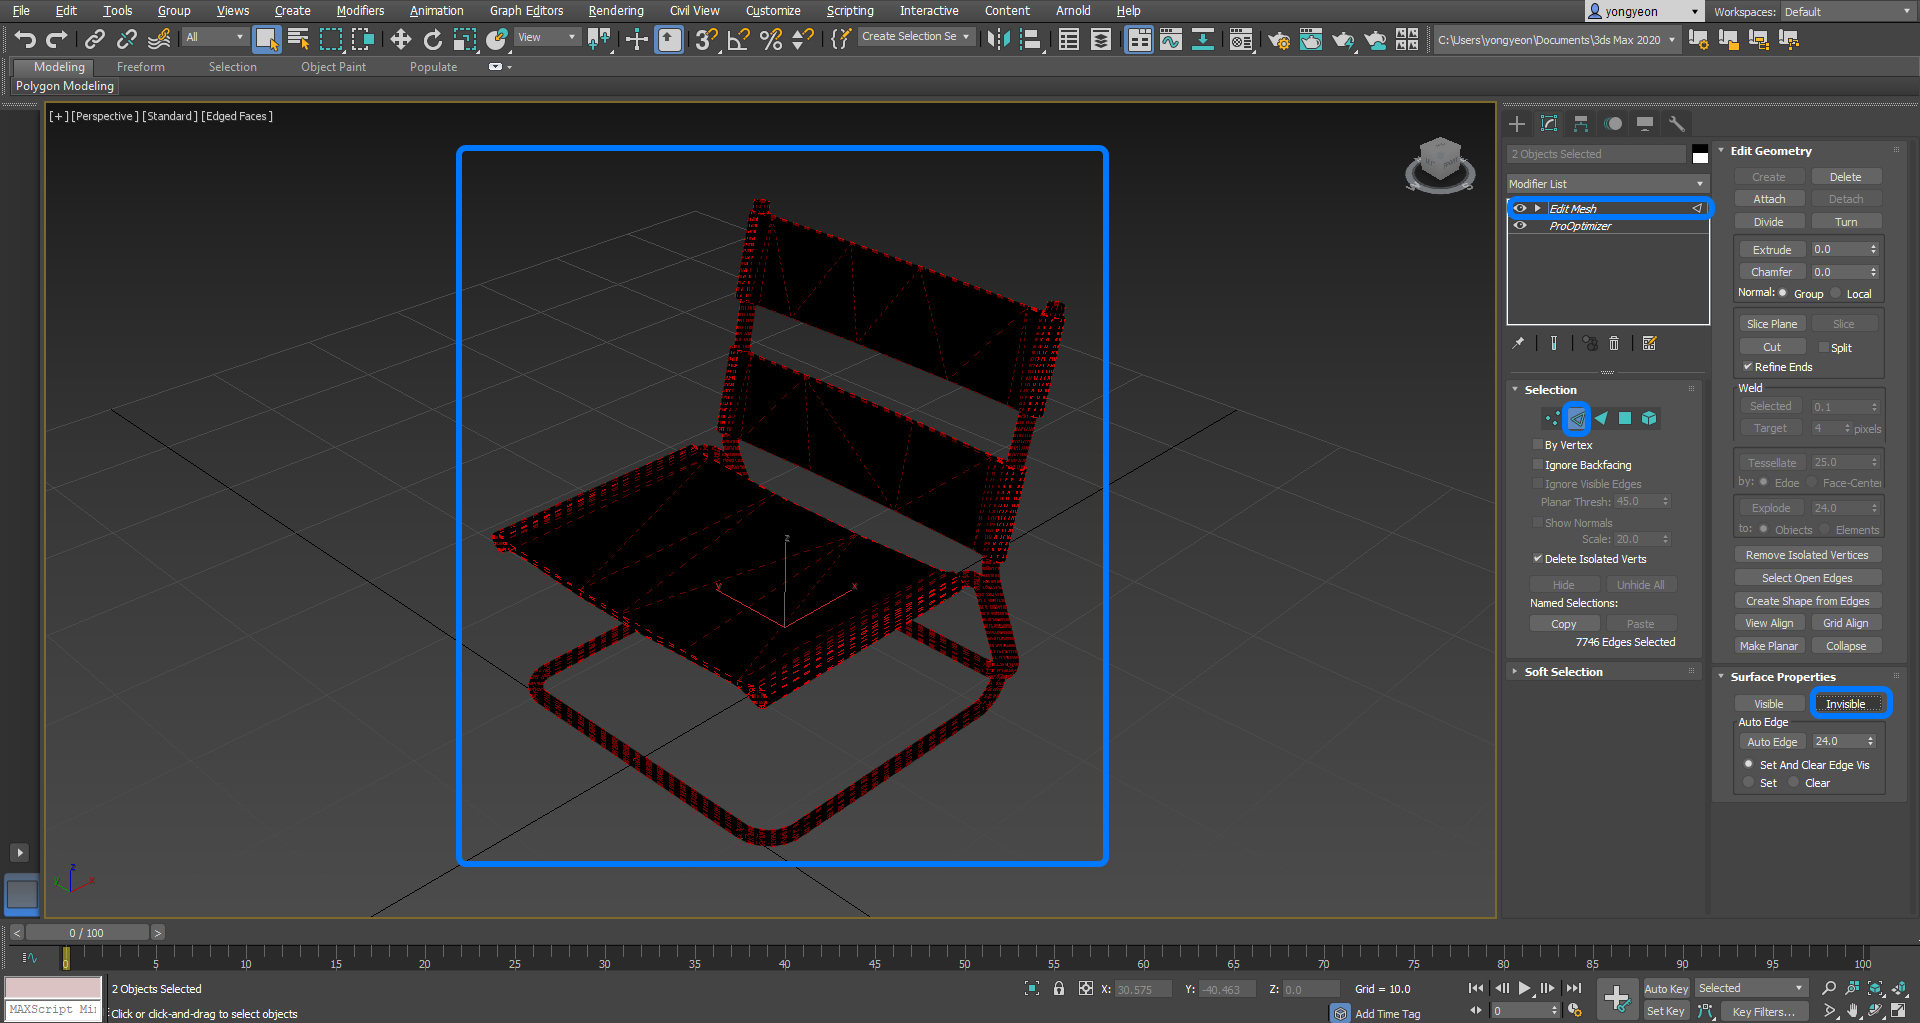
- [STEP 7] Select [Edit Mesh] from [Modifier List] > Select [Edge] > Select [Invisible].
- [STEP 8] Save the DXF file.
- [STEP 9] Import DWF file (Furniture) to Revit.
- File > New > Family > Select Family Template file (Furniture).
- Insert tab > Import CAD > Change files of type to DXF > Select the file > Click [Open] > Save the family file > Load into Project.
- [STEP 10] Change materials for an imported file in the Revit project file.
- Manage tab > Object Style.
- Click Imported objects.
- Change material by clicking the material slot.
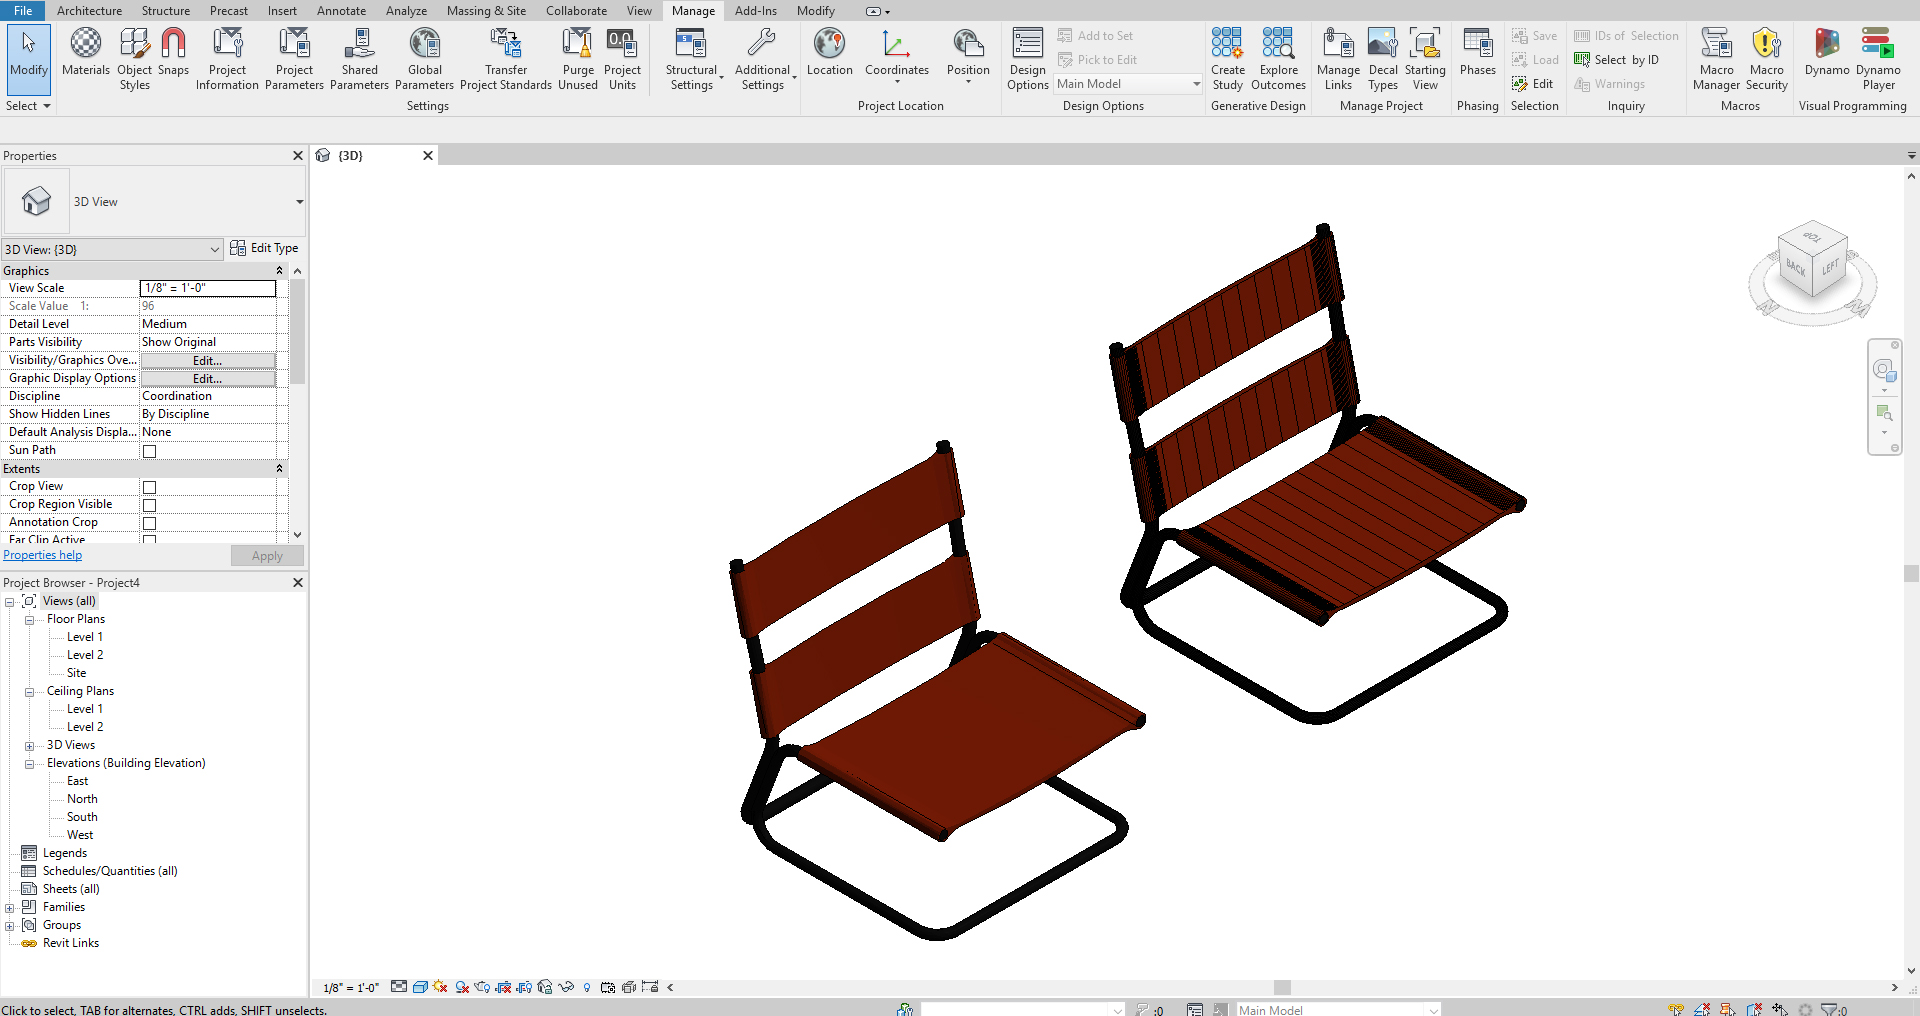
Compare a family file without edges (left) and a family file with edges (right).
 References
Balkan Architect. (2018). Importing SketchUp Files into Revit Tutorial. Retrieved December 24, 2021, from https://www.youtube.com/watch?v=4VFK-KEOMZc.
Bee Breeders. (n.d.). Monte d’Oiro Wine tasting room architecture competition winners revealed! Retrieved December 24, 2021, from https://architecturecompetitions.com/wineroom/
M.T.H Revit tutorials. (2018). Revit Architecture | Convert SketchUp Models Into Revit(With Materials). Retrieved December 24, 2021, from https://www.youtube.com/watch?v=k_1g3077jxI
Pedroeron. (2011). Amazing Revit 1 – from 3ds max to Revit without viewing triangles edges. Retrieved December 24, 2021, from https://www.youtube.com/watch?v=k_1g3077jxI
Vojislav N. (2014, March 30). Chair. 3D Warehouse. Retrieved December 24, 2021, from https://3dwarehouse.sketchup.com/model/151bf5bba187132266ce260f78a5fa20/Chair
