
Part Five. 3D Video Animation
Chapter 21. Enscape – walk-through video
Upon completing this session, students will be able to:
- (CO 1) Be aware of various tips and skills for better interior 3D animation
- (CO 2) Create a walk-through video in Enscape
 Session Highlights
At the end of the session, students will be able to create the graphics below.
 Lecture Contents
(CO1) Be aware of various tips and skills for better interior 3D animation
10 Tips for making a great movie
Camera work and movie structure
- [TIP 01] Use slow camera movements.
- [TIP 02] Use multiple clips.
- [TIP 03] Move the camera in one direction in each clip.
Artistic effects
- [TIP 04] Use animated effects carefully.
- [TIP 05] Use volume lighting and lens flare carefully.
- [TIP 06] Use the analog color lab or color correction.
Attention to detail
- [TIP 07] Use a little bit of motion blur.
- [TIP 08] Fade in and fade out of the main movie and between clips.
- [TIP 09] Pick the right music and sound effects.
- [TIP 10] Reflections.
Lumion has a tutorial on Tips for Making a Great Movie in Lumion.
Video examples
- 3d Animation for Apartment Interior by Guangzhou Frontop
- Architectural animation of family house – LOĎKA from VESPER HOMES company by ARCHEVIO
- University of Iowa Advancement Services Building Enscape Walkthrough by OPN architects
(CO2) Create a walk-through video in Enscape
To create a video path with scenes
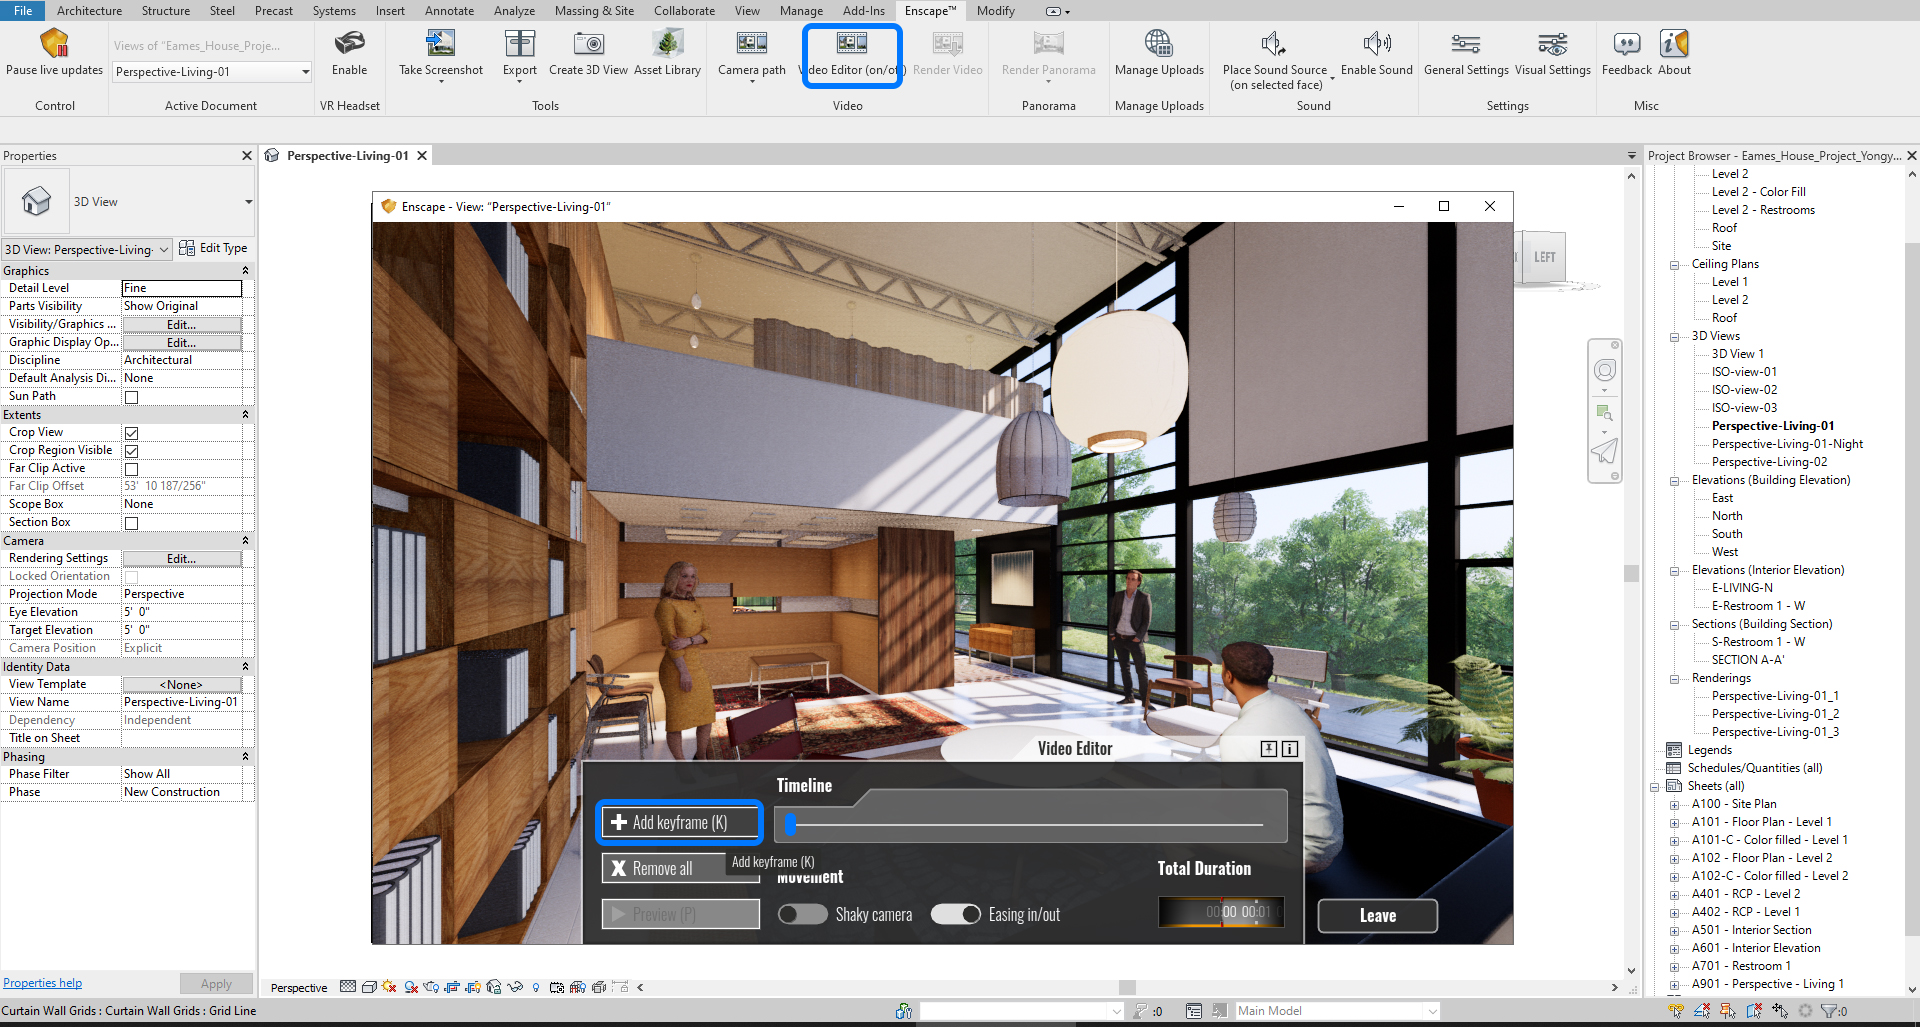
- [STEP 1] Click “Video Editor” from the Enscape tab.
- [STEP 2] Click “Add keyframe” – Once you click “Add keyframe,” the setting will be saved.
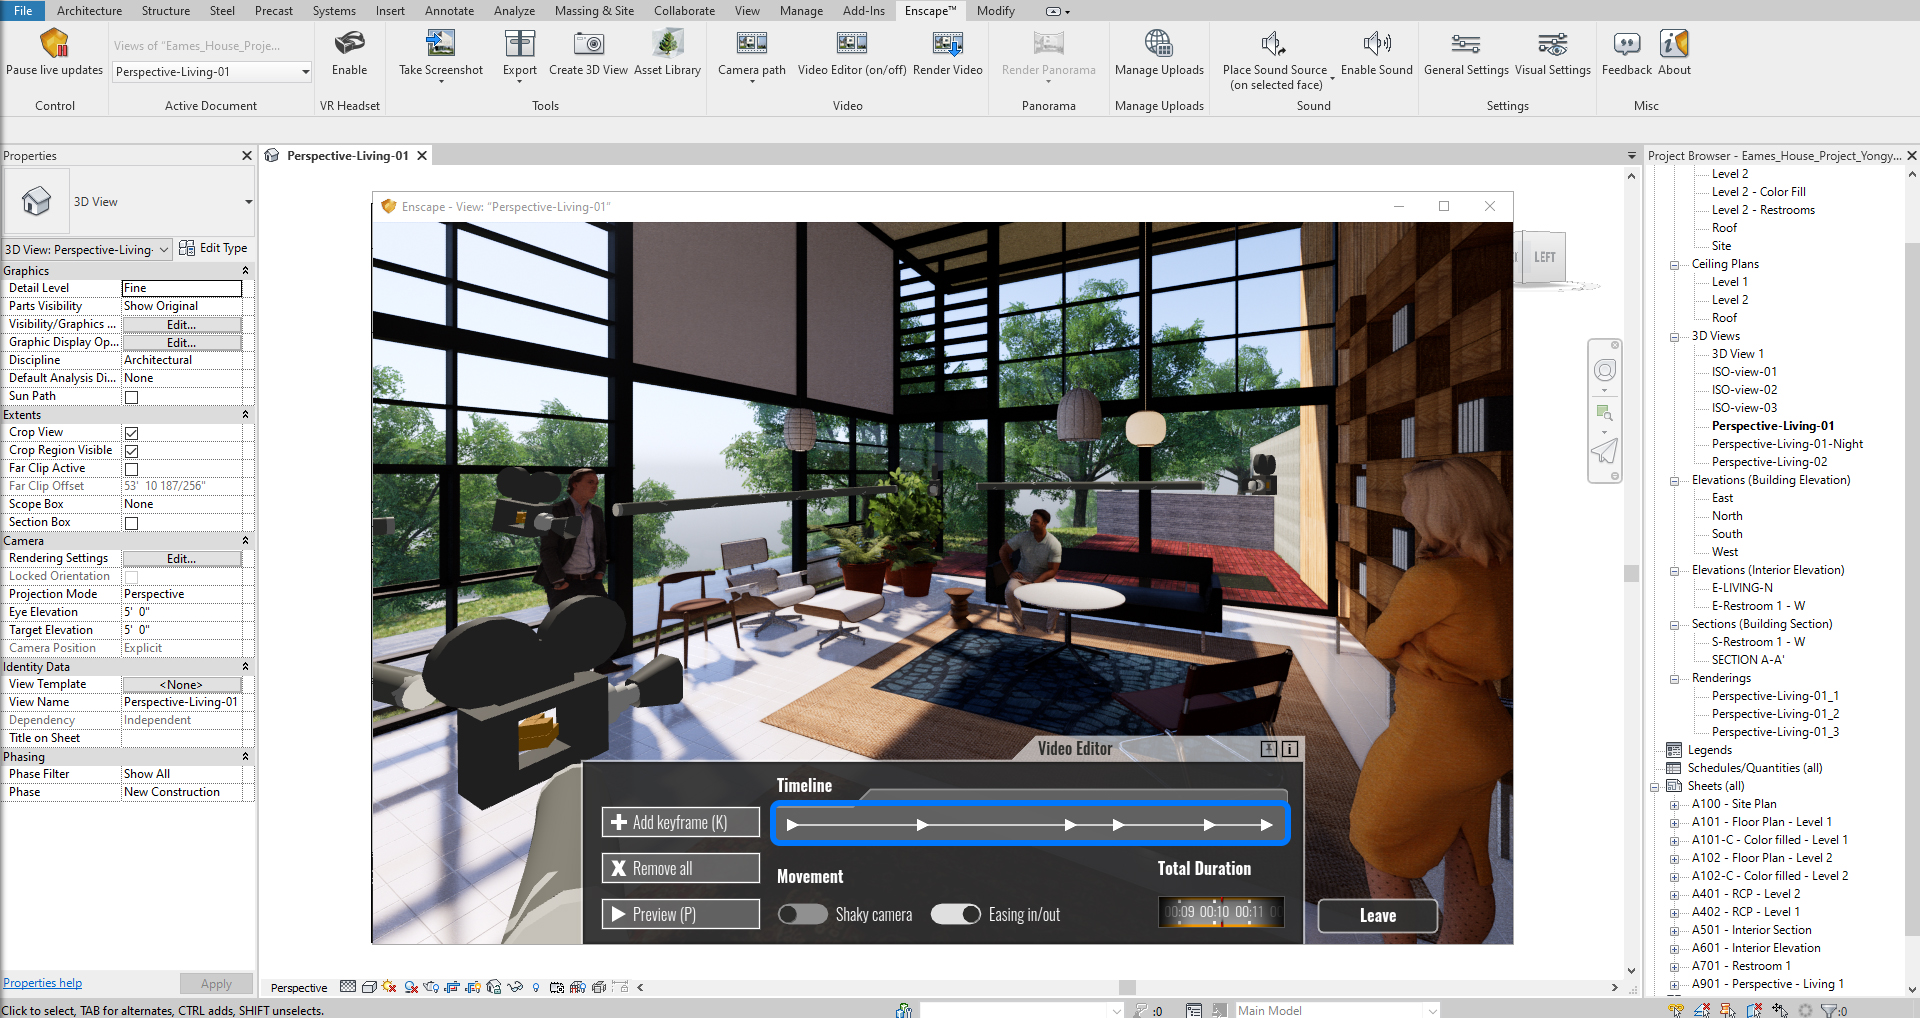
- [STEP 3] Change the scene by moving the scene.
- [STEP 4] Once you think the next scene is in the right position (recommend foot walk to see the scene from the same height), click “Add keyframe,” then you can see the second frame is added.
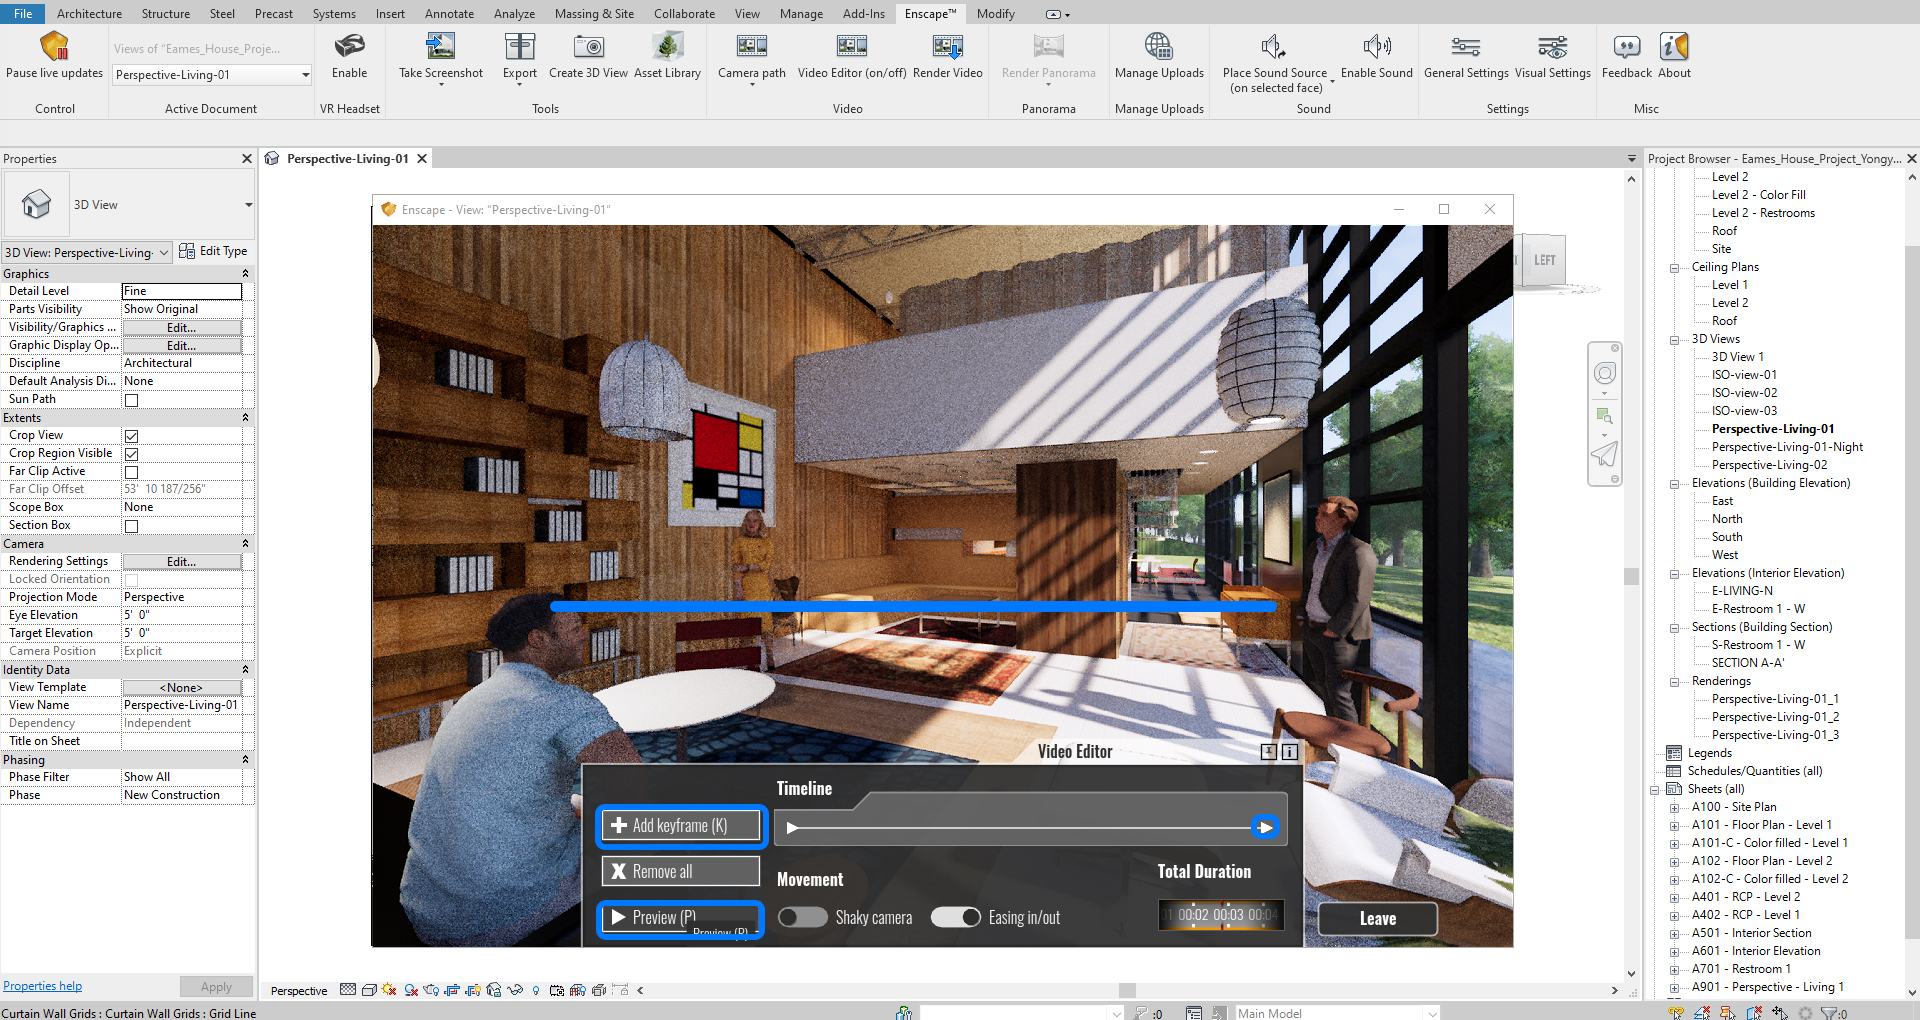
- [STEP 5] You may check the preview to see how this works.
- [STEP 6] Repeat steps 3 to 5 to create a complete path for a video.
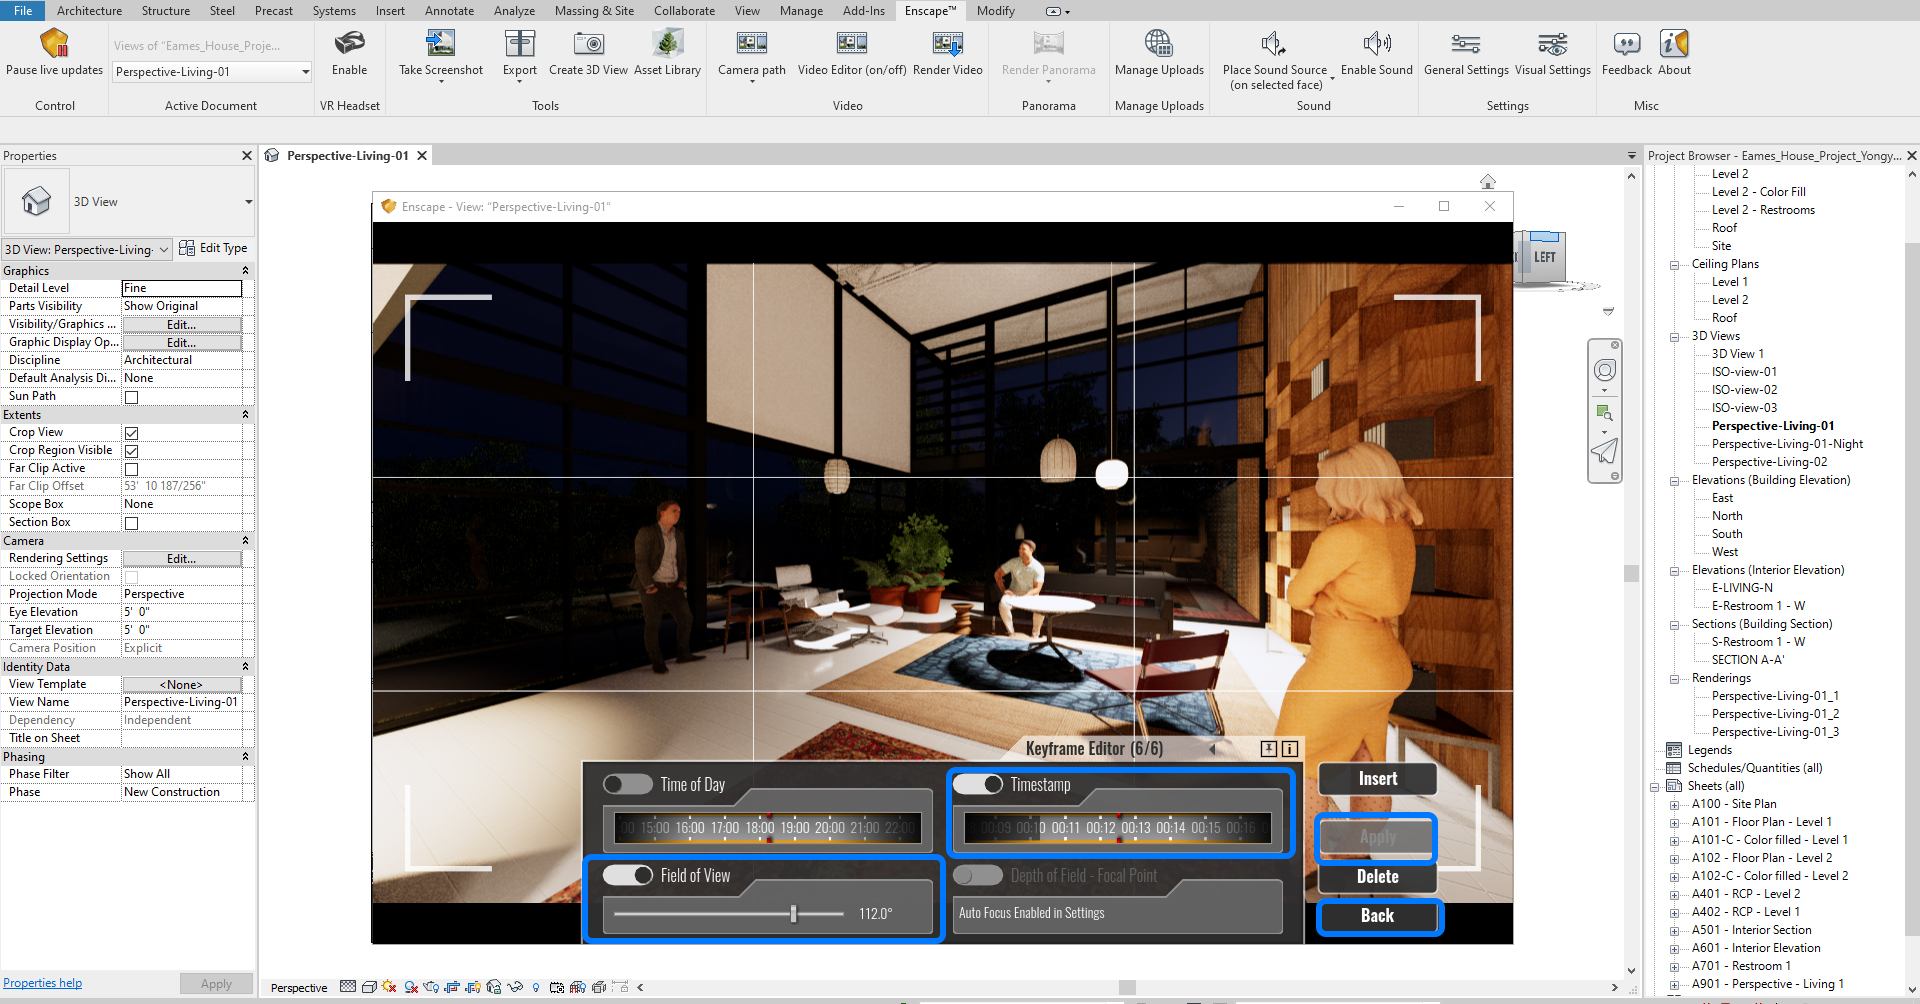
- [STEP 7] Click a [frame] and change the settings (time of the day, duration of the movement, camera field of view, and camera position) and click “Apply” to apply the changes.
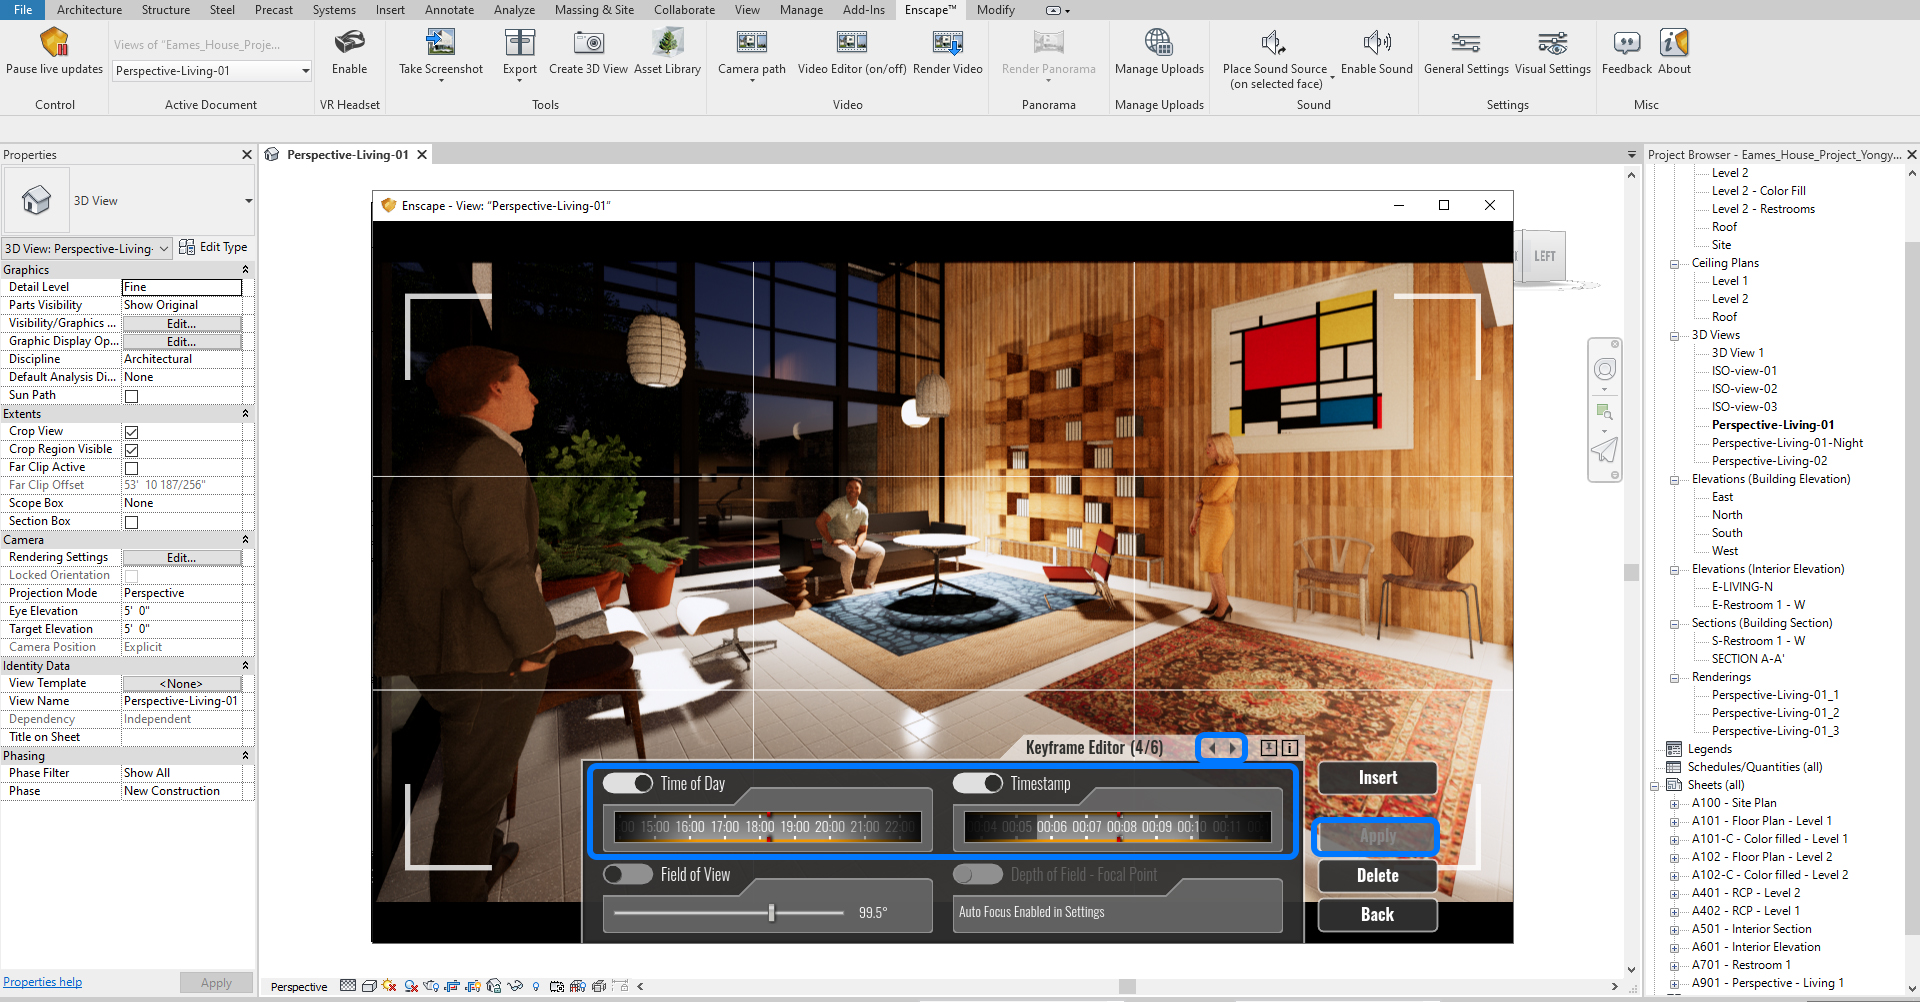
- [STEP 8] You can repeat other frames to change the settings.

- [STEP 9] You can be out of the keyframe editor by clicking Back, Click Preview to see the results.
To save a video path
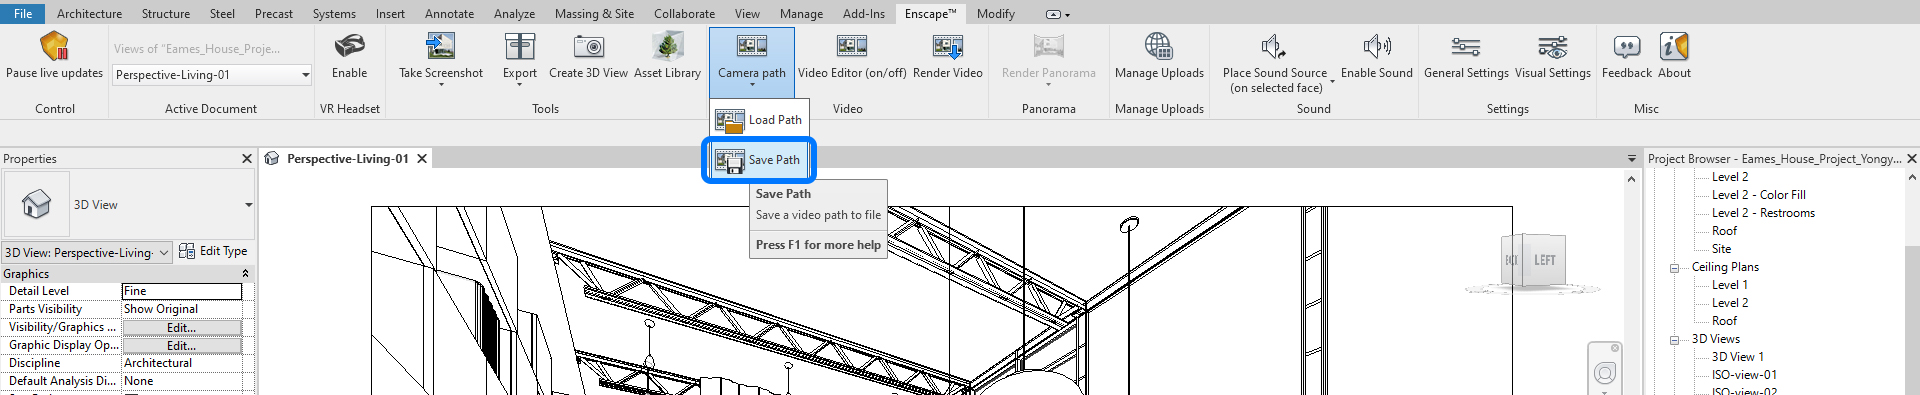
- [STEP 1] Click “Save Path” from the Enscape tab.
- [STEP 2] Make a unique name for the path.
To render the video
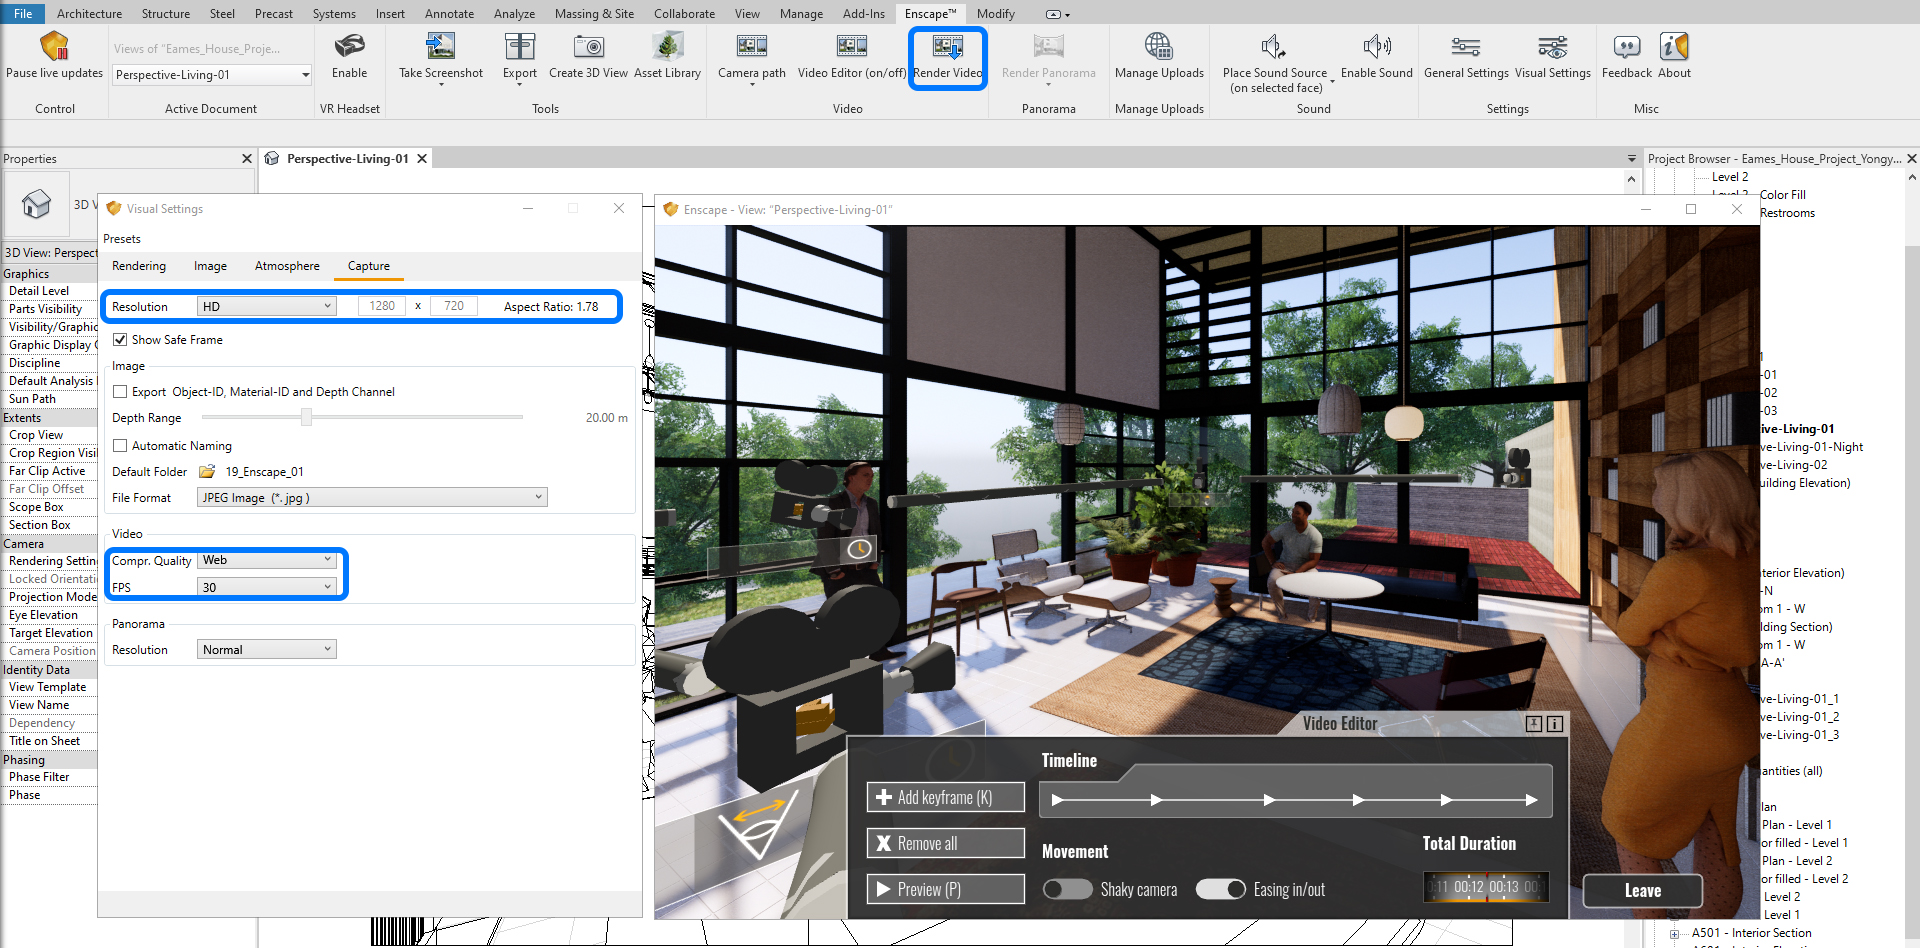
- [STEP 1] Load camera path by clicking “Camera Path” > “Load path” from the Enscape tab.
- [STEP 2] Change video size from Visual Setting – Resolution (HD is recommended), the quality can be [Web], FPS must be [30].
- [STEP 3] Click “Render Video” to render the path.
Note. To render the video, will take a while because of the pictures that the video renders. Typically, if you render a 1-second video, Enscape renders 30 frames. If one frame takes 10 seconds to render, a total of 1-second Video takes 300 seconds to render. Enscape does a great job because Revit rendering takes 5 minutes to render one frame.
 References
Lumion. (2019, September 16). 10 tips for making a great movie in Lumion. Retrieved December 24, 2021, from https://lumion.com/blog/10-tips-for-making-a-great-movie-in-lumion.html
